Table of Contents
Advertisement
Quick Links
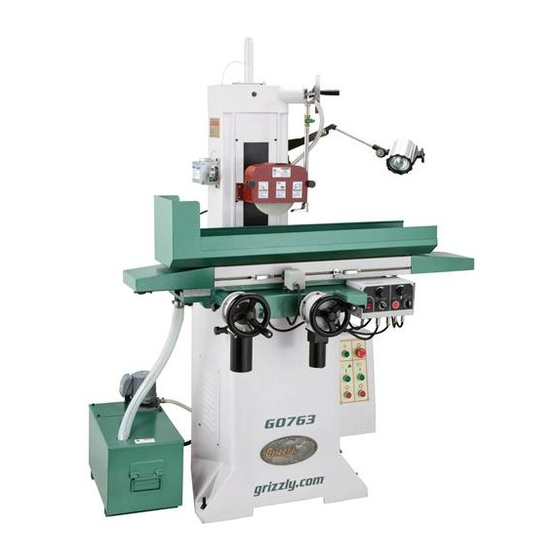
MODEL G0763
6" X 18" SURFACE GRINDER
w/2-AXIS POWER FEED
OWNER'S MANUAL
(For models manufactured since 6/15)
COPYRIGHT © FEBRUARY, 2014 BY GRIZZLY INDUSTRIAL, INC., REVISED AUGUST, 2015 (BL)
WARNING: NO PORTION OF THIS MANUAL MAY BE REPRODUCED IN ANY SHAPE
OR FORM WITHOUT THE WRITTEN APPROVAL OF GRIZZLY INDUSTRIAL, INC.
#TSDM15971 PRINTED IN CHINA
V4.08.15
Advertisement
Table of Contents

Related Manuals for Grizzly G0763


Summary of Contents for Grizzly G0763
- Page 1 OWNER'S MANUAL (For models manufactured since 6/15) COPYRIGHT © FEBRUARY, 2014 BY GRIZZLY INDUSTRIAL, INC., REVISED AUGUST, 2015 (BL) WARNING: NO PORTION OF THIS MANUAL MAY BE REPRODUCED IN ANY SHAPE OR FORM WITHOUT THE WRITTEN APPROVAL OF GRIZZLY INDUSTRIAL, INC.
- Page 2 This manual provides critical safety instructions on the proper setup, operation, maintenance, and service of this machine/tool. Save this document, refer to it often, and use it to instruct other operators. Failure to read, understand and follow the instructions in this manual may result in fire or serious personal injury—including amputation, electrocution, or death.
-
Page 3: Table Of Contents
Table of Contents INTRODUCTION ..........2 SECTION 9: PARTS ........47 Machine Description ........2 Base ............. 47 Contact Info............ 2 Column ............48 Manual Accuracy ........... 2 Motor & Downfeed System ......50 Identification ........... 3 Saddle ............51 Basic Controls .......... -
Page 4: Introduction
The G0763 is equipped with X- and Y-axis power feeds that provide automated operation. In addi- If you find this to be the case, and the difference... -
Page 5: Identification
X-Axis Handwheel w/Power Feed Power Feed Controls Y-Axis Handwheel w/Power Feed Electrical Coolant Cabinet Tank Grinding Wheel Saddle & Coolant Controls To reduce your risk of serious injury, read this entire manual BEFORE using machine. Model G0763 (Mfd. Since 6/15) -
Page 6: Basic Controls
C. Coolant Pump OFF Button D. Grinding Motor OFF Button E. Grinding Motor ON Button Emergency STOP Button: Disables power to grinding wheel motor and coolant pump. To reset, twist the button clockwise until it pops out. Model G0763 (Mfd. Since 6/15) - Page 7 0.0500" of table travel. K. Y-Axis Reverse Button: Reverses the direc- tion of Y-axis table movement. X-Axis Mode Selector Switch: Selects the mode of operation for the X-axis—manual (the “hand”) or automatic (the “table” symbol). Model G0763 (Mfd. Since 6/15)
-
Page 8: Machine Data
MACHINE DATA SHEET Customer Service #: (570) 546-9663 · To Order Call: (800) 523-4777 · Fax #: (800) 438-5901 MODEL G0763 6" X 18" SURFACE GRINDER WITH 2‐AXIS TABLE POWER FEED Product Dimensions: Weight................................1323 lbs. Width (side-to-side) x Depth (front-to-back) x Height............... 54-3/4 x 42 x 73-1/2 in. - Page 9 The information contained herein is deemed accurate as of 8/15/2017 and represents our most recent product specifications. Model G0763 PAGE 2 OF 3 Due to our ongoing improvement efforts, this information may not accurately describe items previously purchased. Model G0763 (Mfd. Since 6/15)
-
Page 10: Section 1: Safety
Everyday ery. Never operate under the influence of drugs or eyeglasses are NOT approved safety glasses. alcohol, when tired, or when distracted. Model G0763 (Mfd. Since 6/15) - Page 11 EXPERIENCING DIFFICULTIES. If at any time debris. Make sure they are properly installed, you experience difficulties performing the intend- undamaged, and working correctly BEFORE ed operation, stop using the machine! Contact our operating machine. Technical Support at (570) 546-9663. Model G0763 (Mfd. Since 6/15)
-
Page 12: Additional Safety For Surface Grinders
ALWAYS wear ANSI-approved eye and face pro- tion that pertains to grinding magnesium, including tection when using this machine. the National Fire Protection Association standard NFPA 480, “Storage, Handling and Processing Magnesium.” -10- Model G0763 (Mfd. Since 6/15) -
Page 13: Section 2: Power Supply
To reduce the risk of these hazards, avoid over- loading the machine during operation and make sure it is connected to a power supply circuit that meets the specified circuit requirements. -11- Model G0763 (Mfd. Since 6/15) -
Page 14: Grounding Instructions
-12- Model G0763 (Mfd. Since 6/15) -
Page 15: Section 3: Setup
• Disposable Shop Rags ....As Needed have resolved any issues between Grizzly or the • Forklift (rated for at least 2500 lbs.) .... 1 shipping agent. You MUST have the original pack- •... -
Page 16: Inventory
S. Grinding Wheel 7"D x ⁄ "T x 1 ⁄ " 80-Grit .. 1 Handwheel Handles ........3 Figure 8. Small parts inventory. U. Arbor Nut ............ 1 Wheel Sleeve ..........1 W. Wheel Flange ..........1 -14- Model G0763 (Mfd. Since 6/15) -
Page 17: Cleanup
Figure 9. T23692 Orange Power Degreaser. off the rest with the rag. Repeat Steps 2–3 as necessary until clean, then coat all unpainted surfaces with a quality metal protectant to prevent rust. -15- Model G0763 (Mfd. Since 6/15) -
Page 18: Site Considerations
Only install in an Shadows, glare, or strobe effects that may distract access restricted location. or impede the operator must be eliminated. Wall Wall 30" Minimum Clearance 46" 79" Figure 10. Minimum working clearances. -16- Model G0763 (Mfd. Since 6/15) -
Page 19: Lifting & Placing
(or other Pipe lifting equipment) rated for weight of this machine. Lifting and placing the G0763 will require help Figure 12. Coolant hose connection to stand from at least one other person, a fork lift with pipe. -
Page 20: Assembly
14. When table is properly leveled, tighten down hex nuts on bolts to secure settings. 15. Reconnect coolant pump electrical cord and coolant hose. -18- Model G0763 (Mfd. Since 6/15) - Page 21 — If the cable position on the pulley does not 11. Secure barrel to table with (1) M10-1.5 x 50 allow full travel of table, reposition cable on cap screw. pulley until it does. -19- Model G0763 (Mfd. Since 6/15)
- Page 22 16. Tighten jam nut against bracket to secure position of hex bolt. Figure 23. Magnetic chuck attached to table. 20. Secure magnetic chuck to table with (2) clamp assemblies, as shown in Figure 23. -20- Model G0763 (Mfd. Since 6/15)
-
Page 23: Power Connection
23. Insert splash guard sides into slots on each side of splash guard base, as shown in Figure 25. Splash Guard Sides Master Power Switch Figure 26. Location of master power switch. Figure 25. Splash guard sides installed. -21- Model G0763 (Mfd. Since 6/15) -
Page 24: Test Run
To test run the machine: Push Emergency STOP button in. Remove all tools used for setup from the machine. Fill and operate the one-shot oiler (refer to Lubrication on Page 35 for detailed instruc- tions). -22- Model G0763 (Mfd. Since 6/15) - Page 25 13. Press coolant pump OFF button and close coolant valve. Coolant flow should stop. Congratulations! The Test Run is complete. Press the Emergency STOP button in and turn the mas- 14. Press Emergency STOP button. ter power switch OFF. -23- Model G0763 (Mfd. Since 6/15)
-
Page 26: Section 4: Operations
Read books/magazines or get formal training before beginning any proj- ects. Regardless of the content in this sec- tion, Grizzly Industrial will not be held liable for accidents caused by lack of training. -24- Model G0763 (Mfd. Since 6/15) -
Page 27: Wheel Selection
For grinding high speed steel. Silicon Carbide. For grinding cast iron and non-ferrous metals. Ceramic Grain. For extremely hard metals, such as tungsten carbide. -25- Model G0763 (Mfd. Since 6/15) -
Page 28: Wheel Inspection
If you determine provide required cushion. Be sure to transfer from ring test that wheel is damaged, DO any RPM limitations and wheel type informa- NOT use it! tion to the new paper washers. -26- Model G0763 (Mfd. Since 6/15) -
Page 29: Wheel Balancing
Place assembly on balancing base and wait until wheel rotation comes to a complete Using a precision level and leveling bolts, stop. make sure the edges of the balancing base are level from front to back and side to side. -27- Model G0763 (Mfd. Since 6/15) -
Page 30: Mounting/Removing Wheel
To mount wheel assembly: DISCONNECT MACHINE FROM POWER! Insert wheel sleeve into wheel (see Figure 33 for component identification). Wheel Sleeve Balancing Wheel Weight Flange Arbor Arbor Grinding Wheel Figure 33. Wheel assembly components. -28- Model G0763 (Mfd. Since 6/15) - Page 31 35, then remove wheel guard front cover. Figure 36. Wheel assembly and arbor nut installed. Re-install wheel guard front cover before Wheel Guard reconnecting machine to power. Front Cover Knobs Figure 35. Wheel guard components. -29- Model G0763 (Mfd. Since 6/15)
-
Page 32: Wheel Dressing
Wheel Remove wheel assembly, then remove puller from wheel assembly. — If storing wheel, follow Wheel Storage instructions on Page 37. Dressing Tool Magnetic Chuck Figure 38. Wheel dressing setup. -30- Model G0763 (Mfd. Since 6/15) -
Page 33: Power Feeds
Figure 41. Y-axis limit switch and stops. E. Y-Axis Reverse Button: Reverses the direc- tion of Y-axis table movement. X-Axis Mode Selector Switch: Selects the mode of operation for the X-axis—manual (the “hand”) or automatic (the “table” symbol). -31- Model G0763 (Mfd. Since 6/15) - Page 34 Z-axis crank for addi- tional surfacing. Do NOT leave machine unattended when operating in power feed mode to prevent an unexpected occurrence from damag- ing machine/workpiece or causing a safety hazard. -32- Model G0763 (Mfd. Since 6/15)
-
Page 35: Section 5: Accessories
Armor Plate To reduce this risk, only install accessories grease is entirely unique due to the fact that the recommended for this machine by Grizzly. moly in it is solubilized, which provides supe- rior performance to other greases containing the NOTICE black solid form of molybdenum disulfide. -
Page 36: Section 6: Maintenance
Then apply a thin film of ISO 32 oil to provide pro- Daily: tection (see Page 33 for an offering from Grizzly). Use/fill one-shot oiler (Page 35). • • Check/fill coolant tank. -
Page 37: Lubrication
Spilled oil left on the floor can become a Sight slipping hazard. Always clean up spilled oil Glass promptly. Pump Handle Figure 45. One-shot oiler components. Use the sight glass to check the oil level and fill when needed. -35- Model G0763 (Mfd. Since 6/15) -
Page 38: Coolant System
Move table back and forth several times to ing, adding, or changing coolant. distribute lubrication. Running the coolant pump without ade- quate coolant in the tank may permanently damage the coolant pump, which will not be covered by the warranty. -36- Model G0763 (Mfd. Since 6/15) -
Page 39: Wheel Storage
Thoroughly clean tank and pump with hot soapy water. When dry, refill tank with coolant (approxi- mately 8 gallons). Replace lids and return hose. -37- Model G0763 (Mfd. Since 6/15) -
Page 40: Section 7: Service
10. Motor or motor bearings at fault. 10. Replace motor or replace bearings. Power feed unit will 1. Power feed unit fuse is blown. 1. Replace fuse. not start. -38- Model G0763 (Mfd. Since 6/15) -
Page 41: Section 8: Wiring
Technical Support at (570) 546-9663. The photos and diagrams included in this section are best viewed in color. You can view these pages in color at www.grizzly.com. -39- Model G0763 (Mfd. Since 6/15) -
Page 42: Wiring Overview
Y-Axis Limit Coolant Switch Pump Motor Page 44 X- and Page 46 Y-Axis Electrical Cabinet Power Page 41 Feed Page 44 Control Panel Page 43 Figure 49. Wiring overview. READ ELECTRICAL SAFETY -40- Model G0763 (Mfd. Since 6/15) ON PAGE 39! -
Page 43: Electrical Cabinet Wiring
Work Lamp 24V 55W To Coolant Pump Motor Page 46 KM1 = 3TB40 22-OX Ground FR1 = 3UA50 40-1H 5-8A 6-15 Plug FR2 = 3UA50 40-1H .63-1A (As Recommended) READ ELECTRICAL SAFETY -41- Model G0763 (Mfd. Since 6/15) ON PAGE 39! -
Page 44: Electrical Panel & Control Panel
Electrical Panel & Control Panel Figure 50. Electrical panel and control panel wiring. READ ELECTRICAL SAFETY -42- Model G0763 (Mfd. Since 6/15) ON PAGE 39! -
Page 45: Control Panel Wiring
Cabinet Page 41 ON BUTTON PUMP MOTOR TAYEE TAYEE LA42P-10G LA42P-10G TAYEE TAYEE LA42P-01R LA42P-01R OFF BUTTON OFF BUTTON SPINDLE MOTOR PUMP MOTOR Figure 51. Control panel wiring. READ ELECTRICAL SAFETY -43- Model G0763 (Mfd. Since 6/15) ON PAGE 39! -
Page 46: Power Feed Control Panel Wiring
Power Feed Control Panel Wiring READ ELECTRICAL SAFETY -44- Model G0763 (Mfd. Since 6/15) ON PAGE 39! -
Page 47: Power Feed Control Panel
Power Feed Control Panel Figure 54. Power feed controls wiring. READ ELECTRICAL SAFETY -45- Model G0763 (Mfd. Since 6/15) ON PAGE 39! -
Page 48: Motor Wiring Diagrams
108-130MF 25MF 450V 250V Spindle Motor Wiring (clockwise) Coolant Pump Motor 220V CBB60 Run Capacitor 6MF 450V Figure 55. Spindle motor wiring (clockwise). Figure 56. Coolant motor wiring. READ ELECTRICAL SAFETY -46- Model G0763 (Mfd. Since 6/15) ON PAGE 39! -
Page 49: Section 9: Parts
Please Note: We do our best to stock replacement parts whenever possible, but we cannot guarantee that all parts shown here are available for purchase. Call (800) 523-4777 or visit our online parts store at www.grizzly.com to check for availability. -
Page 50: Column
Column 160-2 160-3 160-5 160-4 160-1 160-6 -48- Model G0763 (Mfd. Since 6/15) - Page 51 OIL FITTING 3-WAY PJ-3/CS-4/CB-4 P0763133 Z-AXIS LEADSCREW TUBE CAP P0763163 TUBE CASTING CONNECTOR P0763134 Z-AXIS LEADSCREW TUBE (INNER) P0763164 OIL FITTING 4-WAY PJ-4/CS-4/CB-4 P0763135 Z-AXIS LEADSCREW TUBE (OUTER) P0763165 TUBE FITTING CONNECTOR SA-4/CB-4/CS-4 P0763136 COLUMN -49- Model G0763 (Mfd. Since 6/15)
-
Page 52: Motor & Downfeed System
P0763245-8 CENTRIFUGAL SWITCH P0763225 BALANCE WEDGE 245-9 P0763245-9 BALL BEARING 6204ZZ P0763226 STEEL BALL 4MM 245-10 P0763245-10 BALL BEARING 6204ZZ P0763227 SET SCREW M5-.8 X 6 CONE-PT P0763248 KEY 6 X 5 X 25 -50- Model G0763 (Mfd. Since 6/15) -
Page 53: Saddle
357-2 P0763357-2 LIMIT SWITCH DELIXI LXW5-11Q1 P0763330 CROSS LEADSCREW NUT (REAR) 357-3 P0763357-3 X-AXIS LIMIT SWITCH CORD 16G 2W 48" P0763331 CROSS LEADSCREW NUT HOUSING 357-4 P0763357-4 STRAIN RELIEF 5/8" NPT TYPE-5 P0763332 KEY 8 X 7 X 25 -51- Model G0763 (Mfd. Since 6/15) -
Page 54: Table
CAP SCREW M6-1 X 12 P0763417 MAGNETIC CHUCK P0763408 CAP SCREW M10-1.5 X 35 P0763418 MAGNETIC CHUCK KEY P0763409 CAP SCREW M10-1.5 X 30 P0763419 MAGNETIC CHUCK CLAMP ASSEMBLY P0763410 CAP SCREW M8-1.25 X 30 -52- Model G0763 (Mfd. Since 6/15) -
Page 55: Coolant System
TANK COVER (OUTLET) P0763508 CAP SCREW M6-1 X 8 P0763503 TANK COVER (RETURN) P0763509 RETURN HOSE P0763505 COOLANT PUMP ASSY 1/8HP 220V 1-PH P0763510 OUTLET HOSE P0763506 HOSE CONNECTOR P0763511 PUMP POWER CORD ASSEMBLY -53- Model G0763 (Mfd. Since 6/15) -
Page 56: Accessories
WHEEL FLANGE WRENCH P0763612 SCREWDRIVER PHILLIPS #2 P0763605 WHEEL PULLER P0763613 DIAMOND DRESSER P0763606 HEX WRENCH 8MM P0763614 DRESSER BASE ASSEMBLY P0763607 HEX WRENCH 6MM P0763615 WHEEL BALANCING ARBOR P0763608 HEX WRENCH 5MM P0763616 TOOLBOX -54- Model G0763 (Mfd. Since 6/15) -
Page 57: Electrical Cabinet
TRANSFORMER WUXI JBK4-250VA 24-380V P0763707 OL RELAY SIEMENS 3UA50 0.63-0.9A P0763703 CIRCUIT BREAKER DELXI D16 P0763708 GROUND TERMINAL BAR P0763704 CIRCUIT BREAKER DELXI C10 P0763709 TERMINAL BAR 1P P0763705 CONTACTOR SIEMENS 3TB40 24V P0763710 ELECTRICAL MOUNTING PLATE -55- Model G0763 (Mfd. Since 6/15) -
Page 58: Main Control Panel
712V2 P0763712V2 POWER LIGHT AD17K-22 V2.06.15 716V2 P0763716V2 PUMP OFF BUTTON RED LA42P-01R 22MM V2.06.15 713V2 P0763713V2 SPINDLE ON BUTTON GRN LA42P-10G 22MM V2.06.15 P0763717 MAIN CONTROL PANEL PLATE 714V2 P0763714V2 PUMP ON BUTTON GRN LA42P-10G 22MM V2.06.15 -56- Model G0763 (Mfd. Since 6/15) -
Page 59: Power Feed Control Box
723 P0763723 BUTTON SANLI LAY16-1211 22MM RED 731 P0763731 CIRCUIT BOARD CHCO CK-XY-03 724 P0763724 ON/OFF TOGGLE SWITCH KCD4 733 P0763733 SWITCH SANLI LAY16-1207 22MM 2-POS 725 P0763725 PLUG MALE 4-PRONG 734 P0763734 PLUG MALE 5-PRONG, LARGE -57- Model G0763 (Mfd. Since 6/15) -
Page 60: Labels & Cosmetics
Safety labels help reduce the risk of serious injury caused by machine hazards. If any label comes off or becomes unreadable, the owner of this machine MUST replace it in the original location before resuming operations. For replacements, contact (800) 523-4777 or www.grizzly.com. -58-... - Page 61 Would you recommend Grizzly Industrial to a friend? _____ Yes _____No Would you allow us to use your name as a reference for Grizzly customers in your area? Note: We never use names more than 3 times. _____ Yes _____No 10.
- Page 62 FOLD ALONG DOTTED LINE Place Stamp Here GRIZZLY INDUSTRIAL, INC. P.O. BOX 2069 BELLINGHAM, WA 98227-2069 FOLD ALONG DOTTED LINE Send a Grizzly Catalog to a friend: Name_______________________________ Street_______________________________ City______________State______Zip______ TAPE ALONG EDGES--PLEASE DO NOT STAPLE...
-
Page 63: Warranty & Returns
WARRANTY & RETURNS Grizzly Industrial, Inc. warrants every product it sells for a period of 1 year to the original purchaser from the date of purchase. This warranty does not apply to defects due directly or indirectly to misuse, abuse, negligence, accidents, repairs or alterations or lack of maintenance.