Table of Contents
Advertisement
Quick Links
Find Quality Products Online at:
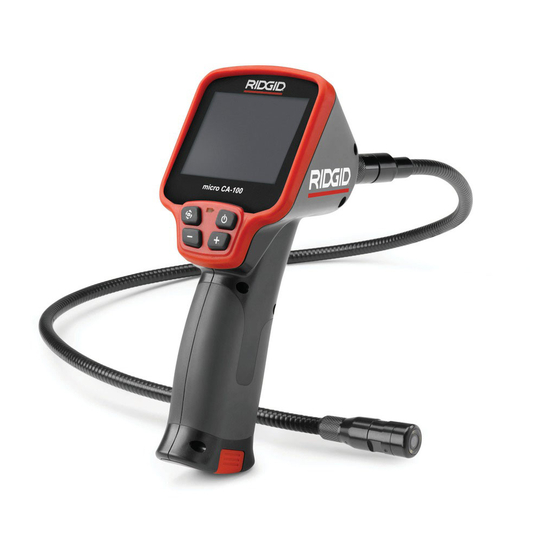
micro CA-100
micro CA-100
Inspection Camera
WARNING!
Read this Operator's Man ual
carefully before using this
tool. Failure to understand
and follow the contents of this
manual may result in electri-
cal shock, fire and/or serious
person al injury.
GlobalTestSupply
www.
Operator's Manual
•
.com
sales@GlobalTestSupply.com
Advertisement
Table of Contents

Summary of Contents for RIDGID micro CA-100
- Page 1 CA-100 Operator’s Manual micro CA-100 Inspection Camera WARNING! Read this Operator’s Man ual carefully before using this tool. Failure to understand and follow the contents of this manual may result in electri- cal shock, fire and/or serious person al injury.
-
Page 2: Table Of Contents
General Safety Information Work Area Safety....................2 Electrical Safety ....................2 Personal Safety ....................2 Equipment Use and Care ..................2 Service.......................3 Specific Safety Information micro CA-100 Inspection Camera Safety ............3 Description, Specifications and Standard Equipment Description......................4 Specifications.....................4 Standard Equipment ..................4 Controls ......................4 FCC Statement .....................5 Electromagnetic Compatibility (EMC) ..............5... -
Page 3: Safety Symbols
CA-100 Inspection Camera Safety Symbols In this operator’s manual and on the product, safety symbols and signal words are used to communicate important safety information. This section is provided to improve understand- ing of these signal words and symbols . -
Page 4: Service
Camera Safety Equipment can be dangerous in the hands • The micro CA-100 imager head and ca- of untrained users. ble are waterproof to 10'.The hand-held • Maintain equipment. Check for misalign- display unit is not. -
Page 5: Description, Specifications And Standard Equipment Description
CA-100 Inspection Camera • Do not operate the micro CA-100 In- Power Source....4 x “AA”, Alkaline or spection Camera if operator or device is Rechargeable standing in water. Operating an electrical Attachments ....Hook, Magnet, device while in water increases the risk Mirror of electrical shock. -
Page 6: Fcc Statement
Tool Assembly Installing the Imager Head Cable or Extension Cables WARNING To use the micro CA-100 Inspection Camera, To reduce the risk of serious injury dur- the imager head cable must be connected ing use, follow these procedures for to the handheld display unit. To connect the proper assembly. -
Page 7: Installing An Accessory
3' and 6' cable extensions are available to grip. increase the length of your cable up to 30' in 4. Inspect micro CA-100 Inspection Camera length. To install an extension, first remove the for any broken, warn, missing, misaligned camera head cable from the display unit by or binding parts or any condition which loosening the knurled knob. -
Page 8: Tool And Work Area Set-Up
CA-100 Inspection Camera is the correct inspection. piece of equipment for the job. If the micro CA-100 Inspection Camera is not • Determine the access points to the the correct piece of equipment for the job, space. The minimum opening the cam-... -
Page 9: Operating Instructions
OFF 30 minutes after the last button press or if the batteries drop too low. Viewing The micro CA-100 Inspection Camera can be connected to a television or other monitor for Battery remote viewing or recording through the in- Indicator cluded RCA cable. -
Page 10: Maintenance
Remove batteries before cleaning. RIDGID micro CA-100 Inspection Camera unsafe to operate. Cleaning Service and repair of the micro CA-100 In- spection Camera must be performed by a • Always clean the imager head and cable RIDGID Independent Authorized Service after use with mild soap or mild detergent. -
Page 11: Troubleshooting
CA-100 Inspection Camera Troubleshooting SYMPTOM POSSIBLE REASON SOLUTION Display turns ON, but Loose cable connections. Check cable connections, clean if re- does not show image. quired. Re-attach. Imager is broken. Replace the Imager. Battery low on power. Replace batteries.


