Table of Contents
Advertisement
Quick Links
Advertisement
Table of Contents

Related Manuals for AEG 47009GO-MN


Summary of Contents for AEG 47009GO-MN
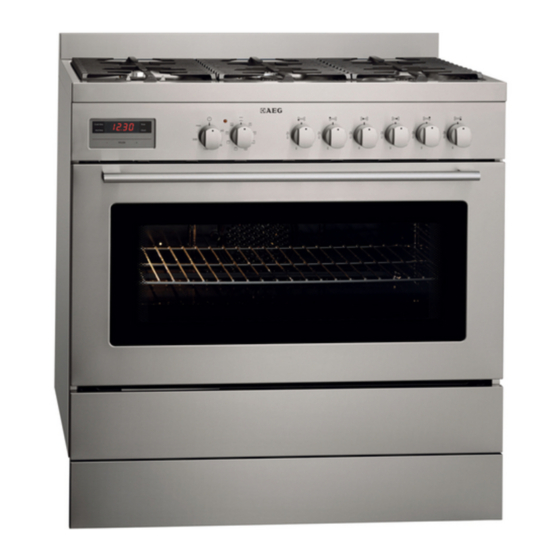
- Page 1 All manuals and user guides at all-guides.com 47009GO-MN EN COOKER USER MANUAL...
-
Page 2: Table Of Contents
All manuals and user guides at all-guides.com CONTENTS 4 Safety information 7 Product description 9 Before first use 10 Hob - daily use 11 Hob - helpful hints and tips 11 Hob - care and cleaning 11 Oven - daily use 14 Using the accessories 14 Oven - helpful hints and tips 15 Cooking table... - Page 3 ENGLISH FOR PERFECT RESULTS Thank you for choosing this AEG product. We have created it to give you impeccable performance for many years, with innovative technologies that help make life simpler – features you might not find on ordinary appliances.
-
Page 4: Safety Information
All manuals and user guides at all-guides.com SAFETY INFORMATION General safety Safety information • Do not change the specifications of Before the installation and use, read this this appliance. There is the risk of manual carefully: injury and damage to the appliance. •... -
Page 5: Gas Connection
All manuals and user guides at all-guides.com ENGLISH mains at all poles. The isolation device Gas connection must have a contact opening with of minimum 3 mm. Make sure that airflow around the • The shock protection parts must be •... -
Page 6: Care And Cleaning
All manuals and user guides at all-guides.com in the appliance after you finish the can become hot. cooking. The interior of the appliance becomes • • Do not apply pressure on the open hot during use. There is a risk of burns. door. -
Page 7: Disposal Of The Appliance
All manuals and user guides at all-guides.com ENGLISH Do not clean the glass door with • Do not let sparks or open flames come • abrasive cleaning agents or metal near the appliance when you open the scraper. Heat resistant door. -
Page 8: Oven Accessories
All manuals and user guides at all-guides.com Oven Grill heating element Oven lamp Fan and heating element Lateral guides Bottom heating element Shelf positions Cooking surface layout Cooking surface layout Semi rapid burner Rapid burner Semi rapid burner Auxiliary burner Semi rapid burner Triple crown burner OVEN ACCESSORIES... -
Page 9: Before First Use
All manuals and user guides at all-guides.com ENGLISH Grill pan set Insert for the grill pan set for grilling • smaller amounts of food (FIG. 3). Baking tray handle (A) • To remove or insert the baking tray FIG. 3 from the oven particularly when hot (FIG. -
Page 10: Hob - Daily Use
All manuals and user guides at all-guides.com HOB - DAILY USE Ignition of the burner To light the burner: Warning! Be very careful when 1. Turn the control knob counterclockwise you use open fire in kitchen to the maximum position ( ) and push environment. -
Page 11: Hob - Helpful Hints And Tips
All manuals and user guides at all-guides.com ENGLISH HOB - HELPFUL HINTS AND TIPS Energy savings Burner Diameters of cookware Rapide 180 mm - 220 mm If possible, always put the lids on the • Semirapide 120 mm - 200 mm pans. - Page 12 All manuals and user guides at all-guides.com The oven is fitted with: Oven lamp a lower heating element; When you turn the control knob to this • position, the light will be on for all the an upper heating element; •...
- Page 13 All manuals and user guides at all-guides.com ENGLISH distributes the heat on the food. The fan lit. After the set time has elapsed the assisted grill function can replace the oven switches off automatically, an need to use the rotisserie. You can obtain acoustic signal sounds (four signals every very good results also with large quantities two seconds) and L1 flashes.
-
Page 14: Using The Accessories
All manuals and user guides at all-guides.com USING THE ACCESSORIES WARNING! Inserting the drip-tray Refer to "Safety information" Insert the drip-tray between the side • chapter. guides, on one of the oven levels (FIG. 7). Inserting the shelf • Insert the shelf between the side gui des, on one of the oven levels. - Page 15 All manuals and user guides at all-guides.com ENGLISH Conventional cooking table Dish Temp. °C. Minutes Fish 180-240 acc. to size Meat Roast beef 30 per kg. Roast veal 200-220 30 per kg. Chicken 200-240 50 about Duck and goose acc. to weight Leg of mutton 30 per kg.
- Page 16 All manuals and user guides at all-guides.com Fan oven cooking table Dish Temp. °C. Minutes Weight kg. First courses Lasagne 200-220 20-25 Oven-baked pasta 200-220 25-30 Creole rice 200-230 20-25 Pizza 210-230 30-45 Meat Roast veal 160-180 65-90 1-1,2 Roast pork 160-170 70-100 1-1,2...
-
Page 17: Oven - Care And Cleaning
All manuals and user guides at all-guides.com ENGLISH OVEN - CARE AND CLEANING • Clean the front of the appliance with Warning! Before you clean the a soft cloth with warm water and appliance, switch it off. Make cleaning agent. sure that the appliance is cold. - Page 18 All manuals and user guides at all-guides.com 1 open the oven door completely. Removal of oven door 2 flip the hinge hooks "A" outwards (see In-depth cleaning of the oven becomes FIG. 9B). more convenient if the door is removed 3 shut the oven door slowly until it following the instructions below: reaches hooks "A", making sure these...
-
Page 19: What To Do If
All manuals and user guides at all-guides.com ENGLISH WHAT TO DO IF… Problem Possible cause Remedy The appliance does not The fuse in the fuse box is re- Control the fuse. If the fuse operate. leased. is released more than one time, refer to a qualified electrician. - Page 20 All manuals and user guides at all-guides.com Problem Possible cause Remedy The appliance makes When the gas is drawn noises or popping sounds. through the burner, it can compress as they heat up. Some metal parts of the appliance expand and contract when they heat up or cool down.
- Page 21 All manuals and user guides at all-guides.com ENGLISH IMPORTANT: The coating of the furniture must be able to withstand high temperatures (min. 90°C). If the appliance is to be installed near units, leave the minimum gaps specified in the figure 10 . min.
- Page 22 All manuals and user guides at all-guides.com To fix the cooker to the rear wall If the part provided is not suitable for the wall material Warning ! please use an appropriate For safety reasons and to device to ensure secure hol- p r e v e n t t i p p i n g o f t h e ding of the “screw eyes”...
-
Page 23: Gas Connections
All manuals and user guides at all-guides.com ENGLISH Gas connections (see total power in kW on the appliance The gas and electricity connec data plate). tions and any adjustments must be made by specialised staff. Gas Safety (Installation & Use) Regulations Warning ! It is the law that all gas appliances are... - Page 24 All manuals and user guides at all-guides.com ENGLISH must be carried out in such a way as to In order to guarantee that the cooker ensure that it runs freely and that it cannot works safely and has a moderate energy come into contact with or be bent by any consumption and long service life, you movable parts in the kitchen, e.g.
-
Page 25: Electrical Connections
All manuals and user guides at all-guides.com ENGLISH For butane/propane gas, the adjusting screw must be tight screwed. Make sure that the flame does not go out passing quickly from the max. flow to the minimum flow Assemble the knob again. FIG. - Page 26 All manuals and user guides at all-guides.com ENGLISH clamp and unscrew (not fully) the screws The wires in the mains lead are in the mains terminal block “L N E” which coloured in accordance with the secure the three wires of the mains cable. following code: Fit the cable and refit screw “A”...
-
Page 27: Environment Concerns
All manuals and user guides at all-guides.com ENGLISH ENVIRONMENT CONCERNS Packaging material The symbol on the product or on its The packaging material is packaging indicates that this product may environmentally-friendly and not be treated as household waste. recyclable. Instead it should be taken to the appro- Plastic parts are marked with priate collection point for the recycling of international abbreviations such... - Page 28 All manuals and user guides at all-guides.com www.aeg-electrolux.com/shop 538751 - 062011...