Cisco 1100 Series Hardware Installation Manual
Integrated services router
Hide thumbs
Also See for 1100 Series:
- Installing and upgrading (15 pages) ,
- Manual (12 pages) ,
- Hardware installation manual (44 pages)
Table of Contents
Advertisement
Advertisement
Table of Contents

Related Manuals for Cisco 1100 Series


Summary of Contents for Cisco 1100 Series
- Page 1 Hardware Installation Guide for the Cisco 1100 Series Integrated Services Router Last Modified: 2018-04-04 Americas Headquarters Cisco Systems, Inc. 170 West Tasman Drive San Jose, CA 95134-1706 http://www.cisco.com Tel: 408 526-4000 800 553-NETS (6387) Fax: 408 527-0883...
- Page 2 © 2017-2017 Cisco Systems, Inc. All rights reserved.
-
Page 3: Table Of Contents
About Slots, Subslots, and Port Numbering Subslot/Bay Numbering Specification Periodic Inspection and Cleaning Preparing for Router Installation C H A P T E R 2 Preparing for Router Installation Safety Recommendations Hardware Installation Guide for the Cisco 1100 Series Integrated Services Router... - Page 4 Setting the Chassis on a Desktop Chassis Grounding Connecting to a Console Terminal or Modem Connecting to the Serial Port with Microsoft Windows Connecting to the Console Port with Mac OS X Hardware Installation Guide for the Cisco 1100 Series Integrated Services Router...
- Page 5 Upgrading the ROMmon for a Router Installing and Upgrading Internal Modules and FRUs C H A P T E R 5 Installing and Upgrading Internal Modules and FRUs Safety Warnings Hardware Installation Guide for the Cisco 1100 Series Integrated Services Router...
- Page 6 Installing and Removing SFP Modules Installing SFPs Removing SFP Modules Declaration of Conformity for RF Exposure C H A P T E R 6 Declaration of Conformity of RF Exposure Hardware Installation Guide for the Cisco 1100 Series Integrated Services Router...
-
Page 7: Document Organization
This guide is intended for Cisco equipment providers and service personnel who are technically knowledgeable and familiar with Cisco routers and Cisco IOS software and features. They would understand how to install, configure, and maintain the router, and they should be familiar with electronic circuitry and wiring practices, and have experience as an electronic or electromechanical technician. -
Page 8: Document Conventions
[x | y] Optional alternative keywords are grouped in brackets and separated by vertical bars. {x | y} Required alternative keywords are grouped in braces and separated by vertical bars. Hardware Installation Guide for the Cisco 1100 Series Integrated Services Router viii... -
Page 9: Related Documentation
Means reader be warned. In this situation, you might perform an action that could result in bodily Warning injury. Related Documentation For related release documentation, see the following URLs: Hardware Installation Guide for the Cisco 1100 Series Integrated Services Router... -
Page 10: Obtaining Documentation And Submitting A Service Request
Subscribe to What’s New in Cisco Product Documentation, which lists all new and revised Cisco technical documentation, as an RSS feed and deliver content directly to your desktop using a reader application. The RSS feeds are a free service. -
Page 11: Overview Of Cisco 1000 Series Integrated Services Routers
Cisco system architecture. About Cisco 1100 Series Integrated Service Routers The Cisco 1100 Series ISRs are fixed branch routers based on the Cisco IOS XE Everest 16.6.2 operating system, with a multi-core Data Plane. The two types of platforms supported on Cisco 1100 Series ISRs are 8-port and 4-port platforms. -
Page 12: Chassis Views
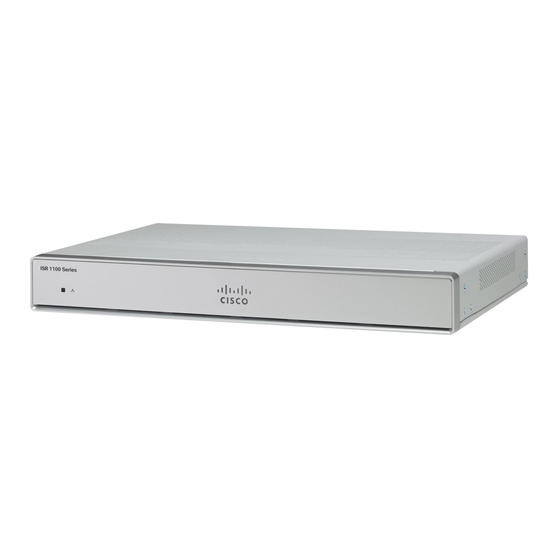
• 4G LTE-Advanced support with carrier aggregation Chassis Views This section contains views of the front and back panels of the Cisco 1100 Series ISR, showing locations of the power and signal interfaces, interface slots, status indicators, and chassis identification labels. -
Page 13: Labels On The Router
Labels on the Router To obtain a software license, you need a product authorization key (PAK) and the unique device identifier (UDI) of the device where the license will be installed. Hardware Installation Guide for the Cisco 1100 Series Integrated Services Router... -
Page 14: For Additional Help Locating Labels On The Router
For Additional Help Locating Labels on the Router Use the Cisco Product Identification (CPI) tool to find labels on the router. The tool provides detailed illustrations and descriptions of where the labels are located on Cisco products. It includes the following features: •... -
Page 15: Power-Over-Ethernet (Poe)
Overview of Cisco 1000 Series Integrated Services Routers Hardware Features The Cisco ISR C1100-4P series comes with 4-Gigabit Ethernet LAN ports, and two WAN ports, with options for one LTE modem and one WLAN interface. Power-over-Ethernet (PoE) The C1100-8P series has 8 Ethernet LAN ports. Four of the Ethernet LAN ports are PoE-capable, LAN ports 0-3. -
Page 16: Hardware Installation Guide For The Cisco 1100 Series Integrated Services Router
CD LED DATA LED Table 1: LED Indicators - Description Port LED Color Description Location Cisco Logo Blue Bezel illuminated Cisco Bezel side logo. Indicates router power is good. Hardware Installation Guide for the Cisco 1100 Series Integrated Services Router... -
Page 17: Hardware Installation Guide For The Cisco 1100 Series Integrated Services Router
-100dBm 2 LEDs On— Low RSSI, -99dbm <> -90dBm 3 LEDs On— Medium RSSI -89dBm <> -70dBm 4 LEDs On— High RSSI, > -69dBm Green— LTE Amber— 3G Hardware Installation Guide for the Cisco 1100 Series Integrated Services Router... -
Page 18: Hardware Installation Guide For The Cisco 1100 Series Integrated Services Router
Red—Ethernet link is not operational or Ethernet failure. Amber—Software upgrade is in progress. Ethernet Switch GE LAN Green I/O side Off— No link Ports, Non-PoE Steady On— link Blink— TXD/RXD data Hardware Installation Guide for the Cisco 1100 Series Integrated Services Router... -
Page 19: Hardware Installation Guide For The Cisco 1100 Series Integrated Services Router
Off — No -53.5V PoE power supply connected to router. DSL Data Green Off— No Data Activity I/O Side Green Blink— TX/RX Data Hardware Installation Guide for the Cisco 1100 Series Integrated Services Router... -
Page 20: Reset Button
About Slots, Subslots, and Port Numbering Cisco 1100 Series ISRs do not support physical and removable modules. It has only one slot, that is, slot 0. Slot 0 is the motherboard and not removable. It is reserved for integrated ports. The front panel GE ports (or native interface ports) always reside in slot 0 and bay 0. -
Page 21: Subslot/Bay Numbering
H x W X D = 1.75 x 12.7 x 9.6 in. (44 x 323 x 244 mm) (includes rubber feet) Weight with AC PS (w/o modules) 5.5 Lbs. (2.5 kg) maximum AC Input Power Hardware Installation Guide for the Cisco 1100 Series Integrated Services Router... -
Page 22: Hardware Installation Guide For The Cisco 1100 Series Integrated Services Router
Default and maximum flash Inline PoE 4 ports for -8P PIDs, 2 ports for -4P PIDs 802.3af-compliant PoE or 802.3at-compliant PoE+ Acoustic for Cisco 1100 Series ISRs Not Applicable - Fanless design Hardware Installation Guide for the Cisco 1100 Series Integrated Services Router... -
Page 23: Hardware Installation Guide For The Cisco 1100 Series Integrated Services Router
◦ CISPR24: 2010 + A1: 2015 ◦ EN 300 386 V1.6.1 ◦ EN55024: 2010 + A1: 2015 ◦ KN35: 2015 ◦ TCVN 7317: 2003 Table 4: Environmental Specification Description Specification Environmental Hardware Installation Guide for the Cisco 1100 Series Integrated Services Router... -
Page 24: Periodic Inspection And Cleaning
Sites with ambient temperatures consistently above 25°C or 77°F and with potentially high levels of dust Note or debris might require periodic preventative maintenance cleaning. Hardware Installation Guide for the Cisco 1100 Series Integrated Services Router... -
Page 25: Preparing For Router Installation
Ultimate disposal of this product should be handled according to all national laws and regulations. Statement Warning 1040. Safety With Electricity Do not work on the system or connect or disconnect cables during periods of lightning activity. Statement Warning 1001 Hardware Installation Guide for the Cisco 1100 Series Integrated Services Router... -
Page 26: Preventing Electrostatic Discharge Damage
This section describes the requirements your site must meet for safe installation and operation of your router. Ensure that the site is properly prepared before beginning installation. If you are experiencing shutdowns or Hardware Installation Guide for the Cisco 1100 Series Integrated Services Router... -
Page 27: Site Selection Guidelines
Router Environmental Requirements Cisco 1100 Series ISRs can be placed on a desktop, installed in a rack, or mounted on a wall. The location of your router and the layout of your equipment rack or wiring room are extremely important considerations for proper operation. -
Page 28: Power Guidelines And Requirements
100-240VAC, 2A, 50-60 Hz 12V, 4.6A, -53.5V 1.12A (PWR-115W-AC) Network Cabling Specifications The following sections describe the cables needed to install your Cisco 1100 Series ISR in the following sections: Hardware Installation Guide for the Cisco 1100 Series Integrated Services Router... -
Page 29: Console Port Connections
3-19. For operation with a Microsoft Windows OS version older than Windows 7, the Cisco Windows USB Console Driver must be installed on any PC connected to the console port. If the driver is not installed, prompts guide you through a simple installation process. -
Page 30: Console Port Considerations
• 10BASE-T—10 Mb/s full-duplex transmission over a Category 5 or better unshielded twisted-pair (UTP) cable. Supports the Ethernet maximum length of 328 feet (100 meters). See the Cisco Modular Access Router Cable Specifications document at Cisco.com for information about Ethernet cables, connectors, and pinouts. -
Page 31: Installation Checklist
Router received Router quick start guide received Regulatory Compliance and Safety Information for the Cisco 1100 Series ISRs document received Product registration card received Cisco.com contact information label received Hardware Installation Guide for the Cisco 1100 Series Integrated Services Router... -
Page 32: Creating A Site Log
Warranty, service, and support information is in the quick start guide that shipped with your router, or in the Preface of this guide. See the Obtaining Documentation and Submitting a Service Request section. Hardware Installation Guide for the Cisco 1100 Series Integrated Services Router... -
Page 33: Chapter 3 Installing And Connecting The Router
What You Need to Know CLI Console Access Use the USB or RJ-45 console port on the router to access the Cisco Internet Operating System (IOS-XE) command line interface (CLI) on the router and perform configuration tasks. A terminal emulation program is required to establish communication between the router and a PC. -
Page 34: Before You Begin
Always hold the chassis by the sides of the metal body. Installing a Cisco 1100 Series ISR This section describes how to install the Cisco 1100 Series ISR. These routers can be installed on a table top or other flat horizontal surface mounted on a wall or DIN rail. -
Page 35: Attaching The Chassis
DIN rail bracket. Mounting on the Wall The Cisco 1100 Series ISRs have mounting key-hole slots on the bottom of the chassis for mounting the unit on a wall or other vertical surface, as shown in the figure below. -
Page 36: Hardware Installation Guide For The Cisco 1100 Series Integrated Services Router
For hollow-wall mounting, each bracket requires two wall anchors with washers. Wall anchors and washers must be size number 10. Route the cables so that they do not put a strain on the connectors or mounting hardware. Hardware Installation Guide for the Cisco 1100 Series Integrated Services Router... -
Page 37: Hardware Installation Guide For The Cisco 1100 Series Integrated Services Router
When choosing a location for wall-mounting the router, consider cable limitations and wall structure. Note The figure below shows the orientation for wall mounting of the router. Figure 7: Wall-Mount Orientation Key-hole slots Hardware Installation Guide for the Cisco 1100 Series Integrated Services Router... -
Page 38: Attaching Din Rail Brackets
Do not over-torque the screws. The recommended torque is 8 to 10 inch-lbf (.9 to 1.1 N-m). Note Your chassis installation must allow unrestricted airflow for chassis cooling. Note Step 2: Attach the router to the wall using the key-hole slots. Hardware Installation Guide for the Cisco 1100 Series Integrated Services Router... -
Page 39: Hardware Installation Guide For The Cisco 1100 Series Integrated Services Router
The figure below displays the orientation of the DIN rail bracket. Figure 9: DIN Rail Bracket Orientation The figure below displays the DIN rail orientation and mount. Figure 10: DIN Rail Orientation and Mount Hardware Installation Guide for the Cisco 1100 Series Integrated Services Router... -
Page 40: Mounting The Router In A Rack
1.75 in. (4.4 cm). Statement 1076 After the router is installed, you must connect the chassis to a reliable earth ground. For the chassis ground connection procedures, see the “Chassis Grounding” section. Hardware Installation Guide for the Cisco 1100 Series Integrated Services Router... -
Page 41: Setting The Chassis On A Desktop
• For the ground lug—approximately 0.75 inch (20 mm) • For user-provided ring terminal—as required 2 Crimp the ground wire to the ground lug or ring terminal, using a crimp tool of the appropriate size. Hardware Installation Guide for the Cisco 1100 Series Integrated Services Router... -
Page 42: Connecting To A Console Terminal Or Modem
The router has asynchronous serial ports. These ports provide administrative access to the router either locally (with a console terminal or a PC) or remotely (with a modem).To configure the router through the Cisco IOS CLI, you must establish a connection between the router console port and either a terminal or a PC. -
Page 43: Connecting To The Serial Port With Microsoft Windows
• “Installing the Cisco Microsoft Windows 2000 USB Driver” section • “Installing the Cisco Microsoft Windows Vista USB Driver” section • "Installing the Cisco Microsoft Windows 8 and Windows 10 USB Driver" section Note You cannot use the USB port and the EIA port concurrently. When the USB port is used it takes priority over the RJ-45 EIA port. -
Page 44: Connecting To The Console Port With Mac Os X
1 root root 188, 0 Jan 14 18:02 ttyACM0 root@usb-suse /dev# Step 4 Connect to the USB port with the following command followed by the router USB port speed Hardware Installation Guide for the Cisco 1100 Series Integrated Services Router... -
Page 45: Installing The Cisco Microsoft Windows Usb Device Driver
Installing the Cisco Microsoft Windows XP USB Driver This procedure shows how to install the Microsoft Windows XP USB driver. Before you begin, download the appropriate driver for your router model from the Cisco Software Download site, USB Console Software category: http://www.cisco.com/cisco/software/navigator.html... -
Page 46: Installing The Cisco Microsoft Windows 2000 Usb Driver
This procedure shows how to install the Microsoft Windows 8/Windows 10 USB driver. Step 1 Obtain the Cisco USB console driver file from the Cisco.com web site and unzip it. You can download the driver file from the Cisco.com site for downloading the router software. -
Page 47: Uninstalling The Cisco Microsoft Windows Usb Driver
The USB console is now ready for use. Uninstalling the Cisco Microsoft Windows USB Driver This section provides instructions for how to uninstall the Cisco Microsoft Windows USB device driver. • Uninstalling the Cisco Microsoft Windows XP and 2000 USB Driver, on page 37 •... -
Page 48: Uninstalling The Cisco Microsoft Windows Vista Usb Driver
(Type 2 or Type 4 ports as described in GR-1089-CORE, Issue 4) and require isolation from the exposed OSP cabling. The addition of Primary Protectors is not sufficient protection in order to connect these interfaces metallically to OSP wiring. Hardware Installation Guide for the Cisco 1100 Series Integrated Services Router... -
Page 49: Ports And Cabling
Ports and Cabling This chapter summarizes typical WAN and LAN connections for routers. The connections summarized here are also described in detail in the document on Cisco.com: Cisco Modular Access Router Cable Specifications Table 8: WAN and LAN Connections Port or Connection... -
Page 50: Hardware Installation Guide For The Cisco 1100 Series Integrated Services Router
• Inspect the cables to make sure that the routing and bend radius is satisfactory. Reposition cables, if necessary. • Install cable ties in accordance with site requirements. For cable pinouts, see Cisco Modular Access Router Cable Specifications . Hardware Installation Guide for the Cisco 1100 Series Integrated Services Router... -
Page 51: Rom Monitor Overview And Basic Procedures
ROM Monitor mode. The ROM Monitor software is also called the boot software , boot image , or boot helper . Although it is distributed with routers that use the Cisco IOS XE software, ROM Monitor is a separate program from the Cisco IOS XE software. During normal startup, the ROM Monitor initializes the router, and then control passes to the Cisco IOS XE software. -
Page 52: Entering Rom Monitor Mode
ROM Monitor mode is a router mode, not a mode within the Cisco IOS XE software. ROM Monitor software and the Cisco IOS XE software are two separate programs that run on the same router. At any given time, the router is running one of these programs, but it never runs both at the same time. -
Page 53: Commonly Used Rom Monitor Commands
This topic describes the available help commands for ROM Monitor mode. Table 10: Help Commands in ROMMON Command Description help or ? Displays a summary of all available ROM Monitor commands. Displays information about command syntax. Hardware Installation Guide for the Cisco 1100 Series Integrated Services Router... -
Page 54: Examples
[n]: n The configuration register setting is labeled Virtual Configuration Register . Enter the no command to avoid changing the configuration register setting. Hardware Installation Guide for the Cisco 1100 Series Integrated Services Router... -
Page 55: Environment Variable Settings
Displaying Environment Variable Settings To display the current environment variable settings, enter the set command : rommon 1 > set PS1=rommon ! > LICENSE_SUITE= LICENSE_BOOT_LEVEL= MCP_STARTUP_TRACEFLAGS=00000000:00000000 RET_2_RTS= RANDOM_NUM=1721712417 BSI=0 RET_2_RCALTS= Hardware Installation Guide for the Cisco 1100 Series Integrated Services Router... -
Page 56: Entering Environment Variable Settings
Step 2 Respond to each prompt as instructed. See the example that follows this procedure for more information. Step 3 reset Resets and initializes the router. Example: rommon 2> reset Hardware Installation Guide for the Cisco 1100 Series Integrated Services Router... -
Page 57: Configuration Example
6. If autoboot has not been enabled by using the config-register 0x2102 command, run the boot filesystem:/file-location command at the ROMmon prompt to boot the Cisco IOS XE image, where filesystem:/file-location is the path to the consolidated package file. The ROMmon upgrade is not permanent for any piece of hardware until the Cisco IOS XE image is booted. -
Page 58: Hardware Installation Guide For The Cisco 1100 Series Integrated Services Router
If autoboot has not been enabled by using the config-register 0x2102 command, run the boot filesystem:/file-location command at the ROMmon prompt to boot the Cisco IOS XE image, where filesystem:/file-location is the path to the consolidated package file. The ROMmon upgrade is not permanent for any piece of hardware until the Cisco IOS XE image is booted. -
Page 59: Installing And Upgrading Internal Modules And Frus
Installing and Upgrading Internal Modules and FRUs This document describes how to install and upgrade internal modules and field replaceable units (FRUs) in the Cisco 1100 Series Integrated Services Routers (ISRs). The install and upgrade information is contained in these sections: Safety Warnings Class 1 laser product. -
Page 60: Hardware Installation Guide For The Cisco 1100 Series Integrated Services Router
Step 5 Pull the cover to disengage the slots along the front (bezel) edge of the chassis, as shown in the figure below. Figure 13: Removing the Cover Slots Hardware Installation Guide for the Cisco 1100 Series Integrated Services Router... -
Page 61: Hardware Installation Guide For The Cisco 1100 Series Integrated Services Router
This section describes the locations of internal modules on the router motherboard. Internal modules include PoE daughter card on the Cisco1100 Series ISRs. Figure 14: Module Location in the Cisco 1100 Series ISR Hardware Installation Guide for the Cisco 1100 Series Integrated Services Router... -
Page 62: Hardware Installation Guide For The Cisco 1100 Series Integrated Services Router
Close the chassis cover according to the instructions in the Replacing the Cover section, and connect the power supply cable. Figure 15: Internal PoE Daughter Card Assembly Screws PoE Daughter Card Metal Standoffs Hardware Installation Guide for the Cisco 1100 Series Integrated Services Router... -
Page 63: Hardware Installation Guide For The Cisco 1100 Series Integrated Services Router
Removing and Replacing the USB Flash Token Memory Stick The Cisco 1100 Series ISRs contain port for a 1 GB flash token memory stick to store configurations or Cisco IOS XE consolidated packages. Only Cisco USB Flash memory modules are supported by Cisco routers. -
Page 64: Ac Power Supplies
Gigabit Ethernet connectivity. The SFP module installs into a slot on the router rear panel. When selected in Cisco IOS software, it is assigned port gigabitethernet 0/0/0. The default is the built-in RJ-45 1000Base-T connector, which is enabled on this port. - Page 65 100BASE-LX SFP for FE port GLC-FE-100ZX 3.10 100BASE-ZX SFP (80km) GLC-FE-100EX 3.10 100BASE-EX SFP (40km) GLC-FE-100BX-D 3.11 100BASE-BX10-D GLC-FE-100BX-U 3.11 100BASE-BX10-U GLC-GE-100 3.10 100 V02 SFP on GE ports Hardware Installation Guide for the Cisco 1100 Series Integrated Services Router...
- Page 66 NM SFP Gigabit Ethernet and 1G/2G FC CWDM-SFP-1510 3.10 CWDM 1510 NM SFP Gigabit Ethernet and 1G/2G FC CWDM-SFP-1530 3.10 CWDM 1530 NM SFP Gigabit Ethernet and 1G/2G FC Hardware Installation Guide for the Cisco 1100 Series Integrated Services Router...
- Page 67 1532.68 nm SFP (100 GHz ITU grid) DWDM-SFP-3425 3.10 DWDM SFP 1534.25 nm SFP (100 GHz ITU grid) DWDM-SFP-3504 3.10 DWDM SFP 1535.04 nm SFP (100 GHz ITU grid) Hardware Installation Guide for the Cisco 1100 Series Integrated Services Router...
- Page 68 1542.94 nm SFP (100 GHz ITU grid) DWDM-SFP-4373 3.10 DWDM SFP 1543.73 nm SFP (100 GHz ITU grid) DWDM-SFP-4453 3.10 DWDM SFP 1544.53 nm SFP (100 GHz ITU grid) Hardware Installation Guide for the Cisco 1100 Series Integrated Services Router...
- Page 69 1552.52 nm SFP (100 GHz ITU grid) DWDM-SFP-5413 3.10 DWDM SFP 1554.13 nm SFP (100 GHz ITU grid) DWDM-SFP-5494 3.10 DWDM SFP 1554.94 nm SFP (100 GHz ITU grid) Hardware Installation Guide for the Cisco 1100 Series Integrated Services Router...
- Page 70 DWDM SFP 1560.61 nm SFP (100 GHz ITU grid) Use the show controller command at the Cisco IOS prompt to determine whether you are using an SFP certified by Cisco. Currently, GLC-GE-100FX V01 is not supported. Note Hardware Installation Guide for the Cisco 1100 Series Integrated Services Router...
-
Page 71: Installing Sfps
Use a pen, screwdriver, or other small straight tool to gently release a bale-clasp handle if you cannot reach it with your fingers. Step 4 Grasp the SFP on both sides and remove it from the router. Hardware Installation Guide for the Cisco 1100 Series Integrated Services Router... - Page 72 Installing and Upgrading Internal Modules and FRUs Installing and Removing SFP Modules Hardware Installation Guide for the Cisco 1100 Series Integrated Services Router...
-
Page 73: Declaration Of Conformity For Rf Exposure
Son fonctionnement est sujet aux deux conditions suivantes: • le dispositif ne doit pas produire de brouillage préjudiciable • ce dispositif doit accepter tout brouillage reçu, y compris un brouillage susceptible de provoquer un fonctionnement indésirable Hardware Installation Guide for the Cisco 1100 Series Integrated Services Router... - Page 74 Cet équipement est conforme aux limites d'exposition aux rayonnements IC établies pour un environnement non contrôlé. Cet équipement doit être installé et utilisé avec un minimum de 20 cm (7.87 in.) de distance entre la source de rayonnement et votre corps. Hardware Installation Guide for the Cisco 1100 Series Integrated Services Router...
- Page 75 41, 45 saving Ethernet cable types record keeping, site log ROM monitor exiting ROM Monitor prompt help command (ROM Monitor) set command (ROM Monitor) sync command (ROM Monitor) Hardware Installation Guide for the Cisco 1100 Series Integrated Services Router IN-1...
- Page 76 Index Tables Warnings 20, 23, 38 power requirements lightning activity restricted access SELV circuit qualified personnel Hardware Installation Guide for the Cisco 1100 Series Integrated Services Router IN-2...