Cisco 1100 Series Hardware Installation Manual
Terminal gateway
Hide thumbs
Also See for 1100 Series:
- Installing and upgrading (15 pages) ,
- Hardware installation manual (76 pages) ,
- Manual (12 pages)
Table of Contents
Advertisement
Advertisement
Table of Contents

Related Manuals for Cisco 1100 Series


Summary of Contents for Cisco 1100 Series
- Page 1 Hardware Installation Guide for the Cisco 1100 Terminal Gateway First Published: 2020-05-25 Americas Headquarters Cisco Systems, Inc. 170 West Tasman Drive San Jose, CA 95134-1706 http://www.cisco.com Tel: 408 526-4000 800 553-NETS (6387) Fax: 408 527-0883...
- Page 2 © 2020 Cisco Systems, Inc. All rights reserved.
-
Page 3: Table Of Contents
Slots and Interfaces About Slots, Subslots, and Port Numbering Async line Numbering Fans, Ventilation and Airflow Specifications of Cisco 1100 Series Integrated Services Routers Periodic Inspection and Cleaning C H A P T E R 2 Prepare for Router Installation... - Page 4 C H A P T E R 4 Install and Remove Small Form Pluggable Modules and Field Replaceable Units Install Small Form Pluggable Module Install Field Replaceable Units Installing and Removing a NIM Remove and Replace SSD Storage Hardware Installation Guide for the Cisco 1100 Terminal Gateway...
-
Page 5: About Cisco 1100 Terminal Gateway Routers
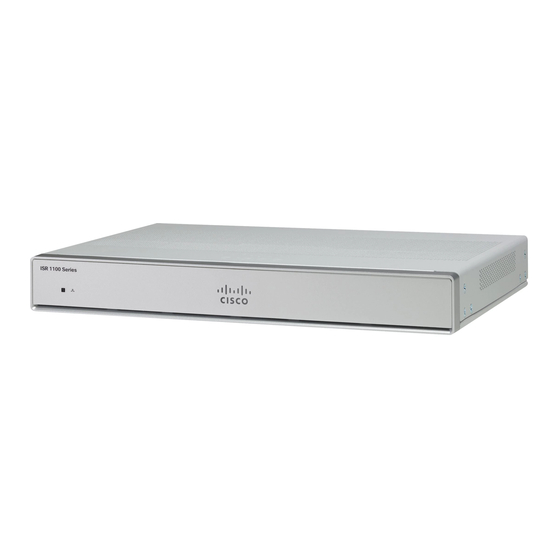
C1100TGX-1N24P32A 24 port L2 Switch 8GB Dram/ 8GB flash For more information on the features and specifications of Cisco 1100 Series Terminal Gateway Routers, refer to Cisco 1100 Terminal Gateway Routers datasheet. • Chassis Views, on page 1 •... - Page 6 Figure 2: C1100TG-1N24P32A and C1100TGX-1N24P32A - I/O View System LED USB 2.0 GE WAN 0/0/0 - RJ45/SFP GE WAN 0/0/1 – RJ45/SFP ASYNC 16 port ASYNC 32 port Ethernet Switch 0-15 Ethernet Switch LED 0-23 Ethernet Switch 16-23 Hardware Installation Guide for the Cisco 1100 Terminal Gateway...
-
Page 7: Led Indicators
RJ-45 Console, AUX ASYNC LED Grounding Attachment Power Supply LED Indicators The following figures and table summarizes the LED indicators that are located on the chassis of the Cisco 1100 Terminal Gateway Routers. Hardware Installation Guide for the Cisco 1100 Terminal Gateway... - Page 8 About Cisco 1100 Terminal Gateway Routers LED Indicators Figure 5: LED Indicators - C1100TG-1N32A I/O Side Figure 6: LED Indicators - C1100TG-1N24P32A and C1100TGX-1N24P32A I/O Side Hardware Installation Guide for the Cisco 1100 Terminal Gateway...
-
Page 9: Power Supply
About Cisco 1100 Terminal Gateway Routers Power Supply Table 2: LED Indicators for Cisco Cisco 1100 Terminal Gateway Router Port LED Color Description Control Source System LEDs Green and Amber Off—Systempower off Bezel side. All models. Steady Green - System operates normally. - Page 10 Async 0/1/0 ~ Async 0/1/47 Slot 0/2 NIM slot RJ45/SFP combo GigaEthernet 0/0/1 Figure 8: C1100TG-1N24P32A and C1100TGX-1N24P32A: Slots and Subslots Slot 0/0 Front panel Gigabit Ethernet RJ45/SFP combo GigaEthernet 0/0/0 Hardware Installation Guide for the Cisco 1100 Terminal Gateway...
-
Page 11: Async Line Numbering
Async line Numbering Cisco 1100 Terminal Gateway Routers has 32 onboard async ports, line number starts at 2 and ends at 33. An optional Daughter Card with 16 async ports can be added to Nanook base and Nanook+, line number for Daughter Card starts at 33 and ends at 49. -
Page 12: Fans, Ventilation And Airflow
The fans are always on when the router is powered on. Under most conditions, the fans operate at the slowest speed to conserve power and reduce noise. When necessary, the fans operate at higher speeds under conditions of higher ambient temperature. Hardware Installation Guide for the Cisco 1100 Terminal Gateway... - Page 13 About Cisco 1100 Terminal Gateway Routers Fans, Ventilation and Airflow Figure 11: C1100TG-1N32A - Airflow Figure 12: C1100TG-1N24P32A and C1100TGX-1N24P32A - Airflow Hardware Installation Guide for the Cisco 1100 Terminal Gateway...
-
Page 14: Specifications Of Cisco 1100 Series Integrated Services Routers
About Cisco 1100 Terminal Gateway Routers Specifications of Cisco 1100 Series Integrated Services Routers Specifications of Cisco 1100 Series Integrated Services Routers For specifications on the Cisco 1100 Series ISRs, refer to the Cisco 1100 Terminal Gateway Routers Specifications document. Periodic Inspection and Cleaning We recommend that you periodically inspect and clean the external surface of the router is recommended to minimize the negative impact of environmental dust or debris. -
Page 15: Prepare For Router Installation
C H A P T E R Prepare for Router Installation Before you install the Cisco 1100 Series Integrated Services Routers, you must prepare your site for the installation. This chapter provides pre-installation information, such as recommendations and requirements that should be considered before installing your router. -
Page 16: Safety With Electricity
• Wear an ESD-preventive wrist strap, ensuring that it makes good skin contact. Connect the clip to an unpainted surface of the chassis frame to channel unwanted ESD voltages safely to ground. To guard against ESD damage and shocks, the wrist strap and cord must operate effectively. Hardware Installation Guide for the Cisco 1100 Terminal Gateway... -
Page 17: General Site Requirements
The Cisco 1100 Series ISRs are designed to meet the industry EMC, safety, and environmental standards described in the Regulatory Compliance and Safety Information for the Cisco 1100 Series ISR document. -
Page 18: Nebs Deployment Site Requirements
PE (Protective Earth). • Surge arrestors should support DC-pass and suitable for the frequency range with low attenuation. Hardware Installation Guide for the Cisco 1100 Terminal Gateway... -
Page 19: Rack Requirements
If the chassis is installed on slides, check the position of the chassis when it is seated in the rack. Router Environmental Requirements Cisco 1100 Terminal Gateway Routerscan be placed on a desktop or installed in a rack. The location of your router and the layout of your equipment rack or wiring room are extremely important considerations for proper operation. -
Page 20: Power Guidelines And Requirements
Network Cabling Specifications The following sections describe the cables and thee specifications required to install Cisco 1100 Series ISRs: Console Port Connections The Cisco 1100 Terminal Gateway Routers has EIA/TIA-232 asynchronous (RJ-45) and ASYNC ports. The console port does not have any hardware flow control. -
Page 21: Ethernet Connection
• 10BASE-T—10Mb/s full-duplex transmission over a Category 5 or better unshielded twisted-pair (UTP) cable. Supports the Ethernet maximum length of 328 feet (100 meters). See the Cisco Modular Access Router Cable Specifications document at Cisco.com for information about Ethernet cables, connectors, and pinouts... - Page 22 Prepare for Router Installation Required Tools and Equipment for Installation and Maintenance Hardware Installation Guide for the Cisco 1100 Terminal Gateway...
-
Page 23: Install And Connect The Router
C H A P T E R Install and Connect the Router This chapter describes how to install and connect Cisco 1100 Terminal Gateway Routers to LAN and WAN networks. Warning Read the installation instructions before using, installing or connecting the system to the power source. -
Page 24: Attach Bracket To The Chassis
Use the screws provided along with the mounting kit to attach the screws to the device. Figure 13: C1100TG-1N32A 19” Bracket installation for rack mounting Hardware Installation Guide for the Cisco 1100 Terminal Gateway... - Page 25 Install and Connect the Router Attach Bracket to the Chassis Figure 14: C1100TG-1N24P32A and C1100TGX-1N24P32A 19” Bracket installation for rack mounting Figure 15: C1100TG-1N32A 23” Bracket installation for rack mounting Hardware Installation Guide for the Cisco 1100 Terminal Gateway...
-
Page 26: Mount The Router On The Rack
• When mounting this unit in a partially filled rack, load the rack from the bottom to the top withthe heaviest component at the bottom of the rack. • If the rack is provided with stabilizing devices, install the stabilizers before mounting or servicingthe unit in the rack. Statement 1006. Hardware Installation Guide for the Cisco 1100 Terminal Gateway... -
Page 27: Chassis Grounding
3. Attach the ground lug to the chassis as shown in the below figures. The screw for the ground lug is provided. Tighten the screw; the recommended torque is 8 to 10 inch-lbf (0.9 to 1.1N-m) Hardware Installation Guide for the Cisco 1100 Terminal Gateway... - Page 28 Install and Connect the Router Chassis Grounding Figure 17: C1100TG-1N32A-Grounding Figure 18: C1100TG-1N24P32A and C1100TGX-1N24P32A -Grounding Hardware Installation Guide for the Cisco 1100 Terminal Gateway...
-
Page 29: Connect Power Cable
Connect Power Cable Connect Power Cable Power supply of the Cisco 1100 Terminal Gateway Routers is through AC and DC power adapter. Warning This equipment must be grounded. To reduce the risk of electric shock, never defeat the ground conductor or operate the equipment in the absence of a suitably installed ground conductor. - Page 30 Install and Connect the Router Connect Power Cable Figure 19: C1100TG-1N32A-Power Cable Connection Hardware Installation Guide for the Cisco 1100 Terminal Gateway...
- Page 31 Install and Connect the Router Connect Power Cable Hardware Installation Guide for the Cisco 1100 Terminal Gateway...
- Page 32 Install and Connect the Router Connect Power Cable Figure 20: C1100TG-1N24P32A and C1100TGX-1N24P32A - Power Cable Connection Hardware Installation Guide for the Cisco 1100 Terminal Gateway...
-
Page 33: Connecting To Dc Power
If the two negative and two positive inputs are used, the negative inputs must be connected to the same source and the positive inputs must be connected to the same source. Hardware Installation Guide for the Cisco 1100 Terminal Gateway... - Page 34 Locate the power connector in the accessory package. In the connector, the pins from left to right are: 1—Negative DC power connection 2— Negative DC power connection 3— Positive DC power connection 4— Positive DC power connection Hardware Installation Guide for the Cisco 1100 Terminal Gateway...
- Page 35 3. Make sure that you cannot see any wire lead. Only wire with insulation should extend from the connector. Use the same method for wiring a parallel connection Note for terminals 2 and 4. Hardware Installation Guide for the Cisco 1100 Terminal Gateway...
-
Page 36: Connect To The Console Port With Mac Os X
Step 1 Open the Linux Terminal window. Step 2 Connect the Linux USB port to the router. Step 3 Enter the following commands to find the Linux USB port number Example: Hardware Installation Guide for the Cisco 1100 Terminal Gateway... -
Page 37: Connect Wan And Lan Interfaces
LAN, Ethernet. Statement 1044. Ports and Cabling This section summarizes typical WAN and LAN connections for Cisco 1100 Terminal Gateway Server. Table 3: WAN and LAN Connections Port or Connection... - Page 38 1. Before connecting Async cables to the ports, mount Async bracket onto the front panel. 2. Align the the sides of the brackets to the Async port slots on the front panel. Hardware Installation Guide for the Cisco 1100 Terminal Gateway...
-
Page 39: Connection Procedures And Precautions
After installing the router and connecting the cables, you can configure the router with basic configurations. For more information on how to configure the router, see the Cisco 1100 Series Software Configuration Guide. Hardware Installation Guide for the Cisco 1100 Terminal Gateway... - Page 40 Install and Connect the Router Configure the Router at Startup Hardware Installation Guide for the Cisco 1100 Terminal Gateway...
-
Page 41: Install And Remove Small Form Pluggable Modules And Field Replaceable Units
Install and Remove Small Form Pluggable Modules and Field Replaceable Units This section describes how to install and remove Small Form Pluggable (SFP) modules in the Cisco 1100 Terminal Gateway Routers. The information is contained in the following sections: •... -
Page 42: Installing And Removing A Nim
If you do not shut down the NIM gracefully before removing it, the NIM card could get damaged. • Locate the NIM slot on the front panel. • Loosen the screws that secure the NIM. • Gently pull out the NIM from the slot Hardware Installation Guide for the Cisco 1100 Terminal Gateway... -
Page 43: Remove And Replace Ssd Storage
If you order M.2 storage module, the following are the steps to install it: Procedure Command or Action Purpose Step 1 Remove the SSD panel from the bottom side of chassis by unfastening the screws and keep the screws aside. Hardware Installation Guide for the Cisco 1100 Terminal Gateway... - Page 44 Warning No serviceable parts inside. To avoid risk of electric shock, do not open. Statement 1073 Step 3 Install the SSD panel back with the screws. Hardware Installation Guide for the Cisco 1100 Terminal Gateway...