Bosch BCC100 User Manual
Wi-fi thermostat
Hide thumbs
Also See for BCC100:
- Installation manual and user's manual (53 pages) ,
- User manual (36 pages) ,
- Quick start manual (31 pages)

Related Manuals for Bosch BCC100


Summary of Contents for Bosch BCC100
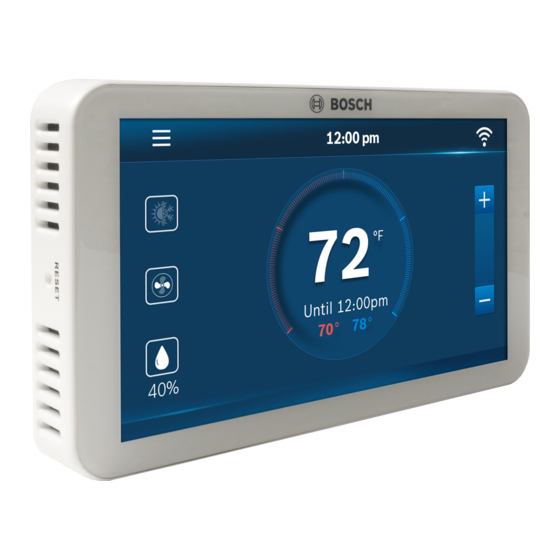
- Page 1 Bosch Connected Control BCC100 Wi-Fi Thermostat User Guide boschheatingandcooling.com...
-
Page 2: Table Of Contents
Some features require an internet connection IN THE BOX: and a user account. Features, ▶ BCC100 Wi-Fi Thermostat specifications, and ▶ Two screws and anchors appearance are ▶ Flathead screwdriver subject to change ▶ Wire labels without notice. -
Page 3: Getting Started
Getting Started The BCC100 thermostat is designed to work on most 24Vac low voltage heating and cooling systems such as gas and oil furnaces, heat pumps, and single or dual-stage systems. Professional installation recommended for: ▶ Humidifiers and dehumidifiers Turn Power Off Please turn off the unit’s main power at the circuit panel... - Page 4 Reversing Valve H/Dh (De) Humidifier 1st Stage Alarm Input Data Compressor (Only to be used with Bosch WSHP) 2nd Stage Jumper Compressor Note: the color of your wires may not be the same as what’s shown in this User Guide...
- Page 5 The following are wiring diagrams for common systems. If you are unsure of how to connect your thermostat, please seek professional support. Conventional Heating Thermostat (2 Stages) & Cooling Data (2 Stages) System with Humidifier and Single Transformer Install a jumper between Rh and Rc only if a single H/Dh transformer is used for...
- Page 6 Thermostat Heat Pump 4 Heat / Data 2 Cool with Dehumidifier ▶ Connect Rc to Rh H/Dh Heat Pump 3 Heat / 2 Cool Thermostat Data ▶ Connect Rc to Rh ▶ Connect W to W2 to operate both stages of electric heat at the same time H/Dh...
- Page 7 Attach BCC100 to the Wall First align the two clips on the back of the BCC100 into the corresponding slots on the top of the wall plate. Firmly press forward until you hear a click to secure the thermostat into position.
-
Page 8: Main Screen
Your thermostat should power on and prompt you to start the setup. If you are having trouble powering the thermostat, please refer to boschheatingandcooling.com for additional support. Thank you for choosing the BCC100. Enjoy the savings and comfort of owning a Bosch connected thermostat! Main Screen Main Menu... -
Page 9: Icons
Icons Basic Icons Heating Types Menu Gas/Oil/ Propane Exit / Save Settings Heat Pump Back Electric Weather Fan Modes Schedule Device Settings Auto System Settings Advanced Settings Circulation System Modes Humidity Humidifier Heat Mode Dehumidifier Cool Mode Auto Mode Emergency Heat Mode... - Page 10 Icons Unit Operation Heating on (1st stage) & (2nd stage) - Heat Mode Cooling on (1st stage) & (2nd stage) - Cool Mode Heating on (1st stage) & (2nd stage) - Auto Mode Cooling on (1st stage) & (2nd stage)- Auto Mode Fan on/running - Fan Auto Mode Emergency Emergency heat on...
-
Page 11: Initialization
Initialization For a quick and easy way to begin using your new smart thermostat, the device will automatically direct you to the Initial Setup screen once it’s turned on for the first time. HEAT PUMP SYSTEM: Configure the 1. Unit Configuration reversing valve for O Select your home’s heating (energized in cool) - Page 12 2. Date & Time ON DEVICE: Please enter your location’s current date and time; once the device is registered or linked to a user account, the date and time on the device will automatically update to the current time associated with the user account.
- Page 13 4. Schedule Only 2 schedules (Home & Vacation) will be available during offline operation. However, this list can be expanded to up to 4 schedules when a Wi-Fi connection is established. HOME: This schedule will be utilized to set your heating and/or cooling equipment to predefined set points.
- Page 14 You will be able to go back to different parts of the Initial Setup guide by pressing the different sections on the left pane. If you have completed the review, please press the Complete button to start utilizing your BCC100 thermostat!
-
Page 15: Wi-Fi Setup
Wi-Fi Setup Wi-Fi Connection SCAN | Tap the Wi-Fi icon to enter the Wi-Fi setup screen, then tap the Scan icon to list available Wi-Fi networks. Follow on-screen instructions to complete the Wi-Fi setup. Hidden Wi-Fi Connection MANUAL ENTRY | If you are trying to connect to a hidden network, press SSID button on the scan page to bring up the screen that will allow you to enter your own SSID. - Page 16 The following may cause a failed connection to the device: ▶ Wi-Fi signal is too weak ▶ 5G Wi-Fi network is too weak ▶ SSID contains space or non-ASCII characters ▶ Incorrect password ▶ Wi-Fi is okay but your internet is unavailable ▶...
- Page 17 Auto Reconnect If your device loses connection with your wireless network, it will automatically attempt to reconnect after 5 minutes. If that fails, it will make a new attempt every 15 minutes for the next 24 hours. Any manual network reconfiguration of the thermostat will stop automatic reconnection attempts.
-
Page 18: App Setup
BOSCH CONNECTED CONTROL COMPATIBLE DEVICES Apple® devices running iOS 7.1 & higher Android™ devices running 4.0.3 & higher There are three ways to download the BCC100 App for your smart device: Search “BCC100 App” in the App Store or Google Play Store, then download. - Page 19 Step 2: Create a User Account After installing the App onto your smart phone, create a user account. Step 3: Add Device to your Account Log in to your account: tap Add New Device on the device list screen, then simply follow on-screen instructions in the App to complete this task.
-
Page 20: Starting Your System
The Temporary Verification Code (TVC) is a 4-digit code randomly generated each time you enter this screen. It expires after 90 seconds, upon which a new code will be needed. Tap the Temporary The MAC ID is a unique Verification Code to network ID for this device generate a new one if the that helps to identify your... - Page 21 Please note that your device is always running on a programmed schedule and the current operating mode is part of that schedule. Thus, when you change the Mode, it will only change the mode for the current program. If you change to a different program, your Mode will follow the new program that you have selected.
-
Page 22: Temporary Scheduling
Temporary Scheduling Temporary Adjustment This feature will override the current set point to the desired set point until the next programmed time in the schedule. If you would like to permanently schedule the new set point press the lock icon. This will permanently lock in the adjustment until the X button is pressed on the main screen. -
Page 23: Programming Schedules
Programming Schedules Programming a Schedule There are only two default schedules (Home and Vacation) available for selection when the device is offline. If the Internet connection is established, you may have up to 4 schedules. Programming with the Thermostat You can access the Schedule by following: Menu > Schedule and selecting the schedule that you would like to run. - Page 24 Programming with the App From the main menu in the App, select Schedule. Select the Mode that you would like the schedule to operate, and press Edit • If you would like to edit a different schedule please press List for a list of available schedules Select the day of the...
-
Page 25: Additional Features
Additional Features Weather Forecast You must grant “location The weather forecast is access” for the app to based on the location of enable this feature. the installed thermostat. The location will be assigned the first time you connect your thermostat to the app. Screen Options There are 3 levels of screen brightness and 3 options for Screen Timeout. - Page 26 Unit Operating Mode Heat: Unit will be cycled to maintain scheduled heating set-point. Cool: Unit will be cycled to maintain scheduled cooling set-point. Auto: Unit will be automatically switched between heating and cooling operations to maintain heat/cool set-points. Off: All heating and cooling functions are turned off. The fan can still operate in this mode if manually activated.
- Page 27 Humidifier/Dehumidifier You may only operate in Operating Mode either humidifier OR The user may select either dehumidifier mode and humidifier/dehumidifier as may not operate in both an optional accessory if modes at the same time. the wire was properly installed during the initial installation process.
- Page 28 Temperature, Alerts, WARNING: Alerts are and Auto-On an additional source of Alert: Send an alert message protection but not the or turn on the system main source protection automatically when the room for the system. temperature is out of the range between set-points.
-
Page 29: Advanced Features
Advanced Features Advanced Settings is designed for HVAC professionals who want to modify advanced features for better unit control. It will also allow the user to reset the device to factory settings. Advanced Settings requires an access code. IP: IP Address Ability to manually type in IP address RS: Factory Reset Factory reset the device to original condition... -
Page 30: Warranty
If Bosch determines that the product has a defect in workmanship or materials, Bosch, at its option, will repair or replace the defective part. - Page 31 SOLE OBLIGATION WITH RESPECT TO THE PRODUCT AND PURCHASER’S EXCLUSIVE REMEDIES ARE SET FORTH IN THE FOREGOING LIMITED WARRANTY. BOSCH SHALL NOT BE LIABLE FOR ANY INDIRECT, PUNITIVE, INCIDENTAL, SPECIAL, CONSEQUENTIAL OR SIMILAR DAMAGES INCLUDING, WITHOUT LIMITATION, INJURY OR DAMAGE TO PERSONS OR PROPERTY OR DAMAGES FOR LOSS OF USE, LOST PROFITS, INCONVENIENCE OR LOSS OF TIME.
- Page 32 Bosch Thermotechnology Corp. Watertown, MA • Londonderry, NH • Ft. Lauderdale, FL • Williston, VT Inquiries and support: 1-800-283-3787 boschheatingandcooling.com 76H993390 7-17 Copyright © 2017 Bosch Thermotechnology Corp. All rights reserved. Subject to change without notice.