NETGEAR ReadyNAS 102 Hardware Manual
Readynas os 6 desktop storage systems
Hide thumbs
Also See for ReadyNAS 102:
- Hardware manual (124 pages) ,
- Datasheet (4 pages) ,
- Hardware manual (65 pages)
Table of Contents
Advertisement
Quick Links
Advertisement
Chapters
Table of Contents

Related Manuals for NETGEAR ReadyNAS 102


Summary of Contents for NETGEAR ReadyNAS 102
- Page 1 ReadyNAS OS 6 Desktop Storage Systems Hardware Manual Model ReadyNAS 102, 104 ReadyNAS 202, 204, 212, 214 ReadyNAS 312, 314, 316 ReadyNAS 422, 424, 426, 428 ReadyNAS 516, 524X, 526X, 528X ReadyNAS 626X, 628X ReadyNAS 716X EDA 500 April 2017 202-11206-10 350 E.
- Page 2 For the current EU Declaration of Conformity, visit http://kb.netgear.com/app/answers/detail/a_id/11621. Compliance For regulatory compliance information, visit http://www.netgear.com/about/regulatory. See the regulatory compliance document before connecting the power supply. Trademarks NETGEAR, Inc., NETGEAR, and the NETGEAR Logo are trademarks of NETGEAR, Inc. Any non-NETGEAR trademarks are used for reference purposes only.
-
Page 3: Table Of Contents
Contents Chapter 1 Getting Started Additional Documentation..................13 Setup Locationsetup location................13 Supported Operating Systems................13 Supported Browsers....................14 Diskless Storage Systems...................14 Chapter 2 NETGEAR ReadyNAS 102 Front and Side Panels..................16 Drive Bays......................16 Rear Panel......................17 Status Information....................18 Power On and Shut Down..................19 Power On......................20 Preferred Shutdown..................20... - Page 4 Rear Panel......................40 Status Information....................41 Power On and Shut Down..................42 Power On......................43 Preferred Shutdown..................43 Forced Shutdown....................43 Boot Menu......................43 Chapter 6 NETGEAR ReadyNAS 212 Front and Side Panels..................46 Drive Bays......................46 Rear Panel......................47 Status Information....................48 Power On and Shut Down..................49 Power On......................50 Preferred Shutdown..................50 Forced Shutdown....................50...
- Page 5 ReadyNAS OS 6 Desktop Storage Systems Power On......................73 Preferred Shutdown..................73 Forced Shutdown....................73 Boot Menu......................74 Chapter 10 NETGEAR ReadyNAS 316 Front and Side Panels..................77 Drive Bays......................77 Rear Panel......................78 Status Information....................79 Power On and Shut Down..................80 Power On......................80 Preferred Shutdown..................81 Forced Shutdown....................81 Boot Menu......................81...
- Page 6 Status Information....................126 Power On and Shut Down..................127 Power On.......................127 Preferred Shutdown..................128 Forced Shutdown..................128 Boot Menu......................128 Chapter 17 NETGEAR ReadyNAS 526X and 626X Front and Side Panels..................131 Drive Bays......................132 Rear Panel ReadyNAS 526X................133 Rear Panel ReadyNAS 626X................134 Status Information....................135 Power On and Shut Down..................136 Power On.......................136...
- Page 7 Rear Panel ReadyNAS 628X................143 Status Information....................144 Power On and Shut Down..................145 Power On.......................145 Preferred Shutdown..................146 Forced Shutdown..................146 Boot Menu......................146 Chapter 19 NETGEAR ReadyNAS 716X Front and Side Panels..................149 Drive Bays......................149 Rear Panel......................150 Status Information....................151 Power On and Shut Down..................153 Power On.......................153 Preferred Shutdown..................154...
- Page 8 ReadyNAS OS 6 Desktop Storage Systems ReadyNAS 102 Technical Specifications............184 General:......................184 Physical dimensions (h x w x d):..............185 Physical weight:.....................185 Power consumption:..................185 Electrical:.......................185 Environmental requirements:................185 Certifications:....................185 ReadyNAS 104 Technical Specifications............186 General:......................186 Physical dimensions (h x w x d):..............186 Physical weight:.....................186 Power consumption:..................186...
- Page 9 ReadyNAS OS 6 Desktop Storage Systems General:......................192 Physical dimensions (h x w x d):..............192 Physical weight:.....................192 Power consumption:..................192 Electrical:.......................193 Environmental requirements:................193 Certifications:....................193 ReadyNAS 314 Technical Specifications............193 General:......................193 Physical dimensions (h x w x d):..............193 Physical weight:.....................194 Power consumption:..................194 Electrical:.......................194 Environmental requirements:................194 Certifications:....................194 ReadyNAS 316 Technical Specifications............194 General:......................194...
- Page 10 ReadyNAS OS 6 Desktop Storage Systems Physical dimensions (h x w x d):..............200 Physical weight:.....................200 Power consumption:..................200 Electrical:.......................200 Environmental requirements:................201 Certifications:....................201 ReadyNAS 516 Technical Specifications............201 General:......................201 Physical dimensions (h x w x d):..............201 Physical weight:.....................201 Power consumption:..................202 Electrical:.......................202 Environmental requirements:................202 Certifications:....................202 ReadyNAS 524X Technical Specifications............202 General:......................202...
- Page 11 ReadyNAS OS 6 Desktop Storage Systems Physical weight:.....................208 Power consumption:..................208 Electrical:.......................208 Environmental requirements:................209 Certifications:....................209 ReadyNAS 716X Technical Specifications............209 General:......................209 Physical dimensions (h x w x d):..............209 Physical weight:.....................209 Power consumption:..................210 Electrical:.......................210 Environmental requirements:................210 Certifications:....................210 EDA 500 Technical Specifications..............210 General:......................210 Physical dimensions (h x w x d):..............210 Physical weight:.....................211 Power consumption:..................211 Electrical:.......................211...
-
Page 12: Getting Started
Getting Started Congratulations on your purchase of a NETGEAR ReadyNAS® storage system. This manual describes the physical features of the ReadyNAS OS 6 desktop storage systems. This chapter contains the following sections: • Additional Documentation on page 13 • Setup Location on page 13 •... -
Page 13: Additional Documentation
ReadyNAS OS 6 Desktop Storage Systems Additional Documentation For detailed information about configuring, managing, and using your ReadyNAS storage system, see the ReadyNAS OS 6 Software Manual, which is available at netgear.com/support/product/ReadyNAS_OS_6. NETGEAR maintains a community website that supports ReadyNAS products. Visit www.netgear.com/readynas for reviews, tutorials, a comparison chart, software updates, documentation, an active user forum, and much more. -
Page 14: Supported Browsers
Use only supported SATA hard disk drives (HDD) or solid state drives (SSD) in your ReadyNAS storage system. If you use disks that are not supported, NETGEAR technical support will not provide assistance. For a list of supported disks, see the NETGEAR Hardware Compatibility List at netgear.com/readynas-hcl. - Page 15 NETGEAR ReadyNAS 102 This chapter provides an overview of the physical features of the ReadyNAS 102 and includes the following sections: • Front and Side Panels on page 16 • Drive Bays on page 16 • Rear Panel on page 17 •...
-
Page 16: Netgear Readynas 524X
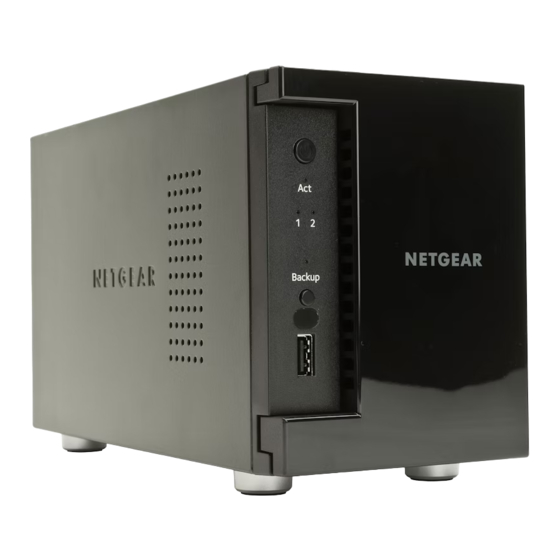
ReadyNAS OS 6 Desktop Storage Systems Front and Side Panels The following figure shows the front and side panels of the ReadyNAS 102. Figure 1. ReadyNAS 102 front and side panels Power button and LED Disk activity LED Exhaust vent USB 2.0 port... -
Page 17: Rear Panel
ReadyNAS OS 6 Desktop Storage Systems Figure 2. ReadyNAS 102 drive bays Drive bay door Disk tray handle Recessed disk tray handle lock Disk tray release latch Drive bays Rear Panel The following figure shows the rear panel of the ReadyNAS 102. NETGEAR ReadyNAS 102... -
Page 18: Status Information
ReadyNAS OS 6 Desktop Storage Systems Figure 3. ReadyNAS 102 rear panel Exhaust fan Kensington lock GbE ports with LED status indicators USB 3.0 ports eSATA port Reset button Power adapter socket Status Information You can obtain information about the status of your storage system by reviewing the indicators listed in the following table. -
Page 19: Netgear Readynas 716X
ReadyNAS OS 6 Desktop Storage Systems Table 1. ReadyNAS 102 indicator descriptions Indicator Description Power button and LED Press this button to turn on the ReadyNAS. The LED indicates these states: • On. Powered on. • Blinking. Booting or shutting down. -
Page 20: Power On
You can gracefully shut down your system by using the Power button or the ReadyNAS local admin page. For information about how to gracefully shut down your system using the ReadyNAS local admin page, see the ReadyNAS OS 6 Software Manual, which is available at netgear.com/support/product/ReadyNAS_OS_6. To gracefully shut down your system using the Power button: Press the Power button. - Page 21 • Memory test. Performs a memory test. The pass or fail result is reported using the storage system's LEDs. Contact a NETGEAR technical support representative to interpret memory test results. • Test disk. Performs an offline full disk test. This process can take four hours or more, depending on the size of your disks.
- Page 22 Power LED and disk 2 LED light. Test disk Power LED and USB and backup status LED light. Legend: • • Off: Press and release the Reset button to confirm your boot menu selection. The system boots in the selected boot mode. NETGEAR ReadyNAS 102...
- Page 23 NETGEAR ReadyNAS 104 This chapter provides an overview of the physical features of the ReadyNAS 104 and includes the following sections: • Front and Side Panels on page 24 • Drive Bays on page 24 • Rear Panel on page 25 •...
-
Page 24: Front And Side Panels
Exhaust vents USB 2.0 port Backup button and LED Disk LEDs Disk activity LED Power button and LED Drive bay door Status display screen Drive Bays The following figure shows the drive bays of the ReadyNAS 104. NETGEAR ReadyNAS 104... -
Page 25: Rear Panel
ReadyNAS OS 6 Desktop Storage Systems Figure 5. ReadyNAS 104 drive bays Drive bay door Disk tray handle Recessed disk tray handle lock Disk tray release latch Drive bays Rear Panel The following figure shows the rear panel of the ReadyNAS 104. NETGEAR ReadyNAS 104... -
Page 26: Status Information
2 Gbps potential speed. For information about how to configure a bonded port, and the network configuration requirements needed to support 2 Gbps, see the ReadyNAS OS 6 Software Manual, which is available at netgear.com/support/product/ReadyNAS_OS_6. Power cable socket Exhaust fan... -
Page 27: Power On And Shut Down
Power On and Shut Down This section describes how to power on and shut down your system. If you need to shut down the system, use one of the preferred shutdown methods whenever possible. NETGEAR ReadyNAS 104... -
Page 28: Boot Menu
You can gracefully shut down your system by using the Power button or the ReadyNAS local admin page. For information about how to gracefully shut down your system using the ReadyNAS local admin page, see the ReadyNAS OS 6 Software Manual, which is available at netgear.com/support/product/ReadyNAS_OS_6. To gracefully shut down your system using the Power button: If the status display screen is not lit, do the following: Press the Power button. -
Page 29: Chapter 4 Netgear Readynas
• Tech support. Boots into a low-level diagnostic mode. Use the tech support boot mode only when a NETGEAR technical support representative instructs you to do so. • Volume read only. Mounts a volume as read-only. Use this option when you are attempting to rescue data off a disk during a disaster recovery. - Page 30 NETGEAR ReadyNAS 202 This chapter provides an overview of the physical features of the ReadyNAS 202 and includes the following sections: • Front and Side Panels on page 31 • Drive Bays on page 31 • Rear Panel on page 32 •...
-
Page 31: Front And Side Panels
Disk activity LED Exhaust vent USB 3.0 port Backup button USB and backup status LED Disk 1 and Disk 2 LEDs Drive bay door Drive Bays The following figure shows the drive bays of the ReadyNAS 202. NETGEAR ReadyNAS 202... -
Page 32: Rear Panel
ReadyNAS OS 6 Desktop Storage Systems Figure 8. ReadyNAS 202 drive bays Drive bay door Disk tray handle Recessed disk tray handle lock Disk tray release latch Drive bays Rear Panel The following figure shows the rear panel of the ReadyNAS 202. NETGEAR ReadyNAS 202... -
Page 33: Status Information
2 Gbps potential speed. For information on how to configure a bonded port, and the network configuration requirements needed to support 2 Gbps, see the ReadyNAS OS 6 Software Manual, which is available at netgear.com/support/product/ReadyNAS_OS_6. Reset button Power adapter socket... -
Page 34: Power On And Shut Down
Off, off. No connection. Power On and Shut Down This section describes how to power on and shut down your system. If you must shut down the system, use one of the preferred shutdown methods whenever possible. NETGEAR ReadyNAS 202... -
Page 35: Power On
You can gracefully shut down your system by using the Power button or the ReadyNAS local admin page. For information about how to gracefully shut down your system using the ReadyNAS local admin page, see the ReadyNAS OS 6 Software Manual, which is available at netgear.com/support/product/ReadyNAS_OS_6. To gracefully shut down your system using the Power button: Press the Power button. -
Page 36: Chapter 5 Netgear Readynas
• Tech support. Boots into a low-level diagnostic mode. Use the tech support boot mode only when a NETGEAR technical support representative instructs you to do so. • Volume read only. Mounts a volume as read-only. Use this option when you are attempting to rescue data off a disk during a disaster recovery. - Page 37 Power LED and disk 2 LED light. Test disk Power LED and USB and backup status LED light. Legend: • • Off: Press and release the Reset button to confirm your boot menu selection. The system boots in the selected boot mode. NETGEAR ReadyNAS 202...
- Page 38 NETGEAR ReadyNAS 204 This chapter provides an overview of the physical features of the ReadyNAS 204 and includes the following sections: • Front and Side Panels on page 39 • Drive Bays on page 39 • Rear Panel on page 40 •...
-
Page 39: Netgear Readynas 204
Exhaust vents USB 2.0 port Backup button and LED Disk LEDs Disk activity LED Power button and LED Drive bay door Status display screen Drive Bays The following figure shows the drive bays of the ReadyNAS 204. NETGEAR ReadyNAS 204... -
Page 40: Rear Panel
ReadyNAS OS 6 Desktop Storage Systems Figure 12. ReadyNAS 204 drive bays Drive bay door Disk tray handle Recessed disk tray handle lock Disk tray release latch Drive bays Rear Panel The following figure shows the rear panel of the ReadyNAS 204. NETGEAR ReadyNAS 204... -
Page 41: Status Information
2 Gbps potential speed. For information about how to configure a bonded port, and the network configuration requirements needed to support 2 Gbps, see the ReadyNAS OS 6 Software Manual, which is available at netgear.com/support/product/ReadyNAS_OS_6. Power cable socket Exhaust fan... -
Page 42: Power On And Shut Down
If the storage system reports an abnormal operation or error, the status display screen stays on. Power On and Shut Down This section describes how to power on and shut down your system. If you must shut down the system, use one of the preferred shutdown methods whenever possible. NETGEAR ReadyNAS 204... -
Page 43: Boot Menu
You can gracefully shut down your system by using the Power button or the ReadyNAS local admin page. For information about how to gracefully shut down your system using the ReadyNAS local admin page, see the ReadyNAS OS 6 Software Manual, which is available at netgear.com/support/product/ReadyNAS_OS_6. To gracefully shut down your system using the Power button: If the status display screen is not lit, do the following: Press the Power button. -
Page 44: Chapter 6 Netgear Readynas
• Tech support. Boots into a low-level diagnostic mode. Use the tech support boot mode only when a NETGEAR technical support representative instructs you to do so. • Volume read only. Mounts a volume as read-only. Use this option when you are attempting to rescue data off a disk during a disaster recovery. - Page 45 NETGEAR ReadyNAS 212 This chapter provides an overview of the physical features of the ReadyNAS 212 and includes the following sections: • Front and Side Panels on page 46 • Drive Bays on page 46 • Rear Panel on page 47 •...
-
Page 46: Netgear Readynas 212
Disk activity LED Exhaust vent USB 3.0 port Backup button USB and backup status LED Disk 1 and Disk 2 LEDs Drive bay door Drive Bays The following figure shows the drive bays of the ReadyNAS 212. NETGEAR ReadyNAS 212... -
Page 47: Rear Panel
ReadyNAS OS 6 Desktop Storage Systems Figure 15. ReadyNAS 212 drive bays Drive bay door Disk tray handle Recessed disk tray handle lock Disk tray release latch Drive bays Rear Panel The following figure shows the rear panel of the ReadyNAS 212. NETGEAR ReadyNAS 212... -
Page 48: Status Information
2 Gbps potential speed. For information about how to configure a bonded port, and the network configuration requirements needed to support 2 Gbps, see the ReadyNAS OS 6 Software Manual, which is available at netgear.com/support/product/ReadyNAS_OS_6. Reset button Power adapter socket... -
Page 49: Power On And Shut Down
Off, off. No connection. Power On and Shut Down This section describes how to power on and shut down your system. If you must shut down the system, use one of the preferred shutdown methods whenever possible. NETGEAR ReadyNAS 212... -
Page 50: Boot Menu
You can gracefully shut down your system by using the Power button or the ReadyNAS local admin page. For information about how to gracefully shut down your system using the ReadyNAS local admin page, see the ReadyNAS OS 6 Software Manual, which is available at netgear.com/support/product/ReadyNAS_OS_6. To gracefully shut down your system using the Power button: Press the Power button. -
Page 51: Chapter 7 Netgear Readynas
• Tech support. Boots into a low-level diagnostic mode. Use the tech support boot mode only when a NETGEAR technical support representative instructs you to do so. • Volume read only. Mounts a volume as read-only. Use this option when you are attempting to rescue data off a disk during a disaster recovery. - Page 52 Power LED and disk 2 LED light. Test disk Power LED and USB and backup status LED light. Legend: • • Off: Press and release the Reset button to confirm your boot menu selection. The system boots in the selected boot mode. NETGEAR ReadyNAS 212...
- Page 53 NETGEAR ReadyNAS 214 This chapter provides an overview of the physical features of the ReadyNAS 214 and includes the following sections: • Front and Side Panels on page 54 • Drive Bays on page 54 • Rear Panel on page 55 •...
-
Page 54: Netgear Readynas 214
Exhaust vents USB 2.0 port Backup button and LED Disk LEDs Disk activity LED Power button and LED Drive bay door Status display screen Drive Bays The following figure shows the drive bays of the ReadyNAS 214. NETGEAR ReadyNAS 214... -
Page 55: Rear Panel
ReadyNAS OS 6 Desktop Storage Systems Figure 19. ReadyNAS 214 drive bays Drive bay door Disk tray handle Recessed disk tray handle lock Disk tray release latch Drive bays Rear Panel The following figure shows the rear panel of the ReadyNAS 214. NETGEAR ReadyNAS 214... -
Page 56: Status Information
2 Gbps potential speed. For information about how to configure a bonded port, and the network configuration requirements needed to support 2 Gbps, see the ReadyNAS OS 6 Software Manual, which is available at netgear.com/support/product/ReadyNAS_OS_6. Power cable socket Exhaust fan... -
Page 57: Power On And Shut Down
If the storage system reports an abnormal operation or error, the status display screen stays on. Power On and Shut Down This section describes how to power on and shut down your system. If you must shut down the system, use one of the preferred shutdown methods whenever possible. NETGEAR ReadyNAS 214... -
Page 58: Boot Menu
You can gracefully shut down your system by using the Power button or the ReadyNAS local admin page. For information about how to gracefully shut down your system using the ReadyNAS local admin page, see the ReadyNAS OS 6 Software Manual, which is available at netgear.com/support/product/ReadyNAS_OS_6. To gracefully shut down your system using the Power button: If the status display screen is not lit, do the following: Press the Power button. -
Page 59: Chapter 8 Netgear Readynas
• Tech support. Boots into a low-level diagnostic mode. Use the tech support boot mode only when a NETGEAR technical support representative instructs you to do so. • Volume read only. Mounts a volume as read-only. Use this option when you are attempting to rescue data off a disk during a disaster recovery. - Page 60 NETGEAR ReadyNAS 312 This chapter provides an overview of the physical features of the ReadyNAS 312 and includes the following sections: • Front and Side Panels on page 61 • Drive Bays on page 61 • Rear Panel on page 62 •...
-
Page 61: Netgear Readynas 312
Exhaust vent USB 2.0 port Infrared remote receiver Backup button USB and Backup status LED Disk 1 and Disk 2 LEDs Drive bay door Drive Bays The following figure shows the drive bays of the ReadyNAS 312. NETGEAR ReadyNAS 312... -
Page 62: Rear Panel
ReadyNAS OS 6 Desktop Storage Systems Figure 22. ReadyNAS 312 drive bays Drive bay door Disk tray handle Recessed disk tray handle lock Disk tray release latch Drive bays Rear Panel The following figure shows the rear panel of the ReadyNAS 312. NETGEAR ReadyNAS 312... -
Page 63: Status Information
LAN ports with LED status indicators Reset button HDMI port (currently not supported) Power adapter socket Status Information You can obtain information about the status of your storage system by reviewing the indicators listed in the following table. NETGEAR ReadyNAS 312... -
Page 64: Power On And Shut Down
This section describes how to power on and shut down your system. If you need to shut down the system, use one of the preferred shutdown methods whenever possible. Power On When you connect the system to a power supply or the system recovers from a power outage, the following occurs: NETGEAR ReadyNAS 312... -
Page 65: Boot Menu
You can gracefully shut down your system by using the Power button or the ReadyNAS local admin page. For information about how to gracefully shut down your system using the ReadyNAS local admin page, see the ReadyNAS OS 6 Software Manual, which is available at netgear.com/support/product/ReadyNAS_OS_6. To gracefully shut down your system using the Power button: Press the Power button. -
Page 66: Chapter 9 Netgear Readynas
• Memory test. Performs a memory test. The pass or fail result is reported using the storage system's LEDs. Contact a NETGEAR technical support representative to interpret memory test results. • Test disk. Performs an offline full disk test. This process can take four hours or more, depending on the size of your disks. - Page 67 Power LED and disk 2 LED light. Test disk Power LED and USB and backup status LED light. Legend: • • Off: Press and release the Reset button to confirm your boot menu selection. The system boots in the selected boot mode. NETGEAR ReadyNAS 312...
- Page 68 NETGEAR ReadyNAS 314 This chapter provides an overview of the physical features of the ReadyNAS 314 and includes the following sections: • Front and Side Panels on page 69 • Drive Bays on page 69 • Rear Panel on page 70 •...
-
Page 69: Netgear Readynas 314
Shared USB 2.0 and eSATA port Backup button and LED Disk LEDs Infrared remote receiver Disk activity LED Power button and LED Drive bay door Status display screen Drive Bays The following figure shows the drive bays of the ReadyNAS 314. NETGEAR ReadyNAS 314... -
Page 70: Rear Panel
ReadyNAS OS 6 Desktop Storage Systems Figure 25. ReadyNAS 314 drive bays Drive bay door Disk tray handle Recessed disk tray handle lock Disk tray release latch Drive bays Rear Panel The following figure shows the rear panel of the ReadyNAS 314. NETGEAR ReadyNAS 314... -
Page 71: Status Information
USB 3.0 ports HDMI port (currently not supported) Power cable socket Exhaust fan Kensington lock Status Information You can obtain information about the status of your storage system by reviewing the indicators listed in the following table. NETGEAR ReadyNAS 314... -
Page 72: Power On And Shut Down
If the storage system reports an abnormal operation or error, the status display screen stays on. Power On and Shut Down This section describes how to power on and shut down your system. If you must shut down the system, use one of the preferred shutdown methods whenever possible. NETGEAR ReadyNAS 314... -
Page 73: Power On
You can gracefully shut down your system by using the Power button or the ReadyNAS local admin page. For information about how to gracefully shut down your system using the ReadyNAS local admin page, see the ReadyNAS OS 6 Software Manual, which is available at netgear.com/support/product/ReadyNAS_OS_6. To gracefully shut down your system using the Power button: If the status display screen is not lit, do the following: Press the Power button. -
Page 74: Boot Menu
• Tech support. Boots into a low-level diagnostic mode. Use the tech support boot mode only when a NETGEAR technical support representative instructs you to do so. • Volume read only. Mounts a volume as read-only. Use this option when you are attempting to rescue data off a disk during a disaster recovery. -
Page 75: Chapter 10 Netgear Readynas
The status display screen shows the current boot mode option. When the status display screen shows the boot mode that you need, press and release the Reset button to confirm your boot menu selection. The system boots in the selected boot mode. NETGEAR ReadyNAS 314... - Page 76 NETGEAR ReadyNAS 316 This chapter provides an overview of the physical features of the ReadyNAS 316 and includes the following sections: • Front and Side Panels on page 77 • Drive Bays on page 77 • Rear Panel on page 78 •...
-
Page 77: Netgear Readynas 316
Figure 27. ReadyNAS 316 front and side panels Status and menu display screen Infrared remote receiver Drive bay door Touch pad and backlight OK button Drive Bays The following figure shows the drive bays of the ReadyNAS 316. NETGEAR ReadyNAS 316... -
Page 78: Rear Panel
Drive bay door Disk tray release latch Recessed disk tray handle lock USB 2.0 port Disk tray handle Power button Disk LED Drive bays Rear Panel The following figure shows the rear panel of the ReadyNAS 316. NETGEAR ReadyNAS 316... -
Page 79: Status Information
LAN ports with LED status indicators HDMI port (currently not supported) USB 3.0 ports Reset button Status Information You can obtain information about the status of your storage system by reviewing the indicators listed in the following table. NETGEAR ReadyNAS 316... -
Page 80: Power On And Shut Down
• The system returns to its last state if the Wake on LAN (WoL) feature is disabled and you did not schedule the system to automatically power on or off: NETGEAR ReadyNAS 316... -
Page 81: Boot Menu
You can gracefully shut down your system by using the Power button or the ReadyNAS local admin page. For information about how to gracefully shut down your system using the ReadyNAS local admin page, see the ReadyNAS OS 6 Software Manual, which is available at netgear.com/support/product/ReadyNAS_OS_6. To gracefully shut down your system using the Power button: If the status display screen is not lit, do the following: Press the Power button on the front panel of the system. -
Page 82: Chapter 11 Netgear Readynas
• Tech support. Boots into a low-level diagnostic mode. Use the tech support boot mode only when a NETGEAR technical support representative instructs you to do so. • Volume read only. Mounts a volume as read-only. Use this option when you are attempting to rescue data off a disk during a disaster recovery. - Page 83 NETGEAR ReadyNAS 422 This chapter provides an overview of the physical features of the ReadyNAS 422 and includes the following sections: • Front and Side Panels on page 84 • Drive Bays on page 85 • Rear Panel on page 86 •...
-
Page 84: Netgear Readynas 422
The following figure shows the front and side panels of the ReadyNAS 422. Figure 30. ReadyNAS 422 front and side panels Status and menu display screen OK button Four buttons (Up, Down, Left, Right) and backlights USB 3.0 port Drive bay door NETGEAR ReadyNAS 422... -
Page 85: Drive Bays
The following figure shows the drive bays of ReadyNAS 422. Figure 31. ReadyNAS 422 drive bays Drive bay door Disk tray handle Disk tray release latch USB 3.0 port Recessed disk tray handle lock Power button Disk LED Drive bays NETGEAR ReadyNAS 422... -
Page 86: Rear Panel
The following figure shows the rear panel of the ReadyNAS 422. Figure 32. Rear panel ReadyNAS 422 Exhaust fan Kensington lock eSATA port USB 3.0 port Micro USB console connector (marked as UART) Reset button 1 GbE LAN ports with LED status indicators Power cable socket NETGEAR ReadyNAS 422... -
Page 87: Status Information
Bicolor LED off, green LED blinking. 10 Mbps connection, activity. Power On and Shut Down This section describes how to power on and shut down your system. If you must shut down the system, use one of the preferred shutdown methods whenever possible. NETGEAR ReadyNAS 422... -
Page 88: Power On
You can gracefully shut down your system by using the Power button or the ReadyNAS local admin page. For information about how to gracefully shut down your system using the ReadyNAS local admin page, see the ReadyNAS OS 6 Software Manual, which is available at netgear.com/support/product/ReadyNAS_OS_6. To gracefully shut down your system using the Power button: If the status display screen is not lit, do the following: Press the Power button on the front panel of the system. -
Page 89: Boot Menu
• Tech support. Boots into a low-level diagnostic mode. Use the tech support boot mode only when instructed to do so by a NETGEAR technical support representative. • Volume read only. Mounts a volume as read-only. Use this option when you are attempting to rescue data off a disk during a disaster recovery. -
Page 90: Chapter 12 Netgear Readynas
The status display screen shows the current boot mode option. When the status display screen shows the boot mode that you need, press the OK button to confirm your boot menu selection. The system boots in the selected boot mode. NETGEAR ReadyNAS 422... - Page 91 NETGEAR ReadyNAS 424 This chapter provides an overview of the physical features of the ReadyNAS 424 and includes the following sections: • Front and Side Panels on page 92 • Drive Bays on page 93 • Rear Panel on page 94 •...
-
Page 92: Netgear Readynas 424
The following figure shows the front and side panels of the ReadyNAS 424. Figure 33. ReadyNAS 424 front and side panels Status and menu display screen OK button Four buttons (Up, Down, Left, Right) and backlights USB 3.0 port Drive bay door NETGEAR ReadyNAS 424... -
Page 93: Drive Bays
The following figure shows the drive bays of ReadyNAS 424. Figure 34. ReadyNAS 424 drive bays Drive bay door Disk tray handle Disk tray release latch Recessed disk tray handle lock USB 3.0 port Disk LED Power button Drive bays NETGEAR ReadyNAS 424... -
Page 94: Rear Panel
The following figure shows the rear panel of the ReadyNAS 424. Figure 35. Rear panel ReadyNAS 424 Exhaust fan Kensington lock eSATA port USB 3.0 port Micro USB console connector (marked as UART) Reset button 1 GbE LAN ports with LED status indicators Power cable socket NETGEAR ReadyNAS 424... -
Page 95: Status Information
Bicolor LED off, green LED blinking. 10 Mbps connection, activity. Power On and Shut Down This section describes how to power on and shut down your system. If you must shut down the system, use one of the preferred shutdown methods whenever possible. NETGEAR ReadyNAS 424... -
Page 96: Power On
You can gracefully shut down your system by using the Power button or the ReadyNAS local admin page. For information about how to gracefully shut down your system using the ReadyNAS local admin page, see the ReadyNAS OS 6 Software Manual, which is available at netgear.com/support/product/ReadyNAS_OS_6. To gracefully shut down your system using the Power button: If the status display screen is not lit, do the following: Press the Power button on the front panel of the system. -
Page 97: Boot Menu
• Tech support. Boots into a low-level diagnostic mode. Use the tech support boot mode only when instructed to do so by a NETGEAR technical support representative. • Volume read only. Mounts a volume as read-only. Use this option when you are attempting to rescue data off a disk during a disaster recovery. -
Page 98: Chapter 13 Netgear Readynas
The status display screen shows the current boot mode option. When the status display screen shows the boot mode that you need, press the OK button to confirm your boot menu selection. The system boots in the selected boot mode. NETGEAR ReadyNAS 424... - Page 99 NETGEAR ReadyNAS 426 This chapter provides an overview of the physical features of the ReadyNAS 426 and includes the following sections: • Front and Side Panels on page 100 • Drive Bays on page 101 • Rear Panel on page 102 •...
-
Page 100: Netgear Readynas 426
The following figure shows the front and side panels of the ReadyNAS 426. Figure 36. ReadyNAS 426 front and side panels Status and menu display screen OK button Four buttons (Up, Down, Left, Right) and backlights USB 3.0 port Drive bay door NETGEAR ReadyNAS 426... -
Page 101: Drive Bays
The following figure shows the drive bays of ReadyNAS 426. Figure 37. ReadyNAS 426 drive bays Drive bay door Disk tray release latch Recessed disk tray handle lock USB 3.0 port Disk tray handle Power button Disk LED Drive bays NETGEAR ReadyNAS 426... -
Page 102: Rear Panel
Figure 38. ReadyNAS 426 rear panel Exhaust fan Power cable socket Power switch Kensington lock eSATA port USB 3.0 port Four 1 GbE LAN ports with LED status indicators Reset button Micro USB console connector (marked as UART) NETGEAR ReadyNAS 426... -
Page 103: Status Information
Bicolor LED off, green LED blinking. 10 Mbps connection, activity. Power On and Shut Down This section describes how to power on and shut down your system. If you must shut down the system, use one of the preferred shutdown methods whenever possible. NETGEAR ReadyNAS 426... -
Page 104: Netgear Readynas 426
You can gracefully shut down your system by using the Power button or the ReadyNAS local admin page. For information about how to gracefully shut down your system using the ReadyNAS local admin page, see the ReadyNAS OS 6 Software Manual, which is available at netgear.com/support/product/ReadyNAS_OS_6. To gracefully shut down your system using the Power button: If the status display screen is not lit, do the following: Press the Power button on the front panel of the system. -
Page 105: Boot Menu
• Tech support. Boots into a low-level diagnostic mode. Use the tech support boot mode only when instructed to do so by a NETGEAR technical support representative. • Volume read only. Mounts a volume as read-only. Use this option when you are attempting to rescue data off a disk during a disaster recovery. -
Page 106: Chapter 14 Netgear Readynas
The status display screen shows the current boot mode option. When the status display screen shows the boot mode that you need, press the OK button to confirm your boot menu selection. The system boots in the selected boot mode. NETGEAR ReadyNAS 426... - Page 107 NETGEAR ReadyNAS 428 This chapter provides an overview of the physical features of the ReadyNAS 428 and includes the following sections: • Front and Side Panels on page 108 • Drive Bays on page 109 • Rear Panel on page 110 •...
-
Page 108: Netgear Readynas 428
The following figure shows the front and side panels of the ReadyNAS 428. Figure 39. ReadyNAS 428 front and side panels Status and menu display screen OK button Four buttons (Up, Down, Left, Right) and backlights USB 3.0 port Drive bay door NETGEAR ReadyNAS 428... -
Page 109: Drive Bays
The following figure shows the drive bays of ReadyNAS 428. Figure 40. ReadyNAS 428 drive bays Drive bay door Disk tray release latch Recessed disk tray handle lock USB 3.0 port Disk tray handle Power button Disk LED Drive bays NETGEAR ReadyNAS 428... -
Page 110: Rear Panel
Figure 41. ReadyNAS 428 rear panel Two exhaust fans Power cable socket Power switch Kensington lock eSATA port USB 3.0 port Four 1 GbE LAN ports with LED status indicators Reset button Micro USB console connector (marked as UART) NETGEAR ReadyNAS 428... -
Page 111: Status Information
Bicolor LED off, green LED blinking. 10 Mbps connection, activity. Power On and Shut Down This section describes how to power on and shut down your system. If you must shut down the system, use one of the preferred shutdown methods whenever possible. NETGEAR ReadyNAS 428... -
Page 112: Power On
You can gracefully shut down your system by using the Power button or the ReadyNAS local admin page. For information about how to gracefully shut down your system using the ReadyNAS local admin page, see the ReadyNAS OS 6 Software Manual, which is available at netgear.com/support/product/ReadyNAS_OS_6. To gracefully shut down your system using the Power button: If the status display screen is not lit, do the following: Press the Power button on the front panel of the system. -
Page 113: Boot Menu
• Tech support. Boots into a low-level diagnostic mode. Use the tech support boot mode only when instructed to do so by a NETGEAR technical support representative. • Volume read only. Mounts a volume as read-only. Use this option when you are attempting to rescue data off a disk during a disaster recovery. -
Page 114: Chapter 15 Netgear Readynas
The status display screen shows the current boot mode option. When the status display screen shows the boot mode that you need, press the OK button to confirm your boot menu selection. The system boots in the selected boot mode. NETGEAR ReadyNAS 428... - Page 115 NETGEAR ReadyNAS 516 This chapter provides an overview of the physical features of the ReadyNAS 516 and includes the following sections: • Front and Side Panels on page 116 • Drive Bays on page 116 • Rear Panel on page 117 •...
-
Page 116: Netgear Readynas 516
Figure 42. ReadyNAS 516 front and side panels Status and menu display screen Infrared remote receiver Drive bay door Touch pad and backlight OK button Drive Bays The following figure shows the drive bays of the ReadyNAS 516. NETGEAR ReadyNAS 516... -
Page 117: Rear Panel
Drive bay door Disk tray release latch Recessed disk tray handle lock USB 2.0 port Disk tray handle Power button Disk LED Drive bays Rear Panel The following figure shows the rear panel of the ReadyNAS 516. NETGEAR ReadyNAS 516... -
Page 118: Status Information
LAN ports with LED status indicators HDMI port (currently not supported) eSATA port USB 3.0 ports Reset button Status Information You can obtain information about the status of your storage system by reviewing the indicators listed in the following table. NETGEAR ReadyNAS 516... -
Page 119: Power On And Shut Down
• The system returns to its last state if the Wake on LAN (WoL) feature is disabled and you did not schedule the system to automatically power on or off: NETGEAR ReadyNAS 516... -
Page 120: Boot Menu
You can gracefully shut down your system by using the Power button or the ReadyNAS local admin page. For information about how to gracefully shut down your system using the ReadyNAS local admin page, see the ReadyNAS OS 6 Software Manual, which is available at netgear.com/support/product/ReadyNAS_OS_6. To gracefully shut down your system using the Power button: If the status display screen is not lit, do the following: Press the Power button on the front panel of the system. - Page 121 • Tech support. Boots into a low-level diagnostic mode. Use the tech support boot mode only when a NETGEAR technical support representative instructs you to do so. • Volume read only. Mounts a volume as read-only. Use this option when you are attempting to rescue data off a disk during a disaster recovery.
- Page 122 NETGEAR ReadyNAS 524X This chapter provides an overview of the physical features of the ReadyNAS 524X and includes the following sections: • Front and Side Panels on page 123 • Drive Bays on page 124 • Rear Panel on page 125 •...
-
Page 123: Front And Side Panels
The following figure shows the front and side panels of the ReadyNAS 524X. Figure 45. ReadyNAS 524X front and side panels Status and menu display screen OK button Four buttons (Up, Down, Left, Right) and backlights USB 3.0 port Drive bay door NETGEAR ReadyNAS 524X... -
Page 124: Drive Bays
The following figure shows the drive bays of ReadyNAS 524X. Figure 46. ReadyNAS 524X drive bays Drive bay door Disk tray handle Disk tray release latch Recessed disk tray handle lock USB 3.0 port Disk LED Power button Drive bays NETGEAR ReadyNAS 524X... -
Page 125: Rear Panel
Exhaust fan Kensington lock eSATA port USB 3.0 ports Micro USB console connector (marked as UART) Reset button 1 GbE LAN port with LED status indicators 10 GbE LAN port with LED status indicators Power cable socket NETGEAR ReadyNAS 524X... -
Page 126: Status Information
Solid blue. Power is on and the disk is operating normally. • Blinking blue. The disk is active. • Solid red. The disk was removed, failed, or is resynchronizing. See the display screen for details. • Off. No disk is present. NETGEAR ReadyNAS 524X... -
Page 127: Power On And Shut Down
If the system was powered off, the system remains off when the power supply is connected or power is restored. In this situation, press the Power button on the front panel of the system to power on the system. NETGEAR ReadyNAS 524X... -
Page 128: Boot Menu
You can gracefully shut down your system by using the Power button or the ReadyNAS local admin page. For information about how to gracefully shut down your system using the ReadyNAS local admin page, see the ReadyNAS OS 6 Software Manual, which is available at netgear.com/support/product/ReadyNAS_OS_6. To gracefully shut down your system using the Power button: If the status display screen is not lit, do the following: Press the Power button on the front panel of the system. - Page 129 • Tech support. Boots into a low-level diagnostic mode. Use the tech support boot mode only when instructed to do so by a NETGEAR technical support representative. • Volume read only. Mounts a volume as read-only. Use this option when you are attempting to rescue data off a disk during a disaster recovery.
- Page 130 NETGEAR ReadyNAS 526X and 626X This chapter provides an overview of the physical features of the ReadyNAS 526X and 626X and includes the following sections: • Front and Side Panels on page 131 • Drive Bays on page 132 •...
-
Page 131: Netgear Readynas 526X And 626X
The following figure shows the front and side panels of the ReadyNAS 526X and 626X. Figure 48. ReadyNAS 526X and 626X front and side panels Status and menu display screen OK button Four buttons (Up, Down, Left, Right) and backlights USB 3.0 port Drive bay door NETGEAR ReadyNAS 526X and 626X... -
Page 132: Drive Bays
The following figure shows the drive bays of ReadyNAS 526X AND 626X. Figure 49. ReadyNAS 526X and 626X drive bays Drive bay door Disk tray release latch Recessed disk tray handle lock USB 3.0 port Disk tray handle Power button Disk LED Drive bays NETGEAR ReadyNAS 526X and 626X... -
Page 133: Rear Panel Readynas 526X
The following figure shows the rear panel of the ReadyNAS 526X. Figure 50. Rear panel ReadyNAS 526X Exhaust fan Power cable socket Power switch Kensington lock eSATA port USB 3.0 ports 10 GbE LAN ports with LED status indicators Reset button NETGEAR ReadyNAS 526X and 626X... -
Page 134: Rear Panel Readynas 626X
Figure 51. Rear panel ReadyNAS 626X Exhaust fan Power cable socket Power switch Kensington lock eSATA port USB 3.0 ports 1 GbE LAN ports with LED status indicators 10 GbE LAN ports with LED status indicators Reset button NETGEAR ReadyNAS 526X and 626X... -
Page 135: Status Information
Solid blue. Power is on and the disk is operating normally. • Blinking blue. The disk is active. • Solid red. The disk was removed, failed, or is resynchronizing. See the display screen for details. • Off. No disk is present. NETGEAR ReadyNAS 526X and 626X... -
Page 136: Power On And Shut Down
• The system returns to its last state if the Wake on LAN (WoL) feature is disabled and you did not schedule the system to automatically power on or off: NETGEAR ReadyNAS 526X and 626X... -
Page 137: Boot Menu
You can gracefully shut down your system by using the Power button or the ReadyNAS local admin page. For information about how to gracefully shut down your system using the ReadyNAS local admin page, see the ReadyNAS OS 6 Software Manual, which is available at netgear.com/support/product/ReadyNAS_OS_6. To gracefully shut down your system using the Power button: If the status display screen is not lit, do the following: Press the Power button on the front panel of the system. - Page 138 • Tech support. Boots into a low-level diagnostic mode. Use the tech support boot mode only when instructed to do so by a NETGEAR technical support representative. • Volume read only. Mounts a volume as read-only. Use this option when you are attempting to rescue data off a disk during a disaster recovery.
- Page 139 NETGEAR ReadyNAS 528X and 628X This chapter provides an overview of the physical features of the ReadyNAS 528X and 628X and includes the following sections: • Front and Side Panels on page 140 • Drive Bays on page 141 •...
-
Page 140: Netgear Readynas 528X And 628X
The following figure shows the front and side panels of the ReadyNAS 528X and 628X. Figure 52. ReadyNAS 528X and 628X front and side panels Status and menu display screen OK button Four buttons (Up, Down, Left, Right) and backlights USB 3.0 port Drive bay door NETGEAR ReadyNAS 528X and 628X... -
Page 141: Drive Bays
The following figure shows the drive bays of ReadyNAS 528X AND 628X. Figure 53. ReadyNAS 528X and 628X drive bays Drive bay door Disk tray release latch Recessed disk tray handle lock USB 3.0 port Disk tray handle Power button Disk LED Drive bays NETGEAR ReadyNAS 528X and 628X... -
Page 142: Rear Panel Readynas 528X
Figure 54. Rear panel ReadyNAS 528X Exhaust fan Power cable socket Power switch Kensington lock eSATA port USB 3.0 ports 10 GbE LAN ports with LED status indicators Reset button Micro USB console connector (marked as UART) NETGEAR ReadyNAS 528X and 628X... -
Page 143: Rear Panel Readynas 628X
Power cable socket Power switch Kensington lock eSATA port USB 3.0 ports 1 GbE LAN ports with LED status indicators 10 GbE LAN ports with LED status indicators Reset button Micro USB console connector (marked as UART) NETGEAR ReadyNAS 528X and 628X... -
Page 144: Status Information
Solid blue. Power is on and the disk is operating normally. • Blinking blue. The disk is active. • Solid red. The disk was removed, failed, or is resynchronizing. See the display screen for details. • Off. No disk is present. NETGEAR ReadyNAS 528X and 628X... -
Page 145: Power On And Shut Down
If the system was powered off, the system remains off when the power supply is connected or power is restored. In this situation, press the Power button on the front panel of the system to power on the system. NETGEAR ReadyNAS 528X and 628X... -
Page 146: Boot Menu
You can gracefully shut down your system by using the Power button or the ReadyNAS local admin page. For information about how to gracefully shut down your system using the ReadyNAS local admin page, see the ReadyNAS OS 6 Software Manual, which is available at netgear.com/support/product/ReadyNAS_OS_6. To gracefully shut down your system using the Power button: If the status display screen is not lit, do the following: Press the Power button on the front panel of the system. - Page 147 • Tech support. Boots into a low-level diagnostic mode. Use the tech support boot mode only when instructed to do so by a NETGEAR technical support representative. • Volume read only. Mounts a volume as read-only. Use this option when you are attempting to rescue data off a disk during a disaster recovery.
- Page 148 NETGEAR ReadyNAS 716X This chapter provides an overview of the physical features of the ReadyNAS 716X and includes the following sections: • Front and Side Panels on page 149 • Drive Bays on page 149 • Rear Panel on page 150 •...
-
Page 149: Front And Side Panels
Figure 56. ReadyNAS 716X front and side panels Status and menu display screen Infrared remote receiver Drive bay door Touch pad and backlight OK button Drive Bays The following figure shows the drive bays of ReadyNAS 716X. NETGEAR ReadyNAS 716X... -
Page 150: Rear Panel
Figure 57. ReadyNAS 716X drive bays Drive bay door Disk tray release latch Recessed disk tray handle lock USB 2.0 port Disk tray handle Power button Disk LED Drive bays Rear Panel The following figure shows the rear panel of ReadyNAS 716X. NETGEAR ReadyNAS 716X... -
Page 151: Status Information
USB 3.0 ports Reset button 10 Gb LAN ports with LED status indicators Status Information You can obtain information about the status of your storage system by reviewing the indicators listed in the following table. NETGEAR ReadyNAS 716X... - Page 152 Green blinking, amber off. 1000 Mbps connection speed, activity. • Green off, amber on. 10 Mbps or 100 Mbps connection speed, no activity. • Green off, amber blinking. 10 Mbps or 100 Mbps connection speed, activity. • Green off, amber off. No connection. NETGEAR ReadyNAS 716X...
-
Page 153: Power On And Shut Down
• The system returns to its last state if the Wake on LAN (WoL) feature is disabled and you did not schedule the system to automatically power on or off: NETGEAR ReadyNAS 716X... -
Page 154: Boot Menu
You can gracefully shut down your system by using the Power button or the ReadyNAS local admin page. For information about how to gracefully shut down your system using the ReadyNAS local admin page, see the ReadyNAS OS 6 Software Manual, which is available at netgear.com/support/product/ReadyNAS_OS_6. To gracefully shut down your system using the Power button: If the status display screen is not lit, do the following: Press the Power button on the front panel of the system. - Page 155 • Tech support. Boots into a low-level diagnostic mode. Use the tech support boot mode only when instructed to do so by a NETGEAR technical support representative. • Volume read only. Mounts a volume as read-only. Use this option when you are attempting to rescue data off a disk during a disaster recovery.
-
Page 156: Chapter 20 Netgear Eda
NETGEAR EDA 500 This chapter provides an overview of the physical features of the EDA 500 and includes the following sections: • Front and Side Panels on page 157 • Drive Bays on page 157 • Rear Panel on page 158 •... -
Page 157: Front And Side Panels
The following figure shows the front and side panels of EDA 500. Figure 59. EDA 500 front and side panels Power LED eSATA LED Volume LED Alert LED Drive bay door Drive Bays The following figure shows the drive bays of EDA 500. NETGEAR EDA 500... -
Page 158: Rear Panel
Disk tray release latch Recessed disk tray handle lock Disk tray handle Power button Disk LED Disk label Active drive bays Cold spare drive bay Rear Panel The following figure shows the rear panel of EDA 500. NETGEAR EDA 500... -
Page 159: Status Information
Figure 61. EDA 500 rear panel Exhaust fan Kensington lock Power switch Power cable socket eSATA port Status Information You can obtain information about the status of your storage system by reviewing the indicators listed in the following table. NETGEAR EDA 500... -
Page 160: Power On And Shut Down
The Alert LED indicates these states: • On. The system needs attention. Use the local admin page to determine the problem. For more information, see the ReadyNAS OS 6 Software Manual, which is available at netgear.com/support/product/ReadyNAS_OS_6. • Off. The system is healthy. Disk LEDs A disk LED next to each active drive bay indicates the status of the disk inside. -
Page 161: Preferred Shutdown
Use the ReadyNAS local admin page to gracefully shut down the EDA 500. For information about how to gracefully shut down the EDA 500 using the ReadyNAS local admin page, see the ReadyNAS OS 6 Software Manual, which is available at netgear.com/support/product/ReadyNAS_OS_6. Forced Shutdown Perform a forced shutdown only if the storage system is not responding. - Page 162 This chapter describes how to reformat, add, and replace disks in your ReadyNAS OS 6 storage system. For information about configuring disks on your storage system, see the ReadyNAS OS 6 Software Manual, which is available at netgear.com/support/product/ReadyNAS_OS_6. This chapter includes the following topics: •...
-
Page 163: Disks
ReadyNAS OS 6 Desktop Storage Systems Disk Trays All systems except the EDA 500 use standard disk trays. The EDA 500 comes with its own special disk trays. This section describes both the standard and EDA 500 disk trays. Note For some disks, first remove the plastic mounting bracket from the disk tray before you mount the disk to the disk tray. -
Page 164: Supported Disks
Use only supported SATA hard disk drives (HDD) or solid state drives (SSD) in your ReadyNAS storage system. If you use disks that are not supported, NETGEAR technical support will not provide assistance. For a list of supported disks, see the NETGEAR Hardware Compatibility List at netgear.com/readynas-hcl. -
Page 165: Previously Formatted Disks
ReadyNAS OS 6 Desktop Storage Systems Previously Formatted Disks This section describes how to use previously formatted disks with your ReadyNAS OS 6 storage system. Previously formatted disks must appear on the NETGEAR Hardware Compatibility List, which is available netgear.com/readynas-hcl. Reformat Previously Formatted Disks If you want to use disks that were previously formatted for an operating system other than ReadyNAS OS 6 (for example, Windows or RAIDiator), you must reformat the disks. -
Page 166: Add A Disk
ReadyNAS OS 6 Desktop Storage Systems Migrate a Volume You can migrate a volume from one ReadyNAS OS 6 storage system to another, as long as you migrate every disk in the volume. For example, if you want to migrate a volume that contains two disks, you must add both disks to the new system. - Page 167 ReadyNAS OS 6 Desktop Storage Systems Press the disk tray release latch. The disk tray handle pops out. Pull out the disk tray. Separate the mounting bracket from the disk tray: Press and hold the disk tray release latch. While holding the release latch, use your other hand to pull out one end of the mounting bracket and then the other until the ends extend slightly past the disk tray.
- Page 168 ReadyNAS OS 6 Desktop Storage Systems Make sure that the ends of the mounting bracket are even with each other. Slide the bracket down the disk tray, keeping both sides of the bracket even with each other. The mounting bracket stops when it hits the bracket lock. The bracket lock prevents the mounting bracket from sliding all the way off the disk tray.
- Page 169 ReadyNAS OS 6 Desktop Storage Systems Make sure that the HDD mounting holes are aligned with the bracket's mounting posts and that the HDD connectors face the interior of the disk tray. Disks...
- Page 170 ReadyNAS OS 6 Desktop Storage Systems Push the mounting bracket and HDD back into the disk tray. WARNING: To prevent damage to your system, make sure that the disk tray is correctly oriented before inserting it into the drive bay. Insert the disk tray back into the drive bay of the storage system.
-
Page 171: Add A 2.5-Inch Disk
For more information about X-RAID, Flex-RAID, and using the local admin page, see the ReadyNAS OS 6 Software Manual, which is available at netgear.com/support/product/ReadyNAS_OS_6. Add a 2.5-Inch Disk To add a 2.5-inch hard disk drive (HDD) or 2.5-inch solid state drive (SSD): Determine whether you must shut down your system: •... - Page 172 ReadyNAS OS 6 Desktop Storage Systems Press and hold the disk tray release latch. While holding the release latch, use your other hand to pull out one end of the mounting bracket and then the other until the ends extend slightly past the disk tray. Make sure that the ends of the mounting bracket are even with each other.
- Page 173 ReadyNAS OS 6 Desktop Storage Systems Push the mounting bracket out of each bracket lock using a pointed object, such as a pen. The mounting bracket is released from the bracket locks. Slide the mounting bracket out of the disk tray. The mounting bracket is not used to secure 2.5-inch HDDs or SSDs.
- Page 174 If you are adding the disk to a system that uses Flex-RAID, the disk becomes available for use. You use the local admin page to manually configure the new disk. For more information about X-RAID, Flex-RAID, and using the local admin page, see the ReadyNAS OS 6 Software Manual, which is available at netgear.com/support/product/ReadyNAS_OS_6. Disks...
-
Page 175: Replace A Disk
For information about RAID configurations, setting up email alerts, and using the local admin page, see the ReadyNAS OS 6 Software Manual, which is available at netgear.com/support/product/ReadyNAS_OS_6. ReadyNAS supports hot-swap drive bays, so you do not need to power down your storage system when replacing a disk. - Page 176 ReadyNAS OS 6 Desktop Storage Systems Pull out the disk tray. Press and hold the disk tray release latch. While holding the disk tray release latch, pull out the mounting bracket and slide the bracket down the tray. The mounting bracket stops when it hits the bracket lock. Disks...
- Page 177 ReadyNAS OS 6 Desktop Storage Systems The bracket lock prevents the mounting bracket from sliding all the way off the disk tray. Remove the old HDD from the mounting bracket. Attach the new HDD to the mounting bracket. Disks...
- Page 178 ReadyNAS OS 6 Desktop Storage Systems Make sure that the HDD mounting holes are aligned with the bracket's mounting posts and that the HDD connectors face the interior of the disk tray. Disks...
- Page 179 ReadyNAS OS 6 Desktop Storage Systems Push the mounting bracket and HDD back into the disk tray. WARNING: To prevent damage to your system, make sure that the disk tray is correctly oriented before inserting it into the drive bay. Insert the disk tray back into the drive bay of the storage system.
-
Page 180: Replace A 2.5-Inch Disk
ReadyNAS OS 6 Desktop Storage Systems For more information about RAID configurations, see the ReadyNAS OS 6 Software Manual, which is available at netgear.com/support/product/ReadyNAS_OS_6. Replace a 2.5-Inch Disk To replace a 2.5-inch hard disk drive (HDD) or 2.5-inch solid state drive (SSD): If necessary, slide the recessed handle lock to the unlocked position. - Page 181 ReadyNAS OS 6 Desktop Storage Systems Remove the screws and the old 2.5-inch HDD or SSD. Place the new 2.5-inch HDD or SSD in the disk tray. Secure the HDD or SSD to the disk tray using the screws. Make sure that the disk connectors face the interior of the disk tray. Disks...
- Page 182 You can continue to use your storage system, although access is slower until the volume resynchronization finishes. For more information about RAID configurations, see the ReadyNAS OS 6 Software Manual, which is available at netgear.com/support/product/ReadyNAS_OS_6. Disks...
- Page 183 Defaults and Technical Specifications This appendix includes the following sections: • Factory Default Settings on page 184 • ReadyNAS 102 Technical Specifications on page 184 • ReadyNAS 104 Technical Specifications on page 186 • ReadyNAS 202 Technical Specifications on page 187 •...
-
Page 184: Factory Default Settings
MTU size 1500 Ethernet port Auto Sense 10/100/1000BASE-T, RJ-45 LAN IP address DHCP acquired ReadyNAS 102 Technical Specifications The ReadyNAS 102 storage system meets the following technical specifications: General: • Marvell Armada 370 1.2 GHz CPU • 512 MB memory •... -
Page 185: Physical Dimensions (H X W X D)
ReadyNAS OS 6 Desktop Storage Systems • One USB 2.0 port (front) • Two USB 3.0 ports (back) • One GbE port Physical dimensions (h x w x d): 142 x 101 x 220 mm (5.60 x 3.98 x 8.70 in.) Physical weight: 2.12 kg (4.67 lb) without disks Power consumption:... -
Page 186: Readynas 104 Technical Specifications
ReadyNAS OS 6 Desktop Storage Systems ReadyNAS 104 Technical Specifications The ReadyNAS 104 storage system meets the following technical specifications: General: • Marvell Armada 370 1.2 GHz CPU • 512 MB memory • Four-bay storage • One eSATA port • One USB 2.0 port (front) •... -
Page 187: Environmental Requirements
ReadyNAS OS 6 Desktop Storage Systems Environmental requirements: • Operating temperature: 0 to 40°C (32° to 104°F) • Operating humidity: 20 to 80% relative humidity (noncondensing) • Storage temperature: –20 to 70°C (–4 to 158°F) • Storage humidity: 5 to 95% relative humidity (noncondensing) •... -
Page 188: Power Consumption
ReadyNAS OS 6 Desktop Storage Systems Power consumption: • BTU at full power supply utilization: 39.5W • In operation: 38W • Power off (Wake On LAN): 1.31W Electrical: • External 60 W (12V, 5A) AC power supply • Input: 100–240 VAC, 50/60 Hz Environmental requirements: •... -
Page 189: Physical Dimensions (H X W X D)
ReadyNAS OS 6 Desktop Storage Systems Physical dimensions (h x w x d): 142 x 101 x 220 mm (5.60 x 3.98 x 8.70 in.) Physical weight: 2.12 kg (4.67 lb) without disks Power consumption: • BTU at full power supply utilization: 39.5W •... -
Page 190: Physical Dimensions (H X W X D)
ReadyNAS OS 6 Desktop Storage Systems • Four-bay storage • One eSATA port • One USB 2.0 port (front) • Two USB 3.0 ports (back) • Two GbE ports • LCD display Physical dimensions (h x w x d): 205 x 134 x 223 mm (8.97 x 5.28 x 8.78 in.) Physical weight: 4.70 kg (10.36 lb) without disks Power consumption:... -
Page 191: Readynas 214 Technical Specifications
ReadyNAS OS 6 Desktop Storage Systems ReadyNAS 214 Technical Specifications The ReadyNAS 214 storage system meets the following technical specifications: General: • Annapurna Labs AL214 1.4 GHz processor • 2 GB memory • Four-bay storage • One eSATA port • One USB 2.0 port (front) •... -
Page 192: Certifications
ReadyNAS OS 6 Desktop Storage Systems • Storage temperature: –20 to 70°C (–4 to 158°F) • Storage humidity: 5 to 95% relative humidity (noncondensing) • Software-controlled 92 mm chassis cooling fan Certifications: FCC Class B, CE Class B, RoHS, VCCI Class B, CCC ReadyNAS 312 Technical Specifications The ReadyNAS 312 storage system meets the following technical specifications: General:... -
Page 193: Electrical
ReadyNAS OS 6 Desktop Storage Systems Electrical: • External 60 W (12V, 5A) AC power supply • Input: 100–240 VAC, 50/60 Hz Environmental requirements: • Operating temperature: 0 to 40°C (32° to 104°F) • Operating humidity: 20 to 80% relative humidity (noncondensing) •... -
Page 194: Physical Weight
ReadyNAS OS 6 Desktop Storage Systems Physical weight: 3.97 kg (8.75 lb) without disks Power consumption: • BTU at full power supply utilization: 69.45W • In operation: 48.71 W • Power off (Wake On LAN): 843.36 mW • Power off: 472.77 mW Electrical: •... -
Page 195: Physical Dimensions (H X W X D)
ReadyNAS OS 6 Desktop Storage Systems • One HDMI port (not currently supported) • One USB 2.0 port (front) • Two USB 3.0 ports (back) • Two LAN ports • LCD display • Infrared remote receiver • Proximity sensor Physical dimensions (h x w x d): 259 x 192 x 287.5 mm (10.20 x 7.56 x 11.32 in.) Physical weight: 7.49 kg (16.50 lb) without disks... -
Page 196: Certifications
ReadyNAS OS 6 Desktop Storage Systems Certifications: FCC Class B, CE Class B, RoHS, VCCI Class B ReadyNAS 422 Technical Specifications The ReadyNAS 422 storage system meets the following technical specifications: General: • Intel Atom C3338 Dual Core Processor • 2 GB DDR4 memory •... -
Page 197: Environmental Requirements
ReadyNAS OS 6 Desktop Storage Systems Environmental requirements: • Operating temperature: 0 to 45°C (32° to 113°F) • Operating humidity: 20 to 80% relative humidity (noncondensing) • Storage temperature: –20 to 70°C (–4 to 158°F) • Storage humidity: 5 to 95% relative humidity (noncondensing) •... -
Page 198: Power Consumption
ReadyNAS OS 6 Desktop Storage Systems Power consumption: • BTU at full power supply utilization: 57.4W • In operation: 43.09W • Power off (Wake On LAN): 4.4W • Power off: 400 mW Electrical: • External 90W AC power supply • Input: 100–240 VAC, 50/60 Hz Environmental requirements: •... -
Page 199: Physical Dimensions (H X W X D)
ReadyNAS OS 6 Desktop Storage Systems • One micro USB console connector (marked as UART) • OLED display Physical dimensions (h x w x d): 259 x 192 x 277 mm (10.2 x 7.55 x 10.9 in.) Physical weight: 7.43 kg (16.38 lb) without disks Power consumption: •... -
Page 200: Readynas 428 Technical Specifications
ReadyNAS OS 6 Desktop Storage Systems ReadyNAS 428 Technical Specifications The ReadyNAS 428 storage system meets the following technical specifications: General: • Intel Atom C3538 Quad Core Processor, 2.1 GHz • 4 GB DDR4 memory • Eight-bay storage • One eSATA port •... -
Page 201: Environmental Requirements
ReadyNAS OS 6 Desktop Storage Systems Environmental requirements: • Operating temperature: 0 to 45°C (32° to 113°F) • Operating humidity: 20 to 80% relative humidity (noncondensing) • Storage temperature: –20 to 70°C (–4 to 158°F) • Storage humidity: 5 to 95% relative humidity (noncondensing) •... -
Page 202: Power Consumption
ReadyNAS OS 6 Desktop Storage Systems Power consumption: • BTU at full power supply utilization: 153.54W • In operation: 87.69W • Power off (Wake On LAN): 798.08 mW • Power off: 416.77 mW Electrical: • Internal 200W server-rated AC power supply •... -
Page 203: Physical Dimensions (H X W X D)
ReadyNAS OS 6 Desktop Storage Systems • One micro USB console connector (marked as UART) • OLED display Physical dimensions (h x w x d): 194 x 185 x 239 mm (7.64 x 7.28 x 9.4 in.) Physical weight: 4.53 kg (10.0 lb) without disks Power consumption: •... -
Page 204: Readynas 526X Technical Specifications
ReadyNAS OS 6 Desktop Storage Systems ReadyNAS 526X Technical Specifications The ReadyNAS 526X storage system meets the following technical specifications: General: • Intel Pentium processor D-1508 • 4 GB ECC DDR4 memory • Six-bay storage • One eSATA port • One USB 3.0 port (front) •... -
Page 205: Environmental Requirements
ReadyNAS OS 6 Desktop Storage Systems Environmental requirements: • Operating temperature: 0 to 40°C (32° to 104°F) • Operating humidity: 20 to 80% relative humidity (noncondensing) • Storage temperature: –20 to 70°C (–4 to 158°F) • Storage humidity: 5 to 95% relative humidity (noncondensing) •... -
Page 206: Power Consumption
ReadyNAS OS 6 Desktop Storage Systems Power consumption: • BTU at full power supply utilization: 104.3W • In operation: 82.2W • Power off (Wake On LAN): 344 mW • Power off: 341 mW Electrical: • Internal 250W server-rated AC power supply •... -
Page 207: Physical Dimensions (H X W X D)
ReadyNAS OS 6 Desktop Storage Systems • Two 10 GbE LAN ports • OLED display Physical dimensions (h x w x d): 260 x 190 x 280 mm (10.24 x 7.48 x 11.02 in.) Physical weight: 7.9 kg (17.4 lb) without disks Power consumption: •... -
Page 208: Readynas 628X Technical Specifications
ReadyNAS OS 6 Desktop Storage Systems ReadyNAS 628X Technical Specifications The ReadyNAS 628X storage system meets the following technical specifications: General: • Intel Xeon processor D-1521 • 8 GB ECC DDR4 memory • Eight-bay storage • One eSATA port • One USB 3.0 port (front) •... -
Page 209: Environmental Requirements
ReadyNAS OS 6 Desktop Storage Systems Environmental requirements: • Operating temperature: 0 to 40°C (32° to 104°F) • Operating humidity: 20 to 80% relative humidity (noncondensing) • Storage temperature: –20 to 70°C (–4 to 158°F) • Storage humidity: 5 to 95% relative humidity (noncondensing) •... -
Page 210: Power Consumption
ReadyNAS OS 6 Desktop Storage Systems Power consumption: • BTU at full power supply utilization: 172.79W • In operation: 96.15W • Power off (Wake On LAN): 799.89 mW • Power off: 419.62 mW Electrical: • Internal 200W server-rated AC power supply •... -
Page 211: Physical Weight
ReadyNAS OS 6 Desktop Storage Systems Physical weight: 7.3 kg (16.1 lb) without disks Power consumption: • BTU at full power supply utilization: 88.17W • In operation: 37.3W • Power off: 453.8 mW Electrical: • Internal 200W server-rated AC power supply •... -
Page 212: Electrical Safety Precautions
ReadyNAS OS 6 Desktop Storage Systems Electrical Safety Precautions Follow basic electrical safety precautions to protect yourself from harm and the ReadyNAS from damage: • Be aware of the locations of the power on/off switch on the chassis as well as the rooms emergency power-off switch, disconnection switch, or electrical outlet. - Page 213 ReadyNAS OS 6 Desktop Storage Systems • Use a grounded wrist strap designed to prevent static discharge. • Keep all components and printed circuit boards (PCBs) in their antistatic bags until ready for use. • Touch a grounded metal object before removing the board from the antistatic bag. •...