Sign In
Upload
Manuals
Brands
Roland Manuals
Printer
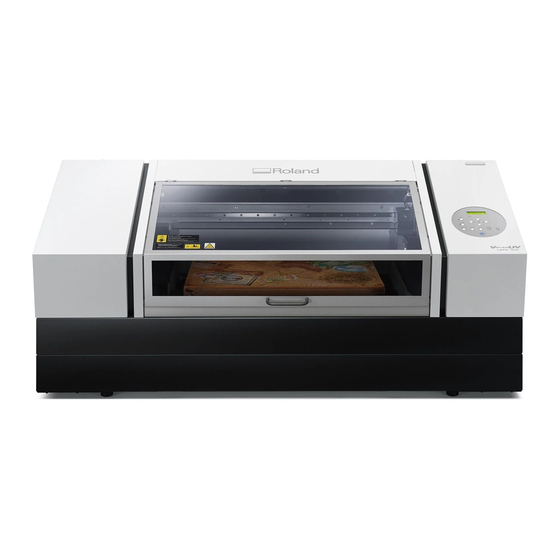
VersaUV LEF2-300
Roland VersaUV LEF2-300 UV-LED Printer Manuals
Manuals and User Guides for Roland VersaUV LEF2-300 UV-LED Printer. We have
6
Roland VersaUV LEF2-300 UV-LED Printer manuals available for free PDF download: User Manual, Service Notes, Regular Maintenance Manual, Manual, Setup Manual
Roland VersaUV LEF2-300 User Manual (277 pages)
Brand:
Roland
| Category:
Printer
| Size: 22.23 MB
Table of Contents
Table of Contents
2
Chapter 1 Basic Handling Methods
7
Basic Information
8
Part Names and Functions
9
Printer Unit
9
Head Refresher
13
Operation Panel
15
Display Screen
16
Statuses Indicated by Status Light Color
17
Object to be Printed on
18
Conditions for Settable Objects to be Printed on
18
Printable Area
19
Spacer Table Attachment/Removal (LEF2-300D)
20
Attaching the Spacer Table
20
Removing the Spacer Table
23
Features of Inks
24
Features of ECO-UV Inks
24
Features of Primer
24
Menu List
25
Main Menu
25
Function Menu
28
Language and Unit Menu
29
Basic Operations
30
Power Supply Operations
31
Turning the Power on
31
Turning the Power off
32
Precautions When Operating the Power Supply
33
Sleep Mode (Power-Saving Feature)
34
Checks before Operations
35
LAN (Local Area Network) Settings
35
Preparing the Cleaning Liquid for Head Refreshing
36
Preventing Sedimentation in Inks
38
Chapter 2 Output Method
39
Printing Operations
40
Printing Method
41
Checking the Daily Workflow
41
Three Checks before Printing
43
Step1: Preparing for the Start of Daily Operations
46
Step 2: Start Printing
58
Step 3: Head Refreshing after Daily Operations
65
Pausing and Canceling Printing
70
Pausing and Resuming Printing
70
Canceling Printing
70
Chapter 3 Optimizing Quality and Efficiency
71
Optimizing the Setup Method
72
Suction Function Setting
73
Setting the Suction Function
73
Adjusting the Height
74
Setting the Height of the Object to be Printed on Manually
74
Adjusting the Distance between the Object to be Printed on and the Print Heads
76
Enabling Automatic Height Adjustment During Printing
77
Determining the Maximum Value (Threshold) for Automatic Height Adjustment
78
Notes When the Print Surface Is Uneven
79
Changing the Z-Axis (Height) Origin
80
Print Area Settings
81
Fixing the Base Position of the Print Area
81
Setting the Print Area Using the Center of the Print Area as the Base Position
82
Changing Just the Base (Home) Position
88
Optimizing the Printing Quality
90
Using the Correction Functions
91
Bidirectional Adjustment
91
Correcting for Misalignment in Bidirectional Printing (Simple)
91
Correcting for Misalignment in Bidirectional Printing more Precisely (Detailed)
93
Preventing Ink Discharge Defects
95
Preventing Soiling of the Object to be Printed on and Dot Drop-Out
95
Reducing Ink Mist (Ink Spatter)
96
Preventing Primer Dot Drop-Out
97
Improving Ink Adhesion
98
Additional UV Lamp Illumination after Printing
98
Optimizing Work Efficiency
99
Using the Preset Function
100
Saving the Current Settings in Presets
100
Load a Preset and Print
102
Making Fine Adjustments and Printing a Preset
103
Checking Current Preset Name
104
Reducing Print Time
105
Omitting the Setting of the Print Area
105
Continuously Printing Multiple Sets of Data
106
Minimizing Print Head Movement
107
Setting the Smallest Possible Print Area
108
Reducing Paper Used During Printing Tests
109
Performing Printing Tests Arranged Horizontally
109
Optimizing Head Refreshing Work When Using Jigs
110
Setting the Installation Height of the Head Refresher
110
Optimizing Operation Management
113
Managing the Operations Appropriately and Efficiently
114
Setting the Date and Time
114
Setting the Start Timer
115
Sounding a Buzzer to Notify the User of the End of Printing
117
Determining What Happens When Ink Runs out
118
Notifying the User of Ink Exceeding Its Shelf Life
119
Checking the Ink Shelf Life
120
Setting the Activation Interval for Sleep Mode (Power-Saving Feature)
121
Deactivating the Sleep Mode (Power-Saving Feature)
122
Managing the Basic Settings of the Printer
123
Setting the Menu Language and Units of Measurement
123
Viewing System Information
124
Turning off the Status Light
125
Returning All Settings to Factory Defaults
126
Other Useful Functions
127
Print with Crop Marks
128
What Are "Crop Marks
128
Chapter 4 Maintenance
129
Introduction
130
Important Notes on Handling and Use
131
Printer
131
Ink Cartridges
132
Basic Maintenance Knowledge
133
Types and Timing of Maintenance
133
Automatic Maintenance Feature and Notes
135
Alarm Feature
136
Measures When the Printer Is Not in Use for a Prolonged Period
137
Regular Maintenance
138
Cleaning the Machine
139
Cleaning the Machine on a Daily Basis
139
Replacing Ink Cartridges
142
Checking for Remaining Ink
142
How to Replace the Ink Cartridge
143
Disposing of Discharged Fluid
144
Precautions for Disposing of Discharged Fluid
144
If the Discharged Fluid Disposal Message Appears
145
If the Drain Bottle Exceeds Its Capacity Limit (Round Drain Bottle)
149
If the Drain Bottle Exceeds Its Capacity Limit (Square Drain Bottle)
151
If the Contents of the Drain Bottle Are Not Visible (Round Drain Bottle)
155
Maintenance that Must be Performed Daily
156
Maintenance of Ink Cartridges
156
Printing Tests and Normal Cleaning
157
Head Refreshing Method
168
When Normal Cleaning Is Not Effective
173
Medium Cleaning Method
173
Powerful Cleaning Method
175
Manual Cleaning
181
When Manual Cleaning Is Necessary
181
Manual Cleaning Method
182
Cleaning that Must be Performed Once a Month or more
192
When UV-LED Device Cleaning Is Necessary
192
How to Clean the UV-LED Devices
193
Advanced Maintenance
196
Restoring the White Ink Concentration
197
Circulating the Ink to Clear Precipitation
197
Handling Severe Dot Drop-Out
199
Handling Severe Dot Drop-Out with White Ink
199
Cleaning All Print Heads
205
Partially Restricting the Print Heads Used for Printing
210
Emergency Measure) Cleaning the Print Head Surface
221
Replacing Consumable Parts and Products
222
How to Replace Consumable Parts
223
Replacing the Wipers and Wiper Cleaner
223
Replacing the Filter
228
Replacing the Cleaning Pad Unit
231
Inquiries for Consumable Parts and Products
232
Items that You Can Purchase and Replace by Yourself
232
Items that Require Inquiries before Replacement
232
Chapter 5 Troubleshooting Methods
233
Print Quality Problems
234
Printed Results Are Coarse or Contain Horizontal Stripes
235
Do the Print Heads Cause Dot Drop-Out
235
Are the Software RIP Settings Appropriate
235
Is the Printer Installed in a Level and Stable Location
235
Is the Printer Installed in a Location that Is Not Exposed to Direct Sunlight
235
Is the Object to be Printed on Loaded and Set up Correctly
235
The Object to be Printed on Becomes Soiled When Printed
236
Are the Print Heads Dirty
236
Is the Humidity of the Room too Low
236
Colors Are Unstable or Uneven
237
DID You Shake the Ink Cartridges before Installing Them
237
Has the Printer Been Used Continuously for a Long Time
237
Was Printing Paused Partway through
237
Is the Printer Installed in a Level and Stable Location
237
Is the Printer Set to Pause During Printing for Cleaning
237
Is the Printer Being Used in a Location Subject to Severe Changes in the Operating Environment
237
Are the Settings for the [PRESET] Menu Item Appropriate
237
Machine Problems
238
The Print Heads Do Not Move
239
What to Do First
239
If the Heads Still Do Not Move
239
The Printer Unit Does Not Run
240
Is the Power Switched on
240
Is [SETUP] Lit
240
Are any Covers Open
240
Is the Top Menu Displayed
240
Is [PAUSE] Lit
240
Has the Ink Run out
240
Is a Message Displayed on the Screen
241
Are the Cables Connected
241
Is the Status LED for the LAN Cable Connector Lit in Green
241
Are the LAN Settings Correct
241
DID the Software RIP End Abnormally
241
Is the Temperature of the Room too Low
241
The Flat Table Does Not Move
242
Is Something Stuck in One of the Movable Components Inside of the Machine
242
Are any Covers Open
242
The Head Gap Sensor Does Not Detect the Object to be Printed on
243
Is Something Covering the Head Gap Sensor or Has It Attracted Dust
243
It Is Not Possible to Check the Amount of Discharged Fluid (Round Drain Bottle)
244
Is Ink Splattered Around the Inside of the Drain Bottle
244
Messages on the Operation Panel
245
Messages
246
Press the Power Key to Clean
246
Circulating Ink
246
Shake White Ink Cartridge
246
Finished Print
246
Set/Remove Cartridge
246
Close XXX Cover Dry-Up May Damage the Head
246
Close XXX Cover
246
Set/Remove Cl-Liquid
247
Readjust Table Height
247
Do Head Refresh
247
Install Drain Bottle
247
Empty Drain Bottle
247
LIMIT over EMPTY DRAIN BOTTLE (Square Drain Bottle)
247
Setup Media
247
Time for Filter Replace
247
Time for Wiper Replace
248
Time for Maintenance
248
Cancel for 19℃ Low Temperature
248
Error Messages
249
Area too Small Continue
249
Print Area too Small
249
Canceled for Table Height
249
Check Table Height
249
Check Height of Head Refresher
249
Adjust Failed
249
Temperature Is too High **°C
250
Temperature Is too Low **°C
250
Data Error Canceling
250
Ink Shelf Life Expire 1234567
250
Wrong Cartridge
251
Wrong Head Is Installed
251
Avoiding Dry-Up Turn Power off
251
Motor Error Turn Power off
251
Canceled for Motor Protection
251
Clear External Device Error
251
Service Call
251
Chapter 6 Appendix
252
How to Connect External Devices
253
Connecting and Removing External Devices
254
Connecting an Alarm Lamp
254
Removing the Alarm Lamp
256
Using Expansion Terminal B to Connect an External Device
257
Disconnecting an External Device (Expansion Terminal B)
258
Operations When Moving the Unit
259
Moving the Unit
260
Step 1: Cleaning All Print Heads
260
Step 2: Securing the Print Heads and the Flat Table Using Retainers
264
Step 3: Securing the Print-Head Carriage in Place Using the Retainer
265
Step 4: Reinstalling the Machine
267
Main Specifications
268
Dimensional Drawings
269
When Using a Jig: Hole Positions for the Head Refresher
270
Location of the Power Rating and Serial Number Label
271
Specifications and Diagrams for the External Expansion Terminal
272
External Controller Connector
272
Connector for an External Deodorizer
273
Alarm Lamp Connector
273
Memo
275
LEF2-300 and LEF2-300D
276
GPL/LGPL Software
277
Advertisement
Roland VersaUV LEF2-300 Service Notes (264 pages)
Brand:
Roland
| Category:
Printer
| Size: 52.1 MB
Table of Contents
Table of Contents
2
Revision History
3
Warning Labels
4
Special Tools
6
Key Combinations
7
Chapter 1 Replacement of Main Parts
8
Important Points
10
To Ensure Safe Work
10
Information
12
Outline Diagram
12
Print Head Replacement
12
Cover that Needs to be Removed
13
Workflow
13
Information
23
Outline Diagram
23
Wiper Replacement
23
Workflow
24
Cap Top Replacement
26
Information
26
Outline Diagram
26
Cover that Needs to be Removed
27
Workflow
27
Information
31
Outline Diagram
31
Scan Motor Replacement
31
Cover that Needs to be Removed
32
Workflow
32
Information
39
Outline Diagram
39
Pump Replacement
39
Cover that Needs to be Removed
40
Workflow
40
Circulation Pump Replacement
45
Information
45
Outline Diagram
45
Cover that Needs to be Removed
46
Workflow
46
Information
50
Ink Tube Replacement
50
Outline Diagram
50
Cover that Needs to be Removed
51
Workflow
52
Ribbon Cable
61
Ribbon Cable (Main Board to Print Carriage Board) Replacement
61
Board Replacement
74
Information
74
Battery Replacement
85
Information
85
Outline Diagram
85
Cover that Needs to be Removed
86
Workflow
86
Carriage Belt Replacement
89
Information
89
Outline Diagram
89
Cover that Needs to be Removed
90
Workflow
91
Encoder Scale Replacement
98
Information
98
Outline Diagram
98
Cover that Needs to be Removed
99
Workflow
99
Information
101
Linear Encoder Board Replacement
101
Outline Diagram
101
Cover that Needs to be Removed
102
Workflow
103
Information
109
Outline Diagram
109
UV Lamp Replacement
109
Workflow
110
Information
113
Ink Damper Replacement
113
Outline Diagram
113
Cover that Needs to be Removed
114
Workflow
114
Information
120
LED Pointer Replacement
120
Outline Diagram
120
Cover that Needs to be Removed
121
Workflow
121
Head Gap Sensor Replacement
123
Information
123
Outline Diagram
123
Cover that Needs to be Removed
124
Workflow
124
Feed Motor Replacement
127
Information
127
Outline Diagram
127
Cover that Needs to be Removed
128
Workflow
128
Information
133
Outline Diagram
133
Cover that Needs to be Removed
134
Procedure
134
Chapter 2 Adjustment
141
Service Mode
142
History Menu
150
Firmware Upgrade
153
Information
153
Workflow
153
Firmware Installation
156
Information
156
Workflow
156
Cover that Needs to be Removed
162
Information
162
Print Head Alignment
162
Workflow
163
Cover that Needs to be Removed
173
Information
173
Limit Position & Maximum Scan Width Position Initialize
173
Workflow
173
Information
176
Linear Encoder Setup
176
Workflow
176
Cover that Needs to be Removed
178
Flushing Position Adjustment
178
Information
178
Workflow
178
Belt Tension Adjustment
180
Cover that Needs to be Removed
180
Information
180
Workflow
180
Belt Position Adjustment
184
Cover that Needs to be Removed
184
Information
184
Workflow
185
Calibration (Feed Direction)
190
Information
190
Workflow
190
Information
192
UV Lamp Check
192
Workflow
192
Information
195
LED Pointer Position Adjustment
195
Workflow
195
Information
198
Print Area Adjustment
198
Workflow
198
Cover that Needs to be Removed
202
Information
202
Workflow
203
Cover that Needs to be Removed
209
Information
209
Print Head Height Adjustment
209
Workflow
210
Information
216
UV Lamp Height Adjustment
216
Workflow
216
Cover that Needs to be Removed
222
Head Gap Sensor Position Adjustment
222
Information
222
Workflow
223
Cover that Needs to be Removed
230
Grease up Maintenance
230
Information
230
Procedure
230
Cover that Needs to be Removed
234
Front Cover Sensor Adjustment
234
Information
234
Workflow
234
Chapter 3 Supplement
240
Motor Errors
241
Service Call Errors
242
Sensor Map
245
Wiring Map
248
Chapter 4 Service Activities
250
Installation Checklist
251
Maintenance Checklist
263
Roland VersaUV LEF2-300 Regular Maintenance Manual (63 pages)
Brand:
Roland
| Category:
Printer
| Size: 19.18 MB
Table of Contents
Table of Contents
3
Contents
3
1 Introduction
5
Important Notes on Handling and Use
6
Printer
6
Ink Cartridges
7
Basic Maintenance Knowledge
8
Types and Timing of Maintenance
8
Automatic Maintenance Feature and Notes
10
Alarm Feature
10
Measures When the Printer Is Not in Use for a Prolonged Period
10
2 Regular Maintenance
11
Preparation before Maintenance
12
Preparing the Cleaning Liquid for Head Refreshing
12
Cleaning the Machine
14
Cleaning the Machine on a Daily Basis
14
Replacing Ink Cartridges
18
Checking for Remaining Ink
18
How to Replace the Ink Cartridge
19
Disposing of Discharged Fluid
21
Precautions for Disposing of Discharged Fluid
21
If the Discharged Fluid Disposal Message Appears
22
If the Drain Bottle Exceeds Its Capacity Limit
24
Maintenance that Must be Performed Daily
28
Maintenance of Ink Cartridges
28
Printing Tests and Normal Cleaning
29
Head Refreshing Method
38
When Normal Cleaning Is Not Effective
44
Medium Cleaning Method
44
Powerful Cleaning Method
46
Manual Cleaning
51
When Manual Cleaning Is Necessary
51
Manual Cleaning Method
52
Consumable Products and Parts Related to Manual Cleaning
57
Cleaning that Must be Performed Once a Month or more
58
When UV-LED Device Cleaning Is Necessary
58
How to Clean the UV-LED Devices
59
Reducing Paper Used During Printing Tests
62
Performing Printing Tests Arranged Horizontally
62
Advertisement
Roland VersaUV LEF2-300 Manual (50 pages)
Brand:
Roland
| Category:
Printer
| Size: 15.5 MB
Table of Contents
Table of Contents
3
안전한 사용을 위해
6
Pour Utiliser en Toute Sécurité
13
기기 특징
20
이 기기의 특징
20
사용자 설명서에 대해
20
설치 환경 결정
22
설치 장소 결정
22
온도 및 습도
23
설치 공간 및 높이
23
스탠드 설치
24
제공된 품목 확인
25
기기 설치
26
Step 1 : 리테이너 제거
26
Step 2 : 폐 잉크 통 설치
30
Step 3 : 케이블 연결
32
Step 4 : 초기 설정
32
Step 5 : 초기 잉크 충전
34
컴퓨터에 연결
41
Step 1 : 컴퓨터의 네트워크 설정
41
Step 2 : 프린터의 네트워크 설정
43
Step 3 : RIP 소프트웨어의 포트 설정
46
정격 전원 및 일련 번호 라벨의 위치
48
주요 사양
49
Roland VersaUV LEF2-300 Regular Maintenance Manual (32 pages)
Brand:
Roland
| Category:
Printer
| Size: 6.26 MB
Table of Contents
Table of Contents
3
Contents
3
1 Introduction
5
Spacer Table Attachment/Removal
6
Attaching the Spacer Table
6
Removing the Spacer Table
9
2 Regular Maintenance
11
Maintenance that Must be Performed Daily
12
Printing Tests and Normal Cleaning
12
Head Refreshing Method
20
Manual Cleaning
27
Manual Cleaning Method
27
Roland VersaUV LEF2-300 Setup Manual (12 pages)
Brand:
Roland
| Category:
Printer
| Size: 1.56 MB
Table of Contents
Table of Contents
3
Contents
3
Differences between the LEF2-300D and LEF2-300
4
To Ensure Safe Use
5
Pour Utiliser en Toute Sécurité
6
Machine Highlights
7
Features of this Machine
7
About the User's Manuals for this Machine
7
Checking the Included Items
8
Setting up the Machine
9
Attaching the Spacer Table
9
Specifications
12
Advertisement
Related Products
Roland VersaUV LEF-12
Roland VersaUV LEF-20
Roland VersaUV LEF-200
Roland VersaUv LEF - 12i
Roland VersaUV LEF2-200
ROLAND LEF-300
Roland VersaUV LEF2-300D
Roland LEC-300
Roland LEC-12
Roland VersaUV LEJ-640 F
Roland Categories
Musical Instrument
Synthesizer
Recording Equipment
Drums
Electronic Keyboard
More Roland Manuals
Login
Sign In
OR
Sign in with Facebook
Sign in with Google
Upload manual
Upload from disk
Upload from URL