Table of Contents
Advertisement
Advertisement
Table of Contents

Related Manuals for York Fitness Heritage G101 Gym


Summary of Contents for York Fitness Heritage G101 Gym
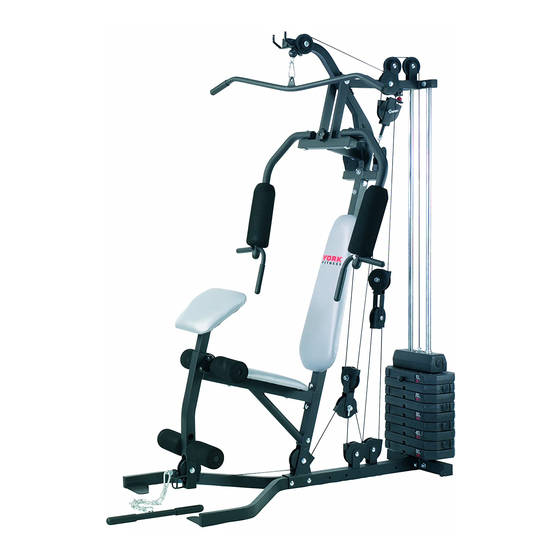
- Page 1 eritage G101 Multigym OWNER’S MANUAL 07JUNE2010...
- Page 2 Congratulations on purchasing your exercise equipment from York Fitness. You have chosen a high quality, safe and innovative piece of equipment as your training partner and we are certain it will keep you motivated on the way to achieving your personal fitness goals.
-
Page 3: Table Of Contents
contents safety information customer support assembly instructions operational instruction warranty exploded drawing part list... -
Page 4: Safety Information
safety information Please read this instruction manual before you begin • Never use the equipment in any other manner other than the ways explained in these instructions and any wall-chart assembly. Great care has been taken to design these supplied. instructions and following them will help you with • Injuries to health may result from incorrect or excessive quicker assembly and minimize the risk of injury. -
Page 5: Customer Support
You will also need original purchase date and where the product was purchased. IMPORTANT!! - Please retain your sales receipt, York Fitness Customer Care may request proof of purchase to validate eligibility for warranty service. Warranty cover starts from the date shown on the proof of purchase. -
Page 6: Assembly Instructions
assembly instruction Before You Start 1. Prepare your work area It is important you assemble the product in a clean and uncluttered space. 2. Work with a friend We recommend you have someone assist you with the assembly as some of the components are quite heavy. 3. - Page 7 IF YOU SUSPECT YOU MAY HAVE SOME PARTS MISSING, PLEASE CONTACT US BEFORE GOING BACK TO YOUR RETAILER. REFER TO THE CUSTOMER SUPPORT SECTION FOR CONTACT DETAILS. 68 x 1 63 x 1 64 x 4 65 x 2 66 x 2 67 x 3 HEX HEAD BOLT HEX HEAD BOLT...
-
Page 8: Table Of Contents
assembly instruction Part List 2 x 1 3 x 2 1 x 1 MAIN STABILIZER ASSEMBLY WEIGHT TUBE MOUNT ASSEMBLY WEIGHT TUBE MAIN STABILIZER ASSEMBLY LEFT SHORT OD25.4 X 1768.2 X 2MM RIGHT 7 x 1 8 x 1 REAR UPPER ASSEMBLY SEAT MOUNT ASSEMBLY 6 x 1 9 x 1... - Page 10 assembly instruction STEP 1 55 x 2 Fit Part #4 last 56 x 6 57 x 4 67 x 2...
- Page 11 STEP 2 55 x 2 57 x 5 64 x 3...
- Page 12 assembly instruction STEP 3 Fit Weights (27) one at a time and alternate the direction of the end caps with the bottom end cap facing the left as illustrated Apply weight labels starting with 50kg/100kg at the bottom as illustrated...
- Page 13 STEP 4 x 12...
- Page 14 assembly instruction STEP 5...
- Page 15 STEP 6 25 x 4 26 x 4 Please note correct position of Pulley Wheel Covers ✗ ✓ Tighten bolt before tting caps (Do not over tighten)
- Page 16 assembly instruction STEP 7 Please note correct position of Pulley Wheel Covers 62 x 1 26 x 2 13 x 1 ✗ ✓ 63 x 1 25 x 2 56 x 6 57 x 3 71 x 1...
- Page 17 STEP 8 45 x 2 25 x 2 26 x 4 56 x 4 64 x 1 57 x 2 Please note correct position of Pulley Wheel Covers ✗ ✓...
- Page 18 assembly instruction STEP 9 Please note correct position of Pulley Wheel Covers 25 x 2 ✗ ✓ 26 x 4...
- Page 19 STEP 10 Install Part #83 & #84 rst. NOTE: Plate face front.
- Page 20 assembly instruction STEP 11 73 x 4 86 x 4 RIGHT PEC ARM 74 x 2 94 x 4 95 x 2 Lubricate Part #11 and #12 with furniture polish before tting of #21. 73 95 FULLY TIGHTEN BOLT REPEAT ON LEFT ARM Fit Part #21 rst.
- Page 21 STEP 12 75 x 2 76 x 2 Fit arms onto main assembly and secure.
- Page 22 assembly instruction STEP 13 Please note correct position of Pulley Wheel Covers 25 x 1 33 x 1 57 x 1 ✗ ✓ 56 x 1 26 x 2 89 x 1 Secure ball end of cable rst using Part 92 x 1 32 x 1 91 x 1...
- Page 23 STEP 14 Please note correct position of Pulley Wheel Covers 25 x 2 56 x 2 ✗ ✓ 26 x 4 57 x 2 34 x 1 61 x 2 START HERE Screw Part #34 halfway into Part #36, please leave room for adjustments.
- Page 24 assembly instruction STEP 15 61 x 1 25 x 2 26 x 4 35 x 1 57 x 1 60 x 1 56 x 1 HOOK CABLE HERE Please note correct position of Pulley Wheel Covers FULLY ✗ ✓ ASSEMBLED NYLOC &...
- Page 25 STEP 16 Please note correct position of Pulley Wheel Covers 56 x 2 ✗ ✓ 57 x 1 87 x 1 FIX CABLE END HERE Attach end of cable with washer & nyloc as illustrated. START HERE...
-
Page 26: Assembly Instruction
assembly instruction STEP 17 30 x 1 98 x 2 73 x 2... - Page 27 STEP 18 72 x 2 73 x 2 Wide end of #18 to be tted at front.
- Page 28 assembly instruction STEP 19 31 x 1 73 x 4 54 x 4...
- Page 29 STEP 20 39 x 1 40 x 3 Go back and tight all nuts & bolts before use.
-
Page 30: Operational Instruction
operational instructions Press 1. Loosen hand wheel 2. Push hand wheel upwards out of way 3. Proceed with press exercise HAND WHEEL 1. Make sure that the hand wheel is in the down position and screwed in tightly 2. Proceed with pec exercise HAND WHEEL Lat &... -
Page 31: Leg Extension
Leg Extension 1. Remove preacher pad by removing pin WEIGHT LOCK 2. Place pin behind seat in storage hole When in use loosen 3. Remove chain Screw in Locking Collar so it moves up & down Freely. 4. Proceed with exercise To prevent accidents when not in use ensure the Weight Lock Collar is secured. -
Page 32: Warranty
This warranty does not extend to any product that has been damaged or rendered defective: (a) as a result of accident, misuse, abuse or lack of reasonable care; (b) by the use of parts not manufactured by York Fitness or sold by York Fitness; (c) by modification of the product; (d) as a result of service by anyone else other than York Fitness or an authorized York Fitness warranty service provider. -
Page 33: Exploded Drawing
exploded drawing... - Page 34 exploded drawing...
- Page 36 exploded drawing...
-
Page 37: Part List
part list YORK REF. Ref. Description Qty. YORK REF. Ref. Description Qty. 50023-1 MAIN STABILIZER ASSEMBLY - RIGHT 50023-51 SQUARE FLAT INTERNAL END CAP (SQ-45MM / 1.5MM TUBE) 50023-2 50023-52 MAIN STABILIZER ASSEMBLY - LEFT RECTANGLE FLAT INTERNAL END CAP (25 X 50MM / 1.5MM TUBE) 50023-3 WEIGHT TUBE MOUNT ASSEMBLY - SHORT 50023-53...
Need help?
Do you have a question about the Heritage G101 Gym and is the answer not in the manual?
Questions and answers