Advertisement
Advertisement

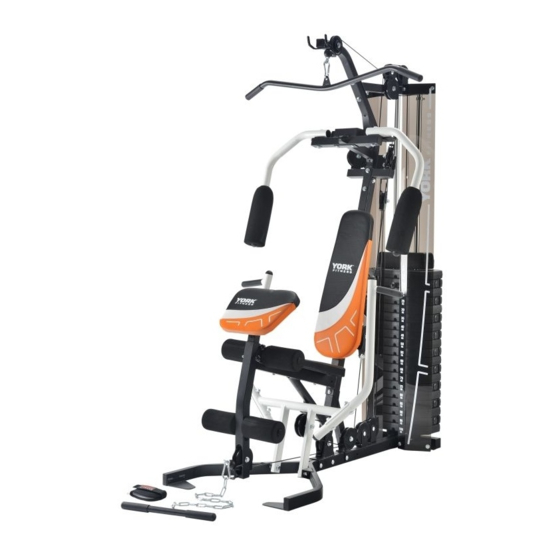
Related Manuals for York Fitness 50033


Summary of Contents for York Fitness 50033
- Page 1 Owner’s Manual Perform Multi Gym 50033 3NOV2011 www.yorkfitness.com...
-
Page 2: Table Of Contents
Table of contents Congratulations on CONTENTS purchasing your exercise equipment from Safety information Customer support Care & Maintenance You have chosen a high quality, safe and innovative piece of equipment as your training Assembly instructions partner and we are certain it will keep you motivated on the way to achieving your personal fitness goals. -
Page 3: Safety Information
Safety information Please read this instruction manual before you • The equipment is under no circumstances suitable begin assembly. Great care has been taken as a children’s toy. to design these instructions and following • Parents and others in charge of children should be aware of their responsibility, because the natural them will help you with quicker assembly and play instinct and the fondness of experimenting of minimize the risk of injury. children can lead to situations and behaviour for which the training equipment is not intended It is important that you keep these instructions... -
Page 4: Customer Support
• Place of purchase • Information about the place and conditions of use • Precise description of the issue / defect IMPORTANT!! - Please retain your sales receipt, York Fitness Customer Care may request proof of purchase to validate eligibility for warranty service. Warranty cover starts from the date shown on the proof of purchase. -
Page 5: Care & Maintenance
Assembly instructions Care & Maintenance • We recommend placing a mat beneath the equipment to protect both the equipment and your flooring • Always place the equipment in a dry environment. • Use a warm, damp cloth to keep the product clean. • The safety level of the equipment can be maintained only if it is regularly examined for damage and wear, at least once a week is recommended. - Page 6 Assembly instructions STEP 1 FIXINGS: FIXINGS: Bush L-12mm Carriage bolt M10 x 70mm Flat washer ID10 x OD23mm Nyloc nut M10 HH bolt M10 x 70mm Ensure bolt passes through bottom of part 4 Ensure bolt passes through bottom of part 4 www.yorkfitness.com...
- Page 7 STEP 2 FIXINGS: FIXINGS: Carriage bolt M10 x 70mm Flat washer ID10 x OD23mm Nyloc nut M10 HH bolt M10 x 60mm Fit this part rst www.yorkfitness.com...
- Page 8 Assembly instructions STEP 3 FIXINGS: FIXINGS: Ball lock pin L-112mm Weight lock collar Cross head screw M6 x 10mm Fit weights 23 one at a time and alternate the direction the caps face www.yorkfitness.com...
- Page 9 STEP 4 FIXINGS: FIXINGS: Bush L-6mm Flat washer ID10 x OD23mm Nyloc nut M10 Carriage bolt M10 x 62mm Carriage bolt M10 x 65mm HH bolt M10 x 55mm HH bolt M10 x 65mm www.yorkfitness.com...
- Page 10 Assembly instructions STEP 5 FIXINGS: FIXINGS: FIXINGS: Flat washer ID10 x OD23mm Nyloc nut M10 Ensure cables are located in grooves on entry/exit of pulley Carriage bolt M10 x 50mm HH bolt M12 x 72mm Flat washer ID12 x OD25mm Nyloc nut M12 Plastic bolt cap HH bolt M10 x 90mm...
- Page 11 STEP 6 FIXINGS: FIXINGS: Bush L-12mm Bush L-8.5mm Flat washer ID10 x OD23mm Nyloc nut M10 HH bolt M10 x 82mm HH bolt M10 x 80mm HH bolt M10 x 60mm HH bolt M10 x 65mm www.yorkfitness.com...
- Page 12 Assembly instructions STEP 7 FIXINGS: FIXINGS: Flat washer ID10 x OD23mm Nyloc nut M10 Carriage bolt M10 x 50mm Note correct allignment Note correct allignment of covers of covers www.yorkfitness.com...
- Page 13 STEP 8 FIXINGS: FIXINGS: Flat washer ID10 x OD23mm CS Philips screw M4 x 10mm Allen head bolt M12 x 40mm Nyloc nut M10 Flat washer ID12 x OD25mm HH bolt M10 x 75mm Carriage bolt M10 x 60mm Nyloc nut M12 Plate at front www.yorkfitness.com...
- Page 14 Assembly instructions STEP 9 FIXINGS: FIXINGS: Flat washer ID10 x OD23mm Allen head bolt M8 x 20mm Nyloc nut M10 Flat washer ID8 x OD28mm Carriage bolt M10 x 60mm Carriage bolt M10 x 55mm Ensure cam at rear of pec arm Ensure cam at rear of pec arm www.yorkfitness.com...
- Page 15 STEP 10 FIXINGS: FIXINGS: Flat washer ID10 x OD23mm Carriage bolt M10 x 50mm Insert cable here Flat washer ID12 x OD38mm Nyloc nut M10 Fit pulley into cable loop Fit washer before cable Fully Assembled Warning: Very important information It is very important to ensure that there are enough threads engaged into the top of the selector stem.
- Page 16 Assembly instructions STEP 11 FIXINGS: FIXINGS: Carriage bolt M10 x 55mm Flat washer ID10 x OD23mm Nyloc nut M10 Carriage bolt M10 x 50mm Hook cable here Fit pulley into cable loop Nyloc & washer tted in next step Fully Assembled www.yorkfitness.com...
- Page 17 STEP 12 FIXINGS: FIXINGS: Flat washer ID10 x OD23mm Nyloc nut M10 Carriage bolt M10 x 50mm Fully Assembled Fit pulley into cable loop Insert cable here www.yorkfitness.com...
- Page 18 Assembly instructions STEP 13 FIXINGS: FIXINGS: Carriage bolt M10 x 70mm Nyloc nut M10 Flat washer ID10 x OD23mm HH bolt M10 x 25mm www.yorkfitness.com...
- Page 19 STEP 14 FIXINGS: FIXINGS: Flat washer ID8 x OD20mm HH bolt M8 x 55mm www.yorkfitness.com...
- Page 20 Assembly instructions STEP 15 FIXINGS: FIXINGS: HH bolt M8 x 65mm Flat washer ID8 x OD20mm Wide end of upholstery at front www.yorkfitness.com...
- Page 21 STEP 16 FIXINGS: FIXINGS: Ball lock pin L-70mm Flat washer ID8 x OD20mm Allen head bolt M8 x 15mm Wide side at top www.yorkfitness.com...
- Page 22 Assembly instructions STEP 17 FIXINGS: FIXINGS: Flat washer ID8 x OD20mm HH bolt M8 x 15mm www.yorkfitness.com...
- Page 23 STEP 18 Final Checks Your gym is now assembled. Please make the following final checks before you use it for the first time: • Make sure all screws / bolts are tightened • Make sure you have positioned it on a flat, level surface www.yorkfitness.com...
-
Page 24: User Instructions
User instructions Low pulley & preacher curl • Preacher curl pad has 2 height settings Ensure ball lock pin is inserted to lock leg back Keep your feet on the floor when using the low pulley – do not use the foam rollers Leg developer • Remove preacher curl pad & chain •... -
Page 25: Fitness Guide
Fitness guide Starting Your Workout Begin each workout with a Warm Up session - a few minutes of stretching to help prevent strains, pulls and cramps. 1. Perform some gentle stretching 2. Do light cardiovascular exercise (i.e. cycle) for approx 5-10 mins 3. ‘Dry-run’ one exercise per body part without using weights to ensure muscles and joints are warm Finishing Your Workout End each work-out with a warm down session – the purpose of this is to lower your heart rate slightly and to prevent strains, pulls and cramps. -
Page 26: Exploded Drawing
Exploded drawing www.yorkfitness.com... - Page 27 www.yorkfitness.com...
- Page 28 Exploded drawing www.yorkfitness.com...
- Page 29 www.yorkfitness.com...
-
Page 30: Part List
Part list YORK REF. PART NO. DESCRIPTION 50033-001 Main Stabilizer Assembly with Fwd Mount - Right 50033-002 Main Stabilizer Assembly with Fwd Mount - Left 50033-003 Weight Tube Mount Assembly - Short 50033-004 Weight tube (Ø25.4 x 1768.2 x 2mm) - Page 31 Cover Mount Assembly 50033-089 Square Spacer 50033-090 Brace Assembly 50033-091 Plastic Cover - Smoke Blue 50033-092 Cover Decal - “York Fitness” 50033-093 Allen Head Bolt (M12 x 40mm) 50033-094 Hex Head Bolt (M10 x 75mm) 50033-095 Carriage Bolt (M10 x 60mm) 50033-096...
- Page 32 www.yorkfitness.com...
Need help?
Do you have a question about the 50033 and is the answer not in the manual?
Questions and answers