NuWave Pro Plus Manual Manual
Hide thumbs
Also See for Pro Plus:
- User manual ,
- Manual and cookbok (102 pages) ,
- Owner's manual (12 pages)
Table of Contents
Advertisement
Advertisement
Table of Contents

Related Manuals for NuWave Pro Plus


Summary of Contents for NuWave Pro Plus
- Page 1 PRO PLUS NuWave Oven Pro Plus Manual & Complete Cookbook...
-
Page 2: Important Safeguards
IMPORTANT SAFEGUARDS When using electrical products, especially when children are present, basic safety precautions should always be followed, including the following: READ ALL INSTRUCTIONS BEFORE USING DANGER – To reduce the risk of electrocution: Read all instructions, safeguards, and warnings before using the appliance. -
Page 3: Save These Instructions
Do not disassemble the product. There are no user serviceable parts. Do not leave the appliance unattended while in use. Use the handles when lifting the dome from the base. Do not touch hot surfaces. Use the handles provided or use oven mitts. -
Page 4: Table Of Contents
Owner’s Manual ........10-17 Stuffed Peppers with Tofu ....49 RoHS Compliant .......... 18 Roasted Vegetables Sandwich ..49 NuWave Supreme Pizza Kit ....19-21 Roasted Herb Potatoes ....50 Cauliflower, Chickpeas & Olives ..50 Quick & Easy Cooking Guide ....22-23 Roasted Butternut Squash .... - Page 5 Contendio Pork ............Baked Ham in Cola ......75 Introducción ..........102 Asian Marinated Pork Chops .... 75 Partes & Accessorios ......103-105 Pork Chops with Mustard Sauce ..76 Maual Del Usario ........ 106-113 Adobo Cutlets ........76 Normas RoHS ........... 114 Thai Pork Tenderloin ......
-
Page 6: Introduction
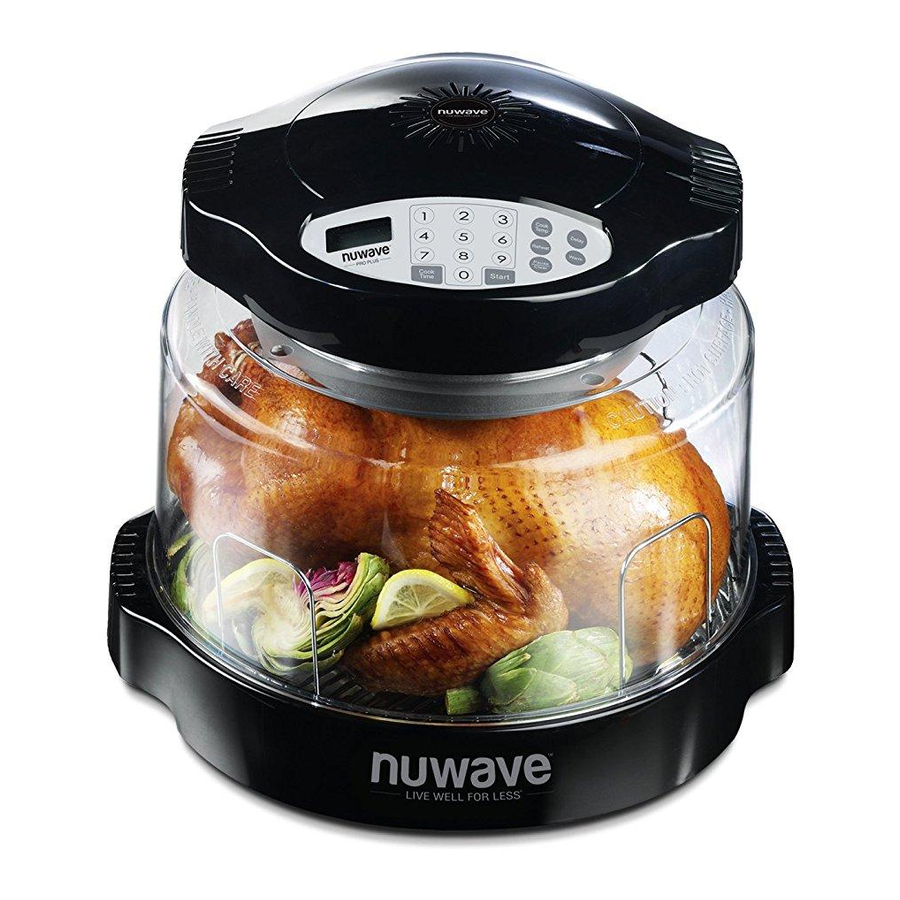
Preparing foods with the NuWave Oven Pro Plus is a healthy choice. No butters or oils are required when cooking, and its unique design drains two to three times the amount of fat drippings when compared with a conventional oven. - Page 7 Parts for the NuWave Oven Pro Plus Power Head - easy-to-use, programmable digital controls. Dome - BPA-free, transparent, and lightweight. Cooking Rack - reversible to heights of 1-inch or 3-inch. Non-Stick Liner Pan - easy clean, eco- friendly, non-stick, no PTFE, and no PFOA.
- Page 8 ¿Quieres Registro rápido y fácil? Enjoy your NuWave Oven for 3 to 4 weeks before returning your registration card. Regístrese por internet en www.NuWaveNow.com Disfrute de su NuWave Oven de 3 a 4 semanas antes de regresar a su tarjeta de registro. Mrs. Miss...
-
Page 9: Parts & Accessories
Stainless Steel Pizza Flipper 22042 Silicone Pizza Liner 22105 Stainless Steel Pizza Server 22106 100% Bamboo Cutting Board 22107 NuWave Pro Plus Baking Kit 26019 Kit includes: 8x8-inch Silicone Baking Pan 22111 Silicone Baking Divider 22112 Silicone Cupcake Liner (set of 12) 22113... -
Page 10: Assembly
Set cook time and temperature according to recipe requirements. BEFORE USING: Prior to the first use of your NuWave Oven, wash Dome, Liner Pan, Base, and Cooking Rack in warm soapy water or run through a dishwasher cycle. IMPORTANT Do not wash or immerse Power Head in water or cycle through dishwasher. -
Page 11: Cooking Instructions
How to Install and Use Dome Holder Make sure the Power Head is tightly locked onto the Dome. The whole assembly can be easily lifted and put aside as shown in steps 1, 2 and 3. Step 1 Place Dome Holder under either side of base handle. - Page 12 440 cubic inches when using the 3-inch Ring. When adding the Extender Ring to the NuWave Oven, make sure it fits snugly onto the dome. When the Ring is placed under the dome incorrectly, the overlapping edges will not fit together properly.
-
Page 13: Ring Kit
Models Containing Extender Ring Kit 10-inch Non-Stick Baking Pan 2-inch Rack The 2-inch Rack for the NuWave Oven Pro Plus can be used in a variety of ways. 2-inch Cooking Rack 1] It can be the primary rack with or without the Extender Ring. -
Page 14: Control Panel
• Be certain that the liner pan has been properly placed within the base. k Control Panel Graphic • Do not place the Pro Plus or any associated parts directly on your stove top, inside a conventional oven or in contact with any other direct heat source. Damage may result. -
Page 15: Reheat Function
Setting Temperature • Press the Cook Temp button. • Press desired temperature. • Temperature can be changed by 1ºF increments. • Temperature ranges from 100ºF to 350ºF. Start Cooking Set appropriate temperature and time, then press Start to begin cooking. The remaining cooking time will appear in the display panel, and the colon symbol between the hours and minutes will blink. - Page 16 The Manufacturer will provide the necessary parts and labor to repair any part of the infrared cooking system at NuWave, LLC. Service Department. After the expiration of the warranty, the cost of the labor and parts will be the responsibility of the owner.
- Page 17 THE WARRANTY DOES NOT COVER The non-stick coating (if applicable) on any part of the cooking system. The Limited Warranty is voided if repairs are made by an unauthorized dealer or the serial number data plate is removed or defaced. Normal deterioration of finish due to use or exposure is not covered by this Warranty.
-
Page 18: Rohs Compliant
At NuWave, LLC., we have taken a great amount of care in ensuring that our products are safe and secure for every household. All NuWave Ovens are built and manufactured in strict compliance with RoHS* standards. Although US manufacturers are not bound by law to follow... -
Page 19: Nuwave Supreme Pizza Kit
Achieve hot, fresh, better-than-just-delivered pizza at home... AS EASY AS 1 - 2 - 3 when you use your NuWave Oven and the Supreme Pizza Kit! Whether you prefer your pizza thin, regular or deep dish...your NuWave Oven, along with the Supreme... - Page 20 Pizza Liner with your NuWave Oven Note Make sure the reversible rack is positioned as the 3-inch rack in the NuWave Oven. 1. Place the Pizza Liner over the top of your pizza. 2. Place pizza upside down on the 3-inch rack. Cook at 350ºF, until crust of pizza is a light brown in color.
- Page 21 Perfect Pizza Every Time! Pizza baked in the NuWave Oven is delicious without exception, so the only thing left to do is ENJOY! CAUTION The edges of the spatula and pizza cutter are sharp.
-
Page 22: Quick & Easy Cooking Guide
140+˚ 6-8 min/side Hot Wings 3-inch 140+˚ 6-8 min/side PLEASE READ BOOKLET FOR COMPLETE INSTRUCTIONS. General Guidelines Only. These are not meant to be recipes. All cooking guidelines may vary. 26014-UA-Q01 Copyright ©2014 by NuWave, LLC. All rights reserved. www.NuWaveNow.com... -
Page 23: Quick & Easy Cooking Guide
3-pulg 140+˚ Hot Wings - Alitas de Pollo 3-pulg 140+˚ 6-8 min/lado LEA EL INSTRUCTIVO PARA INSTRUCCIONES COMPLETAS. Estas son instrucciones únicamente. No utilizar como rectas. Las instrucciones pueden variar. 26014-UA-Q01 Copyright ©2014 by NuWave, LLC. All rights reserved. www.NuWaveNow.com... -
Page 24: Complete Cookbook (General Tips)
NUWAVE OVEN COMPLETE COOKBOOK... -
Page 25: General Tips
Timing is the key to perfection with the beginning of each section that will help you NuWave Oven Pro Plus. Keep in mind that achieve perfect cooking results every time. all cooking guidelines are just that, and may Also visit NuWaveCookingClub.com for other... -
Page 26: Breakfast
Tips for Breakfast Bacon: Cook at 350˚F on the 3-inch rack for 5-6 minutes per side.Sprinkle on brown sugar 5 minutes before finished for a sweet taste. For easy cleanup, place aluminum foil in the liner pan. Once the grease solidifies, discard the foil. -
Page 27: Easy Quiche Pie
Easy Quiche Pie 3. Hold breadstick by each end and twist. Serves: 6 4. Set on 3-inch rack and bake at 350°F for 12 minutes, turning 1 cup ham, chopped once. 4 large mushrooms, medium chopped Tip: If you prefer softer twists, bake 1 cup loosely packed spinach for 9 minutes. -
Page 28: Nuwave Muffin Sandwich
NuWave Muffin Sandwich Steak & Eggs Serves: 2 Serves: 1 2 large eggs 1 (4-ounce) sirloin steak 2 English muffins, split in half Seasoned salt to taste 2 slices Canadian bacon ½ tomato, seeds removed 2 slices American cheese 2 tablespoons Parmesan cheese, Salt &... -
Page 29: Ham & Cheese Strata
1½ cups milk Nest Egg with Manchego 1 teaspoon dry mustard Serves: 1 ¼ teaspoon red bell pepper 1½ cups corn flakes 1 bread slice 4 tablespoons butter, melted 1 teaspoon butter or cooking spray 1 egg Directions: 3 tablespoons Manchego cheese 1. -
Page 30: Appetizers
Tips for Appetizers Prepared foods from your grocer’s freezer section make great, easy snacks for appetizers or entertaining. These items are prepared to perfection on the 3-inch rack at 350˚F for about 6-10 minutes per side. Some of the most popular choices include: Hot wings Corn dogs Bagel bites... -
Page 31: Sweet Party Mix
Sweet Party Mix Stuffed Potato Bites Yield: 6 cups Serves: 2 2 cups bite-size corn square cereal 2 medium baked potatoes 2 cups bite-size rice square cereal ¼ cup low-fat sour cream 1 cup pretzel knots 1 packet ranch seasoning ½... -
Page 32: Sweet & Sour Cocktail Meatballs
Sweet & Sour Cocktail Meatballs 9. Place meatballs in sauce to coat, then place in chafing dish or in Serves: 20 liner pan to serve. 4 slices hearty white sandwich Tip: Unless you have the Extender bread, torn into pieces Ring Kit, you will need to bake ½... -
Page 33: Grilled Cheese
Tangy Mild Wings Grilled Cheese Serves: 2-4 Serves: 1 2 pounds chicken wings 2 slices wheat or white bread 1 cup ketchup 1 tablespoon margarine or butter ¼ bead molasses 2 slices American cheese ¼ cup soy sauce ½ teaspoon red pepper flakes Directions: ½... -
Page 34: Prosciutto-Wrapped Shrimp Sticks
Prosciutto-Wrapped Ham & Cheese Pitas Shrimp Sticks Serves: 4 Yield: 6 skewers 4 (8-inch) pita bread rounds 4 thin slices ham, cut in half 48 medium shrimp, uncooked 4 slices sharp Cheddar or Swiss ¾ pound thinly sliced prosciutto cheese, cut in half 3 tablespoons olive oil 1 red onion, very thinly sliced 8 (6-inch) bamboo skewers... -
Page 35: Spicy Grilled Shrimp Skewers
Spicy Grilled Shrimp Skewers Jumbo Lump Crab Cakes Serves: 4 Yield: 4 large crab cakes 1½ pounds extra-large shrimp, 16 ounces jumbo lump crab meat peeled and deveined ⅔ cup fresh or canned white 4 tablespoons unsalted butter, bread crumbs melted and divided 2 teaspoons Dijon mustard ¼... -
Page 36: Hot Artichoke Dip
Hot Artichoke Dip Italian Purses Yield: 4 cups Yield: 16 purses 1 cup mayonnaise 2 (8-ounce) canned crescent rolls ¼ cup minced fresh garlic clove ½ pound Italian sausage or ground 1 (8-ounce) package cream beef, cooked and crumbled cheese, softened ½... -
Page 37: Crab & Parmesan Wontons
Crab & Parmesan Wontons Chicken Nachos Serves: 4 Serves: 2 24 wonton wrappers 2 chicken breasts, pounded to 4 ounces lump crab meat, 1-inch thickness pre-cooked ½ cup red or green peppers, 3 tablespoons Vidalia onion, grated chopped 2 tablespoons Parmesan cheese, ½... -
Page 38: Dehydration
Tips for Dehydration & Nuts Roasting Nuts: Use pan on 3-inch rack and cook at 350˚F. Pecan or almond pieces, 3-4 minutes. Coconut, unsweetened and shredded, 1-2 minutes. Whole nuts can be roasted in two layers: For example, start one layer in liner pan for 6 minutes and then place another pan, filled with nuts, on 3-inch rack and continue for another 5 minutes. -
Page 39: Spiced Pecans
Spiced Pecans 7. Spread pecans evenly in liner pan. 8. Cook at 350°F for 7-8 minutes. Yield: 2 cups 9. Immediately remove dome and stir pecans. 1 package taco seasoning mix 10. Continue cooking at 350°F for 5 tablespoons sugar, divided additional 7-8 minutes. -
Page 40: Beef Jerky
Beef Jerky Trail Mix Yield: 11 cups Yield: 1 pound 1 cup dried cranberries 1 pound lean beef sliced thin (sliced 1 cup dried blueberries lengthwise with the grain) 1 cup dried pineapple ¼ cup soy sauce 1 cup dried apple pieces 3 tablespoons Worcestershire sauce 1 cup peanuts 1 tablespoon garlic powder... -
Page 41: Pizza
Tips for Pizza To cook a regular crust frozen pizza, place the pizza upside down inside the NuWave Silicone Pizza Liner and then cook according to directions. You can also use parchment paper instead of the Silicone Pizza Liner. To finish, flip the pizza so it is cheese side up and cook for an additional 3-5 minutes, until the cheese melts. -
Page 42: Italian Pizza Burger
Italian Pizza Burger Gorgonzola Pizzettas Serves: 4 Serves: 5-6 4 (7-inch) flatbreads or pita breads ½ cup pizza sauce, divided 1½ cups part-skim ricotta cheese 1 egg, beaten 16 grape or cherry tomatoes, halved ½ cup dry bread crumbs ¼ cup sliced basil 2 teaspoons onion, dried &... -
Page 43: Pizza Boats
Pizza Boats Calzones Serves: 3-4 Serves: 2 4 (6-inch long) slices French bread 1 tube refrigerated pizza dough ¾ cup pizza sauce 1 cup Mozzarella or Monterey Jack ½ cup Parmesan cheese, grated cheese, shredded 4 slices provolone or Mozzarella ½... -
Page 44: Mini Spinach Calzones
Mini Spinach Calzones Pita Pizza Serves: 1 Serves: 12 1 package (8-9-inch) soft pita bread 1 (5-ounce) package frozen spinach, 2 tablespoons tomato sauce thawed and well-drained ¼ cup parsley, freshly chopped 1 (4-ounce) package reduced-fat 6-8 slices pepperoni cream cheese, softened ½... -
Page 45: Vegetables
Tips for Vegetables Glass, oven-safe dishes are denser than metal, foil and silicone. Metal and foil also reflect heat so this will heat faster than glass, which absorbs heat. Silicone will absorb the heat instead of reflect, however it is thinner than oven-safe glass, so silicone will decrease the cooking time compared to an oven-safe glass dish. -
Page 46: Mexican Elote
Mexican Elote Zucchini & Onions Au Gratin Serves: 2-4 Serves: 2-4 4 ears of corn 1 large yellow onion, cut into ½-inch ¼ cup melted butter pieces ¼ cup mayonnaise 1 medium zucchini, cut into ½-inch ½ cup Cotija cheese or Queso slices Fresco, grated 1 tablespoon olive oil... -
Page 47: Asparagus With Parmesan Crust
Asparagus with Parmesan Crust Sweet Potato Casserole with Streusel Topping Serves: 6 Serves: 4-6 1 pound asparagus 1 tablespoon extra virgin olive oil 4 sweet potatoes 1 ounce Parmesan cheese, shaved cup and 3 tablespoons butter ¼ cup balsamic vinegar ½... -
Page 48: Artichoke Feta Tortilla Wraps
Artichoke Feta Tortilla Wraps Stuffed Peppers with Tofu with Chive Sauce Serves: 4 Yield: 24 Rolls 1 cup brown rice 1 (12-ounce) package extra firm tofu, 1 (14-ounce) can artichoke hearts, drained and diced drained and finely chopped 1¾ cups marinara sauce, divided ½... -
Page 49: Roasted Vegetables Sandwich
Roasted Spaghetti Squash Roasted Vegetables Sandwich Serves: 4-5 Serves: 4 1 spaghetti squash, cut in half 1 cup plain fat-free Greek-style crosswise and seeds removed yogurt 2 teaspoons sugar 1½ tablespoons tahini 2 teaspoons salt 1 tablespoon fresh lemon juice Extra-virgin olive oil as needed ½... -
Page 50: Roasted Herb Potatoes
Roasted Herb Potatoes Roasted Butternut Squash Serves: 6 Serves: 4-5 2 pounds small new potatoes 1 butternut squash, cut in half lengthwise and seeds removed 2 tablespoons olive oil 1 tablespoon salt 2 teaspoons sugar ½ teaspoon black pepper 2 teaspoons salt Extra-virgin olive oil as needed 2 tablespoons fresh rosemary, coarsely chopped... -
Page 51: Stuffed Baked Potatoes With Bacon
Stuffed Baked Potatoes with Tip: Cook bacon on 3-inch rack at 350°F for 5-6 minutes Bacon per side. Serves: 6 Tip: Larger potatoes will take longer. 6 medium baking potatoes, washed and dried Parmesan Basil Tomatoes 1 cup milk, slightly heated Serves: 4 1 cup sharp Cheddar cheese, grated 3 tablespoons butter or margarine... -
Page 52: Double Stuffed Cheesy Potatoes
Double Stuffed Cheesy Potatoes Ricotta Spinach Rolls Serves: 4-6 Serves: 4 8 lasagna noodles, cooked and 4 russet potatoes, thoroughly drained washed 1 medium onion, finely chopped 2 tablespoons butter 2 cloves garlic, minced ½ teaspoon salt 1 tablespoon butter ⅛... -
Page 53: Gratin Dauphinois
Gratin Dauphinois Eggplant, Zucchini, & Tomato Tian Serves: 6 Serves: 6 6 cups small red potatoes, washed ½ cup fresh or dry bread crumbs and thinly sliced ½ cup Parmesan cheese, grated ½ cup white onion, finely diced 2 tablespoons flat leaf parsley 2 cloves garlic, finely minced 1½... -
Page 54: Aparagus, Mushrooms & Potatoes
Roasted Asparagus, 13. Cook at 350°F for 26-28 minutes, pausing every 8 minutes to Mushrooms & Potatoes remove cooked vegetables. Serves: 2-3 14. Remove asparagus after 8 minutes. Remove mushrooms 10 stalks asparagus, woody ends after 16 minutes. Cook potatoes of stalks broken for entire 24 minutes. -
Page 55: Caramelized Onions
Cheese Stuffed Tomatoes Caramelized Onions Serves: 6 Serves: 4 3 Roma tomatoes 1 (½-pound) Vidalia onion, halved and 1 cup Mozzarella cheese cut into slices ½ cup Parmesan cheese 2 tablespoons extra virgin olive oil 1 tablespoon fresh thyme 3 tablespoons garlic cloves, minced 1 tablespoon fresh basil 1 teaspoon brown sugar ¼... -
Page 56: Corn Soufflé
2. Transfer mixture to 10-inch 5. When timer goes off, let soufflé sit greased baking pan or casserole inside dome for 2 minutes. pan that will fit into NuWave 6. Serve and enjoy. Oven. 3. Place pan on 1-inch rack and Tip: If you use a larger pan, you will cook at 350°F for 15-17 minutes. -
Page 57: Broiled Zucchini Slices
Broiled Zucchini Slices Balsamic Glazed Carrots Serves: 12 Serves: 6 2 cloves garlic, minced 1 pound fresh carrots, washed 2 tablespoons olive oil and cut into thin round slices 1 tablespoon fresh rosemary, 2 tablespoons olive oil roughly chopped 1 teaspoon salt ⅛... -
Page 58: Poultry
Tips for Poultry Poultry should be turned halfway through the cooking process for even browning. When adding your favorite dry seasonings to frozen poultry, lightly brush with oil or sprinkle cold water on it beforehand; this will allow seasonings to adhere. Brush sauces onto fresh poultry so the seasonings bake right in. -
Page 59: Spicy Buffalo Chicken Sandwiches
Spicy Buffalo Chicken Sandwiches Oven-Fried Chicken Serves: 4 Serves: 4 3 tablespoons butter, melted ½ cup buttermilk ½ cup buffalo-style hot sauce, divided 1 tablespoon Dijon mustard 4 hoagie rolls, split 2 cloves garlic, minced cup ranch dressing 1 teaspoon hot sauce ½... -
Page 60: Chicken Tenders With Wasabi Sauce
Chicken Tenders with Wasabi Thai Chicken Dipping Sauce Serves: 1 Serves: 4 1 (4 – 6-ounce) chicken breast, cut into bite size pieces 3 (1-pound) boneless, skinless 2 tablespoons Thai green curry paste chicken breasts, cut crosswise 2 tablespoons fresh ginger, grated into ½-inch strips 2 tablespoons garlic, minced ⅔... -
Page 61: Breaded Chicken Breast
Breaded Chicken Breast Creamy Chicken Breast with Mushrooms & Peppers Serves: 1 Serves: 1 1 cup seasoned bread crumbs 2 tablespoons butter 1 (4 – 6-ounce) chicken breast 1 egg, beaten 2 large mushrooms, sliced 1 (4 – 6-ounce) boneless chicken ½... -
Page 62: Cornish Hens, Artichokes & Potatoes
Cornish Game Hens with Cilantro Garlic Chicken Breast Artichokes & Potatoes Serves: 6 Serves: 4 6 (6-ounce) boneless, skinless chicken breasts 2 tablespoons lemon juice 4 cloves garlic, peeled 3 cloves garlic 1 small onion, peeled 2 tablespoons extra-virgin olive oil 1 cup loosely packed fresh cilantro 1 teaspoon oregano leaves... -
Page 63: Buttery Chicken Breast
Buttery Chicken Breast Caraway Duck with Raspberry Sauce Serves: 1 Serves: 2-3 1 (4 – 6-ounce) boneless chicken breast 1 whole duck (2 legs, 2 thighs, 2 2 tablespoons butter wings, 2 breasts, all cut in half) 4 tablespoons parsley, chopped 1 tablespoon caraway seed, crushed Salt &... -
Page 64: Nutty Breading Chicken Breast
Nutty Breading Chicken Breast Low-Fat Crunchy Filled Chicken Serves: 4 Serves: 1 4 boneless chicken breasts 1 egg, beaten 3 ounces low-fat Cheddar cheese, ½ cup pecans, ground sliced 1 tablespoon wheat germ 1 tablespoon Dijon mustard 1 teaspoon Italian seasoning blend, 1 cup corn flakes, crushed dried 1 teaspoon parsley flakes, dried... -
Page 65: Air Fried Honey Ginger Chicken
Air-Fried Honey Ginger Crusted 3. Brush mixture over chicken breasts. Chicken 4. Combine corn flakes and parsley Serves: 4 and pat onto chicken. 5. Place chicken in prepared baking 4 (4-ounce) boneless, skinless chicken dish and place on 3-inch rack. breasts 6. -
Page 66: Beef
Tips for Beef Turning beef halfway through cooking time allows for even browning. To use your favorite dry seasonings on frozen meat, sprinkle cold water on it beforehand; this will allow seasonings to adhere. Brush sauces on fresh meats to infuse flavors. Rub with olive oil to achieve maximum browning. -
Page 67: Glazed Beef Ribs
Glazed Beef Ribs Foolproof Standing Rib Roast Serves: 2 Serves: 6-8 1 rack beef ribs, cut in half 1 (5-pound) standing rib roast, Salt & pepper to taste thawed ½ cup orange marmalade 1 teaspoon onion powder 2 teaspoons Dijon mustard 1 teaspoon kosher salt 1 teaspoon lemon juice 1 teaspoon black pepper... -
Page 68: Grilled Cheeseburgers
Grilled Cheeseburgers Yankee Pot Roast Serves: 4-6 Serves: 4 2½-3 pounds chuck or shoulder 1 pound lean ground beef roast 1 tablespoon Worcestershire sauce 3 large potatoes, cleaned and 1 egg peeled into quarters ½ cup dry bread crumbs 4 large carrots, cut on bias ½... -
Page 69: Beef & Andouille Burgers
Beef & Andouille Burgers 2. Store burgers in refrigerator while preparing remaining ingredients. with Caramelized Onions 3. Place sweet onion, 2 tablespoons & Spicy Mayonnaise olive oil, garlic and brown sugar Serves: 6 in liner pan. 4. Cook onion mixture at 350°F for ½... -
Page 70: Homestyle Meatloaf
Homestyle Meatloaf Classic NuWave Pot Roast Serves: 8 Serves: 4-6 1 tablespoon olive oil 2½ pounds chuck or shoulder roast 1 medium onion, chopped 1 tablespoon olive oil 3 garlic cloves, finely chopped Fajita seasoning mix 1½ pounds lean ground beef... -
Page 71: Three-Meat Fajita Dinner
Pepper Steak Three-Meat Fajita Dinner Serves: 4-6 Serves: 2 1-2 pounds sirloin steak 10 ounces meat (flank steak, Salt for taste chicken or pork) ½ cup peppercorns, crushed 1 large Spanish onion 1 green pepper Directions: 1 red pepper 1. Salt steak and press 1 yellow pepper peppercorns into both sides. -
Page 72: Beef & Corn Casserole With Noodles
Beef & Corn Casserole Baked Reuben Sandwich with Noodles Serves: 1 Serves: 4 2-4 tablespoons butter, softened 2 slices rye bread 1 (12-ounce package) 2 ounces corned beef, thinly sliced macaroni noodles ¼ cup sauerkraut, squeezed dry 1 pound ground beef 1 slice Swiss or Gruyere cheese ½... -
Page 73: Boneless Rump Roast
Boneless Rump Roast 4. Place roast, garlic side down, on onions. Serves: 4-6 5. Roast at 350°F for 15 minutes per pound to achieve medium-rare; 4 – 5-pound boneless rump roast 18 minutes per pound for 4-6 cloves whole garlic medium and 22 minutes per 1 teaspoon fresh cracked pound for well-done. -
Page 74: Pork
Place aluminum foil or parchment paper loosely over the pork to prevent overbrowning. Be sure to secure foil to sides of rack or extend it outside the oven to prevent the NuWave Pro Plus Infrared Oven’s internal fan from blowing the foil around during the cooking process. -
Page 75: Baked Ham In Cola
Baked Ham in Cola Asian Marinated Pork Chops with Pineapple Relish Serves: 25 Serves: 4 1 (10-pound) bone-in ham 1 can cola 4 (1 – 1½-inch thick) pork chops 1 cup brown sugar 1 teaspoon ground ginger ¼ teaspoon black pepper Directions: ¼... -
Page 76: Pork Chops With Mustard Sauce
Pork Chops with Mustard Sauce Thai Pork Tenderloin Serves: 6 Serves: 1 2 (12-ounce) pork tenderloins 1 (4 – 6-ounce) pork chop 2 cloves garlic, minced 2 tablespoons butter 1 tablespoon ginger root, chopped 1 tablespoon prepared mustard 2 tablespoons fresh cilantro, chopped 1 tablespoon cream 3 tablespoons hoisin sauce ½... -
Page 77: Kielbasa Casserole With Rice
Kielbasa Casserole with Avocado BLTs Rice & Vegetables Serves: 4 Serves: 4-6 ½ pound bacon slices 1 whole baguette, cut into 4 equal 1 (10½-ounce) can condensed cream pieces and split open of celery soup, undiluted 4 tablespoons extra-virgin olive oil ¾... -
Page 78: Italian Sausage With Peppers
Italian Sausage with Peppers Hot Dogs Serves: 4 Serves: 1 4 Hot dogs 4 ounces Italian sausage 4 Hot dog buns 1 red bell pepper, stem and seeds removed and sliced Directions: 3 scallions, cut into 1-inch crosscut 1. Place hot dogs on 3-inch rack and slices cook at 350°F for 6 minutes per 2 cloves garlic, minced... -
Page 79: Chilied Pork Chops
Chilied Pork Chops Glazed Spareribs Serves: 4 Serves: 4 4 (1-inch) loin pork chops 1 rack pork spareribs 6 tablespoons extra virgin olive oil 1 cup orange marmalade, melted 2 cloves garlic, minced 2 teaspoons Dijon mustard 1 teaspoon oregano 1 teaspoon lemon juice 1 teaspoon cumin 1 tablespoon Worcestershire sauce... -
Page 80: Seafood
To steam fish, place aluminum foil or parchment paper over the top. Be sure to secure the foil to the sides of the rack or extend it outside the oven to prevent the NuWave Pro Plus Infrared Oven’s internal fan from moving foil around during the cooking process. -
Page 81: Tuna Noodle Casserole
Tuna Noodle Casserole Shrimp with Lemon Serve: 4-6 Serves: 2 2 (5-ounce) cans tuna, drained 12 large shrimp, peeled and 2 cups egg noodles, cooked deveined 1 (10½-ounce) can cream of 1 tablespoon lemon juice mushroom soup 2 tablespoons olive oil ½... -
Page 82: Sweet Chili Scallops
Sweet Chili Scallops Clams & Sausage Serves: 4 Serves: 1 16-18 ounces sea scallops 1 sausage, crumbled ⅛ cup olive oil 8 littleneck clams, cleaned 1 tablespoon soy sauce 1 clove garlic, minced 1 tablespoon sweet chili powder Chopped cilantro to taste 1 tablespoon ground cumin Lemon slices as needed Hot sauce to taste... -
Page 83: Lemon Salmon With Mango Salsa
Lemon Salmon with Grilled Salmon & Fresh Basil Mango Salsa Serves: 4 Serves: 4 3 tablespoons lemon juice ¼ cup fresh basil leaves, minced Salmon Ingredients: 1 tablespoon olive oil 4 (6-ounce) salmon fillets 1 tablespoon soy sauce 2 tablespoons lemon juice 1 teaspoon Worcestershire sauce 1 tablespoon olive oil 1 garlic clove, minced... -
Page 84: Peppered Tuna With Hoisin Sauce
Peppered Tuna with Tuna with Fresh Orange Salsa Hoisin Sauce Serves: 4 Serves: 4 4 (5–6-ounce) tuna steaks, ½-inch thick Tuna Ingredients: ½ teaspoon ground cumin 4 (5–6-ounce) tuna steaks, 1 tablespoon olive oil ½-inch thick ½ teaspoon salt 1 teaspoon peppercorns, crushed ¼... -
Page 85: Artichoke Topped Tilapia
Artichoke Topped Tilapia Bass with Fennel Serves: 4 Serves: 1 4 (6 – 8-ounce) tilapia filets 6 ounces stripped or black bass, 2 tablespoons olive oil 1-inch thick 1 tablespoon Italian herb seasoning 1 teaspoon fennel seeds, crushed 1 teaspoon soy sauce 1 tablespoon olive oil 1 cup prepared artichoke antipasto 1 tablespoon lemon juice... -
Page 86: Cheesy Crab Melts
Cheesy Crab Melts Ancho Chili Crusted Salmon Tacos Serves: 6 Serves: 4 7 ounces jumbo lump crab meat 4 (6-ounce) salmon filets ½ cup Cheddar or Asiago 1 tablespoon canola oil cheese, shredded 1 teaspoon ground ancho chili ¼ cup celery, finely chopped powder ¼... -
Page 87: Lamb
Tips for Lamb To use your favorite dry seasonings on frozen meat, sprinkle cold water on it or lightly brush oil on beforehand; this will allow seasonings to adhere. Brush sauces on fresh meats to infuse flavors. To save time, marinate in a sealed bag or container and freeze into separate servings. -
Page 88: Herb Stuffed Lamb Chops
Herb Stuffed Lamb Chops Lamb Chops with Feta & Tomatoes Yield: 6 lamb chops Serves: 4 6 (2-inch) lamb chops 1 stick soft, unsalted butter 2 tablespoons olive oil 3 cloves garlic, minced 1 clove garlic 1 tablespoon fresh parsley, chopped 1 tablespoon lemon juice 1 tablespoon fresh tarragon, 4 (1-inch) lamb chops... -
Page 89: Lamb With Pesto
Lamb with Pesto Lamb Kabob Serves: 4 Serves: 1 2 pounds leg of lamb, trimmed 1 (6-ounce) sirloin chop and cut into 2-inch cubes ½ cup packed fresh basil leaves 1 large green bell pepper, cored 1 tablespoon toasted pine nuts and cut into 8 equal pieces 2 cloves garlic 1 red onion, quartered... -
Page 90: Desserts
Many recipes in this section call for the use of the Silicone Baking Ring, 8x8-inch Silicone Baking Pan, and Silicone Cupcake Liners, all of which can be found in the NuWave Baking Kit. If you’d like to purchase the NuWave Baking Kit and take your baking to the next level, visit www. -
Page 91: Pumpkin Whoopie Cookies
Pumpkin Whoopie Cookies Cream Cheese Filling Ingredients: 1 (8-ounce package) cream Yields: 24 cookies cheese, softened 1 cup butter, softened 1 cup vegetable oil 4½ cups powdered sugar 2 cups packed light brown sugar 2 teaspoons pure vanilla extract 2 large eggs 1 cup pumpkin puree, canned Cream Cheese Filling Directions: or fresh... -
Page 92: Pound Cake
5 minutes at batter onto liner pan 3 inches a time. apart. 11. Remove from NuWave; let cool 6. Bake at 300˚F for 14 minutes or in pan for 15 minutes. until crisp around the edges. -
Page 93: Easy Lemon Cookies
8. Bake additional 20-25 minutes, or until lightly browned and For multi-level baking: edges are bubbly. 1. Place Extender Ring on NuWave 9. Let cool for 1 hour on wire rack. Oven base. Slice each loaf into finger size 2. Place cookies in liner pan as bars. -
Page 94: Bread Pudding With Whiskey Sauce
Bread Pudding with Directions: 1. Break bread into oven-safe Whiskey Sauce casserole dish, no bigger than Serves: 6 1½ quarts. 2. Soften bread with small amount 10 slices day old white bread of milk. 4 tablespoons white sugar 3. Beat sugar and egg yolks. 3½... -
Page 95: Almond Tart
Almond Tart Angel Food Cake (Box) Serves: 8 Serves: 10-12 10-12 ounces ginger snaps, 1 cake mix box (prepared) broken into pieces 1 metal tube pan 1 stick unsalted butter, cut into Water cubes 12 ounces chopped almonds Directions: 4 eggs 1. -
Page 96: Golden Ginger Nut Lemon Bars
Golden Ginger Nut Lemon Bars Ginger Bar Directions: 1. Prepare lemon curd and set Serves: 8-10 aside. 2. Combine flour, sugar, baking 2 cups all-purpose flour soda and salt in a large bowl; cut ½ cup powdered sugar in butter with a pastry blender ½... -
Page 97: Blueberry Streusel Coffee Cake
1 cup fresh or frozen blueberries 6. Sprinkle streusel topping over 1 cup chopped pecans batter. 7. Place Extender Ring on NuWave Streusel Topping Ingredients: Oven base. ½ cup sugar 8. Place 1-inch rack in base tray. - Page 99 PRO PLUS Horno Infrarrojo de The NuWave Pro Plus Libro de recetas & Manual Completos...
- Page 100 IMPORTANTES MEDIDAS DE SEGURIDAD Cuando utilice productos eléctricos, especialmente cuando haya niños presentes, se deben tomar precauciones básicas, incluyendo las siguientes: LEA TODAS LAS INSTRUCCIONES ANTES DE USARSE PELIGRO – Para reducir el riesgo de electrocución: • Lea todas las instrucciones, medidas de seguridad y advertencias antes de utilizar el electrodoméstico.
- Page 101 • No desarme el producto. Las partes no sirven por sí solas. • No deje el electrodoméstico desatendido si está en uso. • Use las asas cuando levante el domo de la base. • No toque las superficies calientes. Utilice las asas o use guantes para hornear.
-
Page 102: Introducción
Cocinar es rápido y fácil con el NuWave® Pro Plus Infrared Oven de NuWave, LLC. Este versátil electrodoméstico de barra combina el calor del infrarrojo, de la conducción y de la convección para ahorrar tiempo y energía, mientras elimina calorías y grasa de su... - Page 103 Partes del NuWave Pro Plus Infrared Oven Fuente de Potencia- fácil de usar, controles digitales programables. Domo- libre de BPA, transparente y ligero. Rejilla para Cocinar- ajustable a alturas de 1ó 3 pulgadas. Cacerola Antiadherente- fácil de limpiar, ecológica, antiadherente, sin PTFE o PPOA.
-
Page 104: Partes & Accessorios
¿Quieres Registro rápido y fácil? Enjoy your NuWave Oven for 3 to 4 weeks before returning your registration card. Regístrese por internet en www.NuWaveNow.com Disfrute de su NuWave Oven de 3 a 4 semanas antes de regresar a su tarjeta de registro. Mrs. Miss... - Page 105 Funda de Silicón para Pizza 22105 Servidor de Acero Inoxidable para Pizza 22106 Tabla para Cortar 100% de Bambú 22107 Kit para Hornear del NuWave Pro Plus 26019 El Kit incluye: Molde para Hornear de Silicón de 8x8 pulgadas 22111 Divisor para Hornear de Silicón...
- Page 106 Programe el tiempo de cocinado y la temperatura de acuerdo a las indicaciones de la receta. ANTES DE USARSE: Antes de usar su NuWave Oven por primera vez, lave el domo, la cacerola, la base y la rejilla con agua tibia con jabón o lávelos en el lavavajillas.
- Page 107 Cómo Instalar y usar el Asa para el Domo Asegúrese de que la Fuente de Potencia esté firmemente asegurada en el Domo. Entonces el ensamble completo podrá ser levantado fácilmente y separado como se muestra en los pasos 1, 2 y 3. Paso 1 Coloque el Asa para el Domo debajo de cualquiera de los agarres de la base.
- Page 108 Modelos que contienen el Aro Extensor de 3 pulgadas Si su NuWave Oven incluye un Aro Extensor de 3 pulgadas, éste puede ser utilizado para cocinar en multiniveles o para piezas de comida demasiado grandes que no cabrían dentro del domo estándar.
- Page 109 No toque el domo ni alguna otra superficie del área de cocinar mientras esté funcionando. El aire dentro del domo puede alcanzar una temperatura de Pro Plus 350˚F (182˚C), por lo que la superficie se encuentra muy caliente y puede causar quemaduras. No abra el domo o quite la fuente de potencia mientras el NuWave Oven esté...
-
Page 110: Maual Del Usario
• Asegúrese de que la cacerola haya sido colocada correctamente dentro de la base. • No coloque el Pro Plus o cualquier otra parte relacionada directamente en su estufa, dentro de un horno convencional o en contacto con alguna otra fuente de calor, ya que se puede dañar. - Page 111 0 el horno “sonará” para avisar el fin. Función de Recalentado Automáticamente está programado a Pro Plus por 4 minutos. Esta función es perfecta para recalentar porciones individuales de alimentos. Para activar la función de recalentado, asegúrese de que la programación previa haya sido borrada.
- Page 112 Departamento de Servicio de NuWave, LLC. Después de la fecha de caducidad de la garantía, el costo de las partes o mano de obra será...
- Page 113 GARANTÍAS IMPLICADAS DE MERCANTILISMO Y BUENA FORMA PARA UN PROPÓSITO PARTICULAR PARA CUALQUIER OTRA PERSONA. LEA SU MANUAL DE USUARIO. SI USTED AÚN TIENE DUDAS SOBRE EL FUNCIONAMIENTO O LA GARANTÍA DEL PRODUCTO, POR FAVOR CONTACTE A NuWave, LLC. 1-877-689-2838, correo electrónico: help@nuwavenow.com...
-
Page 114: Normas Rohs
En NuWave, LLC. hemos tenido un gran cuidado en asegurarnos de que nuestros productos sean seguros y confiables para todo hogar. Todos los NuWave® Pro Plus Infrared Oven están hechos y fabricados bajo estricto cumplimiento de las normas RoHS. Aunque los fabricantes estadounidenses no están obligados por ley a seguir las... - Page 115 ¡TAN FÁCIL COMO EN UN DOS POR TRES cuando utiliza su NuWave Oven y el Kit Pizza Supreme! Como sea que prefiera su pizza; delgada, regular o muy gruesa… ¡su NuWave Oven junto con su Kit Pizza Supreme harán magia!
-
Page 116: Equipo Supremo Para Pizza
Pizza en su NuWave Oven Nota Asegúrese de que la rejilla reversible esté en la posición de 3 pulgadas dentro el NuWave Oven. 1. Coloque la Funda encima de su pizza. 2. Coloque la pizza boca abajo sobre la rejilla de 3 pulgadas. - Page 117 Rebanando y Sirviendo con el Servidor de Acero Inoxidable para Pizza NuWave Rebanador Rodante Tome el mango de tal forma que el Servidor esté arriba, permitiéndole así usar el Cortador de Pizza. Rebanador de Sierra Tanto el Cortador como el Servidor pueden ser usados para rebanar otros alimentos como quesadillas, panini, sándwiches, quiche y...
-
Page 118: Tabla De Preparación Rápida Y Fácil
140+˚ 6-8 min/side Hot Wings 3-inch 140+˚ 6-8 min/side PLEASE READ BOOKLET FOR COMPLETE INSTRUCTIONS. General Guidelines Only. These are not meant to be recipes. All cooking guidelines may vary. 26014-UA-Q01 Copyright ©2014 by NuWave, LLC. All rights reserved. www.NuWaveNow.com... - Page 119 3-pulg 140+˚ Hot Wings - Alitas de Pollo 3-pulg 140+˚ 6-8 min/lado LEA EL INSTRUCTIVO PARA INSTRUCCIONES COMPLETAS. Estas son instrucciones únicamente. No utilizar como rectas. Las instrucciones pueden variar. 26014-UA-Q01 Copyright ©2014 by NuWave, LLC. All rights reserved. www.NuWaveNow.com...
-
Page 120: Recetas
LIBRO DE COCINA COMPLETO HORNO NUWAVE... -
Page 121: Consejos Generales
Horno favor acordarse de levantar la cúpula para que el Infrarrojo de NuWave Pro Plus en tu vida diaria. vapor se canalice lejor de tu cara. Hemos provisto recetas fáciles de preparar, junto con consejos útiles en el comienzo de cada sección... -
Page 122: Huevos Con Chorizo
25 minutos. Alternativa Para derretir mantequilla en el NuWave coloquela en un recipiente apto para hornear y póngalo en la cacerola o en la rejilla de 1-pulgada. Hornee a 350˚F por alrededor de 3-4 minutos. -
Page 123: Pechuga De Pollo A La Mantequilla
Pechuga de Pollo a la Camarones a la Cerveza Mantequilla 1 libra de camarones crudos* 4 dientes de ajo machacados 4-6 onzas de pechuga 1 taza de cerveza 2 cucharadas de mantequilla 1 cucharada de sazonador Old Bay 4 cucharaditas de perejil picado sal y pimienta al gusto Coloque todos los ingredientes en un plato para pay y póngalo en la rejilla de 3-pulgads. -
Page 124: Elote Estilo Mexicano
Elote Estilo Mexicano Papas a la Parmesana 2 papas para hornear grandes 4 elotes aceite de oliva al gusto ¼ taza de mantequilla derretida sal y pimienta al gusto ¼ taza de mayonesa ½ taza de queso Parmesano ½ taza de queso Cotija rallado o queso fresco Corte ½... -
Page 125: Albóndigas
Cena Mexicana Albóndigas 1 onzas de arrachera, pollo o cerdo 1 libra de carne molida 1 cebolla española grande 1 taza de crutones 1 pimiento verde ½ taza de salsa de spaghetti preparada 1 pimiento rojo 2 dientes de ajo picados 1 pimiento amarillo ½... -
Page 126: Helado De Piña Caramelizado
Manzana Crujiente Helado de Piña Caramelizado 4 rebanadas de piña fresca sin 4 manzanas peladas, sin hueso y rebanadas a un grosor de ⅛-pulgada hueso (de 1” de grosor) ½ taza de harina ½ taza de azúcar morena ½ cucharadita de canela ½... - Page 128 Model 20611-20699: 120V, 60Hz, 1500Watts Model 20605-20610: 230V, 50Hz, 1500Watts ™ ® Designed & Developed in U.S.A. by: NuWave, LLC. 1755 N. Butterfield Road, Libertyville, IL 60048 1.877.689.2838 M-F 8:00AM-4:30PM CST © 2014 NuWave, LLC. All Rights Reserved. 26013 UA-C01...
Need help?
Do you have a question about the Pro Plus and is the answer not in the manual?
Questions and answers