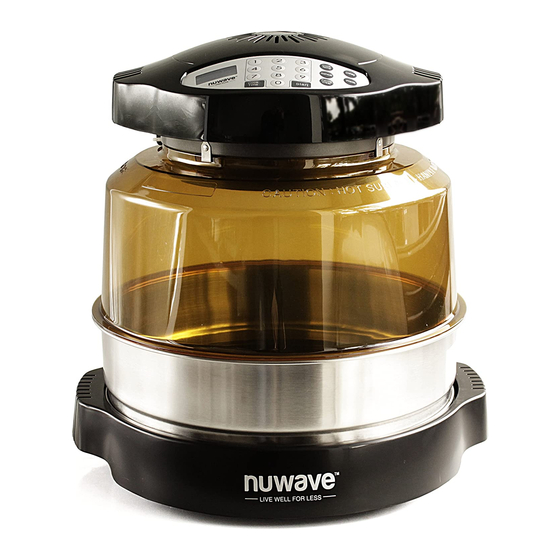
NuWave Oven Pro Plus Owner's Manual
Hide thumbs
Also See for Oven Pro Plus:
- User manual ,
- Manual manual (128 pages) ,
- Manual and cookbok (102 pages)
Advertisement
Quick Links
Connecting Power Head to Dome
1. Place Power Head on rim of the Dome
2. Lock it into place by rotating the Power
Head clockwise until the locking lugs
are engaged.
Assembling the Full NuWave Oven
Place Base Tray on a firm, stable
surface, but never on a stovetop.
Place Liner Pan inside Base Tray. When
doing so, make sure the handles are
in the dropped down position. If the
handles are not fully dropped, the Dome
may not fit over the Base properly.
Place dual level Cooking Rack in
the Liner Pan according to cooking
requirements.
Place food on Rack.
Place Dome with Power Head over food,
connecting to the Base Tray. The Dome
should fit evenly onto the Base.
Set cook time and temperature
according to recipe requirements.
Owner's Manual
10
NuWave
Oven Pro Plus
®
Assembly Guide
BEFORE USING:
Prior to the first use of your NuWave Oven,
wash Dome, Liner Pan, Base, and Cooking
Rack in warm soapy water or run through a
dishwasher cycle.
IMPORTANT
Head in water or cycle through dishwasher. The
outer surface may be cleaned by wiping carefully
with a damp dishcloth or sponge.
-
Do not wash or immerse Power
Lock
Advertisement

Summary of Contents for NuWave Oven Pro Plus
- Page 1 Base. Set cook time and temperature according to recipe requirements. BEFORE USING: Prior to the first use of your NuWave Oven, wash Dome, Liner Pan, Base, and Cooking Rack in warm soapy water or run through a dishwasher cycle.
-
Page 2: Cooking Instructions
How to Install and Use Dome Holder Make sure the Power Head is tightly locked onto the Dome. The whole assembly can be easily lifted and put aside as shown in steps 1, 2 and 3. Step 1 Place Dome Holder under either side of Base handle. - Page 3 440 cubic inches when using the 3-inch Ring. When adding the Extender Ring to the NuWave Oven, make sure it fits snugly onto the Dome. When the Ring is placed under the Dome incorrectly, the overlapping edges will not fit together properly.
- Page 4 The air inside the Dome can reach 350°F (177°C) which makes the surface very hot and may cause burns. Do not open the Dome or remove the power head while the NuWave Oven is operating. Turn off the power before removal Owner’s Manual...
- Page 5 • Be certain that Liner Pan has been properly placed within the Base. • Metal, glass or silicone dishes and pans, and all other oven-safe materials used in a conventional oven may be utilized in the NuWave Pro Plus. • Always place the Dome back onto the Base when finished cooking.
- Page 6 ˚F/˚C Conversion The default temperature setting is Fahrenheit (˚F) but the NuWave Oven Pro Plus can display Celsius (˚C) as well. 1. Press and hold Cook Temp for 3 seconds to activate ˚F/˚C conversion mode. The LED Display will display “350” and TEMP will be flashing.
-
Page 7: Cleaning And Care Instructions
Delay Function After setting your temperature and time, you can delay the program before cooking starts. When entering Delay function, it will always be the first function. The delay function is only for cook time and delaying start time. When you enter in desired cook time, cook temperature, then Delay, Delay will be illuminated and Time will blink on the LCD display. -
Page 8: Important Tips
IMPORTANT TIPS 1. Check the power outlet to ensure proper operation. NuWave Oven uses up to 1500 watts/12.5 amps. Do not operate the unit simultaneously with other major appliances plugged into the same outlet. 2. Check the cooking temperature if Oven is cooking too slowly. -
Page 9: To Obtain Service
WARRANTIES OF MERCHANTABILITY AND FITNESS FOR A PARTICULAR PURPOSE TO ANY OTHER PERSON. READ YOUR OWNER’S MANUAL. IF YOU STILL HAVE ANY QUESTIONS ABOUT OPERATION OR WARRANTY OF THE PRODUCT, PLEASE CONTACT NuWave, LLC 1-877-689-2838 Monday email: help@nuwavenow.com Owner’s Manual... - Page 10 At NuWave, LLC, we have taken a great amount of care in ensuring that our products are safe and secure for every household. All NuWave Ovens are built and manufactured in strict compliance with RoHS* standards. Although US manufacturers are not bound...
- Page 11 Achieve hot, fresh, better-than-just-delivered pizza at home... AS EASY AS 1 - 2 - 3 when you use your NuWave Oven and the Supreme Pizza Kit! Whether you prefer your pizza thin, regular or deep dish...your...
- Page 12 Pizza Liner with your NuWave Oven ® Note: Make sure the reversible rack is positioned as the 3-inch rack in the NuWave Oven. 1. Place the Pizza Liner over the top of your pizza. 2. Place pizza upside down on the 3-inch rack.


Need help?
Do you have a question about the Oven Pro Plus and is the answer not in the manual?
Questions and answers