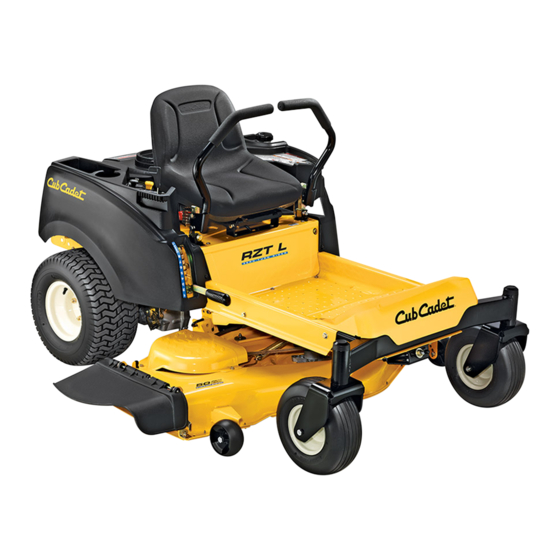
Cub Cadet RZT50 Operator's Manual
Rzt series
Hide thumbs
Also See for RZT50:
- Operator's manual (112 pages) ,
- Operator's manual (85 pages) ,
- Operator's manual (32 pages)
Table of Contents
Advertisement
Available languages
Available languages
Safe Operation Practices • Set-Up • Operation • Maintenance • Service • Troubleshooting • Warranty
O
'
M
peratOr
s
anual
RZT Series Tractor — Model RZT50
WARNING
READ AND FOLLOW ALL SAFETY RULES AND INSTRUCTIONS IN THIS MANUAL
BEFORE ATTEMPTING TO OPERATE THIS MACHINE.
FAILURE TO COMPLY WITH THESE INSTRUCTIONS MAY RESULT IN PERSONAL INJURY.
CUB CADET LLC, P.O. BOX 361131 CLEVELAND, OHIO 44136-0019
Printed In USA
Form No. 769-03513
(Oct., 2007)
Advertisement
Table of Contents

Related Manuals for Cub Cadet RZT50


Summary of Contents for Cub Cadet RZT50
- Page 1 READ AND FOLLOW ALL SAFETY RULES AND INSTRUCTIONS IN THIS MANUAL BEFORE ATTEMPTING TO OPERATE THIS MACHINE. FAILURE TO COMPLY WITH THESE INSTRUCTIONS MAY RESULT IN PERSONAL INJURY. CUB CADET LLC, P.O. BOX 361131 CLEVELAND, OHIO 44136-0019 Printed In USA Form No. 769-03513...
- Page 2 Choose from the options below: ◊ Visit us on the web at www.cubcadet.com ◊ Locate your nearest Cub Cadet Dealer at (877) 282-8684 ◊ Write us at Cub Cadet LLC • P.O. Box 361131 • Cleveland, OH • 44136-0019...
-
Page 3: Important Safe Operation Practices
Important Safe Operation Practices WARNING: This symbol points out important safety instructions which, if not followed, could endanger the personal safety and/or property of yourself and others. Read and follow all instructions in this manual before attempting to operate this machine. Failure to comply with these instructions may result in personal injury. - Page 4 If not Mow across slopes, not up and down. Exercise extreme functioning properly, contact an authorized Cub Cadet caution when changing direction on slopes. Dealer for safety system inspection and repair.
- Page 5 Children When practical, remove gas-powered equipment from the truck or trailer and refuel it on the ground. Tragic accidents can occur if the operator is not alert to the If this is not possible, then refuel such equipment on presence of children. Children are often attracted to the a trailer with a portable container, rather than from a machine and the mowing activity.
- Page 6 Notice Regarding Emissions Check the blade(s) and engine mounting bolts at frequent intervals for proper tightness. Also, visually inspect blade(s) Engines which are certified to comply with California and federal for damage (e.g., excessive wear, bent, cracked). Replace EPA emission regulations for SORE (Small Off Road Equipment) the blade(s) with the original equipment manufacturer’s are certified to operate on regular unleaded gasoline, and (O.E.M.) blade(s) only, listed in this manual.
- Page 7 2 — s ectiOn peratiOn ractices...
- Page 8 Assembly & Set-Up Contents of Crate • One Lawn Tractor • One Oil Drain Tube • One Deck Wash Hose Coupler • One RZT Tractor Operator’s • One Kawasaki Engine Operator’s • One Product Registration Card Manual Manual TRACTOR PREPARATION Note the grooves in the seat adjust spacers attached to the bottom of the seat, then lift the seat and Remove the upper crating material from the shipping...
- Page 9 Position Drive Control levers NOTE Make sure the ignition switch is in the “OFF” position before attaching the battery cable. The drive control levers of the tractor are lowered for Pull the protective cap (if present) off the negative shipping purposes. The flange lock nuts, hex screws, and terminal of the battery, and remove the hex cap screw flat washers that normally secure the control levers in and nut from the free end of the negative battery...
-
Page 10: Controls And Features
Controls and Features Figure 4-1 Deck Height Index Storage Tray Deck Lift Handle Seat Adjustment Lever (Not Visible) RH and LH Drive Control Levers Fuel Tank Cap Ignition Switch Hour Meter/Indicator Panel PTO Switch Throttle Control Transmission Bypass Rod (Not Shown) Choke Control Cup Holder Parking Brake Engagement Lever... - Page 11 C. RH and LH Drive Control Levers When engaged, the two rods open a bypass within the hydrostatic transmissions, which allows the tractor to be The RH and LH control levers are located on each side of pushed short distances by hand. Refer to Maintenance & the operator’s seat.
- Page 12 Contact Pull the lever fully upward and to the left; then lower into your Cub Cadet dealer to have the tractor and engine the short “J” slot to engage the brake. inspected.
-
Page 13: Safety Interlock System
Avoid operation on traction surfaces that are unstable; should ever malfunction, do not operate the tractor. use extreme caution if the surface is slippery. Contact your authorized Cub Cadet Dealer. • Slow down before turning and come to a complete •... -
Page 14: Starting The Engine
Have the tractor is malfunctioning. Periodically check the inspected by your Cub Cadet dealer. functions of the interlock system for proper Cold Weather Starting operation. -
Page 15: Stopping The Engine
• Start the disabled tractor following the normal starting Control Lever Moved Inward and in Neutral instructions previously provided; then disconnect the jumper cables in the exact reverse order of their connection. • Have the tractor’s electrical system checked and repaired as soon as possible to eliminate the need for jump starting. - Page 16 • As the control levers are pushed farther forward the • To execute a “pivot turn,” move the turn side drive speed of the tractor will increase. control lever to the neutral position, while moving the other control lever forward. •...
-
Page 17: Stopping The Tractor
• To turn to the right while traveling in reverse, move the • To turn counterclockwise, move the right control lever right drive control lever forward of the left lever. See forward while simultaneously moving the left control Figure 5-8. lever rearward. - Page 18 If a safety circuit is not working Using the Mower Deck as designed, contact you Cub Cadet dealer to have the WARNING!: Make certain the area to be tractor inspected. DO NOT operate the tractor if any safety mowed is free of debris, sticks, stones, wire circuit is not functioning properly.
- Page 19 Maintenance & Adjustments After the oil has finished draining, push the end of Maintenance the oil drain valve back in, until the tabs click into WARNING! Before performing any place. Re-cap the end of the oil drain valve to keep maintenance or repairs, disengage the PTO, debris from entering the drain port.
- Page 20 Battery Maintenance • Attach the nozzle adapter to a standard garden hose connected to a water supply. • The battery is filled with battery acid and then sealed • Move the tractor to an area within reach of the hose at the factory.
- Page 21 WARNING! : Do not tow the tractor, even with Tractor Storage the bypass rod engaged. Serious transmission If your tractor is not going to be operated for an extended damage will result from doing so. period of time (thirty days to approximately six months), the tractor should be prepared for storage.
- Page 22 Adjusting RH & LH Drive Control Levers Lubricate all lubrication points. The RH and LH drive control levers can be adjusted up or NOTE: We do not recommend the use of a pressure washer or down and fore-and-aft for the comfort of the operator. The garden hose to clean your tractor.
- Page 23 • Tighten the flange lock nut to fix the control lever in • Retighten the hex cap screw on the left deck hanger the adjusted position bracket when proper adjustment is achieved. • Repeat the above procedure to adjust the other control Front to Back Leveling.
- Page 24 Adjusting the Gauge Wheels • Insert the shoulder screw into the one of four index holes in the front gauge wheel bracket that will give the gauge wheel a 1/4 to 1/2 inch clearance with the WARNING!: Keep hands and feet away from ground.
-
Page 25: Maintenance Schedule
Maintenance Schedule Before Every Every Every Every Prior Each use 10 Hours 25 Hours 50 Hours 100 Hours to Storing Clean Hood/Dash Louvers Check Engine Oil Level Check Air Filter for Dirty, Loose or Damaged Parts Clean and Re-oil Air Filter’s Foam Precleaner Replace Air Filter Element Change Engine Oil and Replace Oil Filter Clean Battery Terminals... - Page 26 GOOD Figure 7-2 If you have a recurring problem with blown fuses, have Trim Strip the tractor’s electrical system checked by your Cub Cadet dealer. Relays and Switches Figure 7-1 There are several safety switches in the electrical system. If a function of the safety interlock system described earlier •...
- Page 27 • Working from the middle of the tractor, pivot the idler bracket. After lifting the front hanger rod out of the bracket and movable idler pulley rearward away from slots, slide the deck rearward so that the rod can no the backside of the ‘V”...
- Page 28 Using the idler pulley to tension the belt. PTO Pulley • Using the deck lift handle, raise the deck to the position that provides the most horizontal run of the belt between the deck idler pulleys and the PTO pulley PTO Belt on the bottom of the engine.
- Page 29 Mower Blade Care Transmission Drive Belt If the transmission drive belt becomes worn and causes the WARNING!: Before performing any drive transmissions to slip, the drive belt must be replaced. maintenance, place the PTO switch in the To replace the drive belt, proceed as follows: “OFF”...
- Page 30 Remove the internal cotter pin securing the ferrule to the transmission control arm and withdraw the ferrule. Wheel rotation should stop. If it does not, contact your Figure 7-10 Cub Cadet dealer. • Loosen the jam nut on the stop bolt, then turn the stop •...
-
Page 31: Troubleshooting
Troubleshooting Problem Cause Remedy Engine fails to start PTO/Blade Engage knob engaged. Place knob in disengaged (OFF) position. Parking brake not engaged. Engage parking brake. Drive control levers not fully outward in Move drive control levers fully outward in neutral position. neutral position. -
Page 32: Replacement Parts
Replacement Parts Component Part Number and Description KM-BPR4ES Spark Plug (NGK) KM-11013-7027 Air Filter Element KM-11013-7009 Foam Precleaner KM-49065-2078 Oil Filter KM-49019-7001 Fuel Filter 954-04044A Drive Belt (Mowing Deck) 954-04043A Drive Belt (Transmissions) 942-04053C 2-in-1 Deck Blade 918-04125A Deck Spindle Phone (800) 965-4CUB to order replacement parts or a complete Parts Manual (have your full model number and serial number ready). - Page 33 Component Part Number and Description 734-04155 Deck Wheel (Front) 925-1707D Battery 751-10703 Fuel Tank Cap 746-04214 Choke Control/Cable 746-04066 Throttle Control/Cable 725-1745 Ignition Key 631-04070A Discharge Chute Assembly 634-04321A Caster Wheel Assembly Phone (800) 965-4CUB to order replacement parts or a complete Parts Manual (have your full model number and serial number ready).
- Page 34 Attachments & Accessories The following attachments and accessories are compatible with your Cub Cadet RZT tractor. See your Cub Cadet dealer or the retailer from which you purchased your tractor for information regarding price and availability. Model Number Description 590-303-000...
- Page 35 CALIFORNIA EMISSION CONTROL WARRANTY STATEMENT YOUR WARRANTY RIGHTS AND OBLIGATIONS The California Air Resources Board and MTD Consumer Group Inc are pleased to explain the evaporative emission control system warranty on your 2007 lawn mower. In California, new lawn mower must be designed, built and equipped to meet the State’s stringent anti-smog standards. MTD Consumer Group Inc must warrant the EECS on your lawn mower for the period of time listed below provided there has been no abuse, neglect or improper maintenance of your lawn mower.
- Page 36 Without limiting the foregoing, this limited warranty does not provide coverage in the following cases: The limited warranty set forth below is given by Cub Cadet LLC with respect to new merchandise purchased or leased and used in the a. Routine maintenance items such as lubricants, filters, blade...
- Page 37 LEA Y SIGA TODAS LAS INSTRUCCIONES DE ESTE MANUAL ANTES DE PONER EN FUNCIONAMIENTO ESTA MÁQUINA. SI NO RESPETA ESTAS INSTRUCCIONES PUEDE PROVOCAR LESIONES PERSONALES. CUB CADET LLC, P.O. BOX 361131 CLEVELAND, OHIO 44136-0019 Formulario Nº 769-03513 Impreso en Estados Unidos de América...
- Page 38 Elija entre las opciones que se presentan a continuación: ◊ Visite nuestro sitio web en www.cubcadet.com ◊ Localice a su distribuidor Cub Cadet más cercano llamando al (877) 282-8684 ◊ Escríbanos a Cub Cadet LLC • P.O. Box 361131 • Cleveland, OH • 44136-0019...
- Page 39 Medidas importantes de seguridad ADVERTENCIA: La presencia de este símbolo indica que se trata de instrucciones importantes de seguridad que se deben respetar para evitar poner en peligro su seguridad personal y/o material y la de otras personas. Lea y siga todas las instrucciones de este manual antes de poner en funcionamiento esta máquina.
- Page 40 Cub Cadet para que inspeccionen Para su seguridad, use el indicador de pendientes que se incluye y reparen el sistema de seguridad.
- Page 41 Se puede lesionar gravemente si derrama distribuidor de servicio autorizado Cub Cadet. gasolina sobre usted o sobre la ropa, ya que ésta se puede Controle periódicamente el funcionamiento del sistema incendiar.
- Page 42 Aviso referido a emisiones Revise los pernos de montaje de la(s) cuchilla(s) y del motor a intervalos frecuentes para verificar que estén bien apretados. Además, inspeccione visualmente la(s) cuchilla(s) Los motores que están certificados y cumplen con las regulaciones en busca de daños (por ejemplo, desgaste excesivo, de emisiones federales EPA y de California para SORE (Equipos pequeños todo terreno) están certificados para operar con abolladuras, rajaduras, etc.).
- Page 43 2 — M ección edidas de seguridad...
- Page 44 Montaje y Configuración contenido del cajón • Un tractor corta césped • Un tubo de drenaje de aceite • Un acoplador de manguera para lavado de plataforma • Un Manual del operador del • Un Manual del operador del • Una tarjeta para registrar el tractor RZT motor Kawasaki...
- Page 45 Coloque las palancas de control de la transmisión en posición. Asegúrese de que el interruptor de encendido esté en la NOTA: posición “OFF” (apagado) antes de unir el cable de la batería. Las palancas de control de la transmisión del tractor se Quite el tapón protector (en caso de haber) del borne bajan para el embarque.
- Page 46 Controles y Características Figura 4-1 Posicionamiento de la altura de la plataforma Portacubeta Manija de elevación de la plataforma Bandeja de almacenamiento Palancas de control de transmisión LADO Palanca de ajuste del asiento (no se ve) DERECHO y LADO IZQUIERDO Tapón del depósito de combustible Interruptor de encendido Medidor horario/Panel indicador...
- Page 47 C. Palancas de control de transmisión LADO transmisión, lado derecho y lado izquierdo) están ubicadas debajo de la plataforma del marco, justo dentro de cada DERECHO y LADO IZQUIERDO rueda trasera. Las palancas de control del LADO DERECHO y del LADO Al estar enganchadas, las dos varillas abren una derivación IZQUIERDO se encuentran a cada lado del asiento del dentro de las transmisiones hidrostáticas, lo cual permite...
- Page 48 “J” para colocar el permanece iluminado. Póngase en contacto con el freno. distribuidor Cub Cadet para que se realice la inspección del tractor y del motor. Tire de la palanca hacia arriba para sacarla de la ranura “J”, y hacia la derecha;...
- Page 49 Póngase en contacto con su distribuidor vehículos antes de operar a lo largo de la ruta. autorizado Cub Cadet. • No haga funcionar el tractor sin la plataforma de la •...
- Page 50 Controle periódicamente las funciones de aceite, detenga el motor inmediatamente. Haga del sistema de bloqueo para verificar que controlar el tractor por el distribuidor Cub Cadet. funcionen adecuadamente. Arranque del motor en clima frío ¡ADVERTENCIA!: Por razones de seguridad...
- Page 51 Control Lever Moved • Haga controlar y reparar el sistema eléctrico del tractor Inward and in Neutral lo más pronto que fuere posible, para eliminar la necesidad de usar cables de puente para arrancarlo. Detención del motor • Coloque el interruptor de la potencia de arranque (PTO) en posición “OFF”...
- Page 52 • A medida que las palancas de control se empujan más • Para realizar un “giro de pivote”, mueva la palanca de hacia adelante, aumenta la velocidad del tractor. control del lado de giro a la posición neutral, mientras mueve la otra palanca de control hacia adelante. •...
- Page 53 • Para girar a la derecha mientras se desplaza marcha Para girar en sentido contrario a las agujas del reloj, atrás, mueva la palanca de control del lado derecho mueva la palanca de control del lado derecho hacia hacia adelante respecto de la palanca izquierda. Vea la adelante mientras mueve simultáneamente la palanca Figura 5-8.
- Page 54 ¡ADVERTENCIA!: Asegúrese que el área donde distribuidor Cub Cadet para que inspeccione el tractor. se va a cortar esté libre de desechos, ramitas, NO use el tractor si algún circuito de seguridad no está...
- Page 55 Mantenimiento y Ajustes Después de que termine de drenar el aceite, Mantenimiento empuje el extremo de la válvula de drenaje de ¡ADVERTENCIA! Antes de realizar cualquier tarea aceite hacia adentro, hasta que las lengüetas de mantenimiento o reparaciones, desenganche encajen en su lugar haciendo clic. Vuelva a tapar la potencia de arranque (PTO ), mueva las el extremo de la válvula de drenaje de aceite palancas de control de transmisión totalmente...
- Page 56 • Repita los pasos anteriores para limpiar la plataforma pivote delantero con grasa Cub Cadet 251H EP cada 10 horas de servicio. usando el pico del otro extremo de la plataforma.
- Page 57 ¡ADVERTENCIA! : No remolque el tractor, Almacenamiento del tractor ni siquiera con la varilla de derivación Si el tractor no a va a funcionar por un período prolongado enganchada. La transmisión del tractor sufrirá (desde treinta días hasta aproximadamente seis meses), graves daños.
- Page 58 Ajuste de las palancas de control de transmisión LADo Lubrique todos los puntos de lubricación. DERECHo y LADo IZQUIERDo NOTA: No recomendamos el uso de una lavadora de presión ni de una manguera de jardín para limpiar el tractor. Pueden Las palancas de control del lado derecho y del lado producir daños a los componentes eléctricos, husillos, poleas, izquierdo se pueden ajustar hacia arriba o hacia abajo y...
- Page 59 • Apriete la tuerca de seguridad con brida para fijar la • La plataforma está adecuadamente nivelada cuando las palanca de control en la posición ajustada mediciones desde la punta izquierda y desde la punta derecha de la cuchilla son iguales. •...
- Page 60 • Cuando se alcance la inclinación correcta de la • Retire la tuerca de seguridad que fija uno de los plataforma, fije las tuercas hexagonales interiores con tornillos con reborde de las ruedas de calibración una llave y ajuste las tuercas hexagonales exteriores delanteras a la plataforma.
- Page 61 Calendario de mantenimiento Antes de Cada 10 Cada 50 Cada 100 Antes de Cada 5 horas cada uso horas horas horas almacenar Limpie el capó/los respiraderos Inspeccione el nivel de aceite del motor Controle el filtro de aire para ver si hay piezas sucias, sueltas o dañadas Limpie y vuelva a lubricar el depurador de espuma del filtro de aire...
- Page 62 Hay varios interruptores de seguridad en el sistema eléctrico. Si una función del sistema de bloqueo de seguridad descripto antes no funciona adecuadamente, haga que el distribuidor Cub Cadet revise el sistema eléctrico. Figura 7-1 Retiro de la plataforma •...
- Page 63 Deck Lift Arm Rear Deck ‘V’ Belt Hanger Bracket Pull Idler Pulley Rearward Movable Idler Pulley Deck Rear Hanger Support Fixed Idler Pulley Bracket Slot Idler Bracket Figura 7-4 • Con cuidado para evitar que la varilla de suspensión delantera caiga hacia atrás dentro de las ranuras del Figura 7-3 soporte de la plataforma, (desde el lado derecho) •...
- Page 64 Uso de la polea loca para tensar la correa. PTO Pulley • Usando la manija de elevación de la plataforma, levante la plataforma a la posición que le ofrece mayor recorrido horizontal de la correa entre las poleas locas PTO Belt de la plataforma y la polea de la potencia de arranque en la base del motor.
- Page 65 Cuidado de las cuchillas de la cortadora de césped Correa de transmisión Si la correa de transmisión se desgasta y hace que las ¡ADVERTENCIA!: Antes de realizar cualquier transmisiones patinen es necesario reemplazarla. Para tarea de mantenimiento, coloque el interruptor cambiar la correa de transmisión proceda de la siguiente de la potencia de arranque (PTO) en la posición manera:...
- Page 66 La rueda debe dejar de rotar. Si no lo hace, póngase en contacto con el distribuidor Cub Cadet. • Si deja de rotar, ajuste la férula para arriba o abajo de la Figura 7-10 varilla de control según sea necesario para alinearla con...
- Page 67 Solución de Problemas Problema Causa Solución El motor no arranca Perilla de potencia de arranque (PTO) /enganche de Coloque la perilla en la posición de desconexión (OFF). cuchilla conectada. No está colocado el freno de mano. Coloque el freno de mano. Coloque las palancas de control de transmisión Las palancas de control de transmisión no están totalmente hacia afuera en la posición neutral.
- Page 68 Piezas de reemplazo Componente Número de pieza y Descripción KM-BPR4ES Bujía (NGK) KM-11013-7027 Elemento del filtro de aire KM-11013-7009 Depurador de espuma KM-49065-2078 Filtro de aceite KM-49019-7001 Filtro de combustible 954-04044A Correa de transmisión (plataforma de corte) 954-04043A Correa de transmisión (Transmisiones) 942-04053C Cuchilla de plataforma 2-en-1 918-04125A...
- Page 69 Componente Número de pieza y Descripción 734-04155 Rueda de plataforma (delantera) 925-1707D Batería 751-10703 Tapón del depósito de combustible 746-04214 Control/cable del cebador 746-04066 Control/Cable del regulador 725-1745 Llave de encendido 631-04070A Conjunto de canal de descarga 634-04321A Conjunto de rueditas Llame por teléfono al (800) 965-4CUB para solicitar piezas de reemplazo o un Manual de Piezas de Repuesto completo (tenga el número de modelo y número de serie de su tractor a mano).
- Page 70 Aditamentos y accesorios Los siguientes aditamentos y accesorios son compatibles con su tractor Cub Cadet RZT. Consulte con su distribuidor Cub Cadet o con el representante al cual le ha comprado el tractor para obtener más información con respecto a precios y disponibilidad.
- Page 71 DECLARACIÓN DE GARANTÍA DE CONTROL DE EMISIONES DE CALIFORNIA DERECHOS Y OBLIGACIONES DE SU GARANTÍA El Departamento de los Recursos de Aire de California y MTD Consumer Group Inc, se complacen en explicar la garantía del sistema de control de emisiones por evaporación de su cortadora de césped 2007.
- Page 72 El daño resultante de la instalación o el uso de piezas, accesorios En ningún caso se obtendrá una compensación mayor al monto o complementos no aprobados por Cub Cadet para su uso con el o del precio de compra del producto vendido. La modificación de las los productos incluido(s) en este manual anulará...