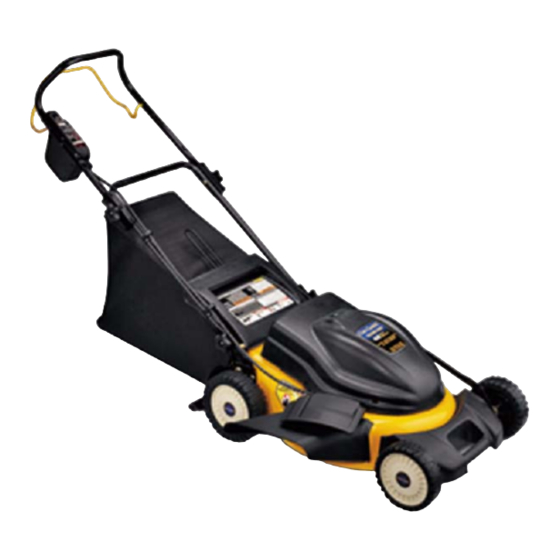
Cub Cadet CC500 BAT Operator's Manual
Rechargeable mower
Hide thumbs
Also See for CC500 BAT:
- Specifications (2 pages) ,
- Brochure (2 pages) ,
- Operator's manual (40 pages)
Table of Contents
Advertisement
Safe Operation Practices • Set-Up • Operation • Maintenance • Service • Troubleshooting • Warranty
O
'
M
peratOr
s
anual
Rechargeable Mower — Model CC500 BAT
WARNING
READ AND FOLLOW ALL SAFETY RULES AND INSTRUCTIONS IN THIS MANUAL
BEFORE ATTEMPTING TO OPERATE THIS MACHINE.
FAILURE TO COMPLY WITH THESE INSTRUCTIONS MAY RESULT IN PERSONAL INJURY.
CUB CADET LLC, P.O. BOX 361131 CLEVELAND, OHIO 44136-0019
Printed In USA
Form No. 769-06685
(November 29, 2010)
Advertisement
Table of Contents

Related Manuals for Cub Cadet CC500 BAT


Summary of Contents for Cub Cadet CC500 BAT
- Page 1 READ AND FOLLOW ALL SAFETY RULES AND INSTRUCTIONS IN THIS MANUAL BEFORE ATTEMPTING TO OPERATE THIS MACHINE. FAILURE TO COMPLY WITH THESE INSTRUCTIONS MAY RESULT IN PERSONAL INJURY. CUB CADET LLC, P.O. BOX 361131 CLEVELAND, OHIO 44136-0019 Printed In USA Form No. 769-06685...
-
Page 2: Table Of Contents
Choose from the options below: ◊ Visit us on the web at www.cubcadet.com ◊ Locate your nearest Cub Cadet Dealer at (877) 282-8684 ◊ Write us at Cub Cadet LLC • P.O. Box 361131 • Cleveland, OH • 44136-0019... -
Page 3: Safe Operation Practices
Important Safe Operation Practices WARNING: This symbol points out important safety instructions which, if not followed, could endanger the personal safety and/or property of yourself and others. Read and follow all instructions in this manual before attempting to operate this machine. Failure to comply with these instructions may result in personal injury. -
Page 4: Slope Operation
Slope Operation: Never pull the mower back toward you while you are walking. If you must back the mower away from a wall or Slopes are a major factor related to slip and fall accidents which obstruction first look down and behind to avoid tripping can result in severe injury. - Page 5 To reduce a fire hazard, keep the motor cover free of grass, leaves and debris build-up. Check the blade and motor mounting bolts at frequent intervals for proper tightness. Also, visually inspect blade for damage (e.g., bent, cracked, and worn). Replace blade with the original equipment manufacturer’s (OEM) blade only, listed in this manual.
-
Page 6: Safety Symbols
Safety Symbols This page depicts and describes safety symbols that may appear on this product. Read, understand, and follow all instructions on the machine before attempting to assemble and operate. Symbol Description READ THE OPERATOR’S MANUAL(S) Read, understand, and follow all instructions in the manual(s) before attempting to assemble and operate DANGER —... - Page 7 2 — i ectiOn MpOrtant peratiOn ractices...
-
Page 8: Assembly & Set-Up
Assembly & Set-Up Contents of Carton • One Battery Mower • One Grass Catcher • One Side Discharge Chute • One Operator’s Manual • One Battery • One Charger Assembly Tighten star knobs securing lower handle to handle brackets. See Fig. 3-2. Make certain the lower handle is Handle seated securely into the handle mounting brackets. - Page 9 Grass Catcher Place grass catcher on the pivot rod. Let go of discharge door so that it rests on the grass catcher. Follow steps below to assemble the grass catcher (if See Fig. 3-5. needed). Make certain bag is turned right side out before assembling (warning label will be on the outside).
- Page 10 Side Discharge Chute Mulching To convert to side discharge, make sure grass catcher is off of To mulch, you will need the rear mulching baffle installed below the unit. Replace the rear mulching baffle and close the rear the rear discharge door. discharge door.
-
Page 11: Charging The Battery
Adjustments Charging the Battery WARNING: Height Adjustment The battery contains corrosive fluid and toxic material - HANDLE WITH CARE. Keep away The cutting height adjustment lever is located above the rear left from children. Do not puncture, disassemble, wheel. See Fig. 3-8. To adjust the cutting height: mutilate, or incinerate. -
Page 12: Controls & Features
Controls and Features Motor/Blade Control Handle Cutting Height Adjustment Lever Battery Level Indicator Overload Protection Switch Safety Key Figure 4-1 Motor/Blade Control Handle Battery Level Indicator The battery level indicator is located on the motor cover. The WARNING: The motor/blade control handle is a indicator shows the condition of the battery, and is on when the safety device. -
Page 13: Operation
Operation Starting Motor and Blade Depress starter button on the motor blade control. Pull motor/blade control handle up against upper WARNING: Avoid accidental starting. Make sure handle. you are in the operating position behind the mower Release starter button. when using it. To avoid serious injury, the operator and unit should be in a stable position while Stopping Motor and Blade starting. -
Page 14: Removing The Battery
Using as Mulcher Removing the Battery To set up the mulching attachments see the “Assembly & Set-Up” If you have two batteries, you can use one battery while the section. For effective mulching, do not cut wet grass. If the grass other battery recharges. -
Page 15: Maintenance & Adjustment
Maintenance & Adjustments Maintenance Deck Care WARNING: To reduce the risk of electric shock, do General Recommendations not expose the mower to water. • Always observe safety rules when performing any maintenance. • The warranty on this lawn mower does not cover items that The underside of mower deck should be cleaned after each use have been subjected to operator abuse or negligence. - Page 16 If the overload protection switch pops out shortly after resetting: Press shield in on either side to remove from hole. See Fig. 6-3. Release the motor/blade control handle and do NOT restart the mower for at least 15 minutes to allow the motor extra time to cool.
-
Page 17: Service
Service Blade Care Blade Sharpening To properly sharpen the cutting blades, remove equal amounts WARNING: When removing the cutting blade for of metal from both ends of the blades along the cutting edges, sharpening or replacement, protect your hands with parallel to the trailing edge, at a 25°... - Page 18 Blade Installation Off-Season Storage Place the cutting blade, locking plate, and blade bolt on The following steps should be taken to prepare your lawn mower the motor shaft and thread the blade bolt in finger tight. for storage. Refer to Fig. 7-1. •...
-
Page 19: Troubleshooting
Troubleshooting Problem Cause Remedy Mower fails to start Safety key not in switch. Insert safety key. Motor/blade control disengaged. Depress starter button and engage motor blade control. Battery discharged. Charge battery. Mower deck clogged with grass and debris. Unclog mower deck. Make certain blade is free to move. -
Page 20: Replacement Parts
925-04102 Switch Assembly 925-04116 Safety Key Contact your Cub Cadet dealer to order replacement parts or a complete Parts Manual (have your full model number and serial number ready). Parts Manual downloads are also available free of charge at www.cubcadet.com. - Page 21 731-04177 Side Discharge Chute Contact your Cub Cadet dealer to order replacement parts or a complete Parts Manual (have your full model number and serial number ready). Parts Manual downloads are also available free of charge at www.cubcadet.com. 9 — r...
- Page 22 Notes...
- Page 23 10 — n ectiOn Otes...
-
Page 24: Warranty
The limited warranty set forth below is given by Cub Cadet LLC with respect to new merchandise purchased or leased and used in the United use or exposure.