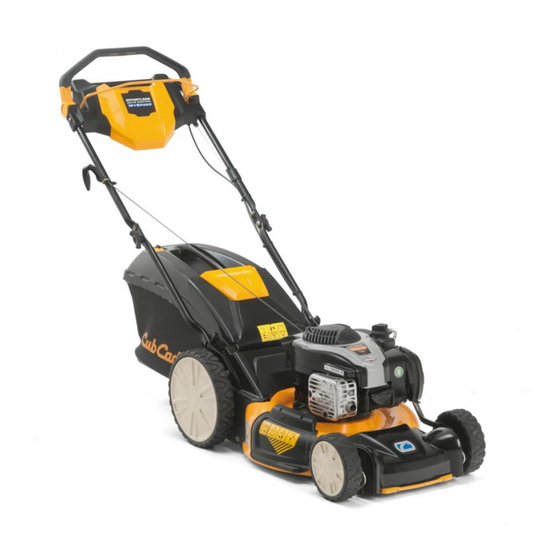
Cub Cadet CC 46 ES Opeartor's Manual
Cub cadet self propelled mower
Hide thumbs
Also See for CC 46 ES:
- Operator's manual (24 pages) ,
- Specifications (2 pages) ,
- Brochure (2 pages)
Table of Contents
Advertisement
Safe Operation Practices • Set-Up • Operation • Maintenance • Service • Troubleshooting • Warranty
O
'
M
peratOr
s
anual
Self Propelled Mower — Model CC 46 ES
WARNING
READ AND FOLLOW ALL SAFETY RULES AND INSTRUCTIONS IN THIS MANUAL
BEFORE ATTEMPTING TO OPERATE THIS MACHINE.
FAILURE TO COMPLY WITH THESE INSTRUCTIONS MAY RESULT IN PERSONAL INJURY.
CUB CADET LLC, P.O. BOX 361131 CLEVELAND, OHIO 44136-0019
Printed In USA
Form No. 769-05629
(November 4, 2009)
Advertisement
Table of Contents

Related Manuals for Cub Cadet CC 46 ES


Summary of Contents for Cub Cadet CC 46 ES
- Page 1 Safe Operation Practices • Set-Up • Operation • Maintenance • Service • Troubleshooting • Warranty ’ peratOr anual Self Propelled Mower — Model CC 46 ES WARNING READ AND FOLLOW ALL SAFETY RULES AND INSTRUCTIONS IN THIS MANUAL BEFORE ATTEMPTING TO OPERATE THIS MACHINE.
-
Page 2: Table Of Contents
Visit us on the web at www.cubcadet.com ◊ Call a Customer Support Representative at (800) 965-4CUB ◊ Locate your nearest Cub Cadet Dealer at (877) 282-8684 ◊ Write us at Cub Cadet LLC • P.O. Box 361131 • Cleveland, OH • 44136-0019... -
Page 3: Safe Operation Practices
Important Safe Operation Practices WARNING: This symbol points out important safety instructions which, if not followed, could endanger the personal safety and/or property of yourself and others. Read and follow all instructions in this manual before attempting to operate this machine. Failure to comply with these instructions may result in personal injury. - Page 4 A missing or damaged discharge cover can cause blade When starting engine, pull cord slowly until resistance contact or thrown object injuries. is felt, then pull rapidly. Rapid retraction of starter cord (kickback) will pull hand and arm toward engine faster than Many injuries occur as a result of the mower being pulled you can let go.
- Page 5 Service Check the blade and engine mounting bolts at frequent intervals for proper tightness. Also, visually inspect blade Safe Handling Of Gasoline: for damage (e.g., bent, cracked, worn) Replace blade with the original equipment manufacture’s (O.E.M.) blade only, To avoid personal injury or property damage use extreme listed in this manual.
-
Page 6: Spark Arrestor
Notice Regarding Emissions Spark Arrestor Engines which are certified to comply with California and federal WARNING: This machine is equipped with an EPA emission regulations for SORE (Small Off Road Equipment) internal combustion engine and should not be used are certified to operate on regular unleaded gasoline, and on or near any unimproved forest-covered, brush may include the following emission control systems: Engine covered or grass-covered land unless the engine’s... -
Page 7: Safety Symbols
Safety Symbols This page depicts and describes safety symbols that may appear on this product. Read, understand, and follow all instructions on the machine before attempting to assemble and operate. Symbol Description READ THE OPERATOR’S MANUAL(S) Read, understand, and follow all instructions in the manual(s) before attempting to assemble and operate DANGER —... - Page 8 2 — i ectiOn MpOrtant peratiOn ractices...
-
Page 9: Assembly & Set-Up
Assembly & Set-Up Contents of Carton • One Lawn Mower • One Lawn Mower Operator’s Manual • One Bottle of Oil • One Grass Catcher • One Side Discharge Chute Assembly Insert a carriage bolt found in the manual bag into the upper hole on the handle mounting bracket. - Page 10 The rope guide is attached to the right side of the upper Slip plastic channel of grass bag over hooks on the handle. See Fig. 3-3. Loosen the wing nut which secures the frame. See Fig. 3-4. All the plastic channels except rope guide.
- Page 11 Adjustments Side Discharge Chute Your mower is shipped as a mulcher. To convert to side discharge, Cutting Height make sure grass catcher is off of the unit and rear discharge door is closed. Each wheel has a height adjustment lever to change the cutting height of the mower.
-
Page 12: Controls & Features
Controls and Features Blade Control Electric Start Ignition Switch Drive Control Recoil Starter Primer Side Discharge Chute Mulch Plug Cutting Height Adjustment Levers Figure 4-1 Mulch Plug Blade Control The mulch plug is used for mulching purposes. Instead of The blade control is attached to the upper handle of the mower. collecting the grass clippings in a grass catcher or using the Depress and squeeze it against the upper handle to operate the side discharge chute, some mower models have the option... -
Page 13: Operation
Operation Starting Engine WARNING: Be sure no one other than the operator is standing near the lawn mower while starting engine or operating mower. Never run engine indoors or in enclosed, poorly ventilated areas. Engine exhaust contains carbon monoxide, an odorless and deadly gas. -
Page 14: Maintenance & Adjustment
Maintenance & Adjustments Maintenance Lubricate the wheels at least once a season with light oil (or motor oil). If wheels are removed for any reason, lubricate General Recommendations surface of the pivot arm and inner surface of the wheel with light oil. See Fig. 6-1. •... - Page 15 Replacing Rear Flap Engine Care NOTE: Refer to the Engine Operation and Maintenance sections To remove rear flap, lift rear door, and press flap in on in this manual for detailed instructions. either side to remove from hole. See Fig. 6-2. •...
-
Page 16: Service
Service Blade Care Lubricate the engine crankshaft and the inner surface of the blade adapter with light oil. Slide the blade adapter WARNING: onto the engine crankshaft. Place the blade on the adapter When removing the cutting blade for sharpening or replacement, protect your hands with such that the side of the blade marked “Bottom”... -
Page 17: Replacing Battery
Press inward on tab on the engine baffle to release it from Replace with new belt, making sure belt is firmly seated on the baffle bracket. See Fig. 7-3. engine pulley while pulling from the other side and sliding it around the transmission pulley. Reattach engine baffle and reassemble blade as described in the previous section. -
Page 18: Charging Battery
Charging Battery NOTE: The battery you have may differ slightly from the one shown in Fig. 7-6. Refer to the Parts List. WARNING: The battery contains corrosive fluid and toxic material; handle with care and keep away from children. Do not puncture, disassemble, mutilate or incinerate the battery. - Page 19 Replacing Fuse Off-Season Storage The electric starter circuit and battery are protected by a 40 The following steps should be taken to prepare your lawn mower ampere fuse. If the fuse burns out, the electric starter will not for storage. operate.
-
Page 20: Troubleshooting
Troubleshooting Problem Cause Remedy Engine Fails to start Blade control disengaged. Engage blade control. Spark plug boot disconnected. Connect wire to spark boot. Fuel tank empty or stale fuel. Fill tank with clean, fresh gasoline. Engine not primed (if equipped with primer). Prime engine as instructed in the Operation section. - Page 21 Problem Cause Remedy Uneven cut Wheels not positioned correctly. Place all four wheels in same height position (if equipped with individual height adjusters). Dull blade. Sharpen or replace blade. Mower will not self propel Belt not installed properly. Check belt for proper pulley installation and movement.
-
Page 22: Engine Operation
Engine Operation Fuel Cap Primer Air Cleaner Starter Grip Oil Fill Oil Drain Spark Plug Figure 9-1 Pre-Operation Check Oil Recommendations NOTE: This engine is shipped without gasoline or oil in the engine. Running the engine with insufficient oil can cause serious engine damage and void the engine warranty. -
Page 23: Starting The Engine
Check Oil Level Check Fuel Level NOTE: Be sure to check the engine on a level surface with the Clean around fuel fill before removing cap to fuel. engine stopped. Fill tank to approximately 1-inch below lowest portion of Remove the oil filler cap and wipe the dipstick clean. See neck to allow for fuel expansion. -
Page 24: Engine Maintenance
Engine Maintenance WARNING: Periodic inspection and adjustment of the engine is essential Shut off the engine before performing if high level performance is to be maintained. Regular any maintenance. To prevent accidental start-up, maintenance will also ensure a long service life. The required disconnect the spark plug boot. - Page 25 Oil Service Air Cleaner Service • Check oil level regularly. Paper filters cannot be cleaned and must be replaced once a year or every 100 operating hours; more often if used in extremely • Be sure correct oil level is maintained. Check every five dusty conditions.
- Page 26 Spark Plug Service Measure the plug gap with a feeler gauge. Correct as necessary by bending side electrode. See Fig. 10-4. The gap should be set to 0.030 in. WARNING: DO NOT check for spark with spark plug removed. DO NOT crank engine with spark plug removed.
-
Page 27: Removing From Storage
Fuel Filter Service Storage The fuel filter cannot be cleaned and must be replaced once a Engines stored between 30 and 90 days need to be treated with year or every 100 operating hours; more often if run with old a gasoline stabilizer and engines stored over 90 days need to be gasoline. -
Page 28: The Surestart Guarantee
If the engine on your mower fails to fuels, lubricants, or additives conform to this limited warranty, Cub Cadet will cover the cost of • Special conditions or circumstances that normally require more parts and labor associated with any adjustments and/or repairs than two pulls to start, specifically: 1) First start-up following your necessary to return your engine to its warranted condition. - Page 29 Notes...
-
Page 30: Replacement Parts
Mulching Blade Phone (800) 965-4CUB or 877-282-8684 for your nearest Cub Cadet Dealer to order replacement parts or a complete Parts Manual (have your full model number and serial number ready). Parts Manual downloads are also available free of charge at www.cubcadet. - Page 31 925-0201 Phone (800) 965-4CUB or 877-282-8684 for your nearest Cub Cadet Dealer to order replacement parts or a complete Parts Manual (have your full model number and serial number ready). Parts Manual downloads are also available free of charge at www.cubcadet.
- Page 34 FEDERAL and/or CALIFORNIA EMISSION CONTROL WARRANTY STATEMENT YOUR WARRANTY RIGHTS AND OBLIGATIONS MTD Consumer Group Inc, the United States Environmental Protection Agency (EPA), and, for those products certified for sale in the state of California, the California Air Resources Board (CARB) are pleased to explain the emission (evaporative and/or exhaust) control system (ECS) warranty on your outdoor 2006 and later small off-road spark-ignited engine and equipment (outdoor equipment engine) In California, new outdoor equipment engines must be designed, built and equipped to meet the State’s stringent anti-smog standards (in other states, 1997 and later model year equipment must be designed, built, and equipped to meet the U.S.
- Page 35 WARRANTED PARTS: The repair or replacement of any warranted part otherwise eligible for warranty coverage may be excluded from such warranty coverage if MTD Consumer Group Inc demonstrates that the outdoor equipment engine has been abused, neglected, or improperly maintained, and that such abuse, neglect, or improper mainte- nance was the direct cause of the need for repair or replacement of the part.
-
Page 36: Cub Cadet Llc
The limited warranty set forth below is given by Cub Cadet LLC with respect to new merchandise purchased or leased and used in the United use or exposure.