Siemens HiPath 500 User Manual
Hide thumbs
Also See for HiPath 500:
- Operating instructions manual (236 pages) ,
- User manual (135 pages) ,
- Operating manual (106 pages)

Related Manuals for Siemens HiPath 500


Summary of Contents for Siemens HiPath 500
- Page 1 Documentation HiPath 500, HiPath 3000, HiPath 5000 OpenStage 40 T OpenStage Key Module 40 OpenStage Busy lamp field 40 User Guide Communication for the open minded Siemens Enterprise Communications www.siemens.com/open...
-
Page 2: Important Information
Never open the telephone or a key module. Should you en- counter any problems, contact the responsible service per- sonnel. Use only original Siemens accessories. The use of other ac- cessories may be hazardous and will render the warranty, extended manufacturer’s liability and the CE marking in- valid. -
Page 3: Location Of The Telephone
Product support on the internet Information and support for our products can be found on the Internet at: http://siemens-enterprise.com/. Technical notes, current information about firmware updates, frequently asked questions and lots more can be found on the Internet at:... -
Page 4: Table Of Contents
Contents Contents Important information ......2 Trademarks ..........2 Location of the telephone . - Page 5 Contents Basic functions ......32 Answering a call ......... . 32 Answering a call via the handset .
- Page 6 Transferring a call after a speaker call announcement in a group . . 68 Send trunk flash (not for HiPath 500)......69 If you cannot reach a destination.
- Page 7 Caller ID suppression........84 Silent Monitor (not for HiPath 500) ......84 Monitoring a room .
- Page 8 Special functions in the LAN (not for HiPath 500)......117 Leaving hunt group/group call ....... 117 Setting up "follow me"...
- Page 9 Differing display view in a HiPath 4000 environment (not for HiPath 500) ......127 Fixing problems ......128 Responding to error messages on the screen .
-
Page 10: General Information
• Your communications platform does not feature this function. Please contact your Siemens sales partner for information on how to upgrade. This user guide is intended to help you familiarize yourself with OpenStage and all of its functions. It contains important information on the safe and proper operation of your OpenStage phone. -
Page 11: Intended Use
General information Intended use The OpenStage phone was developed as a device for speech transmission and should be placed on the desk or mounted on the wall. Any other use is regarded as unauthorized. Telephone type The identification details (exact product designation and serial number) of your telephone can be found on the nameplate on the underside of the base unit. -
Page 12: Getting To Know Your Openstage Phone
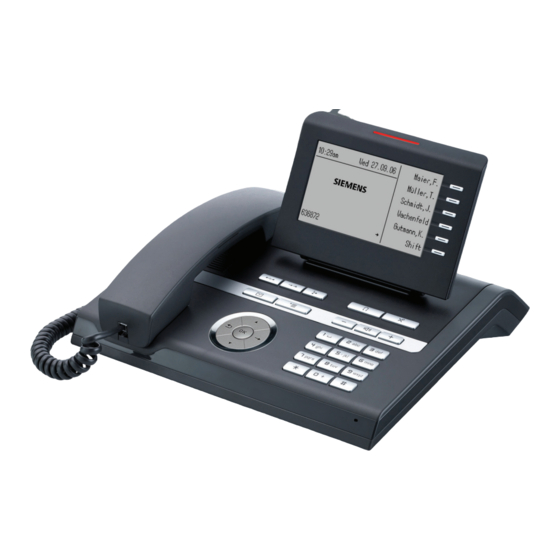
Getting to know your OpenStage phone Getting to know your OpenStage phone The following sections describe the most frequently used operating ele- ments and the displays on your OpenStage phone. The User Interface of Your OpenStage 40 T You can make and receive calls as normal using the handset. The display permits intuitive operation of the phone page 22. -
Page 13: Ports On The Underside Of The Phone
Getting to know your OpenStage phone Ports on the underside of the phone HiPath USB slave Headset Busy Lamp field Handset ey module Properties of your OpenStage 40 T Display type LCD, 40 x 6 characters Illuminated display Programmable sensor keys Full-duplex speakerphone function Headset USB slave... -
Page 14: Key Module
Getting to know your OpenStage phone Key Module OpenStage Key Module 40 The OpenStage Key Module 40 is a key module attached to the side of the phone that provides 12 additional illuminated, programmable keys. Like keys on the phone, these keys can be programmed and used accord- ing to your needs page 19. -
Page 15: Openstage Key Module 15
Getting to know your OpenStage phone OpenStage Key Module 15 The OpenStage Key Module 15 is a key module attached to the side of the phone that provides an additional 18 illuminated, programmable sensor keys. Like keys on the phone, these keys can be programmed and used accord- ing to your needs You can only attach one OpenStage Key Module 15 to your OpenStage 40. -
Page 16: Openstage Busy Lamp Field 40
Alternatively, you can use the Key Labeling Tool to conveniently create new label strips. You can find this including instructions at http://wiki.siemens- .> . enterprise.com/index.php/Key_Labelling_Tool Lay the labeled strips on the key fields and place the transparent cover over... -
Page 17: Keys
Getting to know your OpenStage phone Keys Function keys Key Function when key is pressed End (disconnect) call page 38. Redialing page 37. Button for call forwarding (with red LED key) page 41. Open mailbox (with red LED key) page 26. Open telephone menu (with red LED key) page 28. -
Page 18: 5-Way Navigator
Getting to know your OpenStage phone 5-way navigator Remove the protective film from the ring around the 5-way naviga- tor before using the phone. With this control, you can manage most of your phone’s functions, as well as its displays. Operation Functions when key is pressed In idle mode:... -
Page 19: Programmable Sensor Keys
Getting to know your OpenStage phone Programmable sensor keys Your OpenStage 40 T has six illuminated sensor keys. You can assign func- tions and phone numbers to them on two levels. Increase the number of programmable sensor keys by connecting a key module page 14. -
Page 20: Keypad
Getting to know your OpenStage phone Keypad In cases where text input is possible, you can use the keypad to input text, punctuation and special characters in addition to the digits 0 to 9 and the hash and asterisk symbols. To do this, press the numerical keys repeatedly. Example: To enter the letter "h", press the number key on the keypad twice. - Page 21 Getting to know your OpenStage phone Text input The current label appears on the first line. Delete it with the key before entering new characters. Enter the required characters via the keypad. Select the functions using the keys Confirm your entry with Example: Changing the key label page 78.
-
Page 22: Display
Getting to know your OpenStage phone Display Your OpenStage 40 T comes with a tilt-and-swivel black-and-white LCD display. Adjust the tilt and contrast to suit your needs page 123. Idle mode If there are no calls taking place or settings being made, your OpenStage 40 T is in idle mode. - Page 23 Getting to know your OpenStage phone Idle menu When in idle mode, press a key on the 5-way navigator page 18 to dis- play the idle menu. You can call up various functions here. It includes se- lected functions from the Program/Service menu page 28.
-
Page 24: Telephony Dialogs
Getting to know your OpenStage phone Telephony dialogs Connection-dependent conditions and situations, e.g. when your tele- phone rings, when dialing a number, or during a call, are depicted graphi- cally on the display. Situation-dependent functions that automatically appear on the display can be selected and activated with the 5-way navigator page 18. - Page 25 Getting to know your OpenStage phone Appearance during an ongoing call Example: You are connected with a caller. Icon indicating call status Smith Michael 3:16 Call duration 100168 Current connection Consultation Options relevant to situation; Start conference scroll bar shows that more op- Start transfer tions are available.
-
Page 26: Mailbox
Getting to know your OpenStage phone Mailbox Depending on the type and configuration of your communications platform (contact the relevant service personnel), messages from services, such as, HiPath Xpressions are displayed in this application in addition to messages received. Messages You can send short text messages to individual internal stations or groups. -
Page 27: Caller List
Getting to know your OpenStage phone Caller list If you are unable to accept an external or internal call, the call attempt is stored in the caller list. You can also store external calls that you have answered in the caller list (contact your service personnel). -
Page 28: Menu
Getting to know your OpenStage phone Menu With the menu key , you can access your communications system’s service menu or make telephony-related settings. The LEDs associated with the menu key and the loudspeaker stay red as long as you are in the menu. Menu Program/Service Block Dialing... -
Page 29: Call Preparation
Getting to know your OpenStage phone Call preparation Activate the function "Call preparation" to use en-bloc dialing on your OpenStage 40 T. This means: You engage the line only after you have fully entered the num- ber and confirmed. Activate/deactivating en-bloc dialing Press the menu key, select "Block Dialing On"... -
Page 30: Call Pop-Up
Getting to know your OpenStage phone Call pop-up Activate the function "Call pop up" so that if you are on a call you are noti- fied on the display by a popup about a second incoming call. Activating/deactiviating call pop up Prerequisite: "Second call"... -
Page 31: Audio Accessories
Getting to know your OpenStage phone Audio accessories using the 5- menu key and select entry Audio Zubehör Press the way navigator. Set the following options accordingly: • "schnurloses Headset Aus" or • "schnurloses Headset Ein" or • "Konferenzeinrichtung Aus" or •... -
Page 32: Basic Functions
Basic functions Step by Step Basic functions Please read the introductory chapter "Getting to know your OpenStage phone" page 12 care- fully before performing any of the steps de- scribed here on your phone. Answering a call Your OpenStage phone rings with the tone signal set when an incoming call is received. -
Page 33: Answering A Call Via The Loudspeaker (Speakerphone Mode)
Basic functions Step by Step Answering a call via the loudspeaker (speakerphone mode) Suggestions for using speakerphone mode • Tell the other party that you are using speakerphone mode. • The speakerphone works bests at a low receiving volume. • The ideal distance between the user and the tele- phone set in speakerphone mode is about 50 cm (approx. -
Page 34: Switching To Speakerphone Mode
Basic functions Step by Step Switching to speakerphone mode Prerequisite: You are conducting a call via the handset. Hold down the key and replace the handset. Then re- lease the key. if nec. Set the call volume. Keep pressing the key until the de- sired volume is set. -
Page 35: Making Calls
Basic functions Step by Step Making calls Off-hook dialing Lift the handset. Internal calls: Enter the station number. External calls: Enter the external code and the station number. The called party does not answer or is busy Replace the handset. On-hook dialing Internal calls: Enter the station number. -
Page 36: Dialing With The Headset Connected
Basic functions Step by Step Dialing with the headset connected Prerequisite: The headset is connected. internal: Enter the station number. External calls: Enter the external code and the station number. The headset key lights up. The connection is established as soon as your input is complete. -
Page 37: Redialing A Number
Basic functions Step by Step Redialing a number The last ten external telephone numbers dialed are stored automatically. If this feature is configured (contact your service personnel), account codes entered are also saved page 82. You can redial them simply by pressing a key. Displaying and dialing saved station numbers Press the key once to dial the last number dialed. -
Page 38: Ending A Call
Basic functions Step by Step Ending a call Replace the handset. Press the key shown. Rejecting calls You can reject calls which you do not wish to take. The call is then signaled at another definable telephone (contact your service personnel). The phone is ringing. -
Page 39: Calling A Second Party (Consultation)
Basic functions Step by Step Calling a second party (consultation) You can call a second party while a call is in progress. The first party is placed on hold. Consultation Confirm. Call the second party. Return to the first party: Return to held call Confirm. -
Page 40: Transferring A Call
Enter the number of the party to which you want to transfer the call. Announce the call, if necessary. Replace the handset. Transfer Select and confirm the option shown [1] "Differing display view in a HiPath 4000 environment (not for HiPath 500)“ page 127... -
Page 41: Call Forwarding
Basic functions Step by Step Call forwarding Using variable call forwarding You can immediately forward internal or external calls to different internal or external telephones (destinations). (External destinations require special configuration in the system.) When call forwarding is active, a special dial tone sounds when you lift the handset. -
Page 42: Using Call Forwarding No Reply (Cfnr)
Basic functions Step by Step Using call forwarding no reply (CFNR) Calls that are not answered after three rings (=default, can be adjusted by service personnel) or that are re- ceived while another call is ongoing can be automatical- ly forwarded to a specified telephone. Open the Program/Service menu page 28. -
Page 43: Call Forwarding In The Carrier Network And Forwarding Multiple Subscriber Numbers (Msn) (Not For U.s.)
Basic functions Step by Step Call forwarding in the carrier network and forwarding multiple subscriber numbers (MSN) (not for U.S.) If this function has been configured (contact your ser- vice personnel), you can forward calls to your assigned multiple subscriber number (MSN) (DID number) direct- ly within the carrier network. -
Page 44: Using Callback
Basic functions Step by Step Using callback You can request a callback if the internal station called is busy or if nobody answers. This also applies for external calls via ISDN exchanges. This feature saves you from having to make repeated attempts to reach the user. You receive a callback •... -
Page 45: Viewing And Deleting A Stored Callback
Ending retrieval Exit Select and confirm the option shown. Press the key shown. The LED goes out. Press the key shown. The LED goes out. [1] "Differing display view in a HiPath 4000 environment (not for HiPath 500)“ page 127... -
Page 46: Enhanced Phone Functions
The called party appears on the display. if nec. Next Select and confirm until the name/number of the re- quired subscriber is displayed. Accept call Confirm. [1] "Differing display view in a HiPath 4000 environment (not for HiPath 500)“ page 127... -
Page 47: Using The Speakerphone
Enhanced phone functions Step by Step If you know the number of the telephone that is ringing, enter it directly. Press the flashing key. Accepting a call in a team page 114. Using the speakerphone A colleague addresses you directly over the speaker with a speaker call. -
Page 48: Answering Calls From The Entrance Telephone
Enhanced phone functions Step by Step Answering calls from the entrance telephone and opening the door If an entrance telephone has been programmed, you can use your telephone to speak to someone at the en- trance telephone and to activate a door opener. If you have the proper authorization (contact your ser- vice personnel), you can activate the door opener, en- abling visitors to open the door themselves by entering... -
Page 49: Accepting A Call From An Answering Machine
Enhanced phone functions Step by Step Opening the door with a code (at the door) After ringing the bell, enter the five-digit code (using the keypad or a DTMF transmitter). Depending on how the door opener has been programmed, a doorbell call sig- nal may or may not be forwarded. -
Page 50: Making Calls
Enhanced phone functions Step by Step Making calls En-bloc sending/correcting numbers You can enter the number without the number being di- aled straight away. This means that you can correct the number if necessary. The station number is only dialed at your specific re- quest. -
Page 51: Using The Caller List
Confirm. Removing an entry from the caller list Prerequisite: You are viewing the detailed view of a call. Delete Select and confirm the option shown. [1] "Differing display view in a HiPath 4000 environment (not for HiPath 500)“ page 127... -
Page 52: Dialing A Number From The Internal Directory
Open the idle menu page 23. Directory Confirm. if nec. If several directories have been configured (not for HiPath 500): 1=internal Confirm. The first entry is displayed on the screen. Press the relevant key to select the next/previous entry Scroll Next... -
Page 53: Using The Ldap Directory (Not For Hipath 500)
Enhanced phone functions Step by Step Using the LDAP directory (not for HiPath 500) If configured (ask your service personnel), you can search for directory data in the LDAP database and dial the number of any subscriber you find there. - Page 54 Enhanced phone functions Step by Step The result is displayed If only one name is found, it is displayed. Call Confirm. If several names are found (max. 50), the first name is displayed. Press, Scroll Next select and confirm the option shown, Scroll Previous select and confirm the option shown.
-
Page 55: Making Calls Using System Speed-Dial Numbers
Open the Program/Service menu page 28. Destinations Confirm. Change Speed Dial Select and confirm the option shown Press the key shown. [1] "Differing display view in a HiPath 4000 environment (not for HiPath 500)“ page 127... -
Page 56: Talking To Your Colleague With A Speaker Call
Select and confirm the option shown. Speaker call Select and confirm the option shown Enter the station number. Responding to a speaker call page 47. [1] "Differing display view in a HiPath 4000 environment (not for HiPath 500)“ page 127... -
Page 57: Talking To Your Colleague With Discreet Calling (Not For Hipath 500)
Enhanced phone functions Step by Step Talking to your colleague with discreet calling (not for HiPath 500) If this function has been configured (ask your service personnel), you can join an ongoing call conducted by an internal user at a system telephone with display. -
Page 58: Assigning A Station Number (Not For U.s.)
Dialing aid from your telephone for another tele- phone: Open the Program/Service menu page 28. Associated dial Select and confirm the option shown. Enter the internal station number ("Dial for:"). [1] "Differing display view in a HiPath 4000 environment (not for HiPath 500)“ page 127... - Page 59 Enhanced phone functions Step by Step Enter the number you wish to dial.
-
Page 60: During A Call
Enhanced phone functions Step by Step During a call Using call waiting (second call) Callers can still reach you while you are engaged in an- other call. A signal alerts you to the waiting call. You can ignore or accept the second call. When you accept the waiting call, you can either end the first call or place it on hold and resume the call later You can block the second call or the signal tone... -
Page 61: Preventing And Allowing Call Waiting (Automatic Camp-On)
You can save your call partner’s station number for sub- sequent redialing from the caller list page 51. Prerequisite: You are on a call or an external station is being called. Save number Confirm. [1] "Differing display view in a HiPath 4000 environment (not for HiPath 500)“ page 127... -
Page 62: Parking A Call
If a parked call is not picked up, after a specific pe- riod of time the call is returned to the telephone from where it was parked (recall). [1] "Differing display view in a HiPath 4000 environment (not for HiPath 500)“ page 127... -
Page 63: Holding External Calls
Enhanced phone functions Step by Step Holding external calls If you have programmed a hold key on your phone page 72, you can put external calls on hold. Then all other stations can accept the call on the as- signed trunk. Press the "Hold"... -
Page 64: Conducting A Conference
Enhanced phone functions Step by Step Conducting a conference In a conference call, you can talk to as many as four oth- er parties at the same time. These may be internal or external users. You can only add parties to or remove them from a conference if you initiated the conference. -
Page 65: Activating Tone Dialing/Dtmf Suffix-Dialing
Calls Select and confirm the option shown. DTMF dialing Select and confirm the option shown You can use the keys through to transmit DTMF signals. [1] "Differing display view in a HiPath 4000 environment (not for HiPath 500)“ page 127... - Page 66 Enhanced phone functions Step by Step Ending the call also deactivates DTMF suffix dial- ing. Your system may be configured so that you can start DTMF suffix-dialing immediately after set- ting up a connection.
-
Page 67: Recording A Call
Enhanced phone functions Step by Step Recording a call If configured (contact your service personnel for de- tails), you can record an active call. Prerequisite: You are on a call, the "Recording" key is configured page 72. Press the "Recording" key. The LED lights up. You and the other party hear an announcement that re- cording has started and as long as recording is still run- ning, you hear an acoustic signal approx. -
Page 68: Transferring A Call After A Speaker Call Announcement In A Group
Select and confirm the option shown If the connection between the two other parties is not established within 45 seconds, the call from the first part returns to you (recall). [1] "Differing display view in a HiPath 4000 environment (not for HiPath 500)“ page 127... -
Page 69: Send Trunk Flash (Not For Hipath 500)
Enhanced phone functions Step by Step Send trunk flash (not for HiPath 500) To activate ISDN-type services and features through the network carrier’s analog trunks or those of other com- munications platforms (such as "consultation hold"), you must send a signal to the trunks before dialing the ser- vice code or telephone number. -
Page 70: If You Cannot Reach A Destination
Enhanced phone functions Step by Step If you cannot reach a destination Call waiting (camp-on) Prerequisite: You have dialed an internal number and hear a busy signal. It is important that you reach the called party. Camp-on Wait (approx. 5 seconds) until "Camp-on" appears on the display and the busy tone is followed by the ring tone. -
Page 71: Using Night Answer
Enhanced phone functions Step by Step Using night answer When night answer mode is active, for example during a lunch break or after office hours, all external calls are immediately forwarded to a specific internal telephone (night station). The night station can be defined by ser- vice personnel ( standard night answer service) or by you ( temporary night answer service). -
Page 72: Programming A Sensor Key
Enhanced phone functions Step by Step Programming a sensor key You can program frequently used functions, station numbers or procedures on your OpenStage 40 T’s sen- sor keys. Configuring function keys See also page 19. A list of all available functions is displayed, see the overview page 73. -
Page 73: Overview Of Functions
Enhanced phone functions Step by Step Overview of functions The functions are split into the following menus: • Destinations • Feature Settings • PIN and Authorization • Calls More features • The available functions depend on your configu- ration. If a function is missing, contact your ser- vice personnel. - Page 74 LED function: Repdial key (external), Procedure key, Trace call, Speed dial, Clear, Lock all phones, Send message, Directory (1=internal, 2=LDAP (not for HiPath 500), Call waiting, Toggle/Connect, Conference, Speaker call, Retrieve line, Reserve trunk, Release trunk, Temporary Phone,...
-
Page 75: Programming A Procedure Key
Enhanced phone functions Step by Step Programming a procedure key Numbers and functions which require further input, i.e. which contain several operating steps, can be saved on a key on your telephone. The relevant service personnel must be granted appropriate authorization For example the function "Associated dial"... - Page 76 Enhanced phone functions Step by Step Another key Select and confirm the option shown. Select the saved procedure by pressing the key. Procedures with activatable/deactivatable func- tions are activated with one press of the button and deactivated with the next. You can press the procedure key during a call to automatically send the saved digits as DTMF sig- nals...
-
Page 77: Configuring Repdial Keys
Enhanced phone functions Step by Step Configuring repdial keys You can also program internal and external station num- bers on the second level. The LED function is not avail- able for internal station numbers on the second level. To program the second level, you must program a "Shift" page 72. -
Page 78: Changing The Label
Enhanced phone functions Step by Step Changing the label The label set when a repdial key was programmed can also be subsequently changed. You cannot change the labels on function keys. Changing the label Hold down the key shown. Assign telephony function Confirm the option shown. -
Page 79: Deleting Sensor Key Programming
Enhanced phone functions Step by Step Deleting sensor key programming Deleting a function/phone number/label Press and hold the required sensor key. Clear key Select and confirm the option shown. -
Page 80: Displaying And Assigning Call Charges
(total) is displayed. Open the Program/Service menu page 28. More features Select and confirm the option shown. Show call charges Select and confirm the option shown [1] "Differing display view in a HiPath 4000 environment (not for HiPath 500)“ page 127... -
Page 81: Displaying Call Charges For Another Telephone (Not For U.s.)
Displaying and assigning call charges Step by Step Displaying call charges for another telephone (not for U.S.) If configured (contact your service personnel), you can also display and print chargeable calls for another phone (for instance for a pay phone). Prerequisite: You have programmed the function "Show call charges"... -
Page 82: Dialing With Call Charge Assignment
May be necessary, depending on configuration; contact your service personnel. Enter the external phone number. You can also enter the account code during a call. [1] "Differing display view in a HiPath 4000 environment (not for HiPath 500)“ page 127... -
Page 83: Privacy/Security
When you lift the handset, you will hear a special tone (continuous buzzing) reminding you that "Do not disturb" is activated. Authorized internal callers automatically override the DND feature after five seconds. [1] "Differing display view in a HiPath 4000 environment (not for HiPath 500)“ page 127... -
Page 84: Caller Id Suppression
Select and confirm the option shown. Your service personnel can activate/deactivate caller ID suppression for all phones. Silent Monitor (not for HiPath 500) When configured (ask responsible service personnel), you can join in an on-going call conducted by an internal user and monitor silently and unnoticed. -
Page 85: Monitoring A Room
Privacy/security Step by Step Monitoring a room You can use a phone to monitor a room. This function must be enabled on the monitoring phone. When you call this phone, you can immediately hear what is happening in that room. Activating the telephone to be monitored Open the Program/Service menu page 28. -
Page 86: Locking The Telephone To Prevent Unauthorized Use
Privacy/security Step by Step Locking the telephone to prevent unauthorized use You can prevent unauthorized parties from using your phone during your absence. You can see whether the function is activated or deacti- vated from the corresponding icon in the status bar on the display page 22. -
Page 87: Locking Another Telephone To Prevent Unauthorized Use
Privacy/security Step by Step Locking another telephone to prevent unauthorized use If configured (contact your service personnel), you can lock and unlock other telephones against unauthorized access. If a phone user locks his or her phone and forgets the personal lock code, you can use this function to unlock the phone. -
Page 88: Saving Your Pin
Enter the current five-digit PIN. If you have not yet set a PIN, use "00000" the first time. Enter the new PIN. Re-enter the new PIN. [1] "Differing display view in a HiPath 4000 environment (not for HiPath 500)“ page 127... -
Page 89: More Functions/Services
More functions/services Step by Step More functions/services Appointments function You can configure your phone to call you to remind you about appointments page 90. You must save the required call times. You can enter a single appointment that will take place in the next twen- ty-four hours or you can enter a daily recurring appoint- ment. -
Page 90: Using Timed Reminders
More functions/services Step by Step Using timed reminders Prerequisite: You have saved a reminder page 89. The saved time arrives. Reminder at 1200 The phone is ringing. The appointment time is dis- played. Press key twice. Lift the handset and replace it again. If you do not answer the timed reminder, it is re- peated five times and then deleted. -
Page 91: Viewing And Editing Incoming Messages
More functions/services Step by Step Displaying and deleting messages you have sent Prerequisite: The recipient has not yet accepted a sent message. Open the idle menu page 23. View sent message Select and confirm the option shown. Message sent Confirm. The text message is displayed. -
Page 92: Leaving An Advisory Message
More functions/services Step by Step Leaving an advisory message You can leave messages/advisory messages on your phone’s display for internal callers that wish to contact you in your absence. When you receive a call, the message appears on the caller’s display. Open the idle menu page 23. -
Page 93: Displaying The Number Of Waiting Calls/Overload Display
This state is canceled as soon as the call is ended. Your old and new telephone are the first telephones at each connection. The telephones are in idle state. [1] "Differing display view in a HiPath 4000 environment (not for HiPath 500)“ page 127... - Page 94 More functions/services Step by Step The following procedure is carried out on the new phone. Open the Program/Service menu page 28. Relocate Select and confirm the option shown. Enter own station number. Enter code (telephone lock) page 88. (Not necessary if you have not set a code.) Complete relocate Confirm.
-
Page 95: Fax Details And Message On Answering Machine
• View callbacks Open the Program/Service menu page 28. More features Select and confirm the option shown. Reset services Select and confirm the option shown [1] "Differing display view in a HiPath 4000 environment (not for HiPath 500)“ page 127... -
Page 96: Activating Functions For Another Telephone
More functions/services Step by Step Activating functions for another telephone If configured (contact your service personnel), you can activate and deactivate the following functions for other phones (associated service): • Do not disturb, code: 97/#97 page 83 • Call forwarding, code 13, #1 page 41 •... -
Page 97: Using System Functions From Outside Disa (Direct Inward System Access)
More functions/services Step by Step Using system functions from outside DISA (direct inward system access) If configured (contact your service personnel), you can use an external phone like an internal station to set up an outgoing external connection via the system. You can also activate or deactivate the following system functions: •... -
Page 98: Using Functions In Isdn Via Code Dialing (Keypad Dialing)
Contact your network provider to find out which ISDN functions can be code-operated in your country. Siemens Enterprise Communications GmbH & Co. KG shall not be liable for damages/ costs which may be incurred by fraudulent activ- ities or remote operation (such as toll fraud). -
Page 99: Controlling Connected Computers/Programs/Telephone Data Service
More functions/services Step by Step Controlling connected computers/ programs/telephone data service If this function has been configured (contact your ser- vice personnel), you can control connected computers or programs running on them, such as hotel services or information systems, from your telephone. Prerequisite: You have set up a connection. -
Page 100: Communicating With Pc Applications Over A Csta Interface
More functions/services Step by Step Communicating with PC applications over a CSTA interface If configured (contact your service personnel), you can use your phone to communicate with PC applications (CSTA = Computer Supported Telecommunications Applications). You send information to the application and receive information from the application, for example, via your phone display. -
Page 101: Controlling Relays (Only For Hipath 3000)
More functions/services Step by Step Controlling relays (only for HiPath 3000) If this function has been configured (contact your ser- vice personnel), you can use up to four relays to enable/ disable different devices (such as a door opener). Depending on how you program the relays, you can ac- tivate and deactivate them manually them or configure them to activate and deactivate automatically (after tim- eout). -
Page 102: Paging Persons (Not For Usa, Not For Hipath 500)
More functions/services Step by Step Paging persons (not for USA, not for HiPath 500) If radio paging equipment (PSE) is connected to your system (contact your service personnel), you can locate people via their pocket receivers. Pocket receivers signal a call request to the person you want to page. -
Page 103: Making Calls In The Team/Executive
Making calls in the team/executive/secretary configuration Step by Step Making calls in the team/executive/ secretary configuration If configured (consult your service personnel), you be- long to a team of subscribers with multiple lines (multi- line page 11). Your phone features trunk keys (MU- LAP keys) page 104. -
Page 104: Line Seizure
Making calls in the team/executive/secretary configuration Step by Step Line seizure Line seizure must be configured (consult your service personnel). If automatic line seizure is configured, a trunk is automatically assigned when you lift the hand- set or press the trunk key. Trunk keys The programmable sensor keys on multi-line phones function as trunk keys. -
Page 105: Answering Calls With The Trunk Keys
Making calls in the team/executive/secretary configuration Step by Step Answering calls with the trunk keys Prerequisite: Your telephone rings or the trunk key flashes quickly. if nec. Press the trunk key that is flashing quickly. (not necessary if "Prime Line" is active). Lift the handset. -
Page 106: Making Calls On Multiple Lines Alternately
Making calls in the team/executive/secretary configuration Step by Step Making calls on multiple lines alternately Prerequisite: You are conducting a call via one of your group’s trunks. Another trunk key is flashing. Press the flashing trunk key. The first call party is on hold on the other trunk. -
Page 107: Direct Station Selection Key
Making calls in the team/executive/secretary configuration Step by Step Direct station selection key Each team member has a direct station selection key for every other team member. This means that each team member can be reached di- rectly by other team members at the touch of a button. Understanding LED messages from DSS keys LED on the DSS key is off - the team member is not en- gaged in a phone call. -
Page 108: Transferring A Call In Progress
Making calls in the team/executive/secretary configuration Step by Step Transferring a call in progress Press the DSS key and announce the call if necessary. Replace the handset. Press the key shown. Accepting a call for another team member Press the flashing DSS key or trunk key. Lift the handset. -
Page 109: Forwarding Calls On Trunks
Making calls in the team/executive/secretary configuration Step by Step Forwarding calls on trunks You can immediately forward internal or external calls to different internal or external telephones (destinations). (External destinations require special configuration in the system). Activating call forwarding for one trunk activates the function for all trunk keys assigned to this trunk in your group. - Page 110 Making calls in the team/executive/secretary configuration Step by Step Deactivating call forwarding Open the Program/Service menu page 28. Forward Line: Off Select and confirm the option shown. Press the required trunk key. Enter the required trunk number. If available, press the "CFW MULAP" key. If you have activated call forwarding for a trunk, a special dial tone sounds when the line is seized.
-
Page 111: Transferring Calls Directly To The Executive Phone
Making calls in the team/executive/secretary configuration Step by Step Transferring calls directly to the executive phone Normally, all calls for the executive are audibly signaled only by the secretary phone. You can set audible signaling so calls are signaled only by the executive phone or by a second phone assigned to it. -
Page 112: Using Team Functions
Open the idle menu page 23. Leave group Select and confirm the option shown Join group select and confirm the option shown. Press the "Hunt group". [1] "Differing display view in a HiPath 4000 environment (not for HiPath 500)“ page 127... - Page 113 [1] "Differing display view in a HiPath 4000 environment (not for HiPath 500)“ page 127...
-
Page 114: Accepting A Call For Another Member Of Your Team
Removing all telephones in a call ringing group Ringing group off Select and confirm the option shown. [1] "Differing display view in a HiPath 4000 environment (not for HiPath 500)“ page 127... -
Page 115: Uniform Call Distribution (Ucd)
Logging on and off during your shift Open the Program/Service menu page 28. Destinations Confirm. Select and confirm the option shown Not available Confirm, Available select and confirm the option shown. [1] "Differing display view in a HiPath 4000 environment (not for HiPath 500)“ page 127... - Page 116 Display the number of waiting calls Open the Program/Service menu page 28. Destinations Confirm. Select and confirm the option shown Calls in queue Confirm. [1] "Differing display view in a HiPath 4000 environment (not for HiPath 500)“ page 127...
-
Page 117: Special Functions In The Lan
Special functions in the LAN (not for HiPath 500) Step by Step Special functions in the LAN (not for HiPath 500) If your telephone is operating in a HiPath 5000 environ- ment, multiple HiPath 3000 systems are interconnect- ed via a LAN (Local Area Network, e. g. proprietary PC network). -
Page 118: Setting Up "Follow Me" Call Forwarding
Special functions in the LAN (not for HiPath 500) Step by Step Setting up "follow me" call forwarding You can activate/deactivate call forwarding HiPath 5000 for your phone from other phones in the page 41 en- vironment. Open the idle menu page 23. -
Page 119: Using Night Answer
Special functions in the LAN (not for HiPath 500) Step by Step Using night answer If authorized (contact your service personnel), you can define telephones in other HiPath 3000 communica- tions platforms as the night answer page 71. Open the idle menu page 23. -
Page 120: Ringing Group
Special functions in the LAN (not for HiPath 500) Step by Step Ringing group You can have calls for your telephone signaled audibly at external telephones or at telephones in other HiPath 3000 communications platforms page 112. Saving, displaying, and deleting telephones for the... -
Page 121: Controlling Relays (Only For Hipath 3000)
Special functions in the LAN (not for HiPath 500) Step by Step Controlling relays (only for HiPath 3000) If this feature is configured (contact your service per- sonnel), you can also control relays page 101 in other HiPath 3000 communications platforms. -
Page 122: Opening A Door
Special functions in the LAN (not for HiPath 500) Step by Step Opening a door If this feature is configured (contact your service per- sonnel), you can also activate the door opener in other HiPath 3000 communications platforms page 48. -
Page 123: Individual Phone Configuration
Individual phone configuration Step by Step Individual phone configuration Adjusting display settings Adjusting the display to a comfortable reading angle You can swivel the display unit. Adjust the display unit so that you can clearly read the screen. Illuminated display During operation, e. -
Page 124: Adjusting Audio Settings
Individual phone configuration Step by Step Adjusting audio settings Optimize the audio settings on your OpenStage for your environment and according to your personal require- ments. Adjusting the receiving volume during a call You are conducting a call. Raise or lower the volume. Keep pressing the key until the desired volume is set. -
Page 125: Adjusting The Attention Ring Volume
Individual phone configuration Step by Step Adjusting the attention ring volume If you are part of a team with trunk keys, other calls can be signaled acoustically in the team during a call. You will hear the attention ring. Press one of the keys shown in idle mode page 22. -
Page 126: Testing The Phone
Testing the phone Step by Step Testing the phone Phone functions, testing You can test your phone’s functionality. Prerequisite: The phone is in idle mode. Open the Program/Service menu page 28. Phone test Select and confirm the option shown. If everything is functioning correctly: •... -
Page 127: Differing Display View In A Hipath 4000 Environment
Differing display view in a HiPath 4000 environment (not for HiPath 500) Differing display view in a HiPath 4000 environment (not for HiPath 500) Depending on the system configuration, some functions may not always be offered in the display as described in this document. -
Page 128: Fixing Problems
Fixing problems Step by Step Fixing problems Responding to error messages on the screen Invalid entry Possible cause: Station number is incorrect. Possible reaction: Enter correct station number. Not authorized Possible cause: Locked function selected. Possible reaction: Apply to service personnel for authorization for relevant function. -
Page 129: Contact Partner In The Case Of Problems
Fixing problems Step by Step Key affects other layer Possible cause 1: If "Clear other layer" appears on the menu: you tried to program a function or internal station num- ber with LED on a key that is already programmed on the second layer (for example, external station number). -
Page 130: Troubleshooting
Fixing problems Step by Step Troubleshooting Pressed key does not respond Check if the key is stuck. Telephone does not ring Check whether the "Do not disturb" function is activated on your telephone ("Do not disturb" appears on the screen page 22). -
Page 131: Index
Index Index ......62, 63 retrieving from park ....68 transfer after announcement ........40, 108 transferring Numerics ....107 using DSS keys in a team ......82 Call charge assignment .......... 18 5-way navigator Call charges ......80 for another telephone ........ - Page 132 Index ..........95 ........... 95 Details, fax Fax details Dial Forwarding ........ 50 ..........43 with en-bloc dialing MSN in CO ..43 Dialing multiple subscriber number (MSN) ........51 ......43 from the caller list Forwarding MSN in CO ......
- Page 133 Index ......... 14, 16 ..........71 Key modules Night answer ............20 Keypad Number ..........98 ..........58 Keypad dialing assigning ..........50 Keys correcting ........72 ............77 saving incomplete saving .......... 117 ..........34 LAN telephony Open listening ......
- Page 134 Index Station number ........ 84 deactivating display ....102 Radio paging equipment (PSE) ..........84 suppressing ............68 Recall ......... 55 Station speed-dialing ......32, 124 Receiving volume Suffix-dialing ............ 67 Recording ..........55 automatic ........37 Redialing a number ........
- Page 135 Index ............115 ........27 Unanswered calls ..........12 User interface ..........10 User support ......41 Variable call forwarding ..........93 Waiting calls ..........116 Work time...
-
Page 136: Overview Of Functions And Codes
Overview of functions and codes Overview of functions and codes The following table lists all available functions, as shown on the display. If configured (con- tact your service personnel), functions can be activated interactively (select + confirm), via the Program/Service menu (select + confirm or enter a code), or with function keys.. - Page 137 28 Code Data I/O Service Directory 1=internal 2=LDAP (not for HiPath 500) DISA DISA intern (not for HiPath 500) Discreet Call (not for HiPath 500) DND on DND off Door opener on Door opener off DTMF dialing En-bloc dialing...
- Page 138 Change PIN Mute on Mute off Night answer on Night answer off Open door Override Page (not for HiPath 500) Answer page (not for U.S.) Park a call Retrieve call Phone test Pickup - directed Pickup - group Accept call Prog.
- Page 139 View messages Mailbox Shift Key Show call charges (own telephone) View call charges (other party’s tele- phone) Silent monitor (not for HiPath 500) * 944 Speaker call Suppress call ID Restore caller ID Tel. data service Temporary MSN (not for U.S.)
- Page 140 Overview of functions and codes ... Interac- ... Via the Program/ ... With tively Service menu a key Functions (=display) page 28 Code Log on Log off #401 Available Not available #402 Work on Work off #403 UCD night on UCD night off #404 Calls in queue...
-
Page 141: Display Icons
Display icons Display icons Status bar The ring tone is deactivated page 125 The "Do not disturb" function is activated page 83 The phone lock is activated page 86 Messages You received new voice messages page 26 Call forwarding is active page 41 Connection status The call is active... - Page 142 Hofmannstr. 51 80200 München Deutschland Siemens Enterprise Communications GmbH & Co. KG is a Trademark Licensee of Siemens AG Reference No: A31003-S2000-U101-7-7619 The information provided in this document contains merely general descriptions or char- acteristics of performance which in case of...