Table of Contents
Advertisement
Available languages
Available languages
Operator's Manual
CRRFTSMRN o
121/2 "
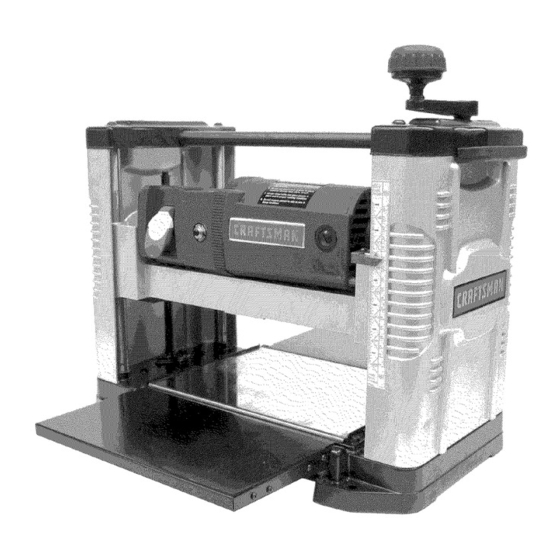
THICKNESS PLANER
Model No.
351.217580
CAUTION:
Read and follow
all Safety Rules and Operating
Instructions
before First Use
of this Product. Keep this
manual with tool.
Sears, Roebuck and Co., Hoffman Estates, IL 60179 U.S.A.
www.sears.com/craftsman
24735.00 Draft (08/14/06)
Advertisement
Table of Contents

Related Manuals for Craftsman 351.217580


Summary of Contents for Craftsman 351.217580
- Page 1 121/2 " THICKNESS PLANER Model No. 351.217580 CAUTION: Read and follow all Safety Rules and Operating Instructions before First Use of this Product. Keep this manual with tool. Sears, Roebuck and Co., Hoffman Estates, IL 60179 U.S.A. www.sears.com/craftsman 24735.00 Draft (08/14/06)
- Page 2 PREPARE WORK AREA FOR JOB • Keep work area clean. Cluttered work areas invite accidents. Warranty ........• Do not use power tools in dangerous environments. Safety Rules....... • Do not use power tools in damp or wet locations. Do Unpacking ........
- Page 3 • Use recommended accessories (refer to page 13). Use of improper accessories may cause risk of Refer to Figures 2 and 3. injury to persons. • Handle with knob should be installed to top-right of • Handle workpiece correctly. Protect hands from pos- the planer.
-
Page 4: Power Source
• Make sure there is plenty of room for moving the • This tool is equipped with an approved cord rated at workpiece through the entire cut. There must be 150V and a 3-prong grounding type plug (see Figure 5) for your protection against shock hazards. enough room that neither the operators or the bystanders will have to stand in line with the wood •... -
Page 5: Specifications
Use quality lumber. Blades last longer and cuts are DESCRIPTION smoother with good quality wood. Craftsman 121/2 ' ' planer finishes rough-cut lumber to • Do not plane material shorter than 15", narrower size and planes soft and hardwoods up to 6" thick and than 3/4"_ wider than 121t/' or thinner than 't/'. -
Page 6: Circuit Breaker
• Take precautions against k ickback. Donotpermit a ny- NOTE: Should the key be removed from the switch at onetostandor cross in lineof cutterhead's rotation. the ON position, the switch can be turned off but cannot Kickback o rthrown debris willtravel i nthisdirection. be turned on. - Page 7 • Each full rotation of the handle moves the rollercase CAUTION: Do not plane board which is less than 141/2 ', long; force of cut could split board and cause I//6 kickback. • Quality of thickness planing depends on the opera- tor's judgement about the depth of cut.
-
Page 8: Changing Blades
• When planing more than one board of the same thickness, butt boards together to avoid snipe. • Snipe is more apparent when deeper cuts are taken. • Feed work in direction of grain. Work fed against grain will have chipped, splintered edges. Planer will operate best if kept in good condition and properly adjusted. -
Page 9: Brush Inspection
BRUSH INSPECTION AND REPLACEMENT • Slowly rotate handle (Fig. 14, Key No. 6) to raise or lower rollercase. Rollercase will move by 0.006" with WARNING: Turn planer off and disconnect from power every turn of the gear by one tooth. Move rollercase source. - Page 10 CORRECTIVE ACTION SYMPTOM POSSIBLE CAUSE(S) 1.Dull blades Snipe 1.Reverse or replace blades per instructions. See "Maintenance" (gouging at ends of board) 2.Inadequate support of long boards 2.Support long boards. See "Avoiding Snipe" 3.Uneven force on cutterhead &Gently push board when board is in contact with only one feed roller.
- Page 11 NOTES...
- Page 12 Model 351.217580 Figure 14 - Replacement Parts Illustration for Base ,/2o .,_//3o...
- Page 13 PART NO. QTY. DESCRIPTION 24769.00 8-1.0 x 16mm Flat Head Screw 24770.00 Left Cap 18993.00 2.5 x 35mm Cotter 18316.00 Plug STD870525 5-0.8 x 25mm Socket Head Bolt* 20393.00 Handle Assembly 24771.00 Right Cap 24772.00 Grip 24773.00 Roller STD870610 6-1.0 x 10mm Socket Head Bolt* STD851006...
- Page 14 Model 351.217580 Figure 15 - Replacement Parts Illustration for Rollercase 1 47 42 43 39J:_...
- Page 15 PART NO. QTY. DESCRIPTION PART NO. DESCRIPTION QTY. 24790.00 Thumb Screw STD851005 Flat Washer* 24791.00 Blade Guard STD863512 5-0.8 x 12mm Pan Head Screw* 24792.00 Thumb Screw 01474.00 5mm Serrated Washer 24793.00 Dust Chute STD863508 5-0.8 x 8mm Pan Head Screw* STD870510 5-0.8 x 10mm Socket...
- Page 16 GARANTIA COMPLETA DE UN PARA HER- • Mantenga a los visitantes a una distancia prudencial RAMIENTA CRAFTSMAN &rea de trabajo. Si esta herramienta Craftsman fallara por causa de defectos • Mantenga a los niSos fuera del lugar de trabajo. Haga...
- Page 17 EL OPERADOR DEBE SABER USAR LA Llave hexagonal con mango en T (en la cepilladora) HERRAMIENTA Enchufe • Use la herramienta adecuada para la tarea. No fuerce Iman (en la cepilladora, herramienta o el accesorio ni los use para una tarea para Manivela con perilla la que no fueron...
- Page 18 Monte firmemente la cepilladora en la mesa de trabajo apernandola a traves de los agujeros. AsegQrese de que la cepilladora no se mueva y de que la mesa de trabajo Perno quede nivelada. FUENTE DE ALIMENTAClON ADVERTENCIA: No conecte la cepilladora a la fuente alimentacion hasta...
- Page 19 3 a 2 espigas conexion a tierra). DESCRIPClON Si se permite el uso de un adaptador de 3 a 2 espigas La cepilladora Craftsman de 12W' acaba la madera tosca con conexion a tierra, se debe conectar firmemente...
-
Page 20: Normas De Seguridad
NORMAS DE SEGURIDAD DE OPERACION • Silice cristalino proveniente de ladrillos, cemento y otto material de mamposteria. ADVERTENCIA: Pot su propia seguridad, lea todas reglas y precauciones antes de manejar la herramienta. • Arsenico y cromo proveniente de madera quimicamente tratada. - Page 21 • Para volver a insertar la Ilave, deslicela al interior de la superficie nivelada, de vuelta a la madera y haga lados ranura del interruptor hasta que se acople. paralelos. • Cepille los lados alternos hasta Iograr el espesor deseado. CORTAClRCUlTO Cuando se haya alcanzado...
- Page 22 • Latablas c onunaIongitud mayor de24"deben t ener m ayor • Las hojas desafiladas rasgan, en vez de cortar, las fibras apoyo m ediante pedestales dematerial independientes. de madera y dan una apariencia fibrosa. • Coloque lapieza d etrabajo c onlacara que sevaacepillar •...
- Page 23 La cuchilla esta ubicada en su posici6n mediante Reemplace los cepillos si el resorte est& daSado. pasadores. Con cuidado levante la cuchilla vieja del por- Reemplace los cepillos si el carb6n est& desgastado. tacuchilla usando los imanes. No toque la cuchilla con los Reemplace los cepillos...
- Page 24 Mesa se puede recubrir con un lubricante, p. ej. cera de • Despues de 10 horas de funcionamiento, se debe retirar pasta, para hacer que la pieza de trabajo se alimente uni- de las cadenas y engranajes las astillas de madera, formemente.
- Page 25 MEDIDAS CORRECTIVAS SINTOMA CAUSA(S) POSIBLE(S) Cuchillas desafiladas Redondeo (depresiones 1. Invierta o reemplace las cuchillas segQn las instrucciones. Vea "Mantenimiento" los extremos de la tabla) Soporte inadecuado de las tablas 2. Soporte las tablas largas. Vea "Como evitar el rodamiento" largas Fuerza dispareja...
- Page 26 SINTOMA MEDIDAS CORRECTIVAS CAUSA(S) POSIBLE(S) La cepilladora no funciona 1. Alimentaci6n no conectada a la 1. Un electricista calificado debe revisar la fuente de alimentacion cepilladora 2. Se dispar6 la protecci6n contra 2. Apague la cepilladora. Reajuste la protecci6n sobrecarga del motor contra la sobrecarga...
- Page 27 NOTAS...
- Page 28 Your Home For repair- in your home-of all major brand appliances, lawn and garden equipment, or heating and cooling systems, no matter who made it, no matter who sold it! For the replacement parts, accessories owner's manuals that you need to do-it-yourse For Sears professional installation of home appliances and items like garage door openers and water heaters.