Hayward OnCommand Installation Manual
Automation pool controller
Hide thumbs
Also See for OnCommand:
- Operation manual (32 pages) ,
- Operation manual (32 pages) ,
- Installation manual (32 pages)

Related Manuals for Hayward OnCommand


Summary of Contents for Hayward OnCommand
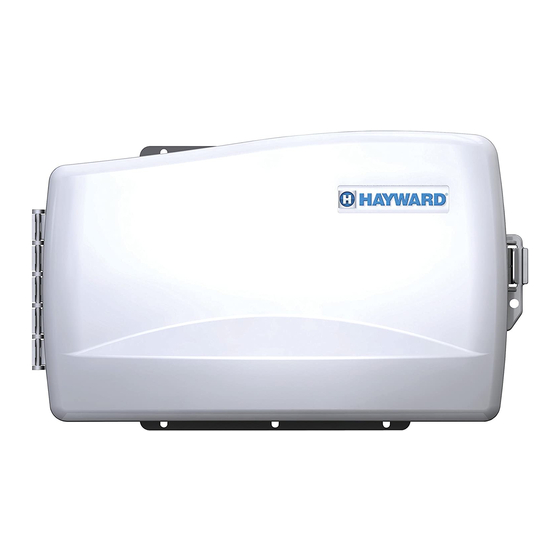
- Page 1 Hayward OnCommand Automation Installation Manual for models ONCOM ONCOM-ACT ONCOM-RC ONCOM-ACT-RC www.haywardnet.com...
- Page 2 IMPORTANT SAFETY INSTRUCTIONS When using this electrical equipment, basic safety precautions should always be followed, including the following: READ AND FOLLOW ALL INSTRUCTIONS • • WARNING: Disconnect all AC power during installation. • WARNING: Water in excess of 100 degrees Fahrenheit may be hazardous to your health.
-
Page 3: Table Of Contents
Table of Contents Introduction Before You Begin..............1 Installation Steps..............1 1. Mounting OnCommand Control Center..........2 Equipment Temperature Sensors............2 Wireless Remote Control............2 Base Station................3 Optional Valve Actuators............3 2. Plumbing Plumbing Configuration............4 3. Electrical Grounding................5 Wiring Input Wiring................ -
Page 4: Introduction Before You Begin
Introduction Before You Begin What’s Included The following components have been included in the OnCommand package: (1) OnCommand Control Unit (3) Temperature sensors with 15 ft. (5m) cable, hose clamp (2) Goldline GVA-24 actuators (ONCOM-ACT, ONCOM-ACT-RC only) (1) Goldline AQL2-BASE-RF/AQL2-SS-RF remote control (ONCOM-RC, ONCOM-ACT-RC only) What’s NOT Included... -
Page 5: Mounting Oncommand Control Center
There is no limit on the number of wireless remotes that can used. The maximum distance between wireless remote controls and the base station on the OnCommand main control unit is 400 feet (120m) line of sight or 200 feet (60m) through walls, etc. -
Page 6: Base Station
The AQL2-BASE-RF base station must be installed if the AQL2-SS-RF or AQL2-POD will be used. To install the base station, remove the knockout on the upper left side of the OnCommand main control unit, insert the base station, and then tighten the nut from the inside. Also refer to the Base Station installation manual and the diagram on page 12. -
Page 7: Plumbing Plumbing Configuration
PRESSURE CLEANER CLEANER CLEANER POP-UP Some important notes regarding the OnCommand control of Standard Pool/Spa systems (refer to the Operation section for more information): Pool/Spa Setup In Pool/Spa Config., select: Pool and Spa 1. The OnCommand can be programmed to accommodate spa spillover, if desired. -
Page 8: Electrical Grounding
Grounding A ground bus bar is located in the high voltage compartment of the OnCommand. Connect a ground wire from the primary electrical panel to this ground bus bar. Also use this ground bar to ground each piece of high voltage (120 or 240VAC) equipment that is connected to the OnCommand control relays. -
Page 9: High Voltage Pool Equipment
High Voltage (120/240V) Pool Equipment All OnCommand relays are double pole (they make/break both “legs” of 240V circuits) and are rated at 3HP/25A at 240V (1½HP/25A at 120V). Refer to the diagram below for typical relay wiring. 240 VAC 120 VAC... - Page 10 When the filter pump output is off, the relay will be off. Note that when the filter pump relay is off (power off to the VSC), the OnCommand will not display errors or diagnostics for the pump.
-
Page 11: Low Voltage Wiring
Heater Control The OnCommand provides a set of low voltage dry contacts that can be connected to most gas heaters or heat pumps with 24V control circuits. Refer to the diagram on the following page for a generic connection. The manuals supplied with most heaters also include specific wiring instructions for connecting the heater to an external control (usually identified as “2-wire”... - Page 12 4. Move “BYPASS” dipswitch on heater circuit board to “ON” position (up). 5. Turn heater power back on. 6. Switch heater to either “Pool” or “Spa” (it doesn’t make any difference which is selected, the OnCommand will take control). 7. Heater display should be “bO” (for “bypass On).
- Page 13 2. Remove factory installed jumper from the “Ext Switch” connector. 3. Wire the OnCommand to the “Ext Switch” connector as shown below. 4. The wires to the OnCommand must be separated from any line voltage wires. Failure to follow these instructions may cause erratic operation of the heater.
- Page 14 Use four conductor cable (typically phone cable) for communications connection between the VSC and the OnCommand. The maximum wiring distance is 500 feet (160 meters). Note that the terminals on both the VSC interface board and the OnCommand main board are numbered. The terminal connections should be matched between both terminal blocks (connect 1 to 1, 2 to 2, etc.).
- Page 15 VSC Pump Address Setting The VSC address must be set to 001 when using the VSC with the OnCommand. Refer to the TriStar Pump Owner’s Manual (IS3220VSC) and Hayward document IS3220VSCAQLL for specific instructions on setting the pump address. Temperature Sensors The OnCommand utilizes 10K ohm thermistor type sensors.
-
Page 16: Configuration Configuration Menu
Group Function The OnCommand offers the ability to assign one Group function to a particular button. Instead of the button controlling one particular function, the button can be programmed to initiate a sequence of commands that are programmed in the Configuration Menu. - Page 17 Unaffected, Lowest speed to 50% Note that all functions in the table may not be offered. The available functions are dependent on how the OnCommand is configured. Also, under some circumstances, functions will be displayed but can’t be changed. Note that the function whose menu you are in, will not be displayed as an option and will automatically turn on when the group is activated.
- Page 18 Variable Speed in Groups The OnCommand can be programmed to use alternate pump speeds while running a group command. This allows the pump to be set to a higher or lower speed than normal, while the group is activated. When the group stops, the speed will return to its normal setting.
- Page 19 This option is usually preferable because both the pool and spa water will be filtered and sanitized. If “Pool Only” is selected, then the OnCommand will switch the pool/spa valves to the “pool only” position at the start of the programmed pool filtering time period or when the super-chlorinate function is turned on.
- Page 20 AIR temperature sensor falls below the freeze threshold (see below), the OnCommand will turn on the filter pump to circulate the water. If “Pool and Spa” is selected in the Pool/ Spa sub-menu, the valves will also alternate between the pool and spa every 30 minutes and the filter pump will turn off while the valves are turning.
- Page 21 This feature ensures that the heater cools down before water circulation is stopped. When enabled, the OnCommand will continue to run the filter pump for 5 minutes after the heater turns off. During this period the filter pump LED will flash and also a “Heater Cooldown, X:XX remaining” message will scroll on the display.
- Page 22 Solar Config. Push to access solar options + to view/change Move to previous/next configuration menu Toggle between Enabled and Disabled (default) Solar Solar Disabled Move to next menu item or previous/next configuration menu if “Solar” is enabled Toggle between Enabled and Disabled (default) Solar Extend Solar-Extend Disabled Move to next menu item...
- Page 23 LIGHTS button can also be used to turn the output off. Low Speed of a 2-speed Filter Pump – the OnCommand will turn on the lights relay whenever the low speed operation of the filter pump is required. It is very important that the “2-speed” filter pump option be selected under the “Filter Config.”...
- Page 24 Protection is enabled and the AIR temperature sensor falls below the selected freeze temperature threshold, the OnCommand will energize the lights relay. IMPORTANT: this only enables operation of the lights relay during freeze--see the “Filter Pump Config.” menu to enable freeze protection for the main circulation system.
- Page 25 Low Speed of a 2-speed Filter Pump – the OnCommand will operate the aux relay whenever the low speed operation of the filter pump is required. It is very important that the “2-speed” filter pump option be selected under the “Filter Config.”...
- Page 26 AIR temperature sensor falls below the selected freeze temperature threshold, the OnCommand will turn on the aux relay to circulate the water. IMPORTANT: this only enables operation of the AUX output during freeze--see the “Filter Pump Config.” menu to enable freeze protection for the main circulation system.
- Page 27 AIR temperature falls sensor falls below the selected freeze temperature threshold, the OnCommand will turn on the valve to allow circulation of the water. IMPORTANT: this only enables operation of the valve3 output during freeze--see the “Filter Pump Config.” menu to enable...
- Page 28 7-day Move to previous/next configuration menu This selection affects ALL of the timeclock logic in the OnCommand. If “7-day” is selected, each timeclock will have one set of turn-on/turn-off settings that operate every day of the week. If “Weekend/ Weekdays” option is selected then the user can enter one set of turn-on/turn-off times for the weekend (fixed as Saturday/Sunday) and another set of turn-on/turn-off times for weekdays (Monday through Friday).
-
Page 29: System Startup Before Startup
Follow these instructions to verify that the OnCommand is properly controlling the heater. 1. Check that the OnCommand is calling for the heater to turn on as indicated by the “Heater” LED being illumi- nated. If the “Heater” LED is illuminated, go directly to step 2; if not, then check the following: •... -
Page 30: Service Mode
• The pump will automatically turn off at the end of the 5 minute heater cooldown period. For more detailed instructions on control and operation of the OnCommand system, refer to the Operation Manual. Service Mode Service mode disables all automatic control operation and is intended to be used when servicing the pool system. -
Page 31: Warranty Oncommand Limited Warranty
(3) years. Hayward/Goldline also warrants its Aqua Trol chlorination products to be free of defects in materials and work- manship, under normal use and service for a period of one (1) year. These warranties are applicable from the initial date of installation on private residential swimming pools in the US and Canada. - Page 32 OnCommand Programming Flow Chart default menu day and time water temperature air temperature chlorinator setting denotes conditional items salt level reason pump is running (not scheduled) reason hi-speed is running (not scheduled) countdown time remaining heater control status system manual off...
Need help?
Do you have a question about the OnCommand and is the answer not in the manual?
Questions and answers