Advertisement
Operator's
Manuam
®
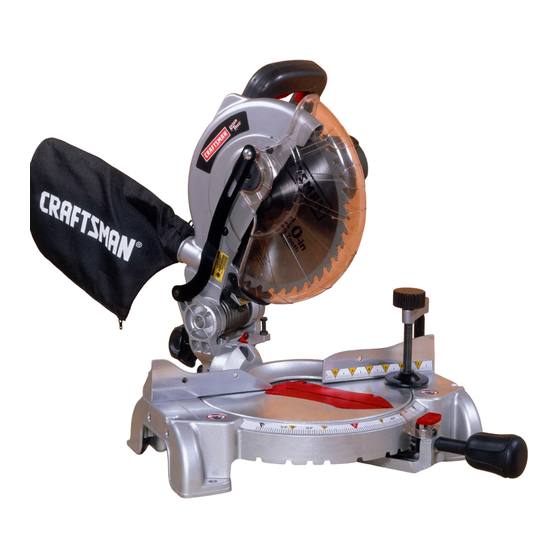
10 in. COMPOUND MITER SAW
Modem No. 137.212290
CAUTmON:
Before using this Mker Saw,
read this manual and follow
all its Safety Rules and
Operating
Instructions
o
Safety mnstructions
o
mnstaliation
o
Operation
o
Maintenance
o
Parts List
Customer
Help Line
1 o800o843ol
682
Sears, Roebuck
and Co., Hoffman
Estates,
IL 60179 USA
Visit our Craftsman
website:
www.sears.com/craftsman
Part No. 137212290001
Advertisement
Table of Contents

Related Manuals for Craftsman 137.21229


Summary of Contents for Craftsman 137.21229
- Page 1 Modem No. 137.212290 CAUTmON: Before using this Mker Saw, read this manual and follow all its Safety Rules and Operating Instructions Sears, Roebuck and Co., Hoffman Visit our Craftsman website: www.sears.com/craftsman Part No. 137212290001 ® Safety mnstructions mnstaliation Operation Maintenance...
- Page 2 ONE-YEAR If this Craftsman tool fails due to a defect in material or workmanship within one year from the date of purchase, CALL 1-800-4-MY-HOME ®TO ARRANGE If this tool is used for commercial or rental purposes, this warranty will apply for only ninety days from the date of purchase.
- Page 3 Follow instructions for lubricating and changing accessories. 2&WARNING: can be hazardous to your health. Always operate saw in well-ventilated area and provide for proper dust removal. Any power could cause permanent eye damage_...
- Page 4 DO NOT perform any operation free hand (use clamp wherever possible). 5. KEEP BANDS out of the path of the saw blade. If the workpiece you are cutting would cause your hands to be within 6-3/4 inches of the saw blade, the...
- Page 5 1. CONNECT this saw to a 120V, 15 amp. circuit with a 15 amp. time delay fuse or circuit breaker. Using the wrong size fuse can damage the motor.
- Page 6 Sears. IA WARNING Read warnings and conditions TIPPED SAW BLADE. Do not operate the saw without the proper saw blade guard in place. Carbide is a very hard but brittle material should be taken while mounting,...
- Page 7 Switch handle, it may cause misalignmenL Only lift machine by the base Hand Hold& Hold =Down Clamp 2. Place the saw on a secure stationary work surface. 3. Separate ali parts from the packing material. Check each one with the illustration to make certain all items...
- Page 8 Upper Blade Guard CoverPlate DustBag Laser G uide Bevel S cale Hold-Down C lamp Base ArborLock Table Insert Positive Miter Detents Cutting Head Handle ON/OFF Trigger S witch Blade Hand Hold Mounting Hole Motor Lower Blade Guard Miter Scale Positive StopLocking Lever MiterHandle Stop Latch Pivot Bolt...
-
Page 9: Woodworking Terms
MITER HANDLE = Use to lock and unlock the miter table, and to rotate the saw to a right or left cutting position. MITER SCALE = Measures the miter angle 0 ° to 45 ° left... - Page 10 4. Push the cutting head (3) down to its lowest position. 5. Push the stop latch (2) into the locking hole (4). IMPORTANT: miter saw by the switch handle, the cutting arm, or the miter table handle. iNSTALLiNG 1_ Squeeze the metal collar wings (2) of the dust...
-
Page 11: Removing O Rinstalling Theblade
REMOWNG (FIG. G, G-l, G-2} 1. Unplug the saw from the outleL 2. Allow the miter saw to rise to the upright position. Raise the lower blade guard (1) to the up position. (Fig. G) 3. - Page 12 MITER SCALE (FIG. J) The miter scale assists the user in setting the desired miter angles from 47 ° left to 47 ° right. The miter saw table has nine of the most common angle setttings with positive stops at 0 °, 15 °, 22.5 °, 31 _6 °, and 45 °.
-
Page 13: Bevel Stop Adjustment
2. Place a combination square (2) on the miter table with the rule against the table and the hee! of the square against the saw blade. 3. If the blade is not 900(0 °) square with the miter table, loosen the bevel lock handle, tilt the cutting head... - Page 14 "pattern line" to test laser alignment. Lay the board on the miter table. 2. Plug saw into outlet and turn on the laser beam and line it up with the pattern line. 3. Lower saw blade to pattern line and if blade is not flush with the pattern line, adjust as follows in procedures (B).
- Page 15 NOTE: The stop latch is for carrying or storing the tooL It is not to be used for holding the saw while cutting. Lower blade and press in stop latch to secure saw for transport or storage.
-
Page 16: Troubleshooting
If any part of this miter saw is missing, or any electrical off and unplug it. Replace damaged, missing, defective Maintain tools with care. Keep the miter saw clean for best and safest performance. instructions for lubricating. on the blade while it's spinning. Remove adjusting... -
Page 17: Planyour Work
Do not use this sew to cut sina!! pieces. If the workpiece fingers to be within 6-3/4 inches of the saw blade the workpiece fingers on the saws table. neckties or • When cutting... - Page 18 Before making a cut, with the power switch in the OFF position bring the saw blade down to the workpiece to see the cutting path of the blade. Press in lock=off switch in trigger switch handle.
- Page 19 BEVEL CUT(FIG,S) 1_Whena bevel c utis required, loosen thebevel I ock handle (1)_ 2_Tiltthecuttinghead tothedesired angleasshown onthebevel s cale(2).Thebladecanbepositioned atanyangle, f roma 90° straight c ut(0° onthescale) toa 45°leftbevel. & Tighten thebevel l ockhandle (1)tolockthecutting headin position_ Fig.S COMPOUND C UT(FIG, T ) A compound c utisthecombination o fa miter anda bevel c utsimultaneously.
- Page 20 Adjust if necessary. NOTE: This auxiliary fence is used only with the saw blade in the 0 ° bevel position (90 ° to the table). The auxiliary wood fence must be removed when bevel cutting.
-
Page 21: Cutting Base Molding
Miter Saw Fen_ CUTTING BASE MOLDING (FIG. Z} Base moldings and many other moldings can be cut on a compound miter saw. The setup of the saw depends on molding characteristics and application, as shown. Perform practice cuts on scrap material to achieve best results: 1. -
Page 22: Cutting Crown Molding
ONLY WHEN THE ANGLE BETWEEN THE WALLS EQUALS EXACTLY 90 °. Your compound miter saw is suited for the difficult task of cutting crown molding. To fit properly, crown molding must be compound=mitered with extreme accuracy. -
Page 23: Maintenance
GUARD Do not use the saw without the lower blade guard. The lower blade guard is attached to the saw for your protection. Should the lower guard become damaged, do not use the saw until the damaged guard has been replaced. - Page 24 1. See ADJUSTMENT 1. Sears Service Centre. 2. Sears Service Centre. 3. Clean and lubricate moving parts. 1. See BASIC SAW OPERATION section. 2. Replace or sharpen blade. 3. Replace with 10in. diameter blade. 4. Replace blade. 1. Replace blade.
-
Page 25: Miter Saw
IA WAR"I"G n When servicing use only CRAFTSMAN replacement parts. Use of any other parts many create a HAZARD or cause product damage. Any attempt to repair or replace electrical parts on this Miter Saw may create a HAZARD unless repair is done by a qualified service technician. - Page 26 10 in. COMPOUND MINTER SAW MODEL NO. 137.212290 SCHEMATIC FOR SAW 0CV5 ODfB C_/_ 0_UK 0KQ_\ 2CIA OLS9 083S OKB[ 3CES ssx% 2CSB OKA9 2COF OKTZ .2D8M OKTX. 0KSC _'2CU6 2C8D OJMM...
- Page 27 10 in. COMPOUND B/liTER SAW PARTS LIST AND SCHEB_IATtC FOR MOTOR i.D. NO DescfipJion 0HVY BALL BEARING 0HX9 NEEDLE BEARING 0JX3 HEX. SOC. SET SCREW 0KCN CR.RE. PAN HEAD TAPPING 0QQS BRUSH HOLDER 0QQT BRUSH ASS'Y 0QR0 BRUSH COVER 2AKT...
- Page 28 For repair - in your home - of all major brand appfiances, lawn and garden equipment, no matter who made it, no matter who soJd it! For the replacement Operator's For Sears professional and items like garage door openers and water heaters. 1-800-4-MY-HOME Call anytime, For repair of carry-in items fike vacuums,...
Need help?
Do you have a question about the 137.21229 and is the answer not in the manual?
Questions and answers