Table of Contents
Advertisement
Quick Links
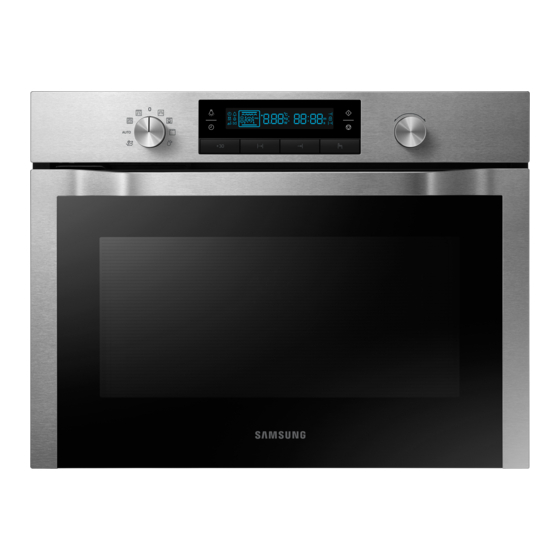
NQ50H5533KS
Combi MWO Built-in
Oven
user & installation manual
Please be advised that the Samsung warranty does NOT cover service calls
to explain product operation, correct improper installation, or perform normal
cleaning or maintenance.
This manual is made with 100 % recycled paper.
imagine
the possibilities
Thank you for purchasing this Samsung product.
NQ50H5533KS_WT_DE68-04306L-00_EN.indd 1
2014-10-16
2:56:22
Advertisement
Table of Contents

Related Manuals for Samsung NQ50H5533KS


Summary of Contents for Samsung NQ50H5533KS
- Page 1 Combi MWO Built-in Oven user & installation manual Please be advised that the Samsung warranty does NOT cover service calls to explain product operation, correct improper installation, or perform normal cleaning or maintenance. This manual is made with 100 % recycled paper.
-
Page 2: Table Of Contents
contents safETy informaTion Safety information ovEn fEaTurEs Control panel Oven Accessories bEforE you sTarT Clock settings Setting the Energy Save mode Turning the beeper on/off ovEn usE Types of heating How a microwave oven works Using the microwave mode Using the oven mode Combination mode Using the vegetable cook mode Using the auto menu mode... -
Page 3: Safety Information
This insTrucTion booklET You have just purchased a SAMSUNG microwave oven. Your Owner’s Instructions contains valuable information on cooking with your microwave oven: • Safety precautions • Suitable accessories and cookware • Useful cooking tips • Cooking tips lEgEnd for symbols and icons Hazards or unsafe practices that may result in severe personal injury or death. - Page 4 Warning: It is hazardous for anyone other than a competent person to carry out any service or repair operation that involves the removal of a cover which gives protection against exposure to microwave energy. This appliance is intended to be used in household only. Warning: Only allow children to use the oven without supervision when adequate instructions have been given so that the child is able to use the oven in a safe...
- Page 5 Eggs in their shell and whole hard-boiled eggs should not be heated in microwave ovens since they may explode, even after microwave heating has ended. The oven should be cleaned regularly and any food deposits removed. Failure to maintain the oven in a clean condition could lead to deterioration of the surface that could adversely affect the life of the appliance and possibly result in a hazardous situation.
- Page 6 Appliance should allow to disconnection of the appliance from the supply after installation. The disconnection may be achieved by having the plug accessible or by incorporating a switch in the fixed wiring in accordance with the wiring rules. Warning (oven function only) - optional Warning: When the appliance is operated in the combination mode, children should only use the oven under adult supervision due to the temperatures...
- Page 7 Do not use harsh abrasive cleaners or sharp metal scrapers to clean the oven door glass since they can scratch the surface, which may result in shattering of the glass. The temperature of accessible surfaces may be high when the appliance is operating. The door or the outer surface may get hot when the appliance is operating.
- Page 8 Kitchen Cabinets in contact with the oven must be heat- resistant up to 100 °C. Samsung will take no responsibility for damage of cabinets from the heat. English - 8 NQ50H5533KS_WT_DE68-04306L-00_EN.indd 8...
- Page 9 Fig1. Slide the oven partly into the recess. Lead the connection cable to the power source. Fig2. Slide the oven completely into the recess. Fig3. Fasten the oven using the two screws (4 x 25 mm) provoded. Fig4. Make the electrical connection. Check that the appliance works.
- Page 10 building-in dimensions Min. 550 200 cm² Min. 50 Min. 564~568 Min. 446 Max. 450 454.2 Space for power outlet (30 ¢ Hole) 200 cm² built-under dimensions Be sure to hold the appliance with 2 side handles and door handle when unpacking the product. Min.
- Page 11 clEaning your microWavE ovEn The following parts of your microwave oven should be cleaned regularly to prevent grease and food particles from building up: • Inside and outside surfaces • Door and door seals • Turntable and Roller rings (Turntable type model only) alWays ensure that the door seals are clean and the door closes properly.
- Page 12 This microwave oven is not intended for commercial use. The Light bulb should not be replaced in person for safety reasons. Please contact nearest authorised Samsung customer care centre to arrange for a qualified engineer to replace the bulb. Warning Only qualified staff should be allowed to modify or repair the appliance.
- Page 13 Remove all foreign substances such as dust or water from the power plug terminals and contact points using a dry cloth on a regular basis. Do not pull or excessively bend or place heavy objecton the power cord. In the event of a gas leak (such as propane gas, LP gas, etc.), ventilate immediately without touching the power plug.
- Page 14 Do not put the tray or rack in water shortly after cooking because it may cause breakage or damage of the tray or rack. Do not operate the microwave oven for deep fat frying because the oil temperature cannot be controlled. This could result in a sudden boil over of the hot liquid.
- Page 15 Samsung will charge a repair fee for replacing an accessory or repairing a cosmetic defect if the damage to the unit and/or damage to or loss of the accessory was caused by the customer. Items this stipulation covers include: (a) A Dented, Scratched, or Broken Door, Handle, Out-Panel, or Control Panel.
-
Page 16: Oven Features
oven features CONTROl pANel 1. MODE SELECTOR 2. DISPLAY 3. MULTI FUNCTION SELECTOR mode Selector 2 3 4 7 8 9 1. OFF 6. STEAM CLEAN MODE 2. MICROWAVE + GRILL MODE 7. GRILL MODE 3. MICROWAVE + CONVECTION MODE 8. -
Page 17: Oven
OveN Control Panel Top Heating Elements Level 5 Level 4 Oven Levels Level 3 Level 2 Microwave Level 1 Safety Door Lock Door Door Handle • Shelf levels are numbered from the bottom up. • The levels 4 and 5 are mainly used for grill function. •... -
Page 18: Accessories
ACCeSSORIeS The following accessories are provided with your microwave oven: 1. Ceramic tray. (Useful for microwave mode) Baking trays. (DO NOT use for microwave mode.) Grill insert for ceramic tray. Grill Insert (Useful for speed menu and grill mode) Ceramic Tray pure steam cooker, refer to page 50 to 52. -
Page 19: Before You Start
before you start When the appliance is first plugged in, the display lights up. After three seconds, the clock symbol and “12:00” blink on the display. ClOCK SeTTINGS 1. Press clock. “12:00” blinks. 2. Turn the mulTi funcTion sElEcTor to set the hour. -
Page 20: Setting The Energy Save Mode
SeTTING THe eNeRGy SAve mODe Energy save mode saves electricity when the oven is not being used. standby mode The oven will default to Standby mode after 2 minutes of no activity. Eco mode 1. Press and hold End TimE for 3 seconds. When the oven is in ECO mode, the display turns off, and the oven cannot be used. -
Page 21: Oven Use
oven use TypeS Of HeATING The following chart summarizes the various heating modes and settings available on your oven. Use the Cooking Guides in the pages that follow to determine the appropriate mode and setting for all your recipes. microwave mode Microwave energy is used to cook and defrost foods. -
Page 22: How A Microwave Oven Works
HOW A mICROWAve OveN WORKS Microwaves are high - frequency electromagnetic waves; the energy released enables food to be cooked or reheated without changing either the form or the colour. you can use your microwave to: • Microwave mode • Combi-functions Cooking principle 1. -
Page 23: Using The Microwave Mode
USING THe mICROWAve mODe Microwave cooking uses high-frequency waves to cook food. The waves cause molecules in the food to move rapidly, creating friction and the resulting energy cooks the food. For Microwave mode, use the ceramic tray on the first level. Setting microwave mode 1. - Page 24 Guide to microwave power levels pErcEnTagE ouTpuT poWEr lEvEl rEmark poWEr (W) For heating up liquids. HIGH For heating up and cooking HIGH lOW food. For heating up and cooking meDIUm HIGH food. meDIUm For cooking meat and heating up delicate foods. meDIUm lOW For defrosting and continued DefROST...
- Page 25 microwave- cookware comments safe Glassware • Oven-to-table ware Can be used, unless decorated with a metal trim. • Fine glassware Can be used to warm foods or liquids. Delicate glass may break or crack if heated suddenly. • Glass jars Must remove the lid.
- Page 26 microwave cooking guide General guidelines food suitable for microwave cooking Many kinds of food are suitable for microwave cooking, including fresh or frozen vegetables, fruit, pasta, rice, grains, beans, fish, and meat. Sauces, custard, soups, steamed puddings, preserves, and chutneys can also be cooked in a microwave oven. covering during cooking Food should be covered during cooking, as the evaporated water rises as steam and contributes to the cooking process.
- Page 27 Cooking guide for fresh vegetables Use a suitable glass Pyrex bowl with lid. Add 30-45 ml cold water (2-3 tbsp.) for every 250 g unless another water quantity is recommended (see table) Cook covered for the minimum time (see table) Continue cooking to get the result you prefer. Stir once during and after cooking.
- Page 28 Cooking guide for rice and pasta rice: Use a large glass Pyrex bowl with lid. (Note that rice doubles in volume during cooking.) Cook covered. After cooking time is over, stir before letting stand. Add salt or herbs and butter. Note that rice may not have absorbed all water after the cooking time is finished.
- Page 29 Reheating Your microwave oven will reheat food in a fraction of the time a conventional oven takes. arranging and covering Avoid reheating large items such as joints of meat since they tend to overcook and dry out before the centre is piping hot. You will have more success reheating smaller pieces. Keeping food covered while heating will also help prevent drying.
- Page 30 Reheating baby food baby food Extra caution should also be exercised when reheating baby foods. Put food into a deep ceramic plate. Cover with plastic lid. Stir well after reheating. Let stand for 2-3 minutes before serving. Stir again and check temperature. Recommended serving temperature is between 30-40 °C.
- Page 31 reheating liquids and food Use the power levels and times in this table as guide lines for reheating. standing food portion power Time time instruction (min.) Drink 250 ml 800 W 1½-2 Pour into a ceramic cup and (1 mug) reheat uncovered.
- Page 32 Frozen foods should be defrosted using defrosting power level (180 W). Place food on ceramic tray, insert ceramic tray in shelf level 1. portion Time standing food instructions (min.) time (min.) meAT Minced Beef 15-30 Place the meat on the ceramic 8-12 plate.
-
Page 33: Using The Oven Mode
USING THe OveN mODe To set an oven mode 1. Turn the modE sElEcTor to grill modE or convEcTion modE. The oven mode and recommended temperature are displayed. Grill Convection 2. Press sElEcT and then turn the mulTi funcTion sElEcTor to set the desired temperature. 3. - Page 34 Grill setting Food is heated by the top heating element. For grilling, Grill insert with Ceramic Tray on level * Temperatures Setting: 150-230 °C * Please ensure that glass baking dishes are suitable for 150-230 °C cooking temperatures. Cooking guide Use temperatures and times in this table as guidelines for grilling.
- Page 35 Convection setting Food is heated by hot air from the fan and heating element, which are located in the rear back side of the oven. This setting provides uniform heating and is ideal for baking. Place the trays on Level * Temperatures Setting: 40-230 °C * Please ensure that glass baking dishes are suitable for 40-230 °C cooking temperatures.
- Page 36 Setting the cooking time You can set the cooking time to max. 10 hours. After cooking, the heating elements automatically turn off. 1. Select the desired mode and function. Set the temperature if preferred. 2. Press cook TimE. 3. Turn the mulTi funcTion sElEcTor to select the desired cooking time and then press cook TimE.
- Page 37 Setting the end time You can set a specific time you would like the oven to stop cooking. End Time mode can only be used in the grill modE and convEcTion modE. 1. Select the desired mode and function. Set the temperature if preferred. 2.
- Page 38 Setting the delay start Use Delay Start to delay the start of the oven’s operation. Example: Current time: 12:00 Cooking time: 2 hours End time: You wish to end cooking at 18:00 1. Select the desired mode and function. Set the temperature if preferred.
-
Page 39: Combination Mode
COmBINATION mODe microwave + Grill This mode uses the radiant heat coming from the grill and cooks at the speed of microwave cooking. Cooking time is decreased, and the food will have a nice browning. Suitable food combinations include all kinds of cooked food that need reheating and browning (baked pasta), as well as food that require a short cooking time to brown the top of the food. - Page 40 For Microwave + Grill, ceramic tray with grill insert is usually placed on Level * Microwave Power Setting: 100-600 W * Temperatures Setting: 40-200 °C * Please ensure that glass baking dishes are suitable for 40-200 °C cooking temperatures. Cooking guide Use power level with temperatures and times in this table as guidelines for cooking.
- Page 41 microwave + Convection This mode combines hot air and microwaves and reduces the cooking time while giving the food a brown and crispy surface. Suitable food for this mode include all kinds of meat and poultry as well as casseroles and gratin dishes, sponge and light fruit cakes, pies and crumbles, roasted vegetables, scones and breads.
- Page 42 For Microwave + Convection, ceramic tray with grill insert is usually placed on Level * Microwave Power Setting: 100-600 W * Temperatures Setting: 40-200 °C * Please ensure that glass baking dishes are suitable for 40-200 °C cooking temperatures. Cooking guide Use power level with temperatures and times in this table as guidelines for cooking.
-
Page 43: Using The Vegetable Cook Mode
USING THe veGeTABle COOK mODe Add 30-45 ml of cold water for every 250 g unless another water quantity is recommended (see table). Cook covered for the minimum time (see table). Continue cooking to get the result you prefer. Stir once during and once after cooking. Add, salt, herbs, or butter after cooking. Cover and let stand for 3 minutes. - Page 44 Guide to vegetabel menu setting The following table presents 10 vegetable. It contains its quantities, standing times and appropriate recommendations. These auto programmes contain special cook modes, which have been developed for your convenience. Weight shelf food item accessory recommendation (kg) level U:01 Broccoli...
- Page 45 Weight shelf food item accessory recommendation (kg) level U:06 Courgettes 0.2-0.3 Ceramic tray Cut courgettes into slices. Add 0.3-0.4 30 ml (2 tablespoons) water or a knob of butter. Put them evenly into a glass bowl with lid. Cook covered. Cook until just tender. U:07 Sliced Egg 0.1-0.2 Ceramic tray...
-
Page 46: Using The Auto Menu Mode
USING THe AUTO meNU mODe Auto Menu mode allows you to choose from 15 pre-programmed settings (10 Auto Cook and 5 Auto Defrost) to conveniently cook, roast, or bake your favorite foods. The cooking time and power level are automatically set. Simply select one of the 15 settings and set the weight to start cooking. Setting auto menu mode 1. - Page 47 Guide to auto cook menu setting The following table presents 10 Auto Programmes Reheating, Cooking, Roasting and Baking. It contains its quantities, standing times and appropriate recommendations. These auto programmes contain special cook modes, which have been developed for your convenience.
- Page 48 shelf food item Weight (kg) accessory recommendation level A:08 Baked 0.4-0.5 Grill Insert Cut potatoes into halves. Put Potato 0.6-0.7 + Ceramic them in a circle on the tray Halves Tray with the cut side to the grill. After cooking let stand for 2-3 minutes.
- Page 49 Guide to auto speed defrost setting The following table presents the various Auto Defrost programmes, quantities, standing times and appropriate recommendations. These programmes use microwave energy only. Remove all packaging material before defrosting. Place meat, poultry and fish on the ceramic tray.
-
Page 50: Pure Steam Cooking Guide
STeAm COOKING GUIDe The Pure Steamer is based on the principle of steam cooking, and is designed for fast, healthy cooking in your Samsung Microwave oven. This accessory is ideal for cooking rice, pasta, vegetables, etc. in record time, while preserving their nutritional values. - Page 51 COOKING: serving poWEr cooking time food handling size (min.) Artichokes 300 g 800 W Bowl with Insert tray + Lid (1-2 pcs) instructions Rinse and clean artichokes. Put insert tray into bowl. Set artichokes on tray. Add 1 tbsp lemon juice. Cover with lid. Stand for 1-2 minutes. fresh 300 g 800 W...
-
Page 52: Lamp On/Off
serving poWEr cooking time food handling size (min.) frozen 150 g 600 W 1½-2½ Bowl + Lid yeast instructions Dumpling Moist the top of filled dumplings with cold water. Put 1-2 frozen with Jam dumplings side by side into the steam bowl. Cover with lid. filling Stand for 2-3 minutes. -
Page 53: Adjusting The Cooking Time
ADJUSTING THe COOKING TIme You can adjust the cooking time by pressing +30. • Check how cooking is progressing at any time simply by opening the door. • Increase the remaining cooking time. It is possible to operate during microWavE modE, microWavE + grill modE and microWavE + convEcTion modE. -
Page 54: Using The Steam Clean Mode
USING THe STeAm CleAN mODe The Steam Clean allows you to sanitize your oven in just 15 minutes. 1. Turn the modE sElEcTor to sTEam clEan modE. The time (15:00) is displayed. 2. Press sTarT. The oven will start automatically. •... -
Page 55: Troubleshooting And Information Code
STORING AND RepAIRING yOUR mICROWAve OveN Repairs should only be made by a qualified service technician. If oven requires servicing, unplug the oven and contact SAMSUNG Customer Service. When calling, please have the following information ready: • The model number and serial number (can be found inside the oven door) •... - Page 56 Operating noise is too loud. • The oven makes noise during operation. This is normal. If you hear an abnormal sound continuously, please contact the Samsung Call Center. The oven causes interference with radios or televisions. • Slight interference may be observed on televisions or radios when the oven is operating.
- Page 57 The fan continues to operate after the oven has been turned off. • This is a normal occurrence. Cooling fan may continue to operate for up to cooling down the oven after oven has been turned off. Condensation inside the oven. •...
-
Page 58: Information Codes
It occurs when the temperature of cavity inside is over 210 °C in the Microwave Mode. abnormal TEmp sEnsing Error Call your local SAMSUNG It occurs when the temperature of cavity inside Customer Care Centre. is over 250 °C for 10 minutes. -
Page 59: Technical Data
SAMSUNG strives to improve its products at all times. Both the design specifications and these user instructions are thus subject to change without notice. TeCHNICAl SpeCIfICATIONS model NQ50H5533KS power source 230 V ~ 50 Hz power consumption Maximum Power... - Page 60 П : Samsung Electronics Co., Ltd / Са Э К ., Л А (М а - ) 129, Са - , Й - ,С Г - , К , 443-742 А а : ЛОТ 2, ЛЕБУХ 2, НОРС КЛАНГ СТРЕЙТС, ЭРИА 21, ИНДАСТРИАЛ...
- Page 61 McGrp.Ru Сайт техники и электроники Наш сайт McGrp.Ru при этом не является просто хранилищем инструкций по эксплуатации, это живое сообщество людей. Они общаются на форуме, задают вопросы о способах и особенностях использования техники. На все вопросы очень быстро находятся ответы от таких же посетителей сайта, экспертов...