Table of Contents
Advertisement
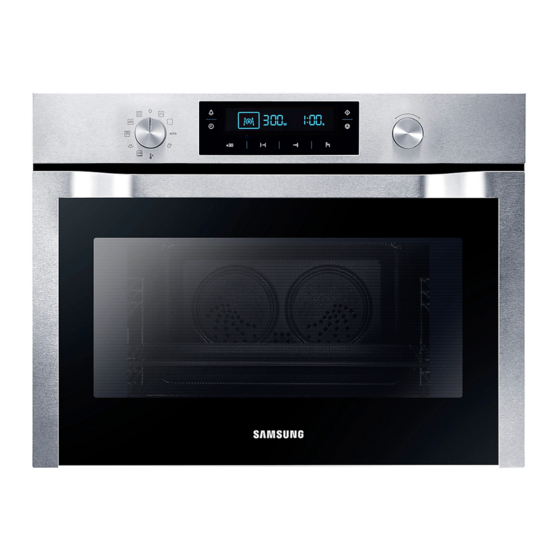
Combi MWO Built-
Please be advised that the Samsung warranty does NOT cover service
calls to explain product operation, correct improper installation, or
perform normal cleaning or maintenance.
This manual is made with 100 % recycled paper.
NQ50C7535DS_SA_DG68-00470D_EN.indb 1
in Oven
user manual
imagine
the possibilities
Thank you for purchasing this Samsung product.
To receive more complete service, please register
your product at
www.samsung.com/register
NQ50C7535DS
ENGLISH
2013-03-31
4:37:41
Advertisement
Table of Contents

Related Manuals for Samsung nq50c7535ds


Summary of Contents for Samsung nq50c7535ds
- Page 1 Combi MWO Built- in Oven user manual Please be advised that the Samsung warranty does NOT cover service calls to explain product operation, correct improper installation, or perform normal cleaning or maintenance. This manual is made with 100 % recycled paper.
- Page 2 USING THIS INSTRUCTION BOOKLET You have just purchased a SAMSUNG microwave oven. Your Owner’s Instructions contain valuable information on cooking with your microwave oven: • Safety precautions • Suitable accessories and cookware • Useful cooking tips • Cooking tips LEGEND FOR SYMBOLS AND ICONS Hazards or unsafe practices that may result in severe personal injury or death.
- Page 3 WARNING: It is hazardous for anyone other than a competent person to carry out any service or repair operation that involves the removal of a cover which gives protection against exposure to microwave energy. WARNING: Liquids and other foods must not be heated in sealed containers since they are liable to explode.
- Page 4 The oven should be cleaned regularly and any food deposites removed. Failure to maintain the oven in a clean conditioin could lead to deterioration of the surface that could adversely affect the life of the appliance and possibly result in a hazardous situation.
- Page 5 WARNING (Oven function only) - Optional WARNING: When the appliance is operated in the combination mode, children should only use the oven under adult supervision due to the temperatures generated. During use the appliance becomes hot. Care should be taken to avoid touching heating elements inside the oven.
-
Page 6: General Technical Information
The door or the outer surface may get hot when the appliance is operating. Keep the appliance and its cord out of reach of children less than 8 years. Appliances are not intended to be operated by means of an external timer or separate remote-control system. Please put the bent up frame side to the back, in order to support the restposition when cooking big loads. -
Page 7: Electrical Connection
Install in the Cabinet Kitchen Cabinets in contact with the oven must be heat- resistant up to 100 °C. Samsung will take no responsibility for damage of cabinets from the heat. Important safety instructions _7 NQ50C7535DS_SA_DG68-00470D_EN.indb 7... - Page 8 Fig1. Slide the oven partly into the recess. Lead the connection cable to the power source. Fig2. Slide the oven completely into the recess. Fig3. Fasten the oven using the two screws (4 X 25 mm) provoded. Fig4. Make the electrical connection. Check that the appliance works.
- Page 9 Building-in dimensions Be sure to hold the appliance with min 564 2 side handles and door handle when 200 cm² max 568 unpacking the product. Side Side handle handle min 446 max 450 Door handle 200 cm² Built-under Dimensions min 564 max 568 min 446 max 450...
- Page 10 CLEANING YOUR MICROWAVE OVEN The following parts of your microwave oven should be cleaned regularly to prevent grease and food particles from building up: • Inside and outside surfaces • Door and door seals • Turntable and Roller rings (Turntable type model only) ALWAYS ensure that the door seals are clean and the door closes properly.
- Page 11 This microwave oven is not intended for commercial use. The Light bulb should not be replaced in person for safety reasons. Please contact nearest authorised Samsung customer care,to arrange for a qualified engineer to replace the bulb. WARNING Only qualified staff should be allowed to modify or repair the appliance.
- Page 12 Remove all foreign substances such as dust or water from the power plug terminals and contact points using a dry cloth on a regular basis. Do not pull or excessively bend or place heavy objecton the power cord. In the event of a gas leak (such as propane gas, LP gas, etc.), ventilate immediately without touching the power plug.
- Page 13 CAUTION Only use utensils that are suitable for use in microwave ovens; DO NOT use any metallic containers, Dinnerware with gold or silver trimmings, Skewers, forks, etc. Remove wire twist ties from paper or plastic bags. Reason: Electric arcing or sparking may occur and may damage the oven. Do not use your microwave oven to dry papers or clothes.
- Page 14 Samsung will charge a repair fee for replacing an accessory or repairing a cosmetic defect if the damage to the unit and/or damage to or loss of the accessory was caused by the customer. Items this stipulation covers include: (a) A Dented, Scratched, or Broken Door, Handle, Out-Panel, or Control Panel.
-
Page 15: Table Of Contents
contents OVEN FEATURES Control panel Oven Accessories BEFORE YOU BEGIN Setting the clock Setting the energy save mode OVEN USE Types of heating How a microwave oven works Using the microwave mode Using the oven mode Using the multi-level cook mode Setting the cook time Setting the end time Setting the delay start... -
Page 16: Control Panel
oven features CONTROL PANEL 2 12 10 15 16 MODE SELECTOR KEEP WARM DISPLAY MULTI LEVEL COOK LAMP SPEED COOK MODE CLOCK MICROWAVE + ROAST +30s (quick start) MICROWAVE + CONVECTION COOK TIME MICROWAVE + GRILL END TIME MICROWAVE MODE SELECT OVEN MODE MULTI-FUNCTION SELECTOR... -
Page 17: Oven
OVEN Control Panel Top Heating Elements Level 5 Level 4 Oven Levels Level 3 Level 2 Microwave Level 1 Safety Door Lock Door Door Handle • Shelf levels are numbered from the bottom up. • The levels 4 and 5 are mainly used for grill function. •... -
Page 18: Accessories
ACCESSORIES The following accessories are provided with your microwave oven: 1. Ceramic tray. (Useful for microwave mode) 2. Baking trays. (DO NOT use for microwave mode.) 3. Grill insert for ceramic tray. Grill Insert (Useful for speed menu and grill mode) Ceramic Tray 4. -
Page 19: Before You Begin
before you begin When the appliance is first plugged in, the DISPLAY lights up. After three seconds, the Clock symbol and “12:00” blink on the DISPLAY. SETTING THE CLOCK 1. Press CLOCK. The “12” starts blinking. 2. Turn the MULTI-FUNCTION SELECTOR to set hour. -
Page 20: Setting The Energy Save Mode
SETTING THE ENERGY SAVE MODE The oven has an energy save mode. This facility saves electricity when the oven is not in use. Standby mode The oven will default to Standby mode after 10 minutes if not operated. ECO mode In ECO mode, the current time is not displayed. You cannot use the oven. 1. Press the END TIME for 3 seconds. -
Page 21: Oven Use
oven use TYPES OF HEATING The following chart summarizes the various heating modes and settings available on your oven. Use the Cooking Guides in the pages that follow to determine the appropriate mode and setting for all your recipes. Microwave mode Microwave energy is used to cook and defrost foods. -
Page 22: Keep Warm Mode
ProRoasting This mode includes an automatic heating-up cycle over 200 °C. The top heater and the convection fan are operating during the process of searing the meat. After this stage the food is cooked gently by the low temperature of preselection. This process is done while the top and the bottom heaters are operating. -
Page 23: Automatic Functions
Automatic functions Auto Menu Mode 36 pre-programmed auto cook settings can be selected for your convenience. Time and temperature will be set automatically. You simply select programme and weight your dish and start the auto cooking process. Speed Cook Mode 4 pre-programmed auto cook settings can be selected for your convenience. -
Page 24: Using The Microwave Mode
USING THE MICROWAVE MODE Microwaves are high frequency electromagnetic waves. In microwave cooking, microwave energy penetrates food, attracted and absorbed by its water, fat and sugar content. The microwaves cause the molecules in the food to move rapidly. The rapid movement of these molecules creates friction and the resulting heat cooks the food. -
Page 25: Guide To Microwave Power Levels
Guide to microwave power levels PERCENTAGE OUTPUT POWER LEVEL REMARK POWER (W) For heating up liquids. HIGH For heating up and cooking HIGH LOW food. For heating up and cooking MEDIUM HIGH food. MEDIUM For cooking meat and heating up delicate foods. MEDIUM LOW For defrosting and continued DEFROST... - Page 26 Microwave- Cookware Comments Safe Glassware • Oven-to-table ware Can be used, unless decorated with a metal trim. • Fine glassware Can be used to warm foods or liquids. Delicate glass may break or crack if heated suddenly. • Glass jars Must remove the lid.
-
Page 27: Microwave Cooking Guide
Microwave cooking guide General guidelines Food suitable for microwave cooking Many kinds of food are suitable for microwave cooking, including fresh or frozen vegetables, fruit, pasta, rice, grains, beans, fish, and meat. Sauces, custard, soups, steamed puddings, preserves, and chutneys can also be cooked in a microwave oven. - Page 28 Cooking guide for fresh vegetables Use a suitable glass Pyrex bowl with lid. Add 30-45 ml cold water (2-3 tbsp.) for every 250 g unless another water quantity is recommended (see table) Cook covered for the minimum time (see table) Continue cooking to get the result you prefer.
- Page 29 Cooking guide for rice and pasta Rice: Use a large glass Pyrex bowl with lid. (Note that rice doubles in volume during cooking.) Cook covered. After cooking time is over, stir before letting stand. Add salt or herbs and butter. Note that rice may not have absorbed all water after the cooking time is finished.
- Page 30 Reheating Your microwave oven will reheat food in a fraction of the time a conventional oven takes. Arranging and covering Avoid reheating large items such as joints of meat since they tend to overcook and dry out before the centre is piping hot. You will have more success reheating smaller pieces.
- Page 31 Reheating baby food Baby food Extra caution should also be exercised when reheating baby foods. Put food into a deep ceramic plate. Cover with plastic lid. Stir well after reheating. Let stand for 2-3 minutes before serving. Stir again and check temperature. Recommended serving temperature is between 30-40 °C.
- Page 32 Reheating liquids and food Use the power levels and times in this table as guide lines for reheating. Time Standing Food Portion Power Instruction (min.) time (min.) Drink 250 ml 900 W 1½-2 Pour into a ceramic cup and (1 mug) reheat uncovered.
- Page 33 Frozen foods should be defrosted using defrosting power level (180 W). Place food on ceramic tray, insert ceramic tray in shelf level 1. Time Standing Food Portion Instructions (min.) time (min.) MEAT Minced Beef 250 g 15-30 Place the meat on the ceramic 500 g 8-12 plate.
-
Page 34: Using The Oven Mode
USING THE OVEN MODE 9 settings are available under this mode. Check Cooking Guides on pages 36 ~ 44 to determine appropriate setting. Setting oven mode 1. Turn the MODE SELECTOR dial to Oven Mode position. 2. Turn the MULTI-FUNCTION SELECTOR Dial to desired oven mode. - Page 35 3. To change temperature, press SELECT and turn the MULTI-FUNCTION SELECTOR to set the desired temperature. 4. To set cooking time, press COOK TIME and turn the MULTI-FUNCTION SELECTOR to set the desired cooking time. • Cooking time setting : Max. 10 hours. 5.
- Page 36 Convection setting Food is heated by hot air from the two fans and heating element, which are located in the rear back side of the oven. This setting provides uniform heating and is ideal for baking. Place the trays on Level * Temperatures Setting: 40-250 °C * Please ensure that glass baking dishes are suitable for 40-250 °C cooking temperatures.
- Page 37 Roasting (Convection + Top) setting Hot air and top heating element combine, making this setting ideal for crisping and browning. This setting is especially recommended for cooking meats. When cooking meat, place on rack on Level and set baking tray on Level to catch drippings.
- Page 38 Conventional Heat setting Heat comes from top and bottom heating elements. This setting is suitable for traditional baking and roasting. Baking tray or oven rack is usually placed on Level * Temperatures Setting: 40-250 °C * Please ensure that glass baking dishes are suitable for 40-250 °C cooking temperatures.
-
Page 39: Grill Setting
Grill setting Food is heated by the top heating element. For grilling, Oven rack is usually placed on Level or Oven rack with baking tray on level level * Temperatures Setting: 150-250 °C * Please ensure that glass baking dishes are suitable for 40-250 °C cooking temperatures. - Page 40 Fan Grill setting The heat generated by the top heating element is distributed by the fan. This mode can be used for grilling meat, fish, poultry and vegetables. It is not necessary to turn over food and it will get the crispy texture. For grilling, oven rack or baking tray are usually placed on Level * Temperatures Setting: 40-250 °C...
- Page 41 Pizza (Convection + Bottom) setting Hot air and the bottom heating element combine to heat food. This is a useful setting for crisping and browning. Baking tray or oven rack is often used on Level * Temperatures Setting: 40-250 °C * Please ensure that glass baking dishes are suitable for 40-250 °C cooking temperatures.
- Page 42 Intensive (Top + Bottom + Convection) setting This mode activates all heating elements such as upper, lower and convection fan alternately. The heat is distributed evenly in the oven. This mode is suitable for big quantities of food, which need heat supply, such as large gratins and pies. Baking tray or oven rack is often used on Level * Temperatures Setting: 40-250 °C * Please ensure that glass baking dishes are suitable for 40-250 °C cooking...
- Page 43 ProRoasting setting This mode includes an automatic heating-up cycle over 200 °C. The top heater and the convection fan are operating during the process of searing the meat. After this stage the food is cooked gently by the low temperature of preselection. This process is done while the top and the bottom heaters are operating.
- Page 44 ECO Convection setting This mode uses the optimized heating system so that you save energy during cooking your dishes. The cooking time will be increased a little but you can achieve even baking results on your dishes. Baking tray or oven rack is often used on Level * Temperatures Setting: 40-250 °C * Please ensure that glass baking dishes are suitable for 40-250 °C cooking temperatures.
-
Page 45: Using The Multi-Level Cook Mode
USING THE MULTI-LEVEL COOK MODE This mode is suitable for cooking with two different levels at the same time. This mode works by the circulation of heated air. The entire oven cavity may then be utilized. For example, cooking two trays of biscuits. The cooking time will be increased compared with 1 level cooking but you can bake double quantity at once. - Page 46 For Multi-Level Cook, 2 Baking trays or 1 baking tray and oven rack are usually placed on Level * Temperatures Setting: 40-250 °C * Please ensure that glass baking dishes are suitable for 40-250 °C cooking temperatures. Cooking guide Use temperatures and times in this table as guidelines for baking. We recommend to preheat the oven with Multi-Level Cook mode.
-
Page 47: Setting The Cook Time
SETTING THE COOK TIME After you get cooking function, you can set how much time you will cook. And the setting time is over, heating elements automatically turn off. 1. Choose the desired mode and function (and set the temperature if preferred). 2. -
Page 48: Setting The End Time
SETTING THE END TIME After you get cooking function, you can set when the cook is over. And the setting time is over, heating elements automatically turn off. 1. Choose the desired mode and function (and set the temperature if preferred). 2. -
Page 49: Setting The Delay Start
SETTING THE DELAY START If the end timer is entered after the cook timer has already been set, the cook timer and the end timer are calculated and if necessary the oven sets a delay start point. Example: Current time : 12:00 Cook time : 2 hours End time : you wish to end cooking at 18:00 1. -
Page 50: Combi-Functions
COMBI-FUNCTIONS Microwave + Grill This mode combines radiant heat coming from the grill with the speed of microwave cooking. The cooking time will be decreased and the results will have a nice browning. Suitable food for combination mode include all kinds of cooked food which need reheating and browning (e.g. - Page 51 For Microwave + Grill, ceramic tray with grill insert is usually placed on Level * Microwave Power Setting: 100-600 W * Temperatures Setting: 40-200 °C * Please ensure that glass baking dishes are suitable for 40-250 °C cooking temperatures. Cooking guide Use power level with temperatures and times in this table as guidelines for cooking.
- Page 52 Microwave + Convection This mode combines hot air and microwave and is therefore reducing the cooking time while giving the food a brown and crispy surface. Suitable food for combination mode include all kinds of meats and poultry as well as casseroles and gratin dishes, sponge cake and light fruit cakes, pies and crumbles, roast vegetables, scones and breads.
- Page 53 For Microwave + Convection, ceramic tray with grill insert is usually placed on Level * Microwave Power Setting: 100-600 W * Temperatures Setting: 40-230 °C * Please ensure that glass baking dishes are suitable for 40-250 °C cooking temperatures. Cooking guide Use power level with temperatures and times in this table as guidelines for cooking.
- Page 54 Microwave + Roast This mode combines Fan grill and microwave and is therefore reducing the cooking time while giving the food a brown and crispy surface. Suitable foods are thin meat, fish, poultry and vegetables, as well as small roasts which do not need a turnover.
- Page 55 For Microwave + Roast, ceramic tray with grill insert is usually placed on Level * Microwave Power Setting: 100-600 W * Temperatures Setting: 40-200 °C * Please ensure that glass baking dishes are suitable for 40-250 °C cooking temperatures. Cooking guide Use power level with temperatures and times in this table as guidelines for cooking.
-
Page 56: Using The Keep Warm Mode
USING THE KEEP WARM MODE In the keep warm setting, the food that you have cooked can be kept warm. Setting keep warm mode 1. Turn the MODE SELECTOR to the Keep Warm mode position. 2 Press SELECT. The temperature is blinking (Default : 70 °C). -
Page 57: Using The Auto Menu Mode
USING THE AUTO MENU MODE Auto Menu Mode allows you to choose from 36 pre-programmed settings (31 Auto Cook and 5 Auto Defrost) to conveniently cook, roast or bake your favorite foods. Cooking time and power level are automatically set. Simply select one of the 36 settings and set the weight to start cooking. - Page 58 Guide to auto cook menu setting The following table presents 31 Auto Programmes Reheating, Cooking, Roasting and Baking. It contains its quantities, standing times and appropriate recommendations. These auto programmes contain special cook modes, which have been developed for your convenience. Shelf Food item Weight (kg)
- Page 59 Shelf Food item Weight (kg) Accessory Recommendation level A:05 Stew 0.2-0.3 Ceramic Pour into a deep ceramic 0.4-0.5 tray plate or bowl and cover with plastic lid during heating. Put soup in the centre of ceramic tray. Stir carefully before and after 2-3min standing.
- Page 60 Shelf Food item Weight (kg) Accessory Recommendation level A:16 Aussie beef 0.5-0.7 Oven rack Put fresh dough into a 22 cm round metal baking dish. Put on the rack. A:17 Pound cake 0.7-0.8 Oven rack Put fresh dough into suitable sized rectangular metal baking dish(length 25 cm).
- Page 61 Shelf Food item Weight (kg) Accessory Recommendation level A:26 Beef steak, 0.3-0.6 Oven rack + 5 + 2 We recommend to preheat thin Baking tray the oven to 250 ˚C with grill mode for 5 min. Put beef steaks side by side in the middle of oven rack and baking tray.
- Page 62 Guide to auto speed defrost setting The following table presents the various Auto Defrost programmes, quantities, standing times and appropriate recommendations. These programmes use microwave energy only. Remove all packaging material before defrosting. Place meat, poultry and fish on the ceramic tray. Standing Food Weight...
-
Page 63: Using The Speed Cook Mode
USING THE SPEED COOK MODE Speed Cook Mode allows you to choose from 4 pre-programmed settings to conveniently cook, roast or bake your favorite foods (using microwave energy). Cooking time and power level are automatically set. Simply select one of the 4 settings and set the weight to start cooking. - Page 64 Guide to speed cook menu setting The following table presents 4 Auto Programmes for Speed Cooking and Roasting. It contains its quantities, standing times and appropriate recommendations. These auto programmes contain special cook modes, which have been developed for your convenience. Shelf Food item Weight (kg)
-
Page 65: Test Dish
TEST DISH According to standard EN 60350 1. Baking The recommendations for baking refer to preheated oven. Insert baking tray with slanted side towards the door front. Dish & Shelf Cooking Temp. Cooking Type of food Notes level mode (°C) time (min.) Conventional 150-170... -
Page 66: Cleaning And Care
cleaning and care USING THE STEAM CLEAN MODE The Steam Clean allows you to sanitize your oven in just 15 minutes. 1. Turn the MODE SELECTOR to Steam Clean position. • Pour about 100 ml water onto the floor of the empty oven. -
Page 67: Switching Off The Beeper
SWITCHING OFF THE BEEPER The oven’s Switching Off The Beeper allows you to switch the beeper on and off. 1. Turn the MODE SELECTOR to “OFF” position. 2. To switch the beeper off, press COOK TIME and END TIME at the same time and hold for 3 seconds. -
Page 68: Child Safety Lock
CHILD SAFETY LOCK The oven’s Child Safety Lock allows you to lock the control panel to protect the oven against unintended use. To lock the oven 1. Turn the MODE SELECTOR to “OFF” position. 2. Press +30s (quick start) and COOK TIME at the same time and hold for 3 seconds. -
Page 69: Troubleshooting And Information Code
STORING AND REPAIRING YOUR MICROWAVE OVEN Repairs should only be made by a qualified service technician. If oven requires servicing, unplug the oven and contact SAMSUNG Customer Service. When calling, please have the following information ready: • The model number and serial number (can be found inside the oven door) •... - Page 70 Operating noise is too loud. • The oven makes noise during operation. This is normal. If you hear an abnormal sound continuously, please contact the Samsung Call Center. The oven causes interference with radios or televisions.
- Page 71 The fan continues to operate after the oven has been turned off. • This is a normal occurrence. Cooling fan may continue to operate for up to cooling down the oven after oven has been turned off. Condensation inside the oven. •...
-
Page 72: Information Codes
SENSING ERROR problem after above It occurs when the temperature of cavity action, then contact an inside is over 210 °C in the Microwave authorized SAMSUNG Mode. Customer Service. TEMP SENSOR TARGET TEMP ERROR It occurs when the preheating is not completed and the temperature of cavity inside is under 120 °C for 30 minutes. -
Page 73: Technical Data
SAMSUNG strives to improve its products at all times. Both the design specifications and these user instructions are thus subject to change without notice. TECHNICAL SPECIFICATIONS Model NQ50C7535DS Power Source 240 V / 50 Hz Power Consumption Maximum Power... - Page 74 memo NQ50C7535DS_SA_DG68-00470D_EN.indb 74 2013-03-31 4:41:05...
- Page 75 memo NQ50C7535DS_SA_DG68-00470D_EN.indb 75 2013-03-31 4:41:05...
- Page 76 QUESTIONS OR COMMENTS COUNTRY CALL OR VISIT US ONLINE AT AUSTRALIA 1300 362 603 NEW ZEALAND 0800 SAMSUNG (0800 726 786) www.samsung.com CHINA 400-810-5858 www.samsung.com/hk (Chinese) HONG KONG (852) 3698 4698 www.samsung.com/hk_en (English) 1800 3000 8282 www.samsung.com/in INDIA 1800 266 8282 0800-112-8888 www.samsung.com/id...