Table of Contents
Advertisement
Quick Links
Contents SH WMF 800 / 900 / 1000 S / 1000 pro S
1/1
1/2
1/3
Views
1/3.1
WMF 800 / 900 . . . . . . . . . . . . . . . . . . . . . . . . . . . . . . . . . . . . . . . . . . . . . . . . . . . . . . . . . . . . T1-6
1/3.2
Views WMF 1000 S / 1000 pro S . . . . . . . . . . . . . . . . . . . . . . . . . . . . . . . . . . . . . . . . . . . . . . T1-7
1/4
1/4.1
Water filter 100 for WMF 800 / 900 and 1000 S / 1000 pro S . . . . . . . . . . . . . . . . . . . . . . T1-8
1/4.2
Water filter 200 for WMF 900 and WMF 1000 S / 1000 pro S . . . . . . . . . . . . . . . . . . . . . . T1-8
1/4.3
Water filter adapter. . . . . . . . . . . . . . . . . . . . . . . . . . . . . . . . . . . . . . . . . . . . . . . . . . . . . . . . . T1-9
2/1
2/1.1
Grinder . . . . . . . . . . . . . . . . . . . . . . . . . . . . . . . . . . . . . . . . . . . . . . . . . . . . . . . . . . . . . . . . . . . T2-2
2/1.2
Adjusting rod . . . . . . . . . . . . . . . . . . . . . . . . . . . . . . . . . . . . . . . . . . . . . . . . . . . . . . . . . . . . . . T2-3
2/1.3
Bean hopper with integrated lid on top . . . . . . . . . . . . . . . . . . . . . . . . . . . . . . . . . . . . . . . . . T2-3
2/2
2/2.1
Manual insert for ground coffee and cleaning tablets . . . . . . . . . . . . . . . . . . . . . . . . . . . . . T2-5
2/3
2/3.1
Water tank with lid . . . . . . . . . . . . . . . . . . . . . . . . . . . . . . . . . . . . . . . . . . . . . . . . . . . . . . . . . T2-7
2/3.1.1
2/3.2
Water tank inlet assembly . . . . . . . . . . . . . . . . . . . . . . . . . . . . . . . . . . . . . . . . . . . . . . . . . . . T2-9
2/3.3
Flow meter . . . . . . . . . . . . . . . . . . . . . . . . . . . . . . . . . . . . . . . . . . . . . . . . . . . . . . . . . . . . . . . . T2-9
2/3.4
Oscillation pump . . . . . . . . . . . . . . . . . . . . . . . . . . . . . . . . . . . . . . . . . . . . . . . . . . . . . . . . . . T2-10
2/3.5
Hot water boiler system . . . . . . . . . . . . . . . . . . . . . . . . . . . . . . . . . . . . . . . . . . . . . . . . . . . . T2-11
2/3.5.1
2/3.5.2
Thermostat
2/3.5.3
2/3.5.4
2/3.5.4.2 Valve
2/3.6
Steam boiler system. . . . . . . . . . . . . . . . . . . . . . . . . . . . . . . . . . . . . . . . . . . . . . . . . . . . . . . . T2-19
2/3.6.1
2/3.6.2
Thermostat
2/3.6.3
2/3.6.4
2/3.6.5
2/3.7
Flow Errors . . . . . . . . . . . . . . . . . . . . . . . . . . . . . . . . . . . . . . . . . . . . . . . . . . . . . . . . . . . . . . . T2-26
2/3.7.1
2/4
2/4.1
Brewing unit lid . . . . . . . . . . . . . . . . . . . . . . . . . . . . . . . . . . . . . . . . . . . . . . . . . . . . . . . . . . . T2-28
2/4.2
Brewer with drive. . . . . . . . . . . . . . . . . . . . . . . . . . . . . . . . . . . . . . . . . . . . . . . . . . . . . . . . . . T2-28
2/4.2.1
Outlet piston (top piston with brewing sieve)
2/4.2.2
2/4.2.3
2/4.3
Brewing water connection, coffee spout connection. . . . . . . . . . . . . . . . . . . . . . . . . . . . . . T2-33
2/4.4
Reed switch . . . . . . . . . . . . . . . . . . . . . . . . . . . . . . . . . . . . . . . . . . . . . . . . . . . . . . . . . . . . . . T2-33
2/4.5
Brewing unit motor . . . . . . . . . . . . . . . . . . . . . . . . . . . . . . . . . . . . . . . . . . . . . . . . . . . . . . . . T2-33
2/4.5.1
Pinion
2/4.6
Grounds container . . . . . . . . . . . . . . . . . . . . . . . . . . . . . . . . . . . . . . . . . . . . . . . . . . . . . . . . . T2-34
2/5
2/5.1
All-in-One spout . . . . . . . . . . . . . . . . . . . . . . . . . . . . . . . . . . . . . . . . . . . . . . . . . . . . . . . . . . T2-36
2/5.1.1
2/5.1.2
2/5.2
Hot water dispensing. . . . . . . . . . . . . . . . . . . . . . . . . . . . . . . . . . . . . . . . . . . . . . . . . . . . . . . T2-39
2/5.2.1
2/6
Drip tray and drip tray grid
2/7
Fan
2/8
Electrical / electronics
© WMF 800 / 900 / 1000 S / 1000 pro S Edition 07/2014 - KMT
Table of Contents
T1-3
T1-6
T1-8
T2-1
T2-5
T2-14
T2-18
T2-22
T2-32
T2-34
T2-40
T2-42
T2-43
T0-1
Advertisement
Chapters
Table of Contents
Troubleshooting

Related Manuals for WMF 800


Summary of Contents for WMF 800
-
Page 1: Table Of Contents
T1-8 1/4.1 Water filter 100 for WMF 800 / 900 and 1000 S / 1000 pro S ..... . T1-8 1/4.2 Water filter 200 for WMF 900 and WMF 1000 S / 1000 pro S ..... . T1-8 1/4.3... - Page 2 Front panel WMF 1000 S / 1000 pro S ........
-
Page 3: Notes For Using The Manual
Hot surface. Caution. Caution. Bruising or crushing Hot steam. hazard. Cross reference Instructions Caution. The hazard warnings listed here must be familiar and must be followed before opening, repairing, or maintaining the coffee machine. Shock hazard – live parts The coffee machine is not fully disconnected from the mains if only switched off! Prior to any associated work, be shure to disconnect power cord. Caution. Line voltage is present at the mains cable connection, the CPU board, the power supply, the heater relays, the boilers at the heater connections, and the Klixon thermal overloads, and their corresponding connecting lines. © WMF 800 / 900 / 1000 S / 1000 pro S Edition 07/2014 - KMT T1-1... - Page 4 Handling of cleaning and descaling agents Caution. Health hazard through contact and swallowing. Please familiarize yourself with the safety data sheets. Bruising or crushing hazard Caution. Bruising or crushing hazard exists on the following moving parts: • Brewing unit • Grinder • Grounds container • Water tank • Drip tray • All-in-One spout © WMF 800 / 900 / 1000 S / 1000 pro S Edition 07/2014 - KMT T1-2...
-
Page 5: Part 1 Technical Information
3 x 1.5²/via isolated ground outlet On-site fuses at least 10 A Others Coffee machine with dry coffee grounds ejection into the integrated grounds container Procedure Drip tray without drainage. Installation clearances For operating, service, and safety reasons, the machine should be installed with a clearance of not less than 50 mm at the back and sides from the building or non-WMF components. A clear height of 1100 mm from the top of the supporting surface should be ensured. Recommended height of the working surface is a minimum of 700 mm and maximum of 900 mm from floor level. A minimum of 320 mm should be planned for remove the brewer. Built-in electrical connection The power cord must not come into contact with hot surfaces. No additional user is allowed to be connected to the power connection. Water supply and drainage In each case, WMF-specific connection conditions should be observed for water and Power supply. For drinking water with a carbonate hardness above 5 °dH (carbon hardness), a WMF scale filter should be installed. © WMF 800 / 900 / 1000 S / 1000 pro S Edition 07/2014 - KMT T1-3... -
Page 6: 1/2 Technical Information Wmf 1000 S / 1000 Pro S T1-4
Installation clearances For operating, service, and safety reasons, the machine should be installed with a clearance of not less than 50 mm at the back and sides from the building or non-WMF components. A clear height of 1,100 mm from the top of the supporting surface should be ensured. The height of the installation surface above the floor is at least 850 mm. At least 320 mm clearance must be provided above the machine in order to remove the brewing unit for maintenance and cleaning. Built-in electrical connection The power cord must not come into contact with hot surfaces. No additional user is allowed to be connected to the power connection. Water supply and drainage In each case, WMF-specific connection conditions should be observed for water and Power supply. For drinking water with a carbonate hardness above 5 °dH (carbon hardness), a WMF scale filter should be installed. * The local power supply must be constructed according to applicable national regulations (e.g. VDE 0100 for Germany). To improve safety, the coffee machine should be fitted with an FI 30 mA earth leakage current circuit breaker complying with DIN VDE 0664. If the mains connection lead for this coffee machine is damaged then it must be replaced using an original WMF spare part. No additional user is allowed to be connected to the power connection. ** The given daily / hourly performance is a STANDARD VALUE, which, among other things, is dependent upon the following factors: ground coffee quantity, type of coffee, grinding degree, brew water amount, water hardness and general operating status of the coffee machine (e.g. scaling, connection conditions, electrical power, drinking water, drainage, wear, etc.). © WMF 800 / 900 / 1000 S / 1000 pro S Edition 07/2014 - KMT T1-4... - Page 7 Serial-No. Prod. Date permissible 1.6 M Pa (16 bar) max. pressure Model label WMF 900: Type Mod. Serial-No. Prod. Date permissible 1.6 M Pa (16 bar) max. pressure Model label WMF 1000 S / 1000 pro S: Type Mod. Serial-No. Prod. Date permissible 1.6 M Pa (16 bar) max. pressure © WMF 800 / 900 / 1000 S / 1000 pro S Edition 07/2014 - KMT T1-5...
-
Page 8: Wmf 800 / 900
General information Views 1/3.1 WMF 800 / 900 (443,4) 283,7 © WMF 800 / 900 / 1000 S / 1000 pro S Edition 07/2014 - KMT T1-6... -
Page 9: Views Wmf 1000 S / 1000 Pro S
Technical information / basics 1/3.2 Views WMF 1000 S / 1000 pro S © WMF 800 / 900 / 1000 S / 1000 pro S Edition 07/2014 - KMT T1-7... -
Page 10: Water Filter
General information Water filter The use of water filter 100 and 200 is recommended for using water with a carbon hardness of more than 5 °dH. 1/4.1 Water filter 100 for WMF 800 / 900 and 1000 S / 1000 pro S Technical data and dimensions: 1/4.2 Water filter 200 for WMF 900 and WMF 1000 S / 1000 pro S Technical data and dimensions: © WMF 800 / 900 / 1000 S / 1000 pro S Edition 07/2014 - KMT T1-8... -
Page 11: Water Filter Adapter
Technical information / basics 1/4.3 Water filter adapter see User manuals WMF 800 / 900 / 1000 S / 1000 pro S If a water filter is used, an adapter must be set beforehand in the water tank. © WMF 800 / 900 / 1000 S / 1000 pro S Edition 07/2014 - KMT T1-9... -
Page 12: Part 2 Engineering
Operating current 5 - 6 A when grinding Service life: grinder Grinder disks Maximum 90,000 grinding operations at 10 g/grind With hard beans, appropriately less Complete grinder 90,000 grindings Motor 90,000 grindings © WMF 800 / 900 / 1000 S / 1000 pro S Edition 07/2014 - KMT T2-1... - Page 13 • Standard setting when delivered: about 11 AM Caution: grinding degree is set only during grinder operation. Error messages on the display • Grinder blocked grinder blocked See instructions, error messages, troubleshooting, part 6. © WMF 800 / 900 / 1000 S / 1000 pro S Edition 07/2014 - KMT T2-2...
-
Page 14: Adjusting Rod
Fill capacity about 280 g; not removable Spare parts • Bean hopper lid • Top Error messages on the display • Refill beans refill beans confirm beverage See instructions, error messages, troubleshooting © WMF 800 / 900 / 1000 S / 1000 pro S Edition 07/2014 - KMT T2-3... - Page 15 • If the grinder has been replaced or new grinder disks have been installed, the See Chapter 5/2.5.3 counter must be set to zero using the service program. “Carry out Service Maintenance” part 6. © WMF 800 / 900 / 1000 S / 1000 pro S Edition 07/2014 - KMT T2-4...
-
Page 16: Manual Insert
The manual insert may only be used for inserting cleaning tablets and ground coffee. Never allow cleaning powder or coffee beans or water to be placed inside. © WMF 800 / 900 / 1000 S / 1000 pro S Edition 07/2014 - KMT T2-5... -
Page 17: 2/3 Boiler Water System T2-6
Hot water boiler water Release valve Safety valve Flow meter valve 16 bar Water tank Oscillation pump Functional principles of the water system Fresh water is fed by the oscillation pump to the water tank into the hot water boiler. The required amount is specified by the flow meter. The oscillator pump produces, depending upon flow, a pressure between 3 and 15 bar. The brewing water is brought from the hot water boiler through the brewing valve to the brewing unit for brewing. After the brewing process, pressure in the brewing unit is released through the release valve. All amounts dispensed are monitored by the flow meter. The brew water withdrawal, hot water withdrawal and the supply of the the steam boiler are mutually locked out. While dispensing a beverage, the other beverage buttons are deactivated. The steam boiler produces the steam needed for milk and milk foam preparation, and for preheating the cups (Steam Jet.) © WMF 800 / 900 / 1000 S / 1000 pro S Edition 07/2014 - KMT T2-6... -
Page 18: Water Tank With Lid
Technical data: water tank WMF 800 / 900 WMF 1000 S / 1000 pro S Water tank volume 2.2 litres 2.8 litres Technical data: microswitch for the water tank lid 12 V input on CPU Switch contact closed Technician instructions The lid allows the water tank to be filled higher. The coffee machine cannot be operated without the lid. © WMF 800 / 900 / 1000 S / 1000 pro S Edition 07/2014 - KMT T2-7... -
Page 19: 2/3.1.1 Water Tank Level Sensor T2-8
Possible error on the display • Message “beverage sel. locked - fill the water tank,” cannot be confirmed although the tank is full. beverage sel. locked fill the water tank See instructions, error messages, troubleshooting Part 6 See flow errors chapter 2/3.7 © WMF 800 / 900 / 1000 S / 1000 pro S Edition 07/2014 - KMT T2-8... -
Page 20: Water Tank Inlet Assembly
Flow meter and hoses 6 years, maximum 90,000 brewing cycles See flow errors chapter 2/3.7 Error without display message • Flow meter does not turn • Flow meter not properly connected • Hose kinked before or after flow meter • Flow meter cover clogged See instructions, error messages, troubleshooting Part 6 © WMF 800 / 900 / 1000 S / 1000 pro S Edition 07/2014 - KMT T2-9... -
Page 21: Oscillation Pump
Error without display message • Hot water is spraying strongly • Fluctuating metered quantities of hot water See flow errors chapter 2/3.7 • Fluctuating metered quantities after pauses • Fluctuating metered quantities of coffee • Pump is very hot in normal operation • Pump is not working and/or is not delivering pressure • Non-return valve in pump outlet stuck after long downtime See instructions, error messages, troubleshooting Part 6 © WMF 800 / 900 / 1000 S / 1000 pro S Edition 07/2014 - KMT T2-10... -
Page 22: Hot Water Boiler System
Boiler water system 2/3.5 Hot water boiler system Steam Jet valve Steam-Jet Ventil Cappuccinoventil Cappuccino valve Brewing water valve Brühwasserventil Inlet valve Zulaufventil Hot water valve Heißwasserventil The hot water boiler prepares hot water for all beverages and supplies the steam boiler. During heating, excess water is drained via the brewing water valve and the release valve (not shown). The water is fed to the hot water boiler from the oscillation pump via the inlet hose. © WMF 800 / 900 / 1000 S / 1000 pro S Edition 07/2014 - KMT T2-11... -
Page 23: 2/3.5.1 Hot Water Boiler And Temperature Sensor T2-12
16 bar See hot water boiler safety valve chapter. Technical data: temperature sensor (NTC) Resistance at 20 °C about 12.500 ohms Resistance at 80 °C about 1.200 ohms Resistance at 90 °C about 900 ohms Service life: hot water boiler and temperature sensor maximum 6 years After 6 years, the hot water boiler must be replaced for safety reasons. Descaling may only be performed with the descaling program and with the intended descaler. © WMF 800 / 900 / 1000 S / 1000 pro S Edition 07/2014 - KMT T2-12... - Page 24 Errors without display message • Heating fault • Heating short-circuit to the medium in the boiler • NTC fault or cable break or contact resistance at the plug See instructions, error messages, troubleshooting • CPU Part 6 Spare parts • Hot water boiler with heating system • Insulation © WMF 800 / 900 / 1000 S / 1000 pro S Edition 07/2014 - KMT T2-13...
-
Page 25: 2/3.5.3 Hot Water Boiler Safety Valve T2-14
See hot water boiler in chapter 2/3.5.4.2 2/3.5.3 Hot water boiler safety valve The safety valve prevents an unallowed increase in pressure in the boiler due to faults. Technical data: safety valve Opening pressure 16 bar (1.6 MPa) Service life: safety valve 2 years After 2 years, the safety valve must be replaced for safety reasons © WMF 800 / 900 / 1000 S / 1000 pro S Edition 07/2014 - KMT T2-14... - Page 26 Boiler water system Technician instructions In normal operation (when heating, when dispensing beverages and steam dispensing), no water should leak out of the safety valve. Otherwise, there is a fault in the water metering system for all beverages. A leaking safety valve must be replaced. The safety valve may not be opened. It can only be replaced as a complete unit. Error without display message • Fluctuating beverage amounts See instructions, error messages, troubleshooting Part 6 © WMF 800 / 900 / 1000 S / 1000 pro S Edition 07/2014 - KMT T2-15...
-
Page 27: 2/3.5.4 Water Supply Assembly And Valves T2-16
2/3.5.3 Technical data: water supply assembly and solenoid valves Solenoid valves, general Power supply Rated voltage 24 V DC Current draw <500 mA Brewing valve Opening pressure for the 0.4 MPa (4 bar) opposite the flow brewing valve direction! © WMF 800 / 900 / 1000 S / 1000 pro S Edition 07/2014 - KMT T2-16... - Page 28 Brew valve, hot water valve, maximum 2 years or 30.000 brewing cycles (hot release valve water valve is also replaced during this maintenance) Steam boiler inlet valve maximum 6 years Technician instructions Before replacing a leaking valve, always examine the descaling and filter change counter and descale the coffee machine. Valves may not be opened. It must be replaced, complete with all o-rings (without the solenoid.) Error without display message • Fluctuating beverage amounts with valve leakage • Defective release valve: coffee or lots of water in the drip tray See instructions, error messages, troubleshooting Part 6 © WMF 800 / 900 / 1000 S / 1000 pro S Edition 07/2014 - KMT T2-17...
-
Page 29: 2/3.5.4.1 Operation Of The Brewing Valve And Release Valve T2-18
The brewing water for pre-infusion is fed to the ground coffee ™ The pump and brewing valve remain active during the pre-infusion time After the brewing process After brewing, the brewing pressure is reduced via the release valve into the drip tray. During the brewing process, if the pump switches on in the lowering operation, the brewing pressure is reduced via the release valve into the drip tray. 2/3.5.4.2 Valve If a valve is replaced, the non-wearing components of the solenoid valve remain on the coffee machine. There are no provisions for replacing a plunger or a plunger guide. Either the solenoid or the base can be replaced. Technical service instructions The flow direction is shown on the valve. The brewing valve is installed opposite the direction of flow! © WMF 800 / 900 / 1000 S / 1000 pro S Edition 07/2014 - KMT T2-18... -
Page 30: Steam Boiler System
™ Detach the hoses and pull from the valve housing ™ Remove the old valve ™ Insert the new valve in the correct flow direction, hand-tighten the union screws ™ Mount the solenoid and the fastening bow ™ Mount the springs Spare parts • Base (incl. O-rings on the connectors) • Solenoid 2/3.6 Steam boiler system Steam Jet valve Steam-Jet Ventil Cappuccino valve Cappuccinoventil Hot steam is prepared in the steam boiler to dispense steam and to use with automatic milk and milk foam dispensing. © WMF 800 / 900 / 1000 S / 1000 pro S Edition 07/2014 - KMT T2-19... -
Page 31: 2/3.6.1 Steam Boiler With Temperature Sensor And Electrode (Level Sensor) T2-20
Temperature sensor Resistance at NTC at 20 °C about 12.500 ohms Resistance at NTC at 95 °C about 800 ohms Resistance at NTC at 125 °C about 350 ohms Service life for the steam boiler and temperature sensor Maximum 6 years After 6 years, the steam boiler must be replaced for safety reasons. Descaling may only be performed with the descaling program and with the intended descaler. Fundamental temperature controls: If below the desired temperature, the heat turns on until the desired temperature is reached. © WMF 800 / 900 / 1000 S / 1000 pro S Edition 07/2014 - KMT T2-20... -
Page 32: 2/3.6.1.1 Level Sensor T2-21
Technical data: level probe Empty threshold 180 digits Service life: level probe Level probe 6 years, maximum 90,000 brewing cycles Technician instructions Hot water boiler and steam boiler heating are only activated if the level sensor is contacted. Error without display message • Level sensor does not switch, no milk or milk foam dispensing; instead, only hot water is dispensed. See instructions, error messages, troubleshooting Part 6 © WMF 800 / 900 / 1000 S / 1000 pro S Edition 07/2014 - KMT T2-21... -
Page 33: 2/3.6.1.2 Inlet Pipe T2-22
If tripped without an apparent reason, then the hot water boiler and the CPU must be replaced. If there is mechanical damage or evidence of corrosion, the temperature sensor must be replaced for safety reasons. heating up... Error message on the display • Tripping of the temperature limiter can be traced to faults listed in the steam boiler chapter • Display “heating up...” does not turn off after being switched off and on. See steam boiler chapter See instructions, error messages, troubleshooting Part 6 © WMF 800 / 900 / 1000 S / 1000 pro S Edition 07/2014 - KMT T2-22... -
Page 34: 2/3.6.3 Steam Boiler Safety Valve T2-23
Service life for the steam boiler safety valve 2 years After 2 years, the safety valve must be replaced for safety reasons Technician instructions In normal operation, no steam should issue from the safety valve. If tripped without an apparent reason, then the hot water boiler and the CPU must be replaced. The safety valve may not be opened. It may only be replaced as a complete unit. Error without display message • Safety valve leaks, steam continues to issue from the release pipe into the drip tray. See instructions, error messages, troubleshooting Part 6 © WMF 800 / 900 / 1000 S / 1000 pro S Edition 07/2014 - KMT T2-23... -
Page 35: 2/3.6.4 Cappuccino Valve (Steam Boiler) T2-24
2/3.6.5 Steam Jet valve The Steam Jet valve is used for preheating cups WMF 900, 1000 S, and 1000 pro S coffee machines. Technical data: Steam Jet valve Power supply, valves Rated voltage 24 V DC Current consumption, valves <500 mA Service life: Steam Jet valve Steam Jet valve maximum 2 years, exchange during maintenance Technician instructions Before replacing a leaking solenoid valve, always examine the descaling and filter change counter and descale the coffee machine. Valves may not be opened. It must be replaced, complete with all o-rings (without the solenoid.) © WMF 800 / 900 / 1000 S / 1000 pro S Edition 07/2014 - KMT T2-24... - Page 36 Technical data: air pump Power supply Nominal voltage 24 V DC; with grid voltage regulator to 18 V Current draw <0.5 A Fixed air aperture in 0.2 mm intake hose Additional run time 3 s Line is blown out after (fixed setting) pauses of > 7 minutes Errors without error message • Air pump clogged or defective; milk does not foam © WMF 800 / 900 / 1000 S / 1000 pro S Edition 07/2014 - KMT T2-25...
-
Page 37: Flow Errors
For all error messages, check the flow errors: • is there air in the system (bleed coffee machine via hot water dispensing) See instructions, error messages, troubleshooting In the case of clogging on or after: Part 6 • Hot water valve • Steam boiler inlet valve Due to the stoppage, the brewing valve is forced open by the high pressure, and water runs into the brewing chamber. © WMF 800 / 900 / 1000 S / 1000 pro S Edition 07/2014 - KMT T2-26... -
Page 38: 2/4 Brew System And Grounds Container T2-27
This insertion funnel is spring-loaded and moves appropriately into the brewing position. The brewing unit can be moved outside the coffee machine with the multitool in all positions. © WMF 800 / 900 / 1000 S / 1000 pro S Edition 07/2014 - KMT T2-27... -
Page 39: Brewing Unit Lid
The pinion grips against the teeth of the brewer spindle. On the other hand, the brewer spindle setting can be corrected with the multitool before replacing. © WMF 800 / 900 / 1000 S / 1000 pro S Edition 07/2014 - KMT T2-28... - Page 40 © WMF 800 / 900 / 1000 S / 1000 pro S Edition 07/2014 - KMT T2-29...
- Page 41 ON/OFF, etc.)* *) After power off and on, after resets and after opening the brew cover, basically it drives from the ejection position to the insertion position. © WMF 800 / 900 / 1000 S / 1000 pro S Edition 07/2014 - KMT T2-30...
-
Page 42: 2/4.2.2 Friction Piston T2-32
• Spring for friction piston * • Scraper • Insertion funnel • Right and left springs for the insertion funnel • Add-on components * • Pusher * = own chapter © WMF 800 / 900 / 1000 S / 1000 pro S Edition 07/2014 - KMT T2-31... -
Page 43: 2/4.2.3 Lower Piston T2-32
(lowest position in the brew chamber). This is unavoidable due to the principle. Spare parts • Lower piston complete • Snap ring • Complete brewing cylinder © WMF 800 / 900 / 1000 S / 1000 pro S Edition 07/2014 - KMT T2-32... -
Page 44: Brewing Water Connection, Coffee Spout Connection
The brewer motor is screwed to the base pan with three screws. In addition, a plastic cover is glued over the screws. There is a pinion with a D-surface which transmits power, and is secured with a snap ring. © WMF 800 / 900 / 1000 S / 1000 pro S Edition 07/2014 - KMT T2-33... -
Page 45: Grounds Container
If the grounds container is removed after full message or in operation, the message: “grounds container emptied?” is shown on the display. After confirming with counter is deleted. © WMF 800 / 900 / 1000 S / 1000 pro S Edition 07/2014 - KMT T2-34... - Page 46 Notification of presence With removed grounds container, the micro switch is opened and the 24 V power supply is interrupted. Spare parts • Complete grounds container • Microswitch © WMF 800 / 900 / 1000 S / 1000 pro S Edition 07/2014 - KMT T2-35...
-
Page 47: 2/5 Dispensing Devices T2-36
6 years / 90,000 movements Elastomer nozzle (steam nozzle) 1 year (hygiene) Milk foamer 1 year (hygiene) Milk system If there is high wear / high hygiene requirements, the part must be exchanged if needed. © WMF 800 / 900 / 1000 S / 1000 pro S Edition 07/2014 - KMT T2-36... -
Page 48: 2/5.1.1 Coffee Dispensing T2-37
• Uneven dosing right and left • Coffee spout overruns • Coffee runs too slowly • Foamer doesn't stay (falls downward) Error messages, instructions, troubleshooting see Part 6 © WMF 800 / 900 / 1000 S / 1000 pro S Edition 07/2014 - KMT T2-37... -
Page 49: 2/5.1.2 Automatic Milk And Milk Foam Dispensing T2-38
This sucks in the milk. In the milk foamer, the steam-air mixture is combined in the milk, which heats and foams the milk. Without additional air (All-in-One spout at top position for WMF 800, 900, and 1000 S), milk is heated and dispensed. -
Page 50: Hot Water Dispensing
When the hot water dispensing is started, the pump and the heating is switched on. The dispensing can be stopped by pressing the hot water button again. When the hot water button is held down, water is dispensed in free flow. © WMF 800 / 900 / 1000 S / 1000 pro S Edition 07/2014 - KMT T2-39... - Page 51 A float is integrated to indicate its level. The drip tray grid is loosely laid on the drip tray. The drip tray grid for the WMF 900, 1000 S, and 1000 pro S is equipped with a steam jet for preheating cups.
- Page 52 • No message when cleaning that the drip tray must be emptied • The drip tray can quickly run over Error messages, instructions, troubleshooting see part 6 © WMF 800 / 900 / 1000 S / 1000 pro S Edition 07/2014 - KMT T2-41...
- Page 53 Technical data: fan Rated voltage 24 V DC Capacity 2.4 W Error without display message • Fan is not running Spare parts • Fan Error messages, instructions, troubleshooting see part 6 © WMF 800 / 900 / 1000 S / 1000 pro S Edition 07/2014 - KMT T2-42...
-
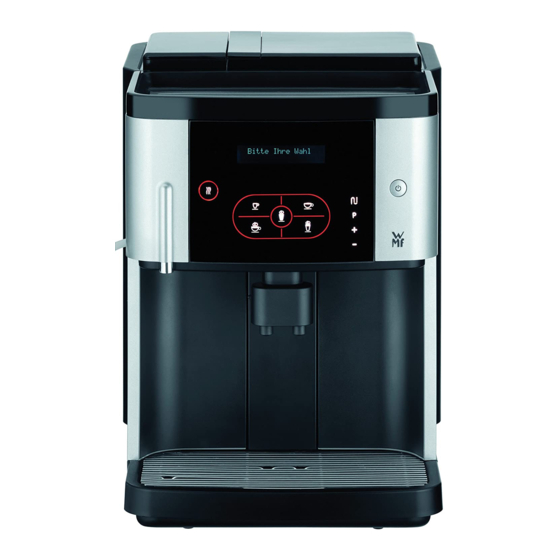
Page 54: Front Panels
Do not touch the controller until your body is connected to the protective ground of the coffee machine. © WMF 800 / 900 / 1000 S / 1000 pro S Edition 07/2014 - KMT T2-43... -
Page 55: 2/8.1.4 Controller Layout T2-44
Outputs are generally connection to ground, while the voltage (12 V or 24 V) is applies to the components (valves, motors, etc.) Spare parts • Programmed complete controller 2/8.1.4 Controller layout © WMF 800 / 900 / 1000 S / 1000 pro S Edition 07/2014 - KMT T2-44... - Page 56 Grounds container Tank Milk foamer Brewing valve Hot water valve Steam valve Inlet valve Steam jet valve (Steam Jet) Optional illumination 1000 pro S T 8 A, 250 V © WMF 800 / 900 / 1000 S / 1000 pro S Edition 07/2014 - KMT T2-45...
-
Page 57: Power Supply
Error without display message • No 12 V and no 24 V available for controller • No 5 V available See troubleshooting chapter part 6 © WMF 800 / 900 / 1000 S / 1000 pro S Edition 07/2014 - KMT T2-46... -
Page 58: Heater Relay
80 mA Total LED voltage approx. 13 V Total LED power about 1.0 W 2/8.5 Cable harnesses All cable harnesses are provided in the basic configuration of the coffee machine. © WMF 800 / 900 / 1000 S / 1000 pro S Edition 07/2014 - KMT T2-47... -
Page 59: Part 3 Cleaning And Care
When the machine is switched off, the milk system is automatically rinsed. If power is lost or if the machine is switched off by a programmed timer, the milk system is automatically rinsed the next time the machine is switched on. © WMF 800 / 900 / 1000 S / 1000 pro S Edition 07/2014 - KMT T3-1... -
Page 60: 3/4 Manual Milk Foamer Cleaning (Milk System) T3-2
™ Press the All-in-One spout on a solid surface. The top and bottom parts loosen and can then be separated ™ Stir one measuring cap of WMF milk system cleaner into 200 ml of water in a container ™ Place all parts of the milk system in the cleaning solution for 5 hours or overnight ™... -
Page 61: 3/7 Brewing Unit Cleaning T3-3
Descaling rinse water 1900 ml Descaling / rinsing hot water valve 300 ml After descaling, the coffee machine must be cleaned using a cleaning tablet. The coffee machine is rinsed again during this process. © WMF 800 / 900 / 1000 S / 1000 pro S Edition 07/2014 - KMT T3-3... -
Page 62: 3/9 Scale Filter Insert T3-4
= Daily, at least once per day and as required Weekly = Weekly cleaning Regularly = Regularly as required Required = As required Optional = Optional (depending on the model) = Daily as required © WMF 800 / 900 / 1000 S / 1000 pro S Edition 07/2014 - KMT T3-4... -
Page 63: Part 4 Software
Part 4 Software Service program training documentation... - Page 64 WMF 900 S/1000 S Training Documentation Service Program KMT Technical Support Axel Klang Edition: October 2012...
-
Page 65: Preamble
Save for a few differences, the following description is also valid for similar machine types such as WMF 800 / WMF 900touch / WMF 900Black etc. -
Page 66: Table Of Contents
2 Table of Contents Table of Contents Preamble ............................................2 Table of Contents .......................................... 3 Basics & Overview User Interface Service Program ..............................6 Start service program = establish connection to the coffee machine ..............................6 Overview user interface service program ......................................... 7 3.2.1 Drop Down Menus .................................................. - Page 67 2 Table of Contents 5.2.3 Undo customer-specific beverage names ........................................30 System configuration ................................................31 Beverage-, and coffee machine configuration – save, reset & upload .............................. 32 5.4.1 Saving of coffee machine data ............................................32 Test functions, coffee machine parameters, component test ..........................34 Test functions ..................................................
- Page 68 Button Test functions – Tab Keyboard / Status ......................................65 10.5 Button Test functions – Special functions right mouse button ................................66 WMF Service Program – Source of Supply, Installation and Troubleshooting ....................67 11.1 Source of supply and installation service program ....................................67 11.2...
-
Page 69: Basics & Overview User Interface Service Program
3 Basics & Overview User Interface Service Program Basics & Overview User Interface Service Program Start service program = establish connection to the coffee machine Connect the switched on coffee machine and the laptop by using a USB cable. Important advice / Attention: Please always use the USB interface which has been activated for the service program in the device manager (see chapter 10.3). -
Page 70: Overview User Interface Service Program
3 Basics & Overview User Interface Service Program Overview user interface service program The user interface can be divided into 4 categories: Drop Down Menu Keys Tabs for selection of coffee machine type Buttons... -
Page 71: Drop Down Menus
3 Basics & Overview User Interface Service Program 3.2.1 Drop Down Menus File: Enables you to „Start“ and „Stop“ the communication to the coffee machine and to „Close“ the service program. Display: Access to „statistics“, „service history“ and „daily counter”. Furthermore, the running time of the grinder can be deleted through „Delete“. System status: Information about current status of machine. -
Page 72: Keys
3 Basics & Overview User Interface Service Program 3.2.2 Keys Start: Starts communication between service program and coffee machine. The buttons – „system status“ and „test functions“ – are now activated! Stop: Stops communication between service program and machine. Thus, coffee machine software update is possible. Prior to updating the coffee machine software the connection to the coffee machine has to be interrupted! ... - Page 73 3 Basics & Overview User Interface Service Program Statistic In the statistic, all counters, running times as well as the initial operation date can be viewed and saved. The statistic shows in an overview all date of the coffee machine. These counters cannot be deleted or edited.
- Page 74 3 Basics & Overview User Interface Service Program Counters (daily counter) The daily counter contains the counters since last deletion. This daily counter can be deleted by the customer at the display and through the service program. The daily counter shows the total no. of beverages dispensed as well as the no. of dispensing per beverage since the last deletion.
-
Page 75: Tabs For Selection Of Coffee Machine Type
3 Basics & Overview User Interface Service Program The dates can be updated by clicking on the exclamation mark. By clicking with the right mouse button in the white area a window is opened to set the service. If „Set service“ is pushed, the maintenance counter in the statistic is set to zero and the message „Service recommended“... -
Page 76: Buttons
3 Basics & Overview User Interface Service Program 3.2.4 Buttons System status: Information about current status of machine. Programming: Uploading and saving of a machine configuration as well as adjusting, for example, water hardness degree, Eco Mode etc. in the system configuration. ... -
Page 77: Software Update
File HexLoad and coffee machine software (…HEX) Coffee machine software incl. language package At the WMF consumer coffee machines software the languages are summarized in language packages (see recoding table on page 14). These packages can be recognized by their file name. -
Page 78: Recoding Table „Language In Language Package
4 Software update Recoding table „Language in language package“ 1000S 1000S 1000proS 1000proS German English French Dutch Spanish Italian Danish Norwegian Swedish Russian Czech Slowakian Polish... -
Page 79: Workflow Description „Software Update
4 Software update Workflow description „Software Update“ Open service program (see chapter 3.1) Important hint – do NOT connect service program with the coffee machine by clicking the „Start“ key, otherwise a software update through the „Flash Pro- grammer“ is not possible. Start software update through „Extras“... - Page 80 4 Software update Indicates the coffee machine software versions in the HexLoad folder Select desired coffee machine software version with the correct language package Push „Open“ -> Update starts automatically If the update does not start automatically, please eliminate the possible errors as described in chapter 11.2.
-
Page 81: Workflow Description Through „Software Download
4 Software update In order that the coffee machine is ready to operate again after the software update, there are two possibilities: 1. possibility – directly in the Hex-Load program Through „Target“ -> „Start Program“ boot coffee machine again Afterwards close „File“ -> „End“ HexLoad program 2. -
Page 82: Configuration And Activation Of The New Software
4 Software update The following window opens Indicates the coffee machine software versions in the HexLoad folder Select desired coffee machine software version with the correct language package Push „Open“-> now the update starts as described in „Software update“ (chap- ter 4.1). - Page 83 4 Software update Machine number (serial number) / Water hardness / Filter / Language / Switch-off time / brewing temperature Open window „Test functions“ Open new window through „Test functions“...
- Page 84 4 Software update Right mouse click into the lower white area „Default Configuration“ select and confirm During this, all customer-specific configuration data (water hardness, language, switch-off time etc…) is deleted and overwritten by the default values of the new software.
- Page 85 4 Software update Call up programming functions through the button „Programming“. Open new window through „Programming“ Load current coffee machine configuration into service program through „Load“ Load current coffee machine configuration through “Load” Open configuration window through „Sys“ button Open system configuration window through „Sys“...
- Page 86 4 Software update Enter in field „Machine number“ the serial number of the coffee machine and close window. Enter machine number (serial number) of the coffee machine here. Transfer default configuration date (now with machine number) again through „Set“key (now with machine number) to the coffee machine and thus into the factory setting memory.
- Page 87 4 Software update Open configuration window again through „Sys“button. Enter the previously noted customer-specific configuration data here again and close window. Enter the customer-specific brew water temperature here Enter the customer-specific language here Enter the machine number of the coffee machine here Enter the customer-specific water filter setting here Enter the customer-specific water hardness degree here Enter the customer-specific switch-off time here...
-
Page 88: Programming - System Configuration
5 Programming - System Configuration Programming - System Configuration Chapter 5 describes the most important processes of the function programming and system configuration. Access Programming Open service program and establish connection to the machine through the „Start“ key (see chapter 3.1) Now open the programming window through the „Programming“... -
Page 89: Define And Allocate Beverage Names
Important advice: In contrary to the professional WMF coffee machines, a modification of the beverage button allocation is not intended for the consumer coffee machines. The reason is that the button designation is already specified by the firmly fixed beverage symbols on the front panel. However, the beverage names (appearing in the display) can be modified. -
Page 90: Allocate Beverage Names To A Button
5 Programming - System Configuration Enter desired beverage name Transfer the modified beverage names to the coffee machine by pushing the „Send“key. This beverage name now only has to be allocated to the desired beverage button. 5.2.2 Allocate beverage names to a button Select the desired beverage button in the window programming. - Page 91 5 Programming - System Configuration Tab for product level Selection of beverage button Now the window with the settings for the selected beverage opens...
- Page 92 5 Programming - System Configuration Left column: beverage-specific settings, this column must not be modified. Right column: button-specific settings Open drop-down menu „Assign defined product name“ and select desired beverage name. Close window by X after allocation. Upload modifications to coffee machine Through the key „Send“, transfer modifications to the coffee machine.
-
Page 93: Undo Customer-Specific Beverage Names
5 Programming - System Configuration 5.2.3 Undo customer-specific beverage names Here, it is described how the modified beverage name can be reset to the default setting in the easiest way. As described in chapter 5.2.2, please open the desired beverage configuration Left column: beverage-specific settings, this column must not be modified. -
Page 94: System Configuration
5 Programming - System Configuration System configuration In the system configuration all machine-specific settings can be made. Examples: grinder capacity, brewing temperature, maintenance settings etc. In chapter 7 of this description it is referred to every single setting in more detail, however, many of these values and functions must not be modified;... -
Page 95: Beverage-, And Coffee Machine Configuration - Save, Reset & Upload
Working memory – there you will find all data and settings to which the machine currently has access. This working memory corresponds to the custom- er memory already known from other WMF coffee machines. If the customer carries out modifications in the beverage or basic settings, these modifica- tions are only done in the working memory. - Page 96 Important advice: The consumer coffee machines DO NOT– as known from the usual WMF coffee machines – have an unchangeable factory setting memory. Consequently, if the existing factory setting memory is overwritten by pushing the „Set“ or „Gear“ key, the saved basic factory data originating from the produc-...
-
Page 97: Test Functions, Coffee Machine Parameters, Component Test
6 Test functions, coffee machine parameters, component test Test functions, coffee machine parameters, component test The CPU of the consumer coffee machines does not offer the possibility of a component test directly at the coffee machine. However, a simple troubleshooting can be carried out here by means of two testing possibilities which are available in the service program. - Page 98 6 Test functions, coffee machine parameters, component test Open the window for live display & component test through „Test functions“. The following window opens:...
- Page 99 6 Test functions, coffee machine parameters, component test Pushing the „Play“ key starts the „Live display“ Pushing the „Stop“ key stops the „Live display“ Pushing the „Test“ key starts/stops the „component test“ You will find a detailed description of the test functions and the single views as from chapter 9.
-
Page 100: Further Functions & Setting Possibilities - Detailed Description
7 Further functions & setting possibilities – detailed description Further functions & setting possibilities – detailed description Chapter 7 describes with screenshots all tabs, drop-down menus as well as windows together with their functions and setting possibilities. Partly, there is the possibility to access functions as well as setting possibilities in respectively from several tabs. Whenever this is the case, reference is made in the index on several pages in this document. - Page 101 7 Further functions & setting possibilities – detailed description The differentiation of „Drop Down Menu“/ „Keys“/ „Tabs“/ „Buttons“is consistently kept according to the below picture: Drop Down Menus Keys Tabs Coffee Machines Buttons...
- Page 102 7 Further functions & setting possibilities – detailed description...
-
Page 103: Stichwortverzeichnis
8 Stichwortverzeichnis Stichwortverzeichnis Allocate beverage names 57 Default value Baudrate 74, 76 descaling table 50 Beverage settings water filter table 50 Default values 50 Allocate beverage names 54 Descaling table 50 Set milk foam volume 54 Display daily counter 11 Set order milk-coffee 54 Display error statistic 61 Set pre-infusion 54... - Page 104 Language package 15 Set language service program 57 Languages 15 Set machine language 43 List error messages 59 Set office functions 52 Load factory setting memory 60 Set service 12, 59 Load machine configuration 42 Set standby delay 44 Load machine configuration 25 Set time format 24 / 12 hours 51 machine number 20, 23 Set warm-up rinsing for espresso 52...
-
Page 105: Button Programming > Programming
Button Programming > Programming 1. Programming File – to open or save configuration files Project – to open or save project files (same as configuration file) Display – opens the coffee machine statistics or service history Configuration – same as the buttons „Load“ and „Send“ Extra –... -
Page 106: Button Programming > Load > Sys
9 Button Programming > Programming Button Programming > Load > Sys 2. System Configuration – „Sys“ – upper window 1. RTC – downloads the system time and date from PC to coffee machine 2. Brew water temp. – shows the brewing water temperature which is currently set in the basic settings, value can be modified. -
Page 107: Button Programming > Load > Sys > Parameter
9 Button Programming > Programming Button Programming > Load > Sys > Parameter 3. System configuration – „Sys“ – Parameters 1. Water hardness – Shows the currently set water hardness, value can be modified. 2. LCD contrast – Shows the LCD contrast, value can be modified. 3. -
Page 108: Button Programming > Load > Sys > Options
9 Button Programming > Programming 12. Current (repress) – Value must not be modified 13. Discharge after beverage – Shows the time during which the release valve remains open after brewing, value must not be modified 14. Discharge after cleaning – Shows the time during which the release valve remains open after cleaning, value must not be modified 9.2.1 Button Programming >... - Page 109 9 Button Programming > Programming 7. Standby flush – activates or deactivates the standby flush during switching off, value must not be modified. 8. Water tank operation – activates or deactivates the option water tank, value must not be modified. 9.
-
Page 110: Button Programming > Load > Sys > Care/Maintenance
9 Button Programming > Programming 9.2.2 Button Programming > Load > Sys > Care/maintenance 5. System configuration – „Sys“ – Care / maintenance 1. Cleaning prompt / days – No. of days until coffee machine cleaning is required, value must not be modified. 2. -
Page 111: Button Programming > Load > Sys > Descaling
9 Button Programming > Programming 12. Milk system steam running time – indicates the time how long after a milk system rinsing a steam jet is dispensed, value must not be modified. 13. Piston cleaning phase 1 – indicates the volume of the 1 piston cleaning, value must not be modified 14. -
Page 112: Button Programmierung > Load > Sys > Filter / Energy
9 Button Programming > Programming not be modified. 7. Descaling / rinse hot water valve – rinsing water volume through hot water outlet af- ter the 3 descaling cycles and the descaling rinsing have been finished, value must not be modified. -
Page 113: Button Programming > Load > Sys > Tables
9 Button Programming > Programming spout, value must not be modified. 7. Energy saving mode enabled – activates or deactivates the option energy saving mode, value must not be modified. 8. Steam temperature at energy mode – indicates the temperature to which the steam boiler is reduced if eco mode is activated, value must not be modified. -
Page 114: Button Programming > Load > Sys > Real Time Clock
9 Button Programming > Programming 9.2.6 Button Programming > Load > Sys > Real Time Clock 9. System configuration – „Sys“ – Real Time Clock 1. Show time on the display – activates or deactivates the display of time and date on the machine display, value can be modified. -
Page 115: Button Programming > Load > Sys > 1000S
10. System configuration – „Sys“ – 1000S 1. Operating mode cup lighting – activates or deactivates the background lighting of the central console (only WMF 1000proS), value must not be modified. 2. Message „Grinding degree too fine“ – this value indicates when the message „Flow stopped –... -
Page 116: Button Programming > Load > Level 1 Products
9 Button Programming > Programming 10. Milk beverages enabled – activates or deactivates dispensing of milk beverages in the office function, value should only be modified at the coffee machine. 11. Pause at coffee pot dispensing – this value indicates how long the waiting time be- tween the single brewing single cycles is during pot dispensing, value must not be modi- fied Button Programming >... - Page 117 9 Button Programming > Programming 2. System Programming – P1…..P10 (in the example P3 Cappuccino) 1. Product counter – indicates by what number the counter is increased in the coffee ma- chine statistics if beverage is dispensed, value must not be modified. 2.
- Page 118 (beverage dis- pensing after a short double click of the beverage button) and thus the dispensing of double beverages (only WMF 1000S/proS). Function is only available, if „Dispense product as double product“ is deactivated, value must not be modified.
- Page 119 9 Button Programming > Programming 22. Pre-infusion – indicates whether the ground coffee should be watered in the brewing chamber prior to the actual brewing process which makes the coffee taste more intensive, value should only be modified at the coffee machine. 23.
-
Page 120: Drop Down Menu „Extra
9 Button Programming > Programming Drop Down Menu „Extra“ 1. Drop – Down – Menu „Extra“ 1. System Information – indicates among others the software version which is on the coffee machine, see also chapter 3.2.1 2. Set Real Time Clock – sets the system time into the service program 3. -
Page 121: Drop Down Menu - „Display
9 Button Programming > Programming Drop Down Menu – „Display“... - Page 122 9 Button Programming > Programming 2. Drop – Down – Menu „Display“ 1. Statistic – indicates the coffee machine statistic, same function as statistic button, see chapter 3.2.2 2. ServiceHistory – indicates the services carried out last, same function as service button, see chapter 3.2.2 3.
-
Page 123: Special Functions - Right Mouse Button
9 Button Programming > Programming Special functions – right mouse button These functions can be called up by a click with the right mouse button in the button window. 3. Special functions of the right mouse button System status – Programming – Test functions – without function, these func- tions can only be called up directly through the buttons. -
Page 124: Button Test Functions
10 Button Test Functions Button Test Functions In this chapter the – test functions – and the single possibilities for live display resp. component test will be explained in detail as already mentioned in chapter 6! 10.1 Button > Test functions – upper window 1. - Page 125 10 Button Test Functions 13. Safety switch value – indicates the binary current value of all safety-relevant mi- cro switches (grounds container, brewer lid, water tank). If one of these switches is triggered, the binary value changes and the coffee machine is not ready for opera- tion.
-
Page 126: Button Test Functions - Tab Input Test / Status
10 Button Test Functions 10.2 Button Test functions – Tab Input test / Status 2. Test functions – Input test / status 1. Flowmeter status – indicates whether the FM is active respectively whether it sends pulses 2. Water level display – indicates whether the water tank sensor detects water in the tank 3. -
Page 127: Button Test Functions - Tab Output Test / Status
10 Button Test Functions 10.3 Button Test functions – Tab Output test / Status 3. Test functions – Output test / Status 1. Main relay 24V – indicates whether the main relay for the 24 V supply is active 2. Change over relay – indicates whether the CPU is supplied with 230V 3. -
Page 128: Button Test Functions - Tab Keyboard / Status
10 Button Test Functions 10.4 Button Test functions – Tab Keyboard / Status 4. Test functions – Keyboard / Status Left column – the status of each button is indicated here Central column – the status of each lighting of the 1 level is indicated here Right column –... -
Page 129: Button Test Functions - Special Functions Right Mouse Button
10 Button Test Functions 10.5 Button Test functions – Special functions right mouse button 5. Test functions – Special functions right mouse button Dispensing time reset – no function Data reset – All counters and statistics are deleted, configuration and beverage settings are kept Master reset –... -
Page 130: Wmf Service Program - Source Of Supply, Installation And Troubleshooting
- > WMF 800/900S or WMF 1000S. Open the downloaded – „WMF Service DE.msi“ – file with a double click and follow the installation routine. It is imperative to pay attention that the in- stallation path is as follows: C:\Programme\ServiceProgramm\WMF_Service –... - Page 131 11 WMF Service Program – Source of Supply, Installation and Troubleshooting Open window with right mouse click… …and open properties A new window opens At „target“it must be added „_/e“.
- Page 132 Enter after „..Service.exe /e“, please pay attention to the blank after exe. achten Afterwards close window with „OK“ The installation of the WMF service program is now finished. In the next step, the corresponding FTDI driver still has to be installed.
-
Page 133: Installation Ftdi Driver
-> software for technicians - > WMF 800/900S. After having assigned this driver in Windows to the corresponding coffee ma- chine type, this coffee machine has to be assigned to a fixed com port below com6 in the device manager. - Page 134 11 WMF Service Program – Source of Supply, Installation and Troubleshooting Here, the interface must be selected on which the coffee machine has been logged (coffee machine must be switched on and connected to the laptop). With a right click to the interface and the selection „Properties“the setting possibilities are opened for this interface.
- Page 135 11 WMF Service Program – Source of Supply, Installation and Troubleshooting Open the new window with „Port Settings“and „Advanced“ In this window the fixed com port must now be assigned, hereby please note that it must be below com 6. Afterwards close all open windows again with „OK“.
- Page 136 11 WMF Service Program – Source of Supply, Installation and Troubleshooting Finally, the assigned com port has to be set in the service program with „Extras“-> „Options“. In order to do this, the service program must be opened, the coffee machine must be connected to the laptop with the USB cable and the coffee machine must be switched on.
- Page 137 11 WMF Service Program – Source of Supply, Installation and Troubleshooting Open tab „Settings“ Enter at COM port (USB) the COM port assigned in the device manager At Baudrate please select „19200“ Now all installations, assignments and settings have been carried out and the connection between coffee machine and laptop is possible. Should there be any...
-
Page 138: Troubleshooting
12 Troubleshooting Troubleshooting In this chapter error messages and their elimination is described. Even if settings and installation are correct there might be problems with the con- nection or the connection may be interrupted. In this chapter, error messages and possible troubleshooting is explained with screenshots. 12.1 Unable to open com port / Timeout connection Com port could not be opened. -
Page 139: Machine Update (Hexload) Does Not Start By Itself
12 Troubleshooting 12.2 Machine update (HexLoad) does not start by itself During the first machine update it might happen that the baudrate in HexLoad Program has not been set correctly and thus the update does not start by itself. In order to eliminate this error, the communication settings have to be adjusted in the HexLoad program. - Page 140 Specific machine data, such as the counter, are not transferred (see service program description.) For any questions please contact the WMF Coffee Machines Service Department. © WMF 800 / 900 / 1000 S / 1000 pro S Edition 07/2014 - KMT T5-1...
- Page 141 • replace the safety valve (s) as specified. These checks must be documented. The completion of the maintenance must be recorded in writing and in the appropriate form (incl. name and date). © WMF 800 / 900 / 1000 S / 1000 pro S Edition 07/2014 - KMT T5-2...
- Page 142 All-in-One spout; steam nozzle replace , grease lightly with No. 5 (steam nozzle) Grease for O-rings Milk foamer complete replace Milk hose complete with 1,3 replace mm and 1,15 mm nozzles © WMF 800 / 900 / 1000 S / 1000 pro S Edition 07/2014 - KMT T5-3...
- Page 143 Service 5/2.3.3 Customer Check-up Procedure © WMF 800 / 900 / 1000 S / 1000 pro S Edition 07/2014 - KMT T5-4...
- Page 144 Ansaugnippel Complete milk foamer Schäumer komplett All-in-One spout WMF 1000 pro S Air intake cap Luftansaugkappe Milk nozzle Milchdüse Elastomer nozzle Elastomerdüse Milk hose Milchschlauch Complete milk foamer Schäumer komplett © WMF 800 / 900 / 1000 S / 1000 pro S Edition 07/2014 - KMT T5-5...
- Page 145 They cannot be erased. The customer care programs also show how often and when it was last performed. The item “Reference for maintenance” shows how many beverages have been dispensed since the last maintenance. © WMF 800 / 900 / 1000 S / 1000 pro S Edition 07/2014 - KMT T5-6...
- Page 146 (litre) Current water volume, descaling (litre) Current water volume, water filter (liter) Reference for service (brew cycles) Relay cycle brew water Relay cycle steamer 6/18/2012 Machine commissioning date © WMF 800 / 900 / 1000 S / 1000 pro S Edition 07/2014 - KMT T5-7...
- Page 147 Attention: always replace the hot water and steam boilers after 5 years After the service or maintenance, perform “Set service” in the service program. This sets the counter “Reference for maintenance” to 0 (see service program description.) © WMF 800 / 900 / 1000 S / 1000 pro S Edition 07/2014 - KMT T5-8...
- Page 148 Steam Jet valve Steam-Jet Ventil Cappuccino valve Cappuccinoventil Brewing water valve Brühwasserventil Inlet valve Zulaufventil Hot water valve Heißwasserventil © WMF 800 / 900 / 1000 S / 1000 pro S Edition 07/2014 - KMT T5-9...
- Page 149 Elastomer nozzle (steam nozzle) 7. Brewing unit ™ Disassemble brewing unit ™ clean ™ lubricate - according to lubrication chart ™ Reassemble brewing unit ™ Check brewing unit © WMF 800 / 900 / 1000 S / 1000 pro S Edition 07/2014 - KMT T5-10...
- Page 150 = Attention! Graisser joint torique, cylindre d'echaudage en haut et en bas avec "Molykote" (Art.Nr. 00.0048.7705) = Attention! Grease seal toroid, brew cylinder above and under with "Klübersynth UH 1-64-2403 food grease" (Art. No. 00.0048.7705) © WMF 800 / 900 / 1000 S / 1000 pro S Edition 07/2014 - KMT T5-11...
- Page 151 ™ When reinstalling, make sure that the red O-ring has been properly inserted ™ Insert flow meter in holder and ensure hoses are kink-free ™ Start up the coffee machine and check pump for leaks © WMF 800 / 900 / 1000 S / 1000 pro S Edition 07/2014 - KMT T5-12...
- Page 152 ™ Install the nipple and insert the hot water hose ™ Close coffee machine The next time it is switched on, the coffee machine will be filled again; all counter levels and statistics entries remain intact © WMF 800 / 900 / 1000 S / 1000 pro S Edition 07/2014 - KMT T5-13...
- Page 153 (appears 2 days after request to clean). your selection pls Coffee machine descaling request descale machine machine descaling Forced descaling of coffee machine OK: P (appears after 50 liters) © WMF 800 / 900 / 1000 S / 1000 pro S Edition 07/2014 - KMT T6-1...
- Page 154 Place brewing unit correctly, clean the brewing brewer end switch chamber. beverage sel. locked Switch off the machine, clean control panel (only clean control panel with the WMF 800 and 900). © WMF 800 / 900 / 1000 S / 1000 pro S Edition 07/2014 - KMT T6-2...
- Page 155 If the error repeats, the grinder motor or the brewer motor must be replaced. EEPROM Error Switch coffee machine off and then on again. If the error repeats, the CPU must be replaced. © WMF 800 / 900 / 1000 S / 1000 pro S Edition 07/2014 - KMT T6-3...
- Page 156 ™ Quantity of ground coffee is set too low ™ Cup is too cold: preheat ™ Grinding degree too coarse: set the grinding degree to be finer ™ Carry out warm-up rinse © WMF 800 / 900 / 1000 S / 1000 pro S Edition 07/2014 - KMT T6-4...
Need help?
Do you have a question about the 800 and is the answer not in the manual?
Questions and answers