WMF 1000 S User Manual
Wmf 1000 s and wmf 1000pro s coffee machines
Hide thumbs
Also See for WMF 1000 S:
- User manual (96 pages) ,
- Service manual (64 pages) ,
- Manual (156 pages)

Related Manuals for WMF WMF 1000 S


Summary of Contents for WMF WMF 1000 S
-
Page 1: User Manual
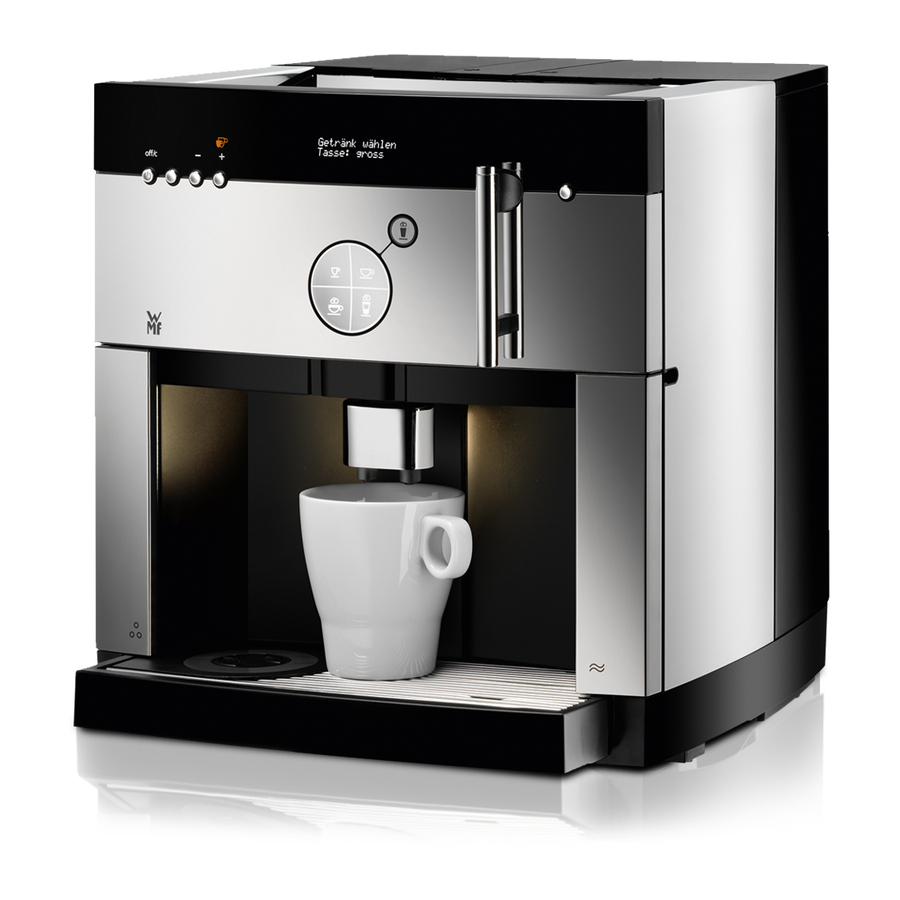
User manual WMF 1000 S and WMF 1000pro S coffee machines EN - Type 03 0500 (WMF 1000 S), Type 03 0510 (WMF 1000pro S) - Page 2 Preliminary comments Congratulations on choosing your new WMF coffee machine. WMF has been involved with the preparation of coffee for more than 125 years. Innovation, quality and many years of experience characterise WMF as a manufacturer of professional premium coffee machines. The WMF 1000pro S and WMF 1000 S bring this quality coffee into your home.
- Page 3 5 Hot water spout 6 Milk hose 7 Water tank 8 Drip tray with drip tray grid Preheat cup Steam Jet WMF 1000 S Preheat cup Steam Jet WMF 1000pro S 10 WMF All-In-One spout 11 Coffee grounds container 12 Beverage buttons...
- Page 4 Ready-to-operate display The descriptions in this user manual are always based on the assumption that coffee machine Press briefl y: 1x Espresso is ready to operate. When the following display appears (item 14) your machine is ready for use and you can now select your hot drink: Press 2x briefl...
- Page 5 The hot water button off/c-button The hot water button is located on the right hand side at the front on the machine (item 4). It - Switching on can be operated in two ways: - Timer operation - Stop the procedure - Back without change - press for at least 2 seconds: Press briefl...
- Page 6 Overview of highlights of the WMF 1000 S and WMF 1000pro S The following functions make the WMF coffee machine unique: Unique variety of beverages and pot WMF Steam Jet Professional WMF Technology function With the WMF Steam Jet you can heat your...
-
Page 7: Table Of Contents
Transport and Disposal ... . 91 (only on WMF 1000 S) ....23 care programmes ..... 53 3.2.2 With the milk lance . -
Page 8: For Your Safety
Each portion is freshly brewed at the touch of a button. The WMF 1000 S and the WMF 1000pro S are designed for domestic use and for use in an offi... -
Page 9: Hazard Instructions
For your safety Hazard instructions Despite all safety precautions, there is a hazard potential associated with each device if handled improperly. Therefore, follow the instructions below when handling your automatic coffee machine to avoid injuries and health hazards: Hazard! Possible injuries due to the grinders! As long as your automatic coffee machine is switched on and connected to the power supply, the grinder of your automatic coffee machine can start up and you may suffer injury. - Page 10 For your safety Hazard! Probable risk of burns or scalding due to hot components or steam and hot liquids! The All-In-One spout and the hot water spout are very hot while in operation and on contact can cause burns. Hot beverages and escaping steam can scald you. >...
- Page 11 Cleaning agents and descaling agents can affect your health. Cleaning agents and descaling agents can damage the plastic parts of the automatic coffee machine and other articles and textiles. > Use only the WMF cleaning agents and descaling agents. > Avoid any contact with cleaning agents or descaling agents.
-
Page 12: Initial Setup
Initial setup Initial setup Now you are only few steps away from preparing and enjoying the perfect coffee. In this chapter, you can learn step-by-step how you can start operating yourcoffee machine. Scope of supply > Check the scope of supply for completeness. - Page 13 Operating comfort in the offi ce with WMF Offi ce Accessories Set Specially for using the coffee machine in the offi ce you can purchase the WMF Offi ce Accessories Set. This makes operating and cleaning your coffee machine easier when the machine is being used intensively.
-
Page 14: Installation And Connection
Initial setup Installation and connection > Unpack the automatic coffee machine. > Check the machine for possible damages during transportation. > While installing the automatic coffee machine, follow the hazard instructions given under chapter Assembly “1.2 Hazard instructions” on page 2 and in this chapter as well as the following instructions: >... - Page 15 Initial setup > Remove the cover from the cable compartment and remove the cable (a). Installation > Plug the cable into the socket on the machine (b). > Place the cable through the opening in the cover. > Close the cable compartment. >...
-
Page 16: Testing The Water Hardness
Thoroughly rinse the water tank with tap water and a mild cleaning agent. > For the time being do not slide the water tank back into the machine. First carry out the steps in chapters “2.5 Insert the WMF water fi lter” on page 10, “2.6 Installing milk hose” on page 11. -
Page 17: Insert The Wmf Water Fi Lter
Initial setup Insert the WMF water fi lter The WMF water fi lter protects the coffee machine from scale formations and ensures best quality of water for making coffee. There is no need for a water fi lter if the water hardness range is between 0 and 4. If you insert a water fi... -
Page 18: Installing Milk Hose
Initial setup Installing milk hose In the as-delivered condition, the milk hose (6) hangs from the All-In-One spout and is packed in a plastic bag. The water tank must remain outside the machine when fi tting the milk hose. > Push the All-In-One spout to the lower position. -
Page 19: Filling The Water Tank
Initial setup Filling the water tank Caution! Possible damage to your automatic coffee machine due to unsuitable liquids! Liquids other than drinking water can damage your coffee machine or can result in clogging. > Fill the water tank of your automatic coffee machine only with clean, cold drinking water. >... - Page 20 Initial setup Hazard! Possible injuries due to the grinders! As long as your automatic coffee machine is switched on and connected to the power supply, the grinder of your automatic coffee machine can start up and you may suffer injury. >...
-
Page 21: Initial Setting
> Confi rm the language with button. OK: P change: -/+ initial setting of your WMF 1000 S The setup programme now guides you through the initial settings. initial setting of your WMF 1000pro S > Set the time after which the machine automatically sw. - Page 22 Initial setup You can choose between 4 energy saving modes. Energy saving modes Eco-Mode: 2 > Please note the following information. OK: P change: -/+ > Using the – , set the energy saving mode. > Confi rm your selection with button.
- Page 23 Initial setup > – Set the time Set the current time with time hh:mm (hh = hours in two digits, mm = minutes in two digits). OK: P change: -/+ > Confi rm the time with button. > Set the current date with –...
- Page 24 Initial setup > Rinsing the water fi lter Place a collecting vessel with approximately 3 litres place 3L container capacity under the hot water spout. under h. w. spout While rinsing the fi lter, unusual noises are heard. This is normal.
- Page 25 Initial setup At the end of the setup program, a test brew is carried out. The Espresso button blinks. > Place an appropriate drinking vessel under the All-In-One spout. > Press the Espresso button. The test brewing starts. During this test brewing, coffee grinder is fi lled with coffee beans. >...
-
Page 26: Operation
Operation Operation In this chapter, you can learn everything about the easy method of coffee preparation with the coffee machine and how you can individually customize your coffee machine - entirely according to your preference! Hazard! Possible risk of burns or scalding due to hot components or steam and hot liquids! The All-In-One spout and the hot water spout are very hot while in operation and on contact can cause burns. -
Page 27: Switching On
Operation 3.1.1 Switching on > Push the off/c button. WELCOME WMF 1000 S From switch on to WELCOME operational readiness WMF 1000pro S in about 3 minutes Your coffee machine heats up and performs coffee system heating up... rinse. This warms up all the pipes. -
Page 28: Switching Off
Operation 3.1.2 Switching off > Push the off/c button for at least 2 seconds. Before switching off, an automatic coffee system rinse is performed. If beverages are prepared with milk, then you are requested to perform a milk system rinse. >... - Page 29 The machine automatically switches on at the set time. > In order to manually switch the WMF 1000 S/WMF 1000pro S on in timer mode, briefl y push the off/c Manual switch on and switch off for button.
-
Page 30: Use Milk
With the milk nozzle (only on WMF 1000 S) On the WMF 1000 S use the milk with the milk nozzle. As an optional accessory you can also use the milk lance on the WMF 1000 S. To do this, continue as per Chapter “3.2.2 With the milk lance” on page 24. -
Page 31: With The Milk Lance
On the WMF 1000pro S use the milk with the milk lance. The milk lance is included with the delivery. You can also use the milk lance on the WMF 1000 S as an alternative. Ask your dealer or order the milk lance from www.wmf.de. -
Page 32: Preparing Beverages
Operation Preparing beverages In this chapter you will discover how to prepare your beverages at the touch of a button and how you can fi ne tune your taste experience with the comfort functions of the control panel. The way to make coffee beverages is described in Chapter 3.3.1 on page 26. The way to adjust the volume of the next beverage is described in Chapter 3.3.2 on page 28. -
Page 33: Coffee Specialities At The Touch
Operation 3.3.1 Coffee specialities at the touch of a button > Place an appropriate drinking vessel under the All-In-One spout. > Adjust the All-In-one spout to suit the height of the drinking vessel. > Select your beverage by pressing the beverage button. You can interrupt the beverage preparation at any time using the off/c button. - Page 34 Operation If you want a Cappuccino, push the bottom left button. > Cappuccino, > Latte Macchiato If you want a Latte Macchiato, push the bottom right button. 1 x briefl y: 1x Cappuccino 1 x briefl y: 1x Latte Macchiato 2 x briefl...
-
Page 35: Quick Selection Of Cup Size
Operation 3.3.2 Quick selection of cup size The volume of the next cup can be stipulated before starting to prepare the beverage. The taste will therefor remain the same. You set the size of cup for the next beverage using the cup size rapid selection. You can also change the permanent setting of the cup size. -
Page 36: Cup Warming Wmf Steam-Jet
3.3.3 Cup warming WMF Steam-Jet The WMF Steam-Jet fi nally sees the end of cold coffee cups. At the push of a button, hot steam fl ows slowly from below into the drinking vessel - to ensure coffee enjoyment at exactly the right temperature! -
Page 37: Pot Function
The Cafe Creme beverage button lights up. > Push the All-In-One spout upwards. > Place the WMF coffee pot under the spout. You can now make 2, 4, 6, or 8 cups of Cafe Creme. > Follow the display instructions. -
Page 38: Set The Coffee Strength For The Next Beverage
Operation 3.3.5 Set the coffee strength for the next beverage Prior to each coffee preparation, you can decide on the desired strength of your next coffee speciality. > Set the desired coffee strength with – Following coffee strengths are available for selection: Mild (about 15 % weaker than the saved setting) Normal (corresponds to your setting) Strong (about 15 % stronger than the saved setting) - Page 39 Operation > Place an appropriate drinking vessel under the All-In-One spout. > Open the lid of the ground coffee hopper (2). The display notifi es: insert coff. grounds select beverage > Pour the ground coffee (adequate for a brewing cycle of about 9 g) in the ground coffee insert (2a). Cup volume: max.
-
Page 40: Preparing Milk And Milk Foam
Place an appropriate drinking vessel under the All-In-One spout. Slide the All-In-One spout to the top position. If you forget this step on the WMF 1000 S, you will be reminded by the display. > Briefl y press the milk button. -
Page 41: Hot Water Dispensing
> Set the most economical energy saving mode (see “Energy saving mode” on page 15). > Switch the WMF 1000 S/1000pro S off when it is not being used. Your WMF 1000 S/1000pro S will not consume any power then. -
Page 42: Carry Out The Settings
Operation > Your WMF 1000 S/1000pro S switches off automatically after 30 minutes. Reduce the automatic switch off time (“Set the switch off time” on page 14). > Descale your WMF 1000 S/1000pro S regularly. Scale residues will lead to increased energy consumption. - Page 43 Operation If you wish to adapt the volume of the next beverage delivery, proceed as per chapter “3.3.2 Quick selection of cup size” on page 28. If you wish to permanently change the volume to suit your cup size, proceed as follows: Press button.
-
Page 44: Beverage Settings
Pre brew (for perfect aroma) On the WMF 1000 S you can also adjust the rest time for Latte Macchiato. This means that the milk is separated from the milk foam and from the Espresso to produce the layering effect of the Latte Macchiato. - Page 45 Operation > Press button. > Browse with for beverage setting. select program Select the beverage browse: + setting > Confi rm your selection with button. beverage settings OK: P change: -/+ > Select the beverage for which you want to change the taste and the composition with the help of beverage buttons.
- Page 46 Operation The setting is applicable for coffee beverages with milk or foam volume: 14 sec. milk foam. OK: P change: -/+ > Set the desired coffee strength with – The volume of foam depends on the type of milk, the Foam volume temperature of the milk and the milk nozzle being used.
-
Page 47: Grinding Grade Setting: Perfect Extraction System
Confi rm your setting with button. At www.wmf.de, you can fi nd useful tips and tricks for enjoying a perfect cup of coffee. 3.6.3 Grinding grade setting: Perfect Extraction System The grinding grade, in addition to the volume of the ground coffee, infl uences the “fullness” of the fl... - Page 48 Operation > Use the button to scroll to grinding grade adjustment grinding adjustment > Confi rm the selection with OK: P change: -/+ Automatic coffee system rinsing starts. A brewing test starts directly and the grinding grade is brewing test checked.
- Page 49 Operation If the grinding grade is set correctly, the brewing pressure grinding grade OK is in the optimum range. test: P end: C The message “Grinding grade OK” appears. > Then confi rm the grinding grade setting with off/c. If necessary, the grinding grade can be adapted to suit. If the grinding grade is too coarse, the coffee will run out grinding too coarse quickly, the cream is light in colour and small in volume...
- Page 50 Operation If the grinding grade is too fi ne the delivery stream is grinding too fine irregular, fl ow problems can arise and the ground coffee test: P end: C blocks the sieve or brewing unit. The message “Grinding grade too fi ne” appears. >...
- Page 51 Operation Set the grinding degree Caution! Possible malfunction due to false setting of the grinding grade! The setting of the grinding grade of your automatic coffee machine in idle mode can lead to the grinder being set too tight and cannot start. >...
-
Page 52: Basic Settings
Operation 3.6.4 Basic settings Following settings can be adjusted: Basic settings Language* Time* Switch off time* Date* Switch-on time Display of time/date Eco-Modes (energy saving mode)* Water hardness* Brewing temperature Water fi lter* Illumination Special information tone Offi ce functions Contrast display Warm up rinsing Factory settings... - Page 53 Operation > Confi rm your selection with basic settings OK: P change: -/+ > Set the pre brew function on or off with – switch-on time: on Automatic (chapter “3.1.3 Timer operation (automatic switch-on)” OK: P change: -/+ switch-on time on page 21).
- Page 54 Operation Offi ce functions - You can deactivate functions of the beverage buttons offi ce functions specially for the offi ce OK: P change: -/+ using the offi ce settings, to make operation of the machine easier, particularly in an offi ce environment. >...
- Page 55 Operation > Set the display of date and time on or off with – Allow display of date / time: on > date/time? Confi rm your selection with button. OK: P change: -/+ > Sound Switch on or off the sound by pressing the control keys sound: on and beverage buttons with –...
-
Page 56: Reading Counter Readings
Operation Reading counter readings > Press button. select program Select the > Browse with for counters. browse: + counters > Confi rm your selection with button. Counters OK: P browse: -/+ > Browse with – to display the number of beverages Allow display of the Espresso prepared. -
Page 57: Care
- Automatic for each switch on and switch off. Warm up rinse / Coffee system rinse - If necessary - 20 minutes after the preparation Rinse milk system WMF Connect & Clean of beverages with milk. - at the latest, while switching off. Clean the milk system... -
Page 58: Customer Care Programmes
Clean machine housing - weekly After 10000 brewings, it is recommended that the maintenance of the device be carried out by the WMF Servicecenter. An instruction appears in the display while switching on. The instruction is repeated after sometime. Customer Care programmes Adequate water is required in the water tank is required for automatic rinsing of the coffee system. - Page 59 Cleaning agents and descaling agents can affect your health. Cleaning agents and descaling agents can damage the plastic parts of the automatic coffee machine and other articles and textiles. > Use only the WMF cleaning agents and descaling agents. > Avoid any contact with cleaning agents or descaling agents.
-
Page 60: Calling Up The Customer
Care 4.2.1 Calling up the customer care programmes > Press the care button for longer than 2 seconds. > Use the care button to scroll to the desired customer select care program Select care program. OK: P browse: -/+ care programs >... -
Page 61: Wmf Connect & Clean Milk System Rinse
Care 4.2.3 WMF Connect & Clean milk system rinse The WMF Connect & Clean milk system rinse is unique worldwide; it allows you to easily maintain perfect beverages with milk and thus, make consistently enjoyable coffee. Tip: Before switching off, place the milk hose in the hot water spout and start the milk system rinsing by pushing the button. - Page 62 Care Milk system rinsing milk system rinsing > Push the All-In-One spout to the upper OK: P browse: -/+ most position. > Select the milk system rinsing with button. The display notifi es the individual activities that must be completed before the rinse. >...
-
Page 63: Machine-Cleaning - Cleaning Programme
Care > Push the All-In-One spout slightly downwards. lower spout into beverage position 4.2.4 Machine-cleaning - Cleaning programme Hazard! Possible health hazard due to accidental ingestion of cleaning solution! Cleaning agents and descaling agents that are dispensed during the cleaning programme of your auto- matic coffee machine can affect your health. - Page 64 Care > Follow the instructions in the display. empty drip tray refi ll water tank place 2L container under spouts insert tablet into coffee grounds slot > Place a suitable vessel (at least 2 litres capacity) under the All-In-One spout. >...
- Page 65 After 250 brews or 14 days, the request for machine-cleaning appears on the display. When requested to do so, clean the machine regularly using the WMF cleaning tablets. This will ensure perfect function and do so, clean the machine regularly using the WMF cleaning tablets. This will ensure perfect function n and consistent coffee enjoyment.
-
Page 66: Replace Water Fi Lter
This program appears when you use a water fi lter and the usage has been confi rmed during the initial settings (chapter “2.5 Insert the WMF water fi lter” on page 10). However, depending on the water hardness and the water fl ow, at least after 3 months, a display requesting to change the water fi... - Page 67 Care > Start the fi lter rinsing with the care button. Rinsing water fi lter fi lter rinsing The fi lter rinsing program starts. rinsing fi lter ... A minute countdown indicates how long the rinsing will time remain: 4 min. last.
-
Page 68: Descale Coffee Machine
Care 4.2.6 Descale coffee machine Hazard! Possible health hazard due to accidental ingestion of cleaning solution! Cleaning agent and descaling agent that are dispensed during the cleaning programme of your automatic coffee machine can affect your health. > After cleaning, rinse it with clear drinking water so that no cleaning solution remains in your automatic coffee machine. - Page 69 Care > Press the release button (10a) at the back of the All-In-One-spout and pull the milk foamer (10b) off downwards. > Detach the milk hose (6) from the milk foamer (10b). > Remove the milk hose (6).
- Page 70 Remove the water water fi lter is used. fi lter > Pour a whole bottle of WMF liquid descaling agent (750 ml) into the water tank. > Fill the water tank with water and cover it with the lid. >...
- Page 71 Immediately after descaling, a machine-cleaning is requested. The procedure is described under “4.2.4 Machine-cleaning - Cleaning programme” on page 56. > Replace the water fi lter in the water tank (chapter “2.5 Insert the WMF water fi lter” on page 10). > Replace the milk foamer and milk hose.
-
Page 72: Manual Cleaning
Manual cleaning 4.3.1 Clean the brewing unit The hygiene of your WMF 1000 S/ WMF 1000pro S is of particular importance to us. Hence, the brewing unit is detachable and the interior of the machine is easily accessible for cleaning. Hazard! Possible burn injuries while cleaning! The brewing unit of our automatic coffee machine is very hot while under operation and can cause burns. - Page 73 Care > Open the lid of the brewer (3). If it is diffi cult to remove the > Release the brewing unit (3a). brewer, the O-Rings must be > Pull the brewing unit (3b) upwards out of the brew chute. Use both the gripping lugs for pulling it out (3a). lubricated.
- Page 74 Care > Turn the thread (3d) on the brewing unit head (3e) with the multitool in the anticlockwise direction. The scraper (3g) folds out forward and the brewing fi lter is now visible. > Clean the brewing unit (3e) under running water. >...
- Page 75 Care > Pull out the water tank (7) and the coffee grounds container (11). > Remove the residues of ground coffee in both the openings (7a, 11a), for example, with a vacuum cleaner. > Turn the thread on the brewing unit head with the Multitool in a clockwise direction until the black scraper folds in again.
-
Page 76: General Cleaning
> Follow the chapter “2.4 Clean the water tank” on page 9. Heavy calcium deposits can be removed with the WMF descaling agent. After descaling, the water tank must be thoroughly rinsed to removed the descaling residues. >... -
Page 77: Clean The Milk System
Care Clean the housing and > Switch the coffee machine off with the off/c button (push for at least 2 seconds). control panel > Remove the mains plug. > Clean the housing with a damp cloth. 4.3.3 Clean the milk system In domestic use we recommend cleaning the milk system once a week. - Page 78 Care > Detach the milk hose (6) from the milk foamer (10b). > Detach the milk nozzle (6a). > Detach the upper and lower part (10e) of the milk foamer from one another by pressing the part of the milk foamer with the spout downwards on a solid surface. >...
- Page 79 Hazard of eye injury! In case of eye contract, the WMF milk system cleaner can lead to serious eye injuries. > Ensure that the WMF Milk system cleaner never comes in contact with the eyes of humans or animals. >...
-
Page 80: Clean The Steam Nozzle
Care 4.3.4 Clean the steam nozzle Cleaning the steam nozzle is only required in the event of a fault. - Page 81 Care > Press the release button (10a) at the back of the All-In-One-spout and pull the milk foamer (10b) off downwards. > Carefully clean the steam nozzle (10e) in the All-In-One spout with one of the small cleaning brushes provided (b).
-
Page 82: Lubricating O-Rings
If it is diffi cult to remove the water tank and diffi cult to insert it, you must mildly lubricate the O-Ring on the water spout with the WMF “Gasket grease”. > Pull out the water tank (7). > Lubricate the O-Ring (7a) on the water spout with the WMF “Gasket grease”. -
Page 83: Lubricating O-Ring Of The Water Tank
Release the lock (3a) and lift the brewing unit from the brewing chute (3b). > Mildly lubricate the O-Rings (3c) in the brewing chute with the WMF “Grease for gasket rings”. > Make sure that no grease gets into the holes. -
Page 84: Display Messages
Display messages Display messages Messages for operation and troubleshooting are displayed on your coffee machine. Thus, you always know how to proceed. Operating messages The coffee grounds container is full empty grounds cont. Emptying coffee > Remove the coffee grounds container. grounds container >... - Page 85 Display messages The water tank is nearly empty. Refi lling water tank beverage sel. locked The water tank is never emptied completely so that no air refi ll water tank enters the coffee system. > Remove the water tank from the automatic coffee beverage sel.
- Page 86 Display messages your selection pls The water fi lter must be changed. Replace water fi lter replace water fi lter > Change the water fi lter (chapter “4.2.5 Replace water fi lter” on page 59). The remaining capacity is displayed. The lid is not placed or not correctly placed.
-
Page 87: Messages For Troubleshooting
Display messages Messages for troubleshooting Brewer The brewing unit is not inserted. place brewer > Insert the brewing unit. The brewing unit is not inserted. brewer pos. switch > Check if the brewing unit is inserted correctly. The brewing unit is inserted only with diffi culty or not at all inserted: >... - Page 88 Display messages Air in the system? Possibly associated with loud pump noise? clear fl ow stopped > Check whether the water tank is completely pushed in. > Bleed the automatic coffee machine by dispensing hot (Water tank is full) water until a constant stream of water comes out. Is the water fi...
- Page 89 Display messages Grinding too fi ne? clear fl ow stopped > Set the degree of grinding to be coarser by one fourth (water tank is full) rotation (chapter “3.6.3 Grinding grade setting: Perfect Extraction System” on page 40). > Suck out the grinding dust. Air in the system? Possibly associated with loud pump timeout steam level noise?
- Page 90 > If switching on does work, pull out the mains plug and re-insert it. On recurrence, the fault must be rectifi ed by the WMF Service-Center. > Switch the coffee machine off with the off/c button Motor driver motor driver error (push for at least 2 seconds).
- Page 91 Set the grinding grade to be coarser > Switch off the coffee machine. Temperature sensor temp.sensor steam > Allow the coffee machine to cool down. > Again switch on the coffee machine. On recurrence, the fault must be rectifi ed by the WMF temp.sensor water Service-Center.
-
Page 92: Problems Without Error Display
Milk or milk foam too cold > Ensure that the right milk nozzle is attached to the milk hose (brown for refrigerated milk, transparent for unchilled milk) or use the WMF milk lance. Milk is too hot and too little >... - Page 93 Problem Rectifi cation measure It is diffi cult to insert > Apply WMF grease from the accessories to the O-Ring on the water spout the water tank supports (chapter “4.4.1 Lubricating O-Ring of the Water tank” on page 75). It is diffi cult to remove the >...
- Page 94 Display messages Problem Rectifi cation measure The brewing unit cannot > Adjust the brewing unit with the multitool as you are be removed or reinserted inserting it until you can insert the brewing unit. > Remove the residue of coffee grounds inside the brewer. There is a noticeable large >...
-
Page 95: Technical Data
Technical data Technical data WMF 1000 S WMF 1000pro S Power rating 1,7 - 2,3 kW Mains power connection 1/N/PE ~ 50/60 Hz; 220 - 240 V On site circuit protection maximum 16 A Coffee bean hopper 320 g Variable brewing chamber 6 to 15 g Capacity of water tank (without fi... -
Page 96: Index
Index Index machine ............56 manually ............65 Factory setting ..........48 Milk system ........54, 70 Fault rectifi cation ........80, 85 Steam nozzle ..........73 Flow fault ............80 Adjusting the milk quantity ....39 Clean the steam nozzle ......73 Adjusting the water volume ....38 Coffee bean hopper All-In-One spout ..... - Page 97 Scope of supply ..........5 fi lling ............12 Second type of coffee ....... 31 White coffee ..........27 Selecting the basic settings .....45 WMF Connect & Clean off/c-button ..........14 Selecting the beverage setting ..36, 38 milk system rinsing .....54 Offi ce functions ...........47 Set the grinding degree ......40...
-
Page 98: Transport And Disposal
If you need additional information or if problems occur, please contact the WMF-dealer or contact the service center in your country. Telephone number and other information are given in the supplementary sheet of the user manual. -
Page 99: Legal Details
Legal details Legal details © 2008-2011 WMF Corporation All rights, especially the right of reproduction, publication and translation, are reserved. No part of this manual may be reproduced in any form or processed, duplicated or distributed electronically without written consent. Subject to technical modifi cations. - Page 100 WMF 1000 S Type 03 0500 WMF 1000 pro S Type 03 0510 User manual EN 03/2011...
Need help?
Do you have a question about the WMF 1000 S and is the answer not in the manual?
Questions and answers