Advertisement
Advertisement
Table of Contents

Related Manuals for AnyCubic Kobra Go


Summary of Contents for AnyCubic Kobra Go
- Page 2 Dear customer, Thank you for choosing Anycubic products. Maybe you are familiar with 3D printing technology or have purchased Anycubic printers before, but we still highly recommend that you read this manual carefully. The installation techniques and precautions in this manual can help you avoid any unnecessary damage or frustration.
-
Page 3: Table Of Contents
Contents Safety Instructions Technical Specification Packing List Product Overview Menu Directory Installation Software Resume from Outage Maintenance Troubleshooting... -
Page 4: Safety Instructions
It is recommended to use protection glasses when cleaning/sanding the printed models to avoid small particles in eyes. Keep the Anycubic 3D printer and its accessories out of the reach of children. Vapors or fumes may be irritating at operating temperature. Always use the Anycubic 3D printer in an open and well ventilated area. -
Page 5: Technical Specification
Technical Specification Printing Technology FDM (Fused Deposition Modeling) Build Size 220 mm(L) × 220 mm(W) × 250 mm(H) Layer Thickness 0.05 - 0.3 mm Positioning Accuracy X / Y / Z 0.0125 / 0.0125 / 0.00125 mm Extruder Quantity Single Nozzle Diameter 0.4 mm Print Speed... - Page 6 Technical Specification Software Slicing Software Cura, Simplify3D, Repetier-HOST Software Input Formats .STL, .OBJ, .JPG, .PNG Software Output Formats GCode Connectivity Memory card; Data cable (expert users only) Electrical Power Input 110 V / 220 V AC, 50 / 60 Hz Rated Power 400 W Physical Dimensions...
-
Page 7: Packing List
Packing List Printer base XE axis kit Print head Z-axis passive block X-axis limit switch kit Screen kit X-axis tensioner Z-axis motor kit Top beam X-axis profile Z-axis profile(left) Z-axis profile(right) T-shaped screw rod Anti-Backlash Nut Filament Holder Assembly Instruction Assembly Instruction Lubricant Tool Kit... - Page 8 Packing List Spare buckles and cable ties、 Power cord Spare nozzle Teflon tube Card Reader Photoelectric Synchronous belt Memory Card switch blank * All pictures shown are for illustrative purposes only. The actual product may vary due to product optimization.
-
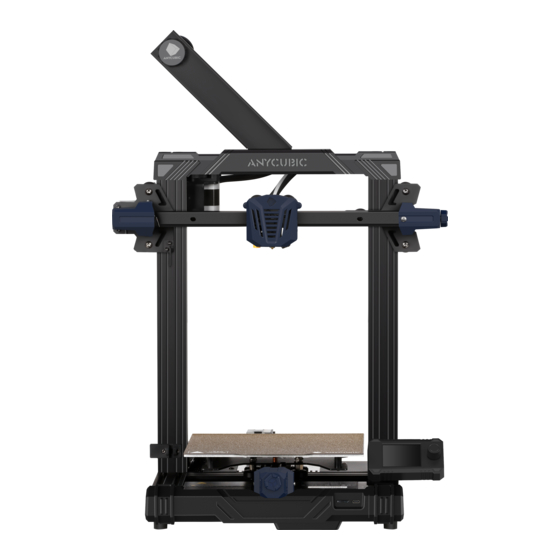
Page 9: Product Overview
Product Overview Front Filament holder Print head Printing platform Touchscreen Y belt tensioner Data cable port Memory card slot... - Page 10 Product Overview Back Lead screw X motor X belt tensioner Z motor Power switch Voltage regulator Y motor...
-
Page 11: Menu Directory
Menu Directory Move X Move Y Main Screen Model 1 Move Z Model 2 Home ..Print from SD Card Disable Steppers Move Axis Menu Leveling Preheat PLA Preheat ABS Auto Prepare Load Leveling Filament Z Offset Unload Configuration Filament Language About... -
Page 12: Installation
If there are some tiny scratches on the aluminum beams or slight unevenness on the platform, it is normal and won’t affect the printing quality. Thank you very much for your kind understanding. Team ANYCUBIC... -
Page 13: Software
Double click Ultimaker_Cura-4.12.0-win64, and follow the steps as shown below. * Ultimaker Cura 4.12.0 is used for example here, please refer to the memory card for the actual version. * File path: Memory card → “Files_ English_Anycubic Kobra Go” → “Cura” → “Windows” or “Mac”. ①... - Page 14 Introduction to slicing software ③ ④ ⑤ ⑥ * Printing online requires the installation of a driver, as shown below. If you don't print online, you don't need to install it.
- Page 15 Introduction to slicing software 2. Machine Settings Upon completion of installation, the first launch of the software will display the following welcome screen. Click Get started to start the machine settings. ① ② 4.12.0...
- Page 16 Introduction to slicing software ③ ④ ⑤...
- Page 17 Introduction to slicing software 切片软件操作介绍 ⑥ ⑦ ⑧...
- Page 18 Introduction to slicing software 切片软件操作介绍 ⑧...
- Page 19 3. Import the Configuration File After continuous testing, we provided users the suggested printing parameters of different filaments for Anycubic Kobra Go, and the user could directly import the parameter files to the software. (1) Click Settings → Configure setting visibility..., and then tick Check all box to make all settings visible.
- Page 20 Introduction to slicing software (3) Select the profile that you just imported, and then click the Activate button。...
- Page 21 Introduction to slicing software * Note: An interface may pop up after clicking the Activate button. If so, please check the values of listed parameters. You can click Keep to keep the custom values or click Discard to enable the values in the profile.
- Page 22 Introduction to slicing software Supplementary Explanation ① You can customize some parameters after importing the profile, but we still recommend that you use the parameters in the profile that we provide. ② The paremeter Build Plate Adhesion → Build Plate Adhesion Type needs to be set to “None”...
- Page 23 Introduction to slicing software 4. Manipulate 3D model in Cura * Model files can be downloaded from www.anycubic.com (ANYCUBIC website) and www.thingiverse.com. (1) Click the open file button in the top left corner to import the model file or directly drag the file into the software.
- Page 24 Introduction to slicing software Other operations: ① Press the mouse wheel and move the mouse to move the platform. ② Scroll the mouse wheel to zoom in and out the platform. ③ Right click and move the mouse to change the viewing angle. * Note: When moving the model, make sure that the model is in the printable area.
- Page 25 Introduction to slicing software Use the layer slider and simulation view to check important parts of your 3D slice. Layer Slider...
- Page 26 Introduction to slicing software 6. Print offline and online There are two operational modes for Anycubic Kobra Go: print offline and print online. • Print offline: Insert memory card into the memory card slot, click on the Home Menu “Print” to enter the file list, and print a selected file (GCode files ONLY).
- Page 27 * Anycubic Kobra Go uses CH340 chip for communication. * CH340 driver file path: “Files_English_Anycubic Kobra Go” → “Driver_CH341”. There are two versions, Windows and Mac version. (* CH341 driver file is suitable for CH340 chip).
- Page 28 Introduction to slicing software (2) Here we take Windows PC system for example. Double click “CH341SerSetup.exe” and follow the wizard to install it. If the driver has installed automatically in step (1), skip this step. * After the installation is completed, refer to the method in step (1) to see if the driver has been identified (no exclamation mark).
-
Page 29: Resume From Outage
Resume from Outage In case of a power loss during printing, the machine will automatically save the printing status. After restarting, you will see the interface shown below, please click "Continue" to continue your printing or “Cancel” to cancel it. -
Page 30: Maintenance
Maintenance It is necessary to perform routine maintenance to the 3D printer to achieve consistent and quality results. Some maintenance suggestions are shown as below: 1. Clean the nozzle with a needle under preheating conditions. If the filament residue in the nozzle could not be cleared 100%, please replace the nozzle. 2. -
Page 31: Troubleshooting
Troubleshooting 1. Motor shaking or abnormal sound The motor cable are not connected properly. Please Check each connection ① and then inspect the cable routing for any faults. Drive current is too large / small (please contact customer service). ② The motor is damaged. - Page 32 Please check if the soft cable above the screen is loose. ① Inspect if the touchscreen has been pressed by something. ② Check if screen has cracks, if so, please contact our after sale service via ③ official website www.anycubic.com...
- Page 33 Troubleshooting 8. T0 sensor abnormal Check the wiring of the hotend and ensure a good connection. ① Check if there is any pins bent inside the connector. ② 9. Print head move abnormal The setting of machine type in slicing software is wrong. Please see page 17 ①...
- Page 34 Troubleshooting The printing temperature is too high, which causes the fluidity and viscosity ③ of the filament to be strong. The printing temperature needs to be set a little lower. 13. Nozzle is too low or too high when printing Nozzle is too close to the platform, resulting in insufficient extrusion of ①...
- Page 35 ATTENTION 1. Anycubic 3D printer generates high temperature. DO NOT reach inside of the printer during operation. Contact with extruded materials may cause burns. 2. Use high temperature resistant gloves when operating the product. 3. This equipment is not suitable for use in locations where children are likely to be present.
Need help?
Do you have a question about the Kobra Go and is the answer not in the manual?
Questions and answers