
Related Manuals for Huawei ESS-240V12-9AhBPVBA04


Summary of Contents for Huawei ESS-240V12-9AhBPVBA04
- Page 1 ESS-240V12-(9AhBPVBA04, 7AhBPVBA04) Battery Pack Quick Guide Issue Date 2021-12-23 HUAWEI DIGITAL POWER TECHNOLOGIES CO., LTD.
- Page 2 Notice The purchased products, services and features are stipulated by the contract made between Huawei Digital Power Technologies Co., Ltd. and the customer. All or part of the products, services and features described in this document may not be within the purchase scope or the usage scope. Unless otherwise specified in the contract, all statements, information, and recommendations in this document are provided "AS IS"...
-
Page 3: About This Document
NOTICE is used to address practices not related to personal injury. Supplements the important information in the main text. NOTE is used to address information not related to personal injury, equipment damage, and environment deterioration. Issue 01 (2021-12-23) Copyright © Huawei Digital Power Technologies Co., Ltd. - Page 4 ESS-240V12-(9AhBPVBA04, 7AhBPVBA04) Battery Pack Quick Guide About This Document Change History Issue Date Description 2021-12-23 This is the first official release. Issue 01 (2021-12-23) Copyright © Huawei Digital Power Technologies Co., Ltd.
-
Page 5: Table Of Contents
3.4.3 Connecting Cables to Battery Packs for UPS2000-H-6 kVA................25 3.5 Battery Maintenance................................25 A Obtaining Product Documents Through QR Code Scanning........31 B Battery Backup Time......................32 C Troubleshooting........................34 D Replacing a Fuse Board....................... 35 Issue 01 (2021-12-23) Copyright © Huawei Digital Power Technologies Co., Ltd. -
Page 6: Safety Information
1.4 Personal Safety ● Before performing any operation, carefully read the installation guide. ● To prevent electric shocks, use insulated tools and wear insulated gloves when connecting cables. Issue 01 (2021-12-23) Copyright © Huawei Digital Power Technologies Co., Ltd. - Page 7 Do not transport the equipment by holding the mounting ears, front panel, or wiring port covers. Move the equipment in compliance with the corresponding requirements, as shown in the following figure: Issue 01 (2021-12-23) Copyright © Huawei Digital Power Technologies Co., Ltd.
-
Page 8: Product Description
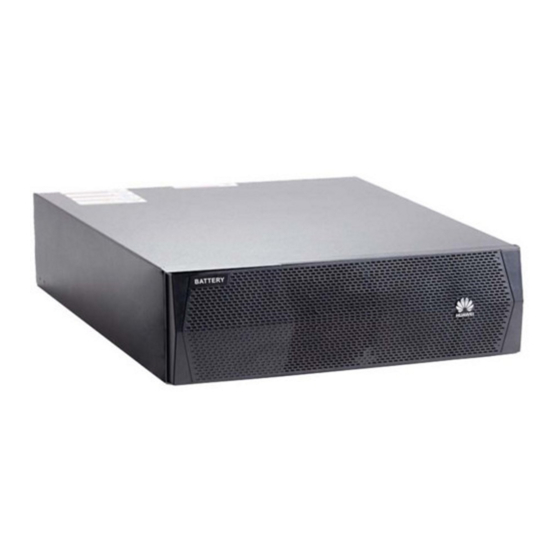
Battery Pack Model Weight Dimensions (H x W x D) ESS-240V12-7AhBPVBA04 63 kg 130 mm x 430 mm x 685 mm ESS-240V12-9AhBPVBA04 70.5 kg Figure 2-1 Appearance of the ESS-240V12-(9AhBPVBA04, 7AhBPVBA04) Issue 01 (2021-12-23) Copyright © Huawei Digital Power Technologies Co., Ltd. - Page 9 QR code. You can scan the QR code to view the quick guide of the product. The information on the QR code label is subject to the actual product. Table 2-1 Environmental specifications Item Specifications Operating temperature range 0–40°C Altitude 0–4000 m Issue 01 (2021-12-23) Copyright © Huawei Digital Power Technologies Co., Ltd.
-
Page 10: Installation
Get tools insulated to prevent electric shocks. Table 3-1 Installation tools Appearance, Specifications, and Name Wire stripper Insulation tape Cotton cloth Flat-head screwdriver (2 Heat gun Electrician's knife mm x 80 mm) Issue 01 (2021-12-23) Copyright © Huawei Digital Power Technologies Co., Ltd. -
Page 11: Unpacking And Checking
Check that battery pack barcode (on the rear of the pack near the wiring ports) is consistent with that specified in the order. If any discrepancy is found, contact the local office immediately. Issue 01 (2021-12-23) Copyright © Huawei Digital Power Technologies Co., Ltd. -
Page 12: Installing The Equipment
Install or replace with battery packs of the same model and specifications. Figure 3-1 Same battery pack model and specifications ● Battery packs of different models cannot be connected in series or parallel. Issue 01 (2021-12-23) Copyright © Huawei Digital Power Technologies Co., Ltd. - Page 13 ESS-240V12-(9AhBPVBA04, 7AhBPVBA04) Battery Pack Quick Guide 3 Installation Figure 3-2 Different battery pack models ● Battery packs of different specifications cannot be connected in series or parallel. Issue 01 (2021-12-23) Copyright © Huawei Digital Power Technologies Co., Ltd.
-
Page 14: Optional) Installing A Temperature Sensor
Figure 3-3 Different battery pack specifications 3.3.1 (Optional) Installing a Temperature Sensor Procedure Step 1 Remove three screws from the cover of the battery pack. Step 2 Remove the cover horizontally. Issue 01 (2021-12-23) Copyright © Huawei Digital Power Technologies Co., Ltd. - Page 15 180 degrees, and secure it with the removed screws. Route the battery temperature sensor into the battery pack through the cable hole, and secure the sensor to the cable bridge with a cable tie. Issue 01 (2021-12-23) Copyright © Huawei Digital Power Technologies Co., Ltd.
-
Page 16: Installing A Battery Pack
6 kVA/10 kVA long backup time UPS, connect the battery packs in parallel and then connect them to the UPS battery input ports, as shown in the following figure. Issue 01 (2021-12-23) Copyright © Huawei Digital Power Technologies Co., Ltd. - Page 17 Figure 3-6 One UPS (model UPS2000-G-15 kVA/20 kVA) + four battery packs Figure 3-7 Two UPSs (model UPS2000-G-15 kVA/20 kVA, 1+1 parallel system) + four battery packs (sharing battery packs) Issue 01 (2021-12-23) Copyright © Huawei Digital Power Technologies Co., Ltd.
- Page 18 Step 1 When battery packs are connected in series or parallel, ensure that the models on the nameplates of the battery packs are the same. Step 2 Install the mounting ears. Figure 3-9 Installing the mounting ears Issue 01 (2021-12-23) Copyright © Huawei Digital Power Technologies Co., Ltd.
- Page 19 ● The front end of the adjustable guide rails is not secured by screws. Do not push the adjustable guide rails out of the rack when placing a battery pack on the rack. Issue 01 (2021-12-23) Copyright © Huawei Digital Power Technologies Co., Ltd.
- Page 20 Step 4 Place a battery pack on the guide rails, and secure it to the rack using M6x16 screws through the mounting ears. D ANGER Ground the rack properly before operation. WARNING Do not touch uninsulated battery terminals. Otherwise, electric shocks may occur. Issue 01 (2021-12-23) Copyright © Huawei Digital Power Technologies Co., Ltd.
-
Page 21: Mode 2: Tower Mounting
Step 2 Assemble the support bases: Align the connecting buckle with the slot and insert the buckle vertically. CA UTION Wear protective gloves when removing and installing the support base components to prevent injury. Issue 01 (2021-12-23) Copyright © Huawei Digital Power Technologies Co., Ltd. -
Page 22: Cable Connection
-M4-90° terminal for the other end (connecting to the UPS) of the cable between the battery pack and the UPS2000-H-6 kVA (PE/battery+/ battery-) terminal, see battery cable 03 in the following table. Issue 01 (2021-12-23) Copyright © Huawei Digital Power Technologies Co., Ltd. -
Page 23: Connecting Cables To Battery Packs For Ups2000-G-6 Kva/10 Kva
The standard battery pack model for UPS2000-G-6 kVA is ESS-240V12-7AhBPVBA04, and the standard battery pack model for UPS2000- G-10 kVA is ESS-240V12-9AhBPVBA04. UPS2000-G-15 kVA/20 kVA connects to at least two battery packs and is compatible with 7 Ah and 9 Ah battery packs. - Page 24 UPS can be configured with a maximum of four battery packs. The cable connection methods for each UPS and battery pack are the same as those for a single UPS. Issue 01 (2021-12-23) Copyright © Huawei Digital Power Technologies Co., Ltd.
- Page 25 ESS-240V12-(9AhBPVBA04, 7AhBPVBA04) Battery Pack Quick Guide 3 Installation Figure 3-15 Connecting cables to battery packs for a UPS2000-G-6 kVA/10 kVA parallel system Issue 01 (2021-12-23) Copyright © Huawei Digital Power Technologies Co., Ltd.
-
Page 26: Connecting Cables To Battery Packs For Ups2000-G-15 Kva/20 Kva
UPS battery input ports, as shown in the following figure. Connect battery packs 1, 3, 5, and 7 in parallel and battery packs 2, 4, 6, and 8 in parallel. Figure 3-16 Connecting cables between a single 15 kVA/20 kVA UPS and battery packs Issue 01 (2021-12-23) Copyright © Huawei Digital Power Technologies Co., Ltd. - Page 27 Connecting Cables to Battery Packs for a Single UPS2000-G-15 kVA/20 kVA NO TICE When a single 15 kVA/20 kVA UPS is configured with two battery packs, the maximum charge current must be less than or equal to 1.0 A. Issue 01 (2021-12-23) Copyright © Huawei Digital Power Technologies Co., Ltd.
- Page 28 If the 15 kVA/20 kVA UPS parallel system does not share battery packs, the cable connection methods for each UPS and battery pack in the parallel system are the same as those in a single 15 kVA/20 kVA UPS system. Issue 01 (2021-12-23) Copyright © Huawei Digital Power Technologies Co., Ltd.
- Page 29 Figure 3-19 Connecting cables to shared battery packs for a UPS2000-G-15 kVA/20 kVA parallel system NO TE After connecting cables, install the delivered front panels for the battery packs. Issue 01 (2021-12-23) Copyright © Huawei Digital Power Technologies Co., Ltd.
-
Page 30: Connecting Cables To Battery Packs For Ups2000-H-6 Kva
● Keep the battery switch off during installation and maintenance. Battery Maintenance Precautions ● Before battery maintenance, insulate tools such as wrenches. Do not place any objects on the top of batteries. Issue 01 (2021-12-23) Copyright © Huawei Digital Power Technologies Co., Ltd. - Page 31 2. The battery terminals are intact. 3. Batteries are free from damage and cracks. 4. Batteries are free from acid leakage. 5. Batteries are not deformed or bulged. Issue 01 (2021-12-23) Copyright © Huawei Digital Power Technologies Co., Ltd.
- Page 32 20°C. 3. Battery charge and discharge conditions meet the requirements specified in the battery specifications Issue 01 (2021-12-23) Copyright © Huawei Digital Power Technologies Co., Ltd.
- Page 33 3°C. Battery Check that the Set parameters Quarterly managem settings of correctly. battery parameter management settings parameters meet the requirements in the user manual. Issue 01 (2021-12-23) Copyright © Huawei Digital Power Technologies Co., Ltd.
- Page 34 (recomme when the UPS is 2. If the fault persists, nded). backed up to contact the verify that the technical support batteries can personnel. discharge properly. Issue 01 (2021-12-23) Copyright © Huawei Digital Power Technologies Co., Ltd.
- Page 35 The torque must meet the requirements of the battery manufacturer . After checking that the battery screws meet requirements, mark the screws for later check. Issue 01 (2021-12-23) Copyright © Huawei Digital Power Technologies Co., Ltd.
-
Page 36: A Obtaining Product Documents Through Qr Code Scanning
Step 2 (Optional) Select a display language. Step 3 Tap Quick Guide to access the quick guide of the product. Figure A-1 Obtaining product documents through QR code scanning ----End Issue 01 (2021-12-23) Copyright © Huawei Digital Power Technologies Co., Ltd. -
Page 37: B Battery Backup Time
Packs Packs (min) (min) (min) (min) 100% 5400 4320 2700 1620 Table B-2 Backup time of the ESS-240V12-9AhBPVBA04 battery pack (10 kVA UPS; calculated based on 94% battery efficiency) Load (%) Load (W) Three Four Battery Battery Battery Battery Pack... - Page 38 Pack Packs Packs Packs (min) (min) (min) (min) 4500 2700 Table B-3 Backup time of the ESS-240V12-9AhBPVBA04 battery pack (15 kVA UPS; calculated based on 94% battery efficiency) Load (%) Load (W) Four Six Battery Eight Battery Battery Packs Battery...
-
Page 39: C Troubleshooting
Measure: Connect to the mains supply in non-battery test state. No Voltage at Battery Pack Port Possible cause: The battery pack cable is short-circuited, and the fuse is blown. Measure: Replace the fuse board. Issue 01 (2021-12-23) Copyright © Huawei Digital Power Technologies Co., Ltd. -
Page 40: D Replacing A Fuse Board
Figure D-1 Removing the cover Step 3 Remove the cables and then the fuse board. Figure D-2 Removing the cables and fuse board Step 4 Wrap cable connectors with insulation tape. Issue 01 (2021-12-23) Copyright © Huawei Digital Power Technologies Co., Ltd. - Page 41 Figure D-4 Installing the fuse board and cables Step 6 Reinstall the cover on the fuse board. Step 7 Reconnect the cables between the UPS and battery packs. ----End Issue 01 (2021-12-23) Copyright © Huawei Digital Power Technologies Co., Ltd.