Advertisement
Quick Links
SERVICE MANUAL
Ver. 1.0 2016.03
Link (English)
SPECIFICATIONS
SERVICE NOTE
REPAIR PARTS LIST
ADJUSTMENT
Link (Japanese)
SPECIFICATIONS
SERVICE NOTE
REPAIR PARTS LIST
ADJUSTMENT
分解図につきましては,英語版を
ご参照下さい。
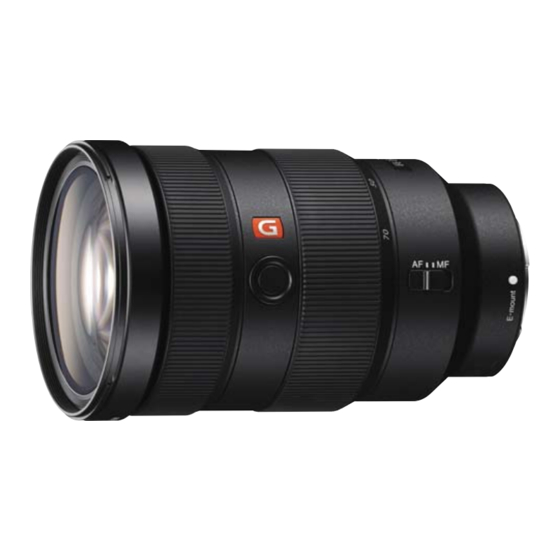
SEL2470GM (FE 2.8 / 24-70 GM) (FE 24-70mm F2.8 GM)
9-896-750-11
SEL2470GM
(FE 2.8 / 24-70 GM) (FE 24-70mm F2.8 GM)
US Model
Canadian Model
AEP Model
Chinese Model
Japanese Model
DISASSEMBLY
DISASSEMBLY
INTERCHANGEABLE LENS
INTERCHANGEABLE LENS
Ver.
Date
History
1.0
2016.03
Official Release
Sony Corporation
Revision History
Contents
—
Published by Sony Techno Create Corporation
989675011.pdf
S.M. Rev.
issued
—
2016C08-1
© 2016.03
Advertisement

Related Manuals for Sony SEL2470GM


Summary of Contents for Sony SEL2470GM
- Page 1 SPECIFICATIONS SERVICE NOTE DISASSEMBLY REPAIR PARTS LIST ADJUSTMENT INTERCHANGEABLE LENS INTERCHANGEABLE LENS 分解図につきましては,英語版を ご参照下さい。 2016C08-1 SEL2470GM (FE 2.8 / 24-70 GM) (FE 24-70mm F2.8 GM) © 2016.03 Sony Corporation 9-896-750-11 Published by Sony Techno Create Corporation...
- Page 2 Lens (1), Front lens cap (1), Rear lens cap (1), Lens hood (1), Lens case (1), Set of printed documentation 仕様および外観は、改良のため予告なく変更することがありますが、ご了承ください。 Design and specifications are subject to change without notice. SEL2470GM (FE 2.8 / 24-70 GM) (FE 24-70mm F2.8 GM) – 2 –...
- Page 3 “ Command ” of E-Mount Lens Adjustment (Adjustment Application for Service) is set to [READ] to implement the [Adjustment Data Backup]. • After main board replacement “ Command ” of E-Mount Lens Adjustment (Adjustment Application for Service) is set to [WRITE(SAVE)] to implement the [Adjustment Data Backup]. SEL2470GM (FE 2.8 / 24-70 GM) (FE 24-70mm F2.8 GM) 1-1E...
-
Page 4: Operation Notes
• The proper way to connect a connector is to grab the connector instead of the wires. If you push on the wires, they might be broken. SERVICE TOOLS B-10 B-10 Adhesive bond (B-10): J-6082-612-A G-85 J-6082-626-A Grease (G-85): SEL2470GM (FE 2.8 / 24-70 GM) (FE 24-70mm F2.8 GM) - Page 5 (Note 1) Middle Barrel Assy (G Badge) (Note 2) Outer Barrel Assy HELP07 G-85 Front Screw Ring HELP06 B-10 Focus Ring Assy HELP05 G-85 Claws Guard Tape F Focus Rubber Ring SEL2470GM (FE 2.8 / 24-70 GM) (FE 24-70mm F2.8 GM)
- Page 6 1. Install the 1st Lens Assy matching the notch of the 1st Lens Assy to the Index Mark. Rear Outer Cover Assy 2. Tighten the six screws. Notch AF/MF Switch Groove of Outer Barrel Assy 1st Lens Assy 1st Lens Assy Index Mark SEL2470GM (FE 2.8 / 24-70 GM) (FE 24-70mm F2.8 GM)
- Page 7 Zoom Ring Assy. Zoom Ring Assy Groove Middle Outer Barrel Apply the Protection Rubber 2 grease (G-85) Groove (Inside) Slider of Outer Barrel Assy Zoom Joint Pin Zoom Joint Pin SEL2470GM (FE 2.8 / 24-70 GM) (FE 24-70mm F2.8 GM)
- Page 8 1. Apply grease (G-85) to the specified locations of the Focus Ring Assy. (All circumferences) Outer Barrel Assy Apply the grease Focus Ring Assy (G-85) (All circumferences) Apply the grease (G-85) (All circumferences) SEL2470GM (FE 2.8 / 24-70 GM) (FE 24-70mm F2.8 GM)
- Page 9 Cam Follower G _A(5.0_4.5) Cam Pin Shaft(M) Outer Barrel Assy Cam Pin A Flexible Board Groove Groove Cam Pin A No groove Optical Block Cam Pin A 1st Group Block Assy S SEL2470GM (FE 2.8 / 24-70 GM) (FE 24-70mm F2.8 GM)
- Page 10 Cam Pin G_B(9137) Tape A (7_7) Groove Groove Stationary Barrel (Inside) Zoom Cam Barrel Flexible Board (Outside) Screw hole Cam Follower G_B(5.0_4.5_4.0) Zoom Cam Barrel (Outside) Cam Pin G_E(9137) Cam Follower G_B(5.0_4.5_4.0) SEL2470GM (FE 2.8 / 24-70 GM) (FE 24-70mm F2.8 GM)
- Page 11 Cam Pin D(9107) Zoom Cam Barrel 2. Apply grease (G-85) to the specified locations of the Zoom Cam Barrel. Apply grease (G-85) Zoom Cam Barrel Apply grease (G-85) Apply grease (G-85) SEL2470GM (FE 2.8 / 24-70 GM) (FE 24-70mm F2.8 GM) 2-8E...
-
Page 12: Repair Parts List
A-2073-555-A BL CONTACT ASSY (9139) 3-348-998-21 SCREW (M1.4X2), TAPPING, PAN 4-580-650-01 BOARD SPACER (9137) 4-583-622-01 6 GROUP MASK 4-586-789-01 MOUNT RUBBER (9137) 4-587-823-01 BACK WASHER (9137) 4-580-331-01 BOARD SHEET (9137) SEL2470GM (FE 2.8 / 24-70 GM) (FE 24-70mm F2.8 GM) - Page 13 (Note 1) (Note 1) (Note 1) Cut the Adhesive Sheet for specified size. Note 2: Note 2: 接着紙は, 指定の寸法にカットして使用してください。 (Note 1) 69 93 70 91 (Note 1) (Note 1) (Note 1) SEL2470GM (FE 2.8 / 24-70 GM) (FE 24-70mm F2.8 GM)
- Page 14 CAM FOLLOWER G_A (5.0_4.5) (D1=5.01, D2=4.51, White) 4-570-829-61 CAM FOLLOWER G_C (5.0) (D1=5.01, D2=3.49, White) 4-570-829-71 CAM FOLLOWER G_C (5.0) (D1=5.01, D2=3.50, White) 4-570-829-81 CAM FOLLOWER G_C (5.0) (D1=5.01, D2=3.51, White) SEL2470GM (FE 2.8 / 24-70 GM) (FE 24-70mm F2.8 GM)
- Page 15 ( ロシア語 , アラビア語 , 取扱説明書 , 韓国語 , ウクライナ語 ) TRADITIONAL CHINESE, KOREAN, UKRAINIAN) 中国語 (繁体字) * 905 4-576-640-31 Operating Instructions (SIMPLIFIED CHINESE) 4-576-640-31 ( 中国語 (簡体字) ) 取扱説明書 SEL2470GM (FE 2.8 / 24-70 GM) (FE 24-70mm F2.8 GM) 3-4E...
- Page 16 J-6082-608-A J-6082-797-A J-6082-798-A Adjustment execute Check Iris Close Lens Sleep Optical Axis Check/Adjustment J-13 Photographic/Projective Resolving Power Check/Adjustment Flange Back Check Table 4-1-1 Resolution Check Chart (ILC) J-6082-813-A Fig. 4-1-1 SEL2470GM (FE 2.8 / 24-70 GM) (FE 24-70mm F2.8 GM)
- Page 17 USB 2.0 recommended (also compatible with 1.1) Two connectors are required. Run time: .NET Framework 2.0 (.NET Framework 2.0 is installed at lens adjustment program installation, if it is not installed.) Fig. 4-1-3 SEL2470GM (FE 2.8 / 24-70 GM) (FE 24-70mm F2.8 GM)
-
Page 18: Installing Procedure
4. The folder select screen appears, then select the installing user and click the [Next] button. Everyone: For all users of the PC for installing. Just me: Only for the user who logs in the PC now. Fig. 4-2-3 SEL2470GM (FE 2.8 / 24-70 GM) (FE 24-70mm F2.8 GM) - Page 19 4. Click the [Connect] button and check that the connection status becomes “Connect”. Fig. 4-2-5 7. Create a shortcut icon of the E-Mount Lens Adjustment (Adjustment Application for Service) on the desk top. Fig. 4-2-6 Fig. 4-3-2 SEL2470GM (FE 2.8 / 24-70 GM) (FE 24-70mm F2.8 GM)
- Page 20 Note: For the adjustment method of “Flange Back (S)” that require operations on lens side, see the following sections. 4. “FINISHED” appears on the pop-up window when the adjustment is complete, then click the [OK] button. Fig. 4-3-6 Fig. 4-3-4 SEL2470GM (FE 2.8 / 24-70 GM) (FE 24-70mm F2.8 GM)
- Page 21 4. After completing the adjustment, “MF ROTATION STOP is displayed, stop the rotation of the ring, push the ENTER key. 7. After “Select the MF.” is displayed, set the focus mode switch to MF. Fig. 4-3-9 Fig. 4-3-12 SEL2470GM (FE 2.8 / 24-70 GM) (FE 24-70mm F2.8 GM)
- Page 22 So that a lens does not work. And never touch the focus ring. 1. Click the [Flange Back (S)] button to display the START screen. After completing the preparation of adjustments, push the ENTER key. Fig. 4-3-18 Fig. 4-3-15 SEL2470GM (FE 2.8 / 24-70 GM) (FE 24-70mm F2.8 GM)
- Page 23 7. Push the ENTER key. 8. Repeat above steps 6 and 7 until “POS8”. 12. Push the ENTER key. 13. Repeat above steps 11 and 12 until “POS15”. Fig. 4-3-20 Fig. 4-3-22 SEL2470GM (FE 2.8 / 24-70 GM) (FE 24-70mm F2.8 GM)
- Page 24 16. Recording the adjustment data and releasing the adjustment mode are performed automatically by pushing the ENTER key. After processing, “FINISHED” is displayed. Fig. 4-3-26 3. Recording the adjustment data and releasing the adjustment mode are performed automatically by pushing the ENTER key. After processing, “FINISHED” is displayed. SEL2470GM (FE 2.8 / 24-70 GM) (FE 24-70mm F2.8 GM)
- Page 25 5. Turn the scale ring of the dial gauge until the long pointer indicates “0”. Note: This position is the flange back (f’F) = 43.50 mm. Memorize the position of the short pointer. Fig. 4-4-1 SEL2470GM (FE 2.8 / 24-70 GM) (FE 24-70mm F2.8 GM) 4-10...
- Page 26 4-4-1. Adjusting Procedure AS (Astigmatism) 0.07 mm or less Table 4-5-1 If the specifications of CB and AS are not satisfied, perform the “4-5-2 Optical Axis Adjustment”. 4-4-1. Adjusting Procedure SEL2470GM (FE 2.8 / 24-70 GM) (FE 24-70mm F2.8 GM) 4-11...
- Page 27 *Check the center circle (red frame) and the other peripheral circles (blue frame) at the same magnification. 4-4-1. Adjusting Procedure 1125mm x 750mm 3:2 2015.12.15 LENS Gp Fig. 4-6-2 4-4-1. Adjusting Procedure SEL2470GM (FE 2.8 / 24-70 GM) (FE 24-70mm F2.8 GM) 4-12...
-
Page 28: Flange Back Check
6. If the specification of Fig.4-6-2 is satisfied, apply the adhesive bond (B-110) to two bond application ditches. 4-4-1. Adjusting Procedure Bond Application Bond Application Groove Groove Apply adhesive Apply adhesive Adjustment Adjustment bond (B-110) bond (B-110) Screws (White) Screws (White) Fig.4-7-1 SEL2470GM (FE 2.8 / 24-70 GM) (FE 24-70mm F2.8 GM) 4-13E... -
Page 29: Service Note
[Adjustment Data Backup] を実施する。 • メイン基板交換後 レンズ調整プログラム ( E-Mount Lens Adjustment ( Adjustment Application for Service ) ) の, “ Command ”を [WRITE(SAVE)] に設定し て [Adjustment Data Backup] を実施する。 SEL2470GM (FE 2.8 / 24-70 GM) (FE 24-70mm F2.8 GM) 1-1E... - Page 30 チップ • コネクターを取り外す際に,線材部 (極細) を持って引っ張る チップ と断線する恐れがありますので,絶対に線材部 (極細) を持っ て引っ張らないでください。 チップB 穴 • 線材部 (極細) を押さえながらコネクターを差し込むと,線材 部 (極細) が断線する恐れがありますので,絶対に線材部 (極細) には負担をかけないでください。 副資材について B-10 ボンド (B-10): J-6082-612-A G-85 グリス (G-85): J-6082-626-A SEL2470GM (FE 2.8 / 24-70 GM) (FE 24-70mm F2.8 GM)
- Page 31 Note 2: HELP01 中間外装環を取り外す時は, ガードテープZ ツメ3箇所に注意しながら取り外してください。 ズームリング部組 フィルターネジ環 HELP03 G-85 防滴ゴム2 HELP04 G-85 化粧板 (Note 1) 中間外装環 (Gバッジ付) (Note 2) 固定保持環部組 HELP07 G-85 フロントリング HELP06 B-10 フォーカスリング部組 HELP05 G-85 ツメ ガードテープF フォーカスゴムリング SEL2470GM (FE 2.8 / 24-70 GM) (FE 24-70mm F2.8 GM)
- Page 32 HELP02 1. 固定保持環部組の溝に後部外装カバー部組の AF/MF スイ ッチを合わせて挿入する。 HELP 2. ネジ 4 本を取り付ける。 取り付け時の注意や, グリス塗布方法などを記載しています。 HELP01 1. 1 群レンズ部組の切り欠きと指標が対象の位置になるように取り付ける。 後部外装カバー部組 2. ネジ 6 本を取り付ける。 切り欠き AF/MFスイッチ 固定保持環部組の溝 1群レンズ部組 1群レンズ部組 指標 SEL2470GM (FE 2.8 / 24-70 GM) (FE 24-70mm F2.8 GM)
- Page 33 1. 防滴ゴム 2 にグリス (G-85) を塗布する。 2. ズームリング部組の溝をスライ ダーの位置に合わせて挿入する。 3. ネジ穴が見える位置までズームリング部組を回す。 (2 箇所 ) 4. ズームジョイントピン 2 本を取り付ける。 注意: ズームリング部組を組み立てた後に, ズームリング部組の溝部にある穴から固定保持環部組のスライダーが掛かっていることを確認してください。 ズームリング部組 溝 中間外装環 グリス (G-85) 防滴ゴム2 を塗布 溝(内側) 固定保持環部組の スライダー ズームジョイントピン ズームジョイントピン SEL2470GM (FE 2.8 / 24-70 GM) (FE 24-70mm F2.8 GM)
- Page 34 フォーカスローラーピン を塗布 フロントリング HELP07 グリス (G-85): J-6082-626-A 1. 固定保持環部組の指示部にグリス (G-85) を塗布する。 グリス塗布 グリス (G-85) 1. フォーカスリング部組の指示部にグリス (G-85) を塗布する。 を塗布 (全周に塗布) 固定保持環部組 グリス (G-85) フォーカスリング部組 を塗布 (全周に塗布) グリス (G-85) を塗布 (全周に塗布) SEL2470GM (FE 2.8 / 24-70 GM) (FE 24-70mm F2.8 GM)
- Page 35 1. カムフォロア G_A(5.0_4.5) とカムピンシャフト (M) をズームカム環に取り付ける。 (3 箇所 ) 2. カムピンシャフト (M) のネジ穴が見える位置に光学部組 S を挿入する。 3. カムピン A を取り付ける。 (3 箇所 ) フレキ 穴 ズームカム環 カムフォロアG̲ A (5.0̲4.5) カムピンシャフト (M) 固定保持環部組 カムピンA フレキ 溝 溝 カムピンA 溝なし 光学ブロック カムピンA 光学部組S SEL2470GM (FE 2.8 / 24-70 GM) (FE 24-70mm F2.8 GM)
- Page 36 5. ズームカム環の上からカムフォロア G_B(5.0_4.5_4.0) を取り付け ( 5 箇所) , カムピン G_E(9137)5 本を取り付ける。 2群部組 6. フレキ板金をネジ 2 本で固定する。 溝 ネジ穴(3ケ所) 凸部(3ケ所) 凹部 フレキ 固定環(内側) 3-5群部組 溝(内側) 接着紙 カムフォロアG_B (5.0_4.5_4.0) 接着紙 フレキ板金 カムピンG_B(9137) 溝 溝 固定環 (内側) ズームカム環(外側) フレキ ネジ穴 カムフォロアG_B(5.0_4.5_4.0) ズームカム環 (外側) カムピンG_E(9137) カムフォロアG_B(5.0_4.5_4.0) SEL2470GM (FE 2.8 / 24-70 GM) (FE 24-70mm F2.8 GM)
- Page 37 カムピンD(9107) 固定環 グリス (G-85) を塗布 凹部B グリス (G-85) を塗布 グリス (G-85) を塗布 (全周に塗布) カムピンD(9107) ズームカム環 2. ズームカム環の指示部にグリス (G-85) を塗布する。 グリス (G-85) を塗布 ズームカム環 グリス (G-85) を塗布 グリス (G-85) を塗布 SEL2470GM (FE 2.8 / 24-70 GM) (FE 24-70mm F2.8 GM) 2-8E...
- Page 38 ● ● ● ● ● 光軸の確認 / 調整 ● ● ● ● ● ● 撮影 / 投影解像力の確認/調整 ● ● ● ● ● ● フランジバックの確認 ● ● ● ● ● ● 解像度チェックチャート (ILC) J-6082-813-A Fig. 4-1-1 SEL2470GM (FE 2.8 / 24-70 GM) (FE 24-70mm F2.8 GM)
- Page 39 三脚ネジへ (1-829-868-41) Fig. 4-1-2 三脚 (任意) HASPキー USBコネクタへ パーソナルコンピュータ (SeusExがインストール済みのもの) OS: Windows Vista/7 RAM: 256MBまたはそれ以上を推奨(Windows 7) 1GBまたはそれ以上を推奨(Windows Vista) USBポート: USB 2.0を推奨(USB 1.1でも使用可能) ポートは2個必要 Run time: .NET Framework 2.0 (.NET Framework 2.0がインストールされていない PCには,レンズ調整プログラムインストール時にイ ンストールされます) Fig. 4-1-3 SEL2470GM (FE 2.8 / 24-70 GM) (FE 24-70mm F2.8 GM)
- Page 40 ・ ページの拡大/縮小: なし ・ 倍率: 200% プリンターの機種により誤差が出ますので,拡大率を微調整して規格に合うように印刷してください。 Fig. 4-2-2 4. インストール先フォルダを選択する画面が表示されるので,インストールするユーザーを選択して, [次へ] ボタンをクリックす る。 すべてのユーザー: インストールを行うPC内すべてのユーザーにインストール このユーザーのみ: 現在ログインしているユーザーのみにインストール Fig. 4-2-3 SEL2470GM (FE 2.8 / 24-70 GM) (FE 24-70mm F2.8 GM)
- Page 41 Fig. 4-2-4 6. インストールが完了すると,下記画面が表示されるので, [閉じる] ボタンをクリックする。 Fig. 4-3-1 4. [Connect] ボタンをクリックし,Connection Statusが“Connect”に変化することを確認する。 Fig. 4-2-5 7. デスクトップにE-Mount Lens Adjustment (Adjustment Application for Service) のショートカットアイコンが作成される。 Fig. 4-2-6 Fig. 4-3-2 SEL2470GM (FE 2.8 / 24-70 GM) (FE 24-70mm F2.8 GM)
- Page 42 3. カメラの電源を切る。 “Lens Device (S)”の項目については,レンズ側での操作が必要となります。 注意: 必ずズームをTELE端にしてから,調整を開始してください。 レンズ操作時は,レンズの位置が動かないように,カメラ本体等をしっかりと手で保持しながら操作してください。その際に,フォーカスリン 4-3-2. E-Mount Lens Adjustment調整 グには絶対に触れないでください。 注意: ENTERを押しても“PUSH ENTER”が消えない場合は,再度ENTERを押してください。 1. [Lens Device (S)] ボタンをクリックするとSTART画面が表示されるので,調整の準備が完了したらENTERキーを押す。 調整時はフォーカスが∞となりますので,レンズ側での操作の際にフォーカスリングを触らないでください。 (1) 調整方法 1. E-Mount Lens Adjustmentを起動する。 2. Adjustment and Inspectionから,該当する調整項目のボタンをクリックする。 3. 画面の指示に従って,調整を行う。 注意: レンズ側での操作が必要な“Flange Back (S)”の調整方法は,次項目以降を参照願います。 4. 調整が終了すると,ポップアップウィンドウにて“FINISHED”と表示されるので,[OK]ボタンをクリックする。 Fig. 4-3-6 Fig. 4-3-4 SEL2470GM (FE 2.8 / 24-70 GM) (FE 24-70mm F2.8 GM)
- Page 43 2. “MF ROTATION START”と表示されたらENTERキーを押す。 5. “START”と表示されたらENTERキーを押す。 Fig. 4-3-7 Fig. 4-3-10 3. “FOCUS RING Adjustment!”と表示されたらフォーカスリングを連続的に一方向へ回転させ続ける。 6. “Push the FH Button(Pos1).”と表示されたらフォーカスホールドボタンを押す。 Fig. 4-3-8 Fig. 4-3-11 4. 調整が完了すると“MF ROTATION STOP”と表示が出るので,リングの回転を止めてENTERキーを押す。 7. “Select the MF.”と表示されたらフォーカスモードスイッチをMF側にする。 Fig. 4-3-9 Fig. 4-3-12 SEL2470GM (FE 2.8 / 24-70 GM) (FE 24-70mm F2.8 GM)
- Page 44 3. 自動調整が正常に終わると“ZOOM ‒ TELE”の表示に変わるので, ズームリングをTELE端まで回してENTERキーを押すとTELE端の 自動調整を開始する。 Fig. 4-3-14 Fig. 4-3-17 10. ENTERキーを押すと自動的に調整データの記録と調整モードの解除が行われ,処理が終わると“FINISHED”のメッセージが表示さ れる。 4. 自動調整が正常に終わると“Please adjust after WIDE move. ZOOM ‒ POS2 [6DF]”の表示に変わる。 (3) “Flange Back (S)”の調整方法 “Flange Back (S)”の項目については,レンズ側での操作が必要となります。 注意: 必ずズームをTELE端にしてから,調整を開始してください。 レンズ操作時は,レンズの位置が動かないように,カメラ本体等をしっかりと手で保持しながら操作してください。その際に,フォーカスリン グには絶対に触れないでください。 1. [Flange Back (S)] ボタンをクリックするとSTART画面が表示されるので,調整の準備が完了したらENTERキーを押す。 Fig. 4-3-18 Fig. 4-3-15 SEL2470GM (FE 2.8 / 24-70 GM) (FE 24-70mm F2.8 GM)
- Page 45 ※ 設定値の許容範囲は±2です。 ※ ウインドウ下部のバーにも設定値の目安となる緑色のラインが表示されます。 ※ ウインドウ左下の調整値が設定値の許容範囲内に達すると,調整値の背景色が水色に変化します。 ※ 設定値の許容範囲は±2です。 注意: ズームリングを操作する際に,ウインドウ左下の調整値が設定値の+側許容範囲を超えないよう,ゆっくりと操作してください。設定値の ※ ウインドウ左下の調整値が設定値の許容範囲内に達すると,調整値の背景色が水色に変化します。 +側許容範囲を超えてから許容範囲内に数値を戻してもエラーとなります。 注意: ズームリングを操作する際に,ウインドウ左下の調整値が設定値の+側許容範囲を超えないよう,ゆっくりと操作してください。設定値の +側許容範囲を超えてから許容範囲内に数値を戻してもエラーとなります。 Fig. 4-3-19 Fig. 4-3-21 7. ENTERキーを押す。 8. 上記の手順6, 7の操作を“POS8”まで繰り返す。 12. ENTERキーを押す。 13. 手順11, 12の操作を“POS15”まで繰り返す。 Fig. 4-3-20 Fig. 4-3-22 SEL2470GM (FE 2.8 / 24-70 GM) (FE 24-70mm F2.8 GM)
- Page 46 “ROM Check”の項目については,レンズ側での操作が必要となります。 注意: 必ずズームをTELE端にしてから,調整を開始してください。 レンズ操作時は,レンズの位置が動かないように,カメラ本体等をしっかりと手で保持しながら操作してください。その際に,フォーカスリン グには絶対に触れないでください。 1. [ROM Check] ボタンをクリックすると“ZOOM set to [WIDE].”が表示されるので, ズームリングをWIDE端にしたらENTERキーを押 す。 Fig. 4-3-23 15. 調整が完了すると“RESONANCE NOISE CHECK OK”と表示される。 Fig. 4-3-25 2. 調整が完了すると“SW CHECK OK”と表示される。 Fig. 4-3-24 16. ENTERキーを押すと自動的に調整データの記録と調整モードの解除が行われ,処理が終わると“FINISHED”のメッセージが表示さ れる。 Fig. 4-3-26 3. ENTERキーを押すと自動的に調整データの記録と調整モードの解除が行われ,処理が終わると“FINISHED”のメッセージが表示さ れる。 SEL2470GM (FE 2.8 / 24-70 GM) (FE 24-70mm F2.8 GM)
- Page 47 4. フランジバックゲージに光を投じながらフランジバック測定器のノブを回転させて,細かい線が出るようにピントを合わせる。 注意: 必ずFig. 4-5-2の矢印方向にピント合わせを行ってください。 ピント合わせ方向 撮影/投影解像力の確認 4-6項 ノブ フランジバック フランジバックの確認 4-9項 の調整 フランジバックの確認 4-9項 中心付近の細かい線にピントを合わせる サービス専用光学 ブロックを交換 Fig. 4-5-2 5. ダイヤルゲージの目盛りリングを回して,ダイヤルゲージの指針を“0”に合わせる。 注意: この位置がフランジバック値 (fʼF) = 43.50 mmとなります。 終了 短針の位置を記憶しておいてください。 Fig. 4-4-1 SEL2470GM (FE 2.8 / 24-70 GM) (FE 24-70mm F2.8 GM) 4-10...
- Page 48 注意: 図は一例を示しています。実際のチャートの見え方とは異なる場合があります。 センターブレおよびアス 最良の状態 フランジバック測定器のダイヤルを回して ピント合わせを行うと, チャート像がずれる。 Fig. 4-5-5 規格値 (参考値) Fig. 4-5-4 CB (センターブレ) 0.09 mm 以下 4-4-1. 調整手順 AS ( 軸上アス) 0.07 mm 以下 Table 4-5-1 7. CBとASの規格値を満足していない場合は, 「4-5-2. 光軸の調整」 を行う。 4-4-1. 調整手順 SEL2470GM (FE 2.8 / 24-70 GM) (FE 24-70mm F2.8 GM) 4-11...
- Page 49 中心のサークルが解像しているこ とを確認し,周辺のサークルは上下左右が均等に解像しているこ とを確認してく ださい。 (任意のサークル その直径方向で反対にあるサークルは同等に解像されているこ と) ※Adobe Photoshop等を使用して,解像の確認を行ってく ださい。 Fig. 4-5-6 ※中心(赤枠)のサークルと中心以外(青枠)のサークルを等倍で確認してください。 4-4-1. 調整手順 1125mm x 750mm 3:2 2015.12.15 LENS Gp Fig. 4-6-2 4-4-1. 調整手順 SEL2470GM (FE 2.8 / 24-70 GM) (FE 24-70mm F2.8 GM) 4-12...
- Page 50 3. 撮影解像力確認チャートとの撮影距離が800 mm (イメージャー面) になるよう設置し,ズームをWIDE端にする。 4-4-1. 調整手順 4. ピントを合わせて撮影解像力確認チャートが上下左右均等になるように配置する。 5. 調整ねじ2本 (白色) マイナスドライバで回し,片ボケを調整する。 6. Fig. 4-6-2で示す基準を満たした時点で,ボンド塗布溝 (2箇所) にボンド (B-110)を塗布する。 ボンド塗布溝 ボンド塗布溝 ボンド (B-110) ボンド (B-110) 調整ねじ (白色) 調整ねじ (白色) を塗布 を塗布 Fig.4-7-1 SEL2470GM (FE 2.8 / 24-70 GM) (FE 24-70mm F2.8 GM) 4-13E...
Need help?
Do you have a question about the SEL2470GM and is the answer not in the manual?
Questions and answers