Samsung VS20R90 Series User Manual
Hide thumbs
Also See for VS20R90 Series:
- User manual (185 pages) ,
- User manual (160 pages) ,
- User manual (32 pages)
Advertisement
Available languages
Available languages
Quick Links
Changes Note: New
Design: Hyunwoo Lim
Size: 148mm x 210mm
Page: 96
Date: 2020-05-25
HQ R&D PIC: Jungran Kim
Material: Wood Free 80g
Print Color: Black
Post Processing : Cut
ART WORK SPEC
Product
Model/PJT
Part Code
Rev No
Vacuum Cleaner
VS9000N
DJ68-00821R
00
Advertisement

Related Manuals for Samsung VS20R90 Series


Summary of Contents for Samsung VS20R90 Series
- Page 1 ART WORK SPEC Changes Note: New Design: Hyunwoo Lim HQ R&D PIC: Jungran Kim Product Vacuum Cleaner Size: 148mm x 210mm Material: Wood Free 80g Model/PJT VS9000N Page: 96 Print Color: Black Part Code DJ68-00821R Date: 2020-05-25 Post Processing : Cut Rev No...
- Page 2 Vacuum cleaner User manual VS20R90**** Series / VS15R85**** Series • Before operating this unit, please read the instructions carefully. • For indoor use only 1_VS9000_EN_00821R-00_AP_A5.indd 1 2020-05-25 오후 3:03:48...
- Page 3 Contents PREPARATION MAINTENANCE Safety information Maintaining the vacuum cleaner When to empty the dustbin Emptying the dustbin easily without causing INSTALLATION dust clouds Name of the parts Emptying and cleaning the dustbin Accessories Cleaning the filter Cleaning the accessories Installing the charging stand Installation guide APPENDIX OPERATION...
- Page 4 PREPARATION Safety information • Before operating the appliance, please read this manual thoroughly and retain it for your reference. • Because the following operating instructions cover various models, the characteristics of your vacuum cleaner may differ slightly from those described in this manual. Caution/Warning symbols used WARNING Indicates that a danger of death or serious injury exists.
- Page 5 Failure to meet these requirements could cause damage to the internal parts of the vacuum and void your warranty. General • Read all instructions carefully. Before switching the vacuum on, make sure that the voltage of your electricity supply is the same as that indicated on the rating plate at the rear of the handy vacuum cleaner (battery contact side).
- Page 6 • Do not use to suction up water. • Do not immerse in water for cleaning. • Please contact Samsung or a Samsung service center for a replacement if one is needed. English 5 1_VS9000_EN_00821R-00_AP_A5.indd 5...
- Page 7 • Do not attempt to open the charging stand. Repairs should be only carried out by a qualified Samsung service center. • Do not expose the charging stand to high temperatures or allow moisture or humidity of any kind to come into contact with the charging stand.
- Page 8 Installation • If you have a problem with installing the charging stand, contact a Samsung service center. ❇ Injury or product malfunction from not installing the charging stand may not be compensated.
- Page 9 • Do not use a damaged power plug, power cord, or loose power outlet. – Otherwise, electric shock or fire may occur. • If the power cord is damaged, have a Samsung authorized service center replace the power cord with a new power cord.
- Page 10 – Otherwise, an explosion or fire may occur. • If the vacuum makes a strange sound or emits a smell or smoke, turn off the vacuum immediately, and then contact a Samsung service center. – Otherwise, electric shock or fire may occur.
- Page 11 CAUTION • Do not use the product near combustible material. Also do not use: – In a place where a burning candle or desk lamp is placed on the floor. – In an area where an unattended place heater is turned on or an area in which there are unextinguished embers in a fireplace, in an ashtray, etc.
- Page 12 • Do not step heavily on the upper part of the wet brush while using it. – Otherwise, product damage or floor damage may occur. • When using the vacuum cleaner, be careful not to hurt yourself on the moving or spinning parts. –...
- Page 13 – If water gets into the product and an error occurs, turn off the product and contact a Samsung service center. • After unplugging the product, clean the charging stand. • When cleaning the washable parts, do not use alkaline detergent, acid, industrial detergent, air freshener, acetic acid, etc.
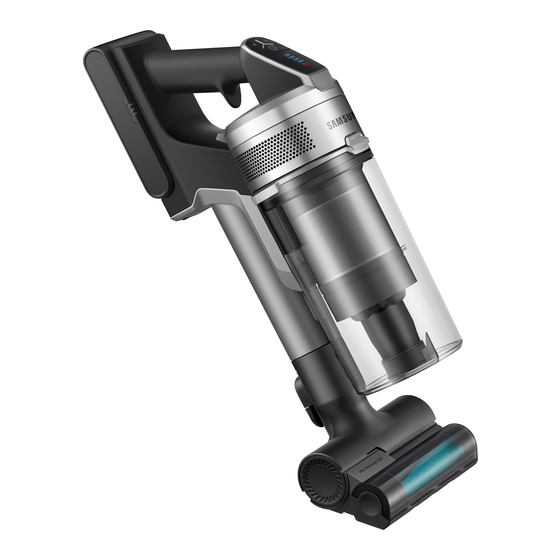
- Page 14 INSTALLATION Name of the parts 01 Pipe (Adjustable) 11 Battery level indicator 02 Dustbin 12 Battery release button 03 Metal mesh grille filter 13 Pipe release button 04 Washable micro filter 14 Pipe length adjustment button 05 Ultra fine dust filter 15 Brush release button 06 Dustbin release button 16 Vacuum charging part...
- Page 15 Accessories Accessories may differ depending on the models. Pipe (Adjustable) Battery User manual Screws: 2 EA / Charging stand / Screw anchors: 2 EA / Screw: 1 EA / Power cord Fixing hook: 1 EA *Flexible Tool Combination Tool Extension Crevice Tool *Brush holder *Soft Action Brush *Turbo Action Brush *Mini Motorized Tool *Wet Brush /...
- Page 16 Installing the charging stand Installation guide Assembling the charging stand 1 Assemble the stand pipe to the bottom support, and fix it with a screw (small). – Make sure the direction for the assembly 'Click' is correct and push it in firmly so that the screw hole is made correctly.
- Page 17 OPERATION Using the vacuum cleaner Using the charging stand Charging ❇ ❇ Make sure the back of the battery is correctly placed onto the vacuum charging part. ❇ ❇ Check if the battery level indicator is displayed while charging. ❇ ❇ The battery level indicator blinks while charging.
- Page 18 Charging the battery ❇ ❇ When the battery level indicator is at its lowest level and blinks( ) charge the battery. ❇ ❇ When charging the vacuum, make sure the connection part of the charging stand is correctly connected. ❇ ❇ The vacuum cleaner cannot be used while it is charging. CAUTION •...
- Page 19 Operating the vacuum cleaner When the brush clings to the floors such as a carpet, a mat, bedding, etc. or does not spin properly, change the suction power to ‘MIN’ or ‘MID’ mode. Power ( ) on / off When pressing the power button, the vacuum cleaner starts operation in ‘MID’...
- Page 20 Using the accessories If the vacuum operates with the spinning brush not working, check whether the brush gets excessive force or clogged with a foreign matter. (Please refer to the troubleshooting part of this manual.) Adjusting the pipe length Press the button at the rear of the pipe to adjust the length of the pipe in 4 steps.
- Page 21 Extension Crevice Tool Use to remove dust in grooves of window frames, chinks, corners, etc. ‘Click’ Flexible Tool Use to clean the places hard to reach such as ‘Click’ upper or rear parts of furniture or ceilings. NOTE • The Flexible Tool can be connected to the Combination Tool and Extension Crevice Tool.
- Page 22 Wet Brush Using the multi-use wet pad Multi-use Use to clean a floor with a wet pad (wood and ‘Click’ wet pad linoleum). ❇ ❇ The Wet Brush does not have a dust suction function. ❇ ❇ When attaching the wet pad, make sure the pad is in the center of the spin disk.
- Page 23 MAINTENANCE Maintaining the vacuum cleaner ❇ ❇ For detailed information, please refer to the QR code. CAUTION • Before cleaning the vacuum cleaner, turn it off. • When the dustbin or filter is filled with dust, the vacuum cleaner may stop due to the overheating prevention device of the motor.
- Page 24 Remove the dust on the metal mesh grille While pressing the button, turn the filter with the combination tool. dustbin cover and remove it from the ❇ ❇ Do not pull the rubber attached to the dustbin. metal mesh grille filter. ‘Click’...
- Page 25 Cleaning the filter • To maintain the best performance of the filter, remove the dust on the filter frequently and clean the filter with water once a month. – After cleaning, dry completely for more than 24 hours in the shade before use. –...
- Page 26 Soft Action Brush NOTE • If a cloth or other foreign matter is vacuumed up and tangled with the spinning brush (drum), the spinning brush will stop working to protect the brush motor. After cleaning the brush, turn the power off and then on again.
- Page 27 • You can charge two batteries at the same time. Additional battery is sold separately. • When you purchase a battery in a Samsung service center, check for the genuine Samsung logo on the battery ( ) and the battery name (VS20R90**** Series: VCA-SBT90 / VS15R85**** Series: VCA-SBT90E).
- Page 28 • Static electricity may occur depending on the humidity, temperature, or floor material, etc. in your home. If it happens repeatedly, contact a Samsung service center. • Please charge the battery fully: – Before using a newly purchased battery for the first time or if you haven’t used the battery for a long time.
- Page 29 • Use a genuine wet pad of Samsung Electronics for wet brush. • If the wet brush is used without a wet pad, any product malfunction will not be covered by warranty and a service fee will be charged.
- Page 30 – If there is foreign matter on the wheel of the brush which cannot be removed easily, contact a Samsung service center. • If the inner part of the wet brush is clogged with a large foreign matter, spinning speed decreases or stops.
- Page 31 Before calling for service, review the problems and solutions below. If none of the suggested solutions resolve your problem, please visit our website at www.samsung.com or call Samsung Customer Care. Note that you will be charged for any service calls in which no defects were found.
- Page 32 Problems Solutions Cleaning is finished but • After cleaning, operate the vacuum for 10 seconds or more to small dust particles come suction up the small dust particles. out of the brush. • As this product has the overheating prevention device of the motor, product will stop operation temporarily for the following conditions.
- Page 33 1_VS9000_EN_00821R-00_AP_A5.indd 32 2020-05-25 오후 3:05:00...
- Page 34 الموقع اإللكتروني مركز خدمة العمالء البلد www.samsung.com/ae/support )English( 800-SAMSUNG )800 - 726 7864( U.A.E www.samsung.com/ae_ar/support )Arabic( www.samsung.com/ae/support )English( 8000-GSAM )8000-4726( BAHRAIN www.samsung.com/ae_ar/support )Arabic( 2_VS9000_AR_00821R-00_AP_A5.indd 32 2020-05-25 오후 3:04:55...
- Page 35 الحلول المشكالت انتهت عملية التنظيف ولكن تخرج .بعد التنظيف، ش غ ِ ّ ل المكنسة لمدة 01 ثوان ٍ أو أكثر لشفط جزيئات الغبار الصغيرة .جزيئات غبار صغيرة من الفرشاة نظر ً ا لتزويد هذا المنتج بجهاز الحماية من السخونة الزائدة للمحرك، سيتوقف المنتج عن العمل .مؤق...
- Page 36 قبل االتصال لطلب الخدمة، راجع المشكالت والحلول الواردة أدناه. إذا لم تحل أي من الحلول المقترحة مشكلتك، ف ي ُ رجى زيارة موقعنا على .. الحظ أنه ستتم محاسبتك على أي مكالمات خدمة لم يتم العثور خاللها على أي عيوبSamsung أو االتصال بخدمة عمالءsamsung.com الحلول...
- Page 37 يمكن أن تتسبب بكرة الفرشاة في خدش األرضية أحيا ن ً ا. تحقق من حالة بكرات الفرشاة قبل استخدام المكنسة .الكهربائية .Samsung في حالة وجود مواد غريبة على بكرة الفرشاة ال يمكن إزالتها بسهولة، اتصل بمركز خدمة – .إذا كان الجزء الداخلي من الفرشاة المبللة مسدو د ًا بمادة غريبة كبيرة، فتنخفض سرعة الدوران أو تتوقف...
- Page 38 .في حالة استخدام الفرشاة المبللة بدون وسادة مبللة، لن يغطي الضمان أي عطل في المنتج وسيتم فرض رسوم خدمة .Samsung عند شراء وسادة مبللة إضافية متعددة االستخدامات للفرشاة المبللة، اتصل بمركز خدمة .VCA-SPA90 عند شراء وسادة مبللة إضافية ذات استخدام واحد، تحقق من اسم الطراز...
- Page 39 قد تقل مدة شحن البطارية ومدة االستخدام مع زيادة استخدام البطارية. فعندما لم يعد من الممكن شحن البطارية أو ينفد .شحنها بسرعة، استبدل البطارية المستنفدة بأخرى جديدة .ال تستخدم سوى حامل الشحن والبطاريات التي توفرها الشركة المصنعة .تأكد قبل إدخال البطارية أنها في االتجاه الصحيح .عند...
- Page 40 .Samsung البطارية الجديدة، اتصل بمركز خدمة .يمكنك شحن بطاريتين في نفس الوقت. ت ُ باع البطارية اإلضافية منفصلة األصلي على البطاريةSamsung ، تحقق من وجود شعارSamsung عند شراء بطارية من مركز خدمة : VS15R85**** / سلسلةVCA-SBT90 : VS20R90**** ) واسم البطارية (سلسلة...
- Page 41 فرشاة التنظيف الناعمة مالحظة في حالة تنظيف قطعة قماش أو مادة غريبة أخرى بالمكنسة الكهربائية وتشابكها مع فرشاة التدوير (األسطوانة)، ستتوقف فرشاة التدوير عن العمل لحماية محرك الفرشاة. بعد تنظيف الفرشاة، أوقف .تشغيل الطاقة ثم أعد تشغيلها في حالة عدم عمل الفرشاة بعد التنظيف، أوقف تشغيل الطاقة ثم أعد .تشغيلها...
- Page 42 تنظيف المر ش ّح .للحفاظ على أفضل أداء للمرشح، أزل األتربة الموجودة على المرشح بشكل متكرر ونظ ِ ّ فه بالماء مرة كل شهر .بعد تنظيفه، جففه تما م ً ا ألكثر من 42 ساعة في الظل قبل استخدامه – .قد...
- Page 43 أزل األتربة الموجودة على مرشح الشبكة المعدنية باستخدام األداة وأزله من أدر غطاء سلة األتربة ،أثناء الضغط على الزر .المركبة .سلة األتربة .ال تسحب المطاط المرفق بمرشح الشبكة المعدنية ❇ ""نقرة أعد تجميع غطاء سلة األتربة مع محاذاة زر تحرير سلة األتربة مع .بعد...
- Page 44 الصيانة صيانة المكنسة الكهربائية .للحصول على معلومات مفصلة، يرجى الرجوع إلى رمز االستجابة السريعة ❇ تنبيه .أوقف تشغيل المكنسة الكهربائية قبل تنظيفها .عند امتالء سلة األتربة أو المرشح باألتربة، قد تتوقف المكنسة الكهربائية بفعل جهاز الحماية من السخونة الزائدة للمحرك .)ينبغي...
- Page 45 فرشاة مبللة استخدام الوسادة المبللة متعددة االستخدامات وسادة مبللة متعددة .)استخدمها لتنظيف أرضية ذات وسادة مبللة (خشب ومشمع ""نقرة االستخدامات .ال تحتوي الفرشاة المبللة على وظيفة شفط الغبار ❇ عند تثبيت الوسادة المبللة، تأكد من أن الوسادة في وسط القرص ❇...
- Page 46 أداة تنظيف التجاويف القابلة لإلطالة استخدمها إلزالة األتربة الموجودة في تجاويف إطارات النوافذ والثغرات .والزوايا وما إلى ذلك ""نقرة األداة المرنة استخدمها لتنظيف األماكن التي يصعب الوصول إليها مثل األجزاء ""نقرة .العلوية أو الخلفية من األثاث أو األسقف مالحظة يمكن توصيل األداة المرنة باألداة المركبة وأداة تنظيف التجاويف .القابلة...
- Page 47 استخدام الملحقات إذا كانت المكنسة تعمل وفرشاة التدوير متوقفة، فتحقق مما إذا كانت ت ُ ستخ د َ م قوة مفرطة على الفرشاة أو أنها مسدودة بمادة غريبة. (يرجى الرجوع إلى ).جزء استكشاف المشكالت وإصالحها في هذا الدليل ضبط طول األنبوب اضغط...
- Page 48 تشغيل المكنسة الكهربائية )" (الحد األدنىMIN" عندما تتشبث الفرشاة باألرضيات مثل السجادة والبساط والفراش وغير ذلك أو ال تدور بشكل صحيح، غ ي ِ ّر قوة الشفط إلى وضع .)" (الحد المتوسطMID" أو ) ( التشغيل / إيقاف التشغيل عند الضغط على زر الطاقة، تبدأ المكنسة الكهربائية في العمل في وضع .)"...
- Page 49 شحن البطارية .)، اشحن البطارية ( عندما يكون مؤشر مستوى البطارية عند أدنى مستوى له ويومض ❇ .عند شحن المكنسة، تأكد من توصيل جزء التوصيل في حامل الشحن بشكل صحيح ❇ .ال يمكن استخدام المكنسة الكهربائية أثناء شحنها ❇ تنبيه ).يجب...
- Page 50 التشغيل استخدام المكنسة الكهربائية استخدام حامل الشحن الشحن تأكد من وضع الجزء الخلفي من البطارية بشكل صحيح على جزء ❇ .شحن المكنسة .تحقق مما إذا كان مؤشر مستوى البطارية معرو ض ً ا أثناء الشحن ❇ ،يومض مؤشر مستوى البطارية أثناء الشحن. عند اكتمال الشحن ❇...
- Page 51 تثبيت حامل الشحن دليل التركيب تجميع حامل الشحن .)جمع أنبوبة الحامل بالدعامة السفلية وثبته بمسامير (صغيرة تأكد من أن اتجاه التجميع صحيح وادفعه بقوة حتى يتم صنع ثقب – .المسامير بشكل صحيح ''اضغط هنا .جمع جزء شحن المكنسة بأعلى أنبوبة الحامل .ال...
- Page 52 الملحقات .قد تختلف الملحقات باختالف ال ط ُ رز البطارية )األنبوب (قابل للضبط / حامل الشحن / EA 2 :المسامير دليل المستخدم / سلك التيار الكهربائيEA 1 :المسامير / EA 2 :مرتكزات تثبيت المسامير EA 1 :خطاف تثبيت أداة تنظيف التجاويف القابلة لإلطالة األداة...
- Page 53 التركيب أجزاء المكنسة الكهربائية مؤشر مستوى البطارية )األنبوب (قابل للضبط زر تحرير البطارية سلة األتربة زر تحرير األنبوب مرشح الشبكة المعدنية زر ضبط طول األنبوب المرشح الصغير القابل للغسل زر تحرير الفرشاة مرشح الغبار الدقيق للغاية جزء شحن المكنسة زر تحرير سلة األتربة حامل...
- Page 54 عند تنظيف الجزء الخارجي من المنتج، أوقف تشغيله أوال ً ثم امسحه بمنشفة جافة. ال ترش الماء مباشرة على المنتج .أو تمسحه بمواد متطايرة مثل البنزين أو ال ت ِ نر أو الكحول .Samsung في حالة دخول الماء داخل المنتج وحودث خطأ ما، أوقف تشغيل المنتج واتصل بمركز خدمة –...
- Page 55 قبل توصيل حامل الشحن أو فصله، أوقف تشغيل المكنسة الكهربائية وتأكد من عدم مالمسة مسامير قابس التيار .الكهربائي ليديك .وإال، قد ينشب حريق أو تحدث صدمة كهربائية – .ال تضغط بشدة على الجزء العلوي من الفرشاة المبللة أثناء استخدامها .وإال، قد يحدث تلف في المنتج أو تلف في األرضية –...
- Page 56 تنبيه :ال تستخدم المنتج بالقرب من مادة قابلة لالحتراق. وال تستخدمه كذلك .في مكان توضع فيه شمعة مشتعلة أو مصباح مكتبي على األرضية – في منطقة موضوع بها مدفأة غير مراقبة أو في منطقة بها قطع جمر غير مطفأة في المستوقد أو في مطفأة السجائر –...
- Page 57 – إذا أصدرت المكنسة صو ت ً ا غري ب ً ا أو انبعث منها رائحة أو دخان، فأوقف تشغيلها فور ً ا، ثم اتصل بمركز خدمة .Samsung .وإال قد يتسبب ذلك في حدوث صدمة كهربية أو نشوب حريق –...
- Page 58 .وإال قد يتسبب ذلك في حدوث صدمة كهربية أو نشوب حريق – . استبداله بسلك كهرباء آخر جديدSamsung في حالة تلف سلك الكهرباء، اطلب من مركز خدمة معتمد من .وإال قد يتسبب ذلك في حدوث صدمة كهربية أو نشوب حريق...
- Page 59 .مواد التصميد العثة أو الغبار القابل لالشتعال أو األبخرة األخرى المتفجرة أو السامة التركيب .Samsung إذا كانت لديك مشكلة في تثبيت حامل الشحن، فاتصل بمركز خدمة .قد ال يتم التعويض عن التعرض لإلصابة أو تعطل المنتج جراء عدم التثبيت الصحيح لحامل الشحن...
- Page 60 .تج ن َّ ب تشويه البطاريات أو حرقها نظر ً ا ألنها ستنفجر في درجات الحرارة العالية ال تحاول فتح حامل الشحن. ينبغي عدم إجراء أعمال اإلصالح سوى بواسطة مركز خدمة مؤهل تابع لشركة .Samsung .ال تعرض حامل الشحن لدرجات حرارة عالية أو تسمح له بمالمسة النداوة أو الرطوبة من أي نوع له...
- Page 61 .مؤهل لتفادي التعرض ألي مخاطر كهربائية .ال تستخدم المكنسة الكهربائية في شفط المياه .ال تغمر المكنسة الكهربائية في الماء لتنظيفها . أو مركز خدمة تابع لها للحصول على مكنسة بديلة إذا لزم األمرSamsung يرجى االتصال بشركة العربية 2_VS9000_AR_00821R-00_AP_A5.indd 5 2020-05-25 오후 3:03:40...
- Page 62 .قد يؤدي عدم االلتزام بهذه اإلرشادات إلى تلف األجزاء الداخلية بالمكنسة الكهربائية وإلغاء الضمان عام اقرأ جميع اإلرشادات بعناية. وقبل تشغيل المكنسة الكهربائية، تأكد أن الجهد الكهربائي لمصدر التيار الكهربائي هو .)نفسه المو ض َّح على لوحة التقنين الموجودة بالجزء الخلفي من المكنسة الكهربائية اليدوية (الجانب المالمس للبطارية .تحذير: ال...
- Page 63 إرشادات ما قبل االستخدام معلومات السالمة .قبل تشغيل الجهاز، ي ُ رجى قراءة هذا الدليل بعناية واالحتفاظ به للرجوع إليه فيما بعد نظر ً ا ألن إرشادات التشغيل التالية تغطي طر ُ ز ً ا متعددة، فقد تختلف خصائص المكنسة الكهربائية لديك اختال ف ً ا طفي ف ً ا .عن...
- Page 64 المحتويات الصيانة إرشادات ما قبل االستخدام صيانة المكنسة الكهربائية معلومات السالمة متى ينبغي تفريغ سلة األتربة تفريغ سلة األتربة بسهولة دون التسبب في س ُ ح ُ ب غبار التركيب تفريغ سلة األتربة وتنظيفها أجزاء المكنسة الكهربائية تنظيف المر ش ّ ح الملحقات...
- Page 65 المكنسة الكهربائية دليل المستخدم VS15R85**** / سلسلةVS20R90**** سلسلة .قبل تشغيل هذا الجهاز، ي ُرجى قراءة اإلرشادات بعناية لالستخدام الداخلي فقط 2_VS9000_AR_00821R-00_AP_A5.indd 1 2020-05-25 오후 3:03:37...
- Page 66 Aspirateur Manuel d'utilisation Série VS20R90**** / Série VS15R85**** • Avant d'utiliser cet appareil, veuillez lire attentivement les instructions. • Utilisation en intérieur uniquement 3_VS9000_FR_00821R-00_AP_A5.indd 1 2020-05-25 오후 3:04:11...
- Page 67 Sommaire PRÉPARATION ENTRETIEN Consignes de sécurité Entretien de l'aspirateur Lorsque vous videz le réservoir de poussière INSTALLATION Vider le réservoir de poussière facilement sans faire voler la poussière Nom des pièces Vider et nettoyer le réservoir de poussière Accessoires Nettoyage du filtre Installation du socle de charge Nettoyage des accessoires Guide d'installation...
- Page 68 PRÉPARATION Consignes de sécurité • Avant d'utiliser cet appareil, veuillez lire attentivement ce manuel et le conserver pour toute référence ultérieure. • Les instructions d'utilisation suivantes concernent plusieurs modèles; il est donc possible que les caractéristiques de votre aspirateur soient légèrement différentes de celles spécifiées dans ce manuel.
- Page 69 Le non-respect de cette instruction risquerait d'endommager les composants internes de l'aspirateur et d'annuler votre garantie. Généralités • Lisez attentivement toutes les instructions. Avant d'allumer l'aspirateur, assurez- vous que la tension de votre alimentation électrique correspond à celle indiquée sur la plaque signalétique située à l'arrière de l'aspirateur portable (côté contact de la batterie).
- Page 70 • N'utilisez pas l'aspirateur pour aspirer de l'eau. • Ne l'immergez pas dans l'eau pour le nettoyer. • Veuillez prendre contact avec Samsung ou un centre de dépannage Samsung pour obtenir une pièce de rechange s'il vous en faut une.
- Page 71 à des températures élevées. • N'essayez pas d'ouvrir le socle de charge. Les réparations doivent être effectuées uniquement par un centre de dépannage Samsung qualifié. • N'exposez jamais le socle de charge à des températures élevées et évitez tout contact avec l'humidité.
- Page 72 Installation • Si vous rencontrez un problème lors de l'installation du socle de charge, contactez un centre de dépannage Samsung. ❇ Si vous n'installez pas le socle de charge, les blessures ou le dysfonctionnement de l'appareil qui en découleront ne pourront être compensés.
- Page 73 – Sinon, il pourrait y avoir un risque d'incendie ou de choc électrique. • Si le cordon d'alimentation est endommagé, faites appel à un centre de dépannage Samsung agréé pour faire remplacer le cordon d'alimentation par un neuf. – Sinon, il pourrait y avoir un risque d'incendie ou de choc électrique.
- Page 74 • Assurez-vous que les bornes de batterie du socle de charge n'entrent pas en contact avec un élément conducteur tel qu'un bracelet, une montre, une tige métallique, un clou, etc. • Assurez-vous qu'aucun liquide tel que de l'eau ou du jus ne puisse entrer dans l'aspirateur ou dans le socle de charge.
- Page 75 • Si l'aspirateur émet un son étrange ou encore des odeurs ou de la fumée, éteignez immédiatement l'aspirateur puis prenez contact avec un centre de dépannage Samsung. – Sinon, il pourrait y avoir un risque d'incendie ou de choc électrique.
- Page 76 • N'utilisez pas l'aspirateur à d'autres fins que celles pour lesquelles il est prévu. (Ne laissez pas les enfants monter sur l'appareil ou jouer avec.) – Ils risqueraient de se blesser ou d'endommager l'appareil. • Avant de brancher ou de débrancher le socle de charge, éteignez l'aspirateur et assurez-vous que les broches de la fiche d'alimentation n'entrent pas en contact avec vos mains.
- Page 77 – Si de l'eau pénètre dans l'appareil ou si une erreur se produit, éteignez l'appareil et prenez contact avec un centre de dépannage Samsung. • Après avoir débranché l'appareil, nettoyez le socle de charge. • Lorsque vous nettoyez les pièces lavables, n'utilisez pas de détergent alcalin, d'acide, de nettoyant industriel, d'assainisseur d'air, d'acide acétique, etc.
- Page 78 INSTALLATION Nom des pièces 01 Tube (réglable) 11 Indicateur du niveau de la batterie 02 Réservoir de poussière 12 Bouton de déverrouillage de la batterie 03 Filtre à grille en maille métallique 13 Bouton de déverrouillage du tube 04 Micro-filtre lavable 14 Bouton de réglage de la longueur du tube 05 Filtre à...
- Page 79 Accessoires Les accessoires peuvent varier en fonction des modèles. Tube (réglable) Batterie Manuel d'utilisation Vis : x 2 / Socle de charge / Douilles à expansion : x 2 / Vis : x 1 /Cordon d'alimentation Crochet de fixation : X 1 *Embout souple Outil de combinaison Suceur plat de rallonge *Support de brosse *Brosse à...
- Page 80 Installation du socle de charge Guide d'installation Assemblage du socle de charge 1 Montez le tube du socle sur le support inférieur et fixez-le à l'aide d'une vis (petite). – Vérifiez que la direction de montage est « Clic » correcte et poussez fermement pour le trou de vis soit à...
- Page 81 FONCTIONNEMENT Utilisation de l'aspirateur Utilisation du socle de charge Mise en charge ❇ ❇ Vérifiez que l'arrière de la batterie est correctement placé sur la partie de charge de l'aspirateur. ❇ ❇ Vérifiez si le voyant de niveau de batterie apparaît durant la charge.
- Page 82 Charge de la batterie ❇ ❇ Lorsque le voyant de niveau de batterie est sur son niveau le plus faible et qu'il clignote ( mettez la batterie en charge. ❇ ❇ Lors de la charge de l'aspirateur, assurez-vous que la partie raccordement du socle de charge est correctement branchée.
- Page 83 Utilisation de l'aspirateur Lorsque la brosse s'accroche à des sols tels qu'une moquette, un tapis, des draps, etc. ou qu'elle ne tourne pas correctement, réglez la puissance d'aspiration en mode « MIN » ou « MID ». Mise sous/hors tension ( ) Lorsque vous appuyez sur le bouton de mise sous tension, l'aspirateur commence à...
- Page 84 Utilisation des accessoires Si l'aspirateur fonctionne alors que la brosse rotative ne fonctionne pas, vérifiez si une force excessive est appliquée sur la brosse ou si cette dernière est obstruée par un corps étranger. (Veuillez vous reporter à la partie dépannage de ce manuel.) Réglage de la longueur du tube Appuyez sur le bouton à...
- Page 85 Suceur plat de rallonge Utilisez-le pour retirer la poussière dans les rainures des cadres de fenêtres, les fentes, les « Clic » coins, etc. Embout souple Utilisez-le pour nettoyer les endroits difficiles « Clic » d'accès tels que le haut ou l'arrière d'un meuble ou les plafonds.
- Page 86 Brosse humide Utilisation du tampon humide à usages multiples Utilisez-la pour nettoyer un sol à l'aide d'un Tampon humide à tampon humide (bois et linoléum). « Clic » usages multiples ❇ ❇ La brosse humide ne dispose pas de fonction d'aspiration de la poussière. ❇...
- Page 87 ENTRETIEN Entretien de l'aspirateur ❇ ❇ Pour plus de détails, reportez-vous au code QR. ATTENTION • Avant de nettoyer l'aspirateur, éteignez-le. • Lorsque le réservoir de poussière ou le filtre est rempli de poussière, l'aspirateur est susceptible de s'arrêter en raison du dispositif anti-surchauffe du moteur. •...
- Page 88 Retirez la poussière du filtre à grille en maille Tout en appuyant sur le bouton, tournez le métallique à l'aide de l'outil de combinaison. cache du réservoir de poussière et retirez-le du ❇ ❇ Ne tirez pas sur le caoutchouc attaché sur le réservoir de poussière.
- Page 89 Nettoyage du filtre • Pour optimiser les performances du filtre, retirez fréquemment la poussière du filtre et nettoyez le filtre à l'eau une fois par mois. – Après l'avoir nettoyé, laissez-le sécher complètement à l'ombre pendant 24 heures avant de l'utiliser. –...
- Page 90 Brosse à action douce REMARQUE • Si un chiffon ou un autre corps étranger est aspiré et enchevêtré dans la brosse rotative (tambour), cette dernière cesse de fonctionner pour protéger le moteur de la brosse. Après avoir nettoyé la brosse, mettez l'appareil hors tension puis de nouveau sous tension.
- Page 91 • Lorsque vous achetez une batterie dans un centre de dépannage Samsung, vérifiez que le logo authentique Samsung est bien apposé sur la batterie ( ) et que le nom de la batterie (série VS20R90**** : VCA-SBT90 / série VS15R85**** : VCA-SBT90E) y figure.
- Page 92 • De l'électricité statique peut se produire en fonction de l'humidité, de la température et du revêtement de sol, etc. dans votre maison. Si cela se produit à plusieurs reprises, prenez contact avec un centre de dépannage Samsung. • Veuillez procéder à la charge complète de la batterie : –...
- Page 93 • Lorsque vous achetez un tampon humide à usages multiples supplémentaire pour la brosse humide, prenez contact avec un centre de dépannage Samsung. • Lorsque vous achetez un tampon humide à usage unique supplémentaire, vérifiez le nom du modèle : VCA-SPA90.
- Page 94 – Si des corps étrangers sont présents sur la roue de la brosse et s'ils ne peuvent pas être facilement retirés, prenez contact avec un centre de dépannage Samsung. • Si la partie interne de la brosse humide est obstruée par un corps étranger de grosse taille, la vitesse de rotation est réduite ou l'appareil cesse de tourner.
- Page 95 En cas de problème, consultez les solutions indiquées ci-dessous avant d'appeler l'assistance. Si aucune des solutions proposées ne permet de résoudre le problème, veuillez consulter notre site Web www. samsung.com ou contacter le centre d'assistance clientèle Samsung. Notez que tout appel déterminant l'absence de défauts sera facturé.
- Page 96 émettre une odeur. • Des filtres de rechange sont disponibles auprès de votre centre de dépannage Samsung local. Le nettoyage est terminé mais de petites particules • Après le nettoyage, faites fonctionner l'aspirateur pendant de poussière tombent de la...
- Page 97 DJ68-00821R-00 3_VS9000_FR_00821R-00_AP_A5.indd 32 2020-05-25 오후 3:05:16...