
Related Manuals for Samsung DV10T9720 Series


Summary of Contents for Samsung DV10T9720 Series
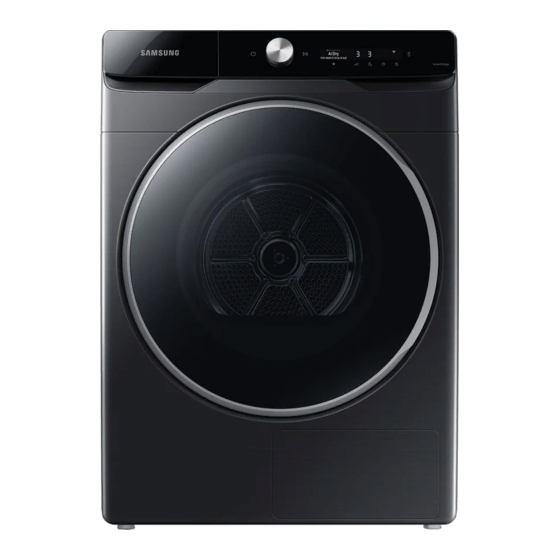
- Page 1 Heat Pump Dryer User manual DV10T9720** DV8700TK_SimpleUX_DC68-04223A-00_AU_EN.indd 1 2020/12/10 11:11:46...
-
Page 2: Table Of Contents
Contents Safety information What you need to know about the safety instructions Important safety symbols Important safety precautions To minimize the risk of fire in a tumble dryer, the following should be observed Critical installation warnings Critical usage warnings Usage cautions Critical cleaning warnings Care for preventing freezing Installation... - Page 3 Appendix Fabric care chart Protecting the environment Specification English 3 DV8700TK_SimpleUX_DC68-04223A-00_AU_EN.indd 3 2020/12/10 11:11:46...
-
Page 4: Safety Information
Safety information Congratulations on your new Samsung dryer. This manual contains important information on the installation, use, and care of your appliance. Please take the time to read this manual to take full advantage of your dryer’s many benefits and features. -
Page 5: Important Safety Precautions
Important safety precautions WARNING To reduce the risk of fire, electric shock, or injury to persons when using your appliance, follow basic precautions, including the following: 1. This appliance is not to be used by persons (including children) with reduced physical, sensory or mental capabilities, or lack of experience and knowledge, unless they have been given supervision or instruction concerning use of the appliance by a person responsible for their safety. - Page 6 Safety information 6. For appliances with ventilation openings in the base, that a carpet must not obstruct the openings. 7. For use in Europe: Children of less than 3 years should be kept away unless continuously supervised. 8. CAUTION: In order to avoid a hazard due to inadvertent resetting of the thermal cut-out, this appliance must not be supplied through an external switching device, such as a timer, or connected to a circuit that is regularly switched on and off by the utility.
- Page 7 15. Items such as foam rubber (latex foam), shower caps, waterproof textiles, rubber backed articles and clothes or pillows fitted with foam rubber pads should not be dried in the tumble dryer. 16. Fabric softeners, or similar products, should be used as specified by the fabric softener instructions.
-
Page 8: To Minimize The Risk Of Fire In A Tumble Dryer, The Following Should Be Observed
Safety information WARNING: In the appliance enclosure or in the built-in structure, keep ventilation openings clear of obstruction. WARNING: Do not damage the refrigerant circuit. To minimize the risk of fire in a tumble dryer, the following should be observed CAUTION Items that have been spotted or soaked with vegetable or cooking oil constitute a fire hazard and should not be placed in a tumble dryer. -
Page 9: Critical Installation Warnings
Items such as foam rubber(latex foam), shower caps, waterproof textiles, rubber backed articles and clothes or pillows fitted with foam rubber pads should not be dried in the tumble dryer. Fabric softeners, or similar products, should be used as specified by the fabric softener instructions. The final part of a tumble dryer cycle occurs without heat(cool down cycle) to ensure that the items are left at a temperature that ensures that the items will not be damaged. -
Page 10: Critical Usage Warnings
Safety information • Never plug the power cord into a socket that is not grounded correctly and make sure that it is in accordance with local and national codes. Do not install or keep the product exposed to the outdoor elements. Do not use a damaged power plug, damaged power cord or loose wall socket. -
Page 11: Usage Cautions
The use for business purposes qualifies as product misuse. In this case, the product will not be covered by the standard warranty provided by Samsung and no responsibility can be attributed to Samsung for malfunctions or damages resulting from such misuse. - Page 12 Safety information Do not touch the glass door and inside of the drum during or just after drying as it is hot. • This may result in burns. The door glass becomes hot during drying. Therefore, do not touch the door glass. Also, do not allow children to play around the dryer or touch the door glass.
-
Page 13: Critical Cleaning Warnings
Critical cleaning warnings WARNING Do not clean the appliance by spraying water directly onto it. Do not use benzene, thinner or alcohol to clean the appliance. • This may result in discoloration, deformation, damage, electric shock or fire. Before cleaning or performing maintenance, unplug the appliance from the wall socket. •... -
Page 14: Installation
Carefully unpack the dryer. Keep all packaging materials away from children. The parts and location of parts shown below may differ from your dryer. Before installation, make sure the dryer has all the parts listed here. If the dryer and/or parts are damaged or missing, contact the nearest Samsung customer service center. - Page 15 • The stacking kit allows the dryer to be stacked on top of a washing machine. Please note that the stacking kit can only be used with Samsung washing machine and dryers. To purchase a stacking kit above, contact a Samsung service centre or local appliance retailer. The stacking kit differs with the washing machine model.
-
Page 16: Installation Requirements
• Do not let children or pets play in, on, or around the dryer. Proper supervision is necessary at all times. • Keep all packaging materials away from children. • Do not replace a damaged power cord or power plug yourself. Have Samsung or a qualified service technician replace a damaged power cord or power plug. -
Page 17: Step-By-Step Installation
Alcove or closet installation For alcove or closet installation, the dryer requires the following minimum clearances: Sides Front Rear 20 mm 25 mm 490 mm 50 mm If installing the dryer with a washing machine, the front of the alcove or closet must have an unobstructed air opening of at least 550 mm. - Page 18 Installation STEP 2 Adjust the levelling feet 1. Gently slide the dryer into the desired location. 2. Use a level (A) and check the levelness of the dryer from side to side and front to back. 3. If the dryer is not level, turn the levelling feet (B) left or right to adjust the height.
- Page 19 STEP 3 Connect the drain hose Draining directly to a drainage system • We strongly recommend draining condensed water directly to your drainage system instead of draining to the built-in water tank. • Use the provided accessory hose (long drain hose) to drain condensed water directly to your drain system instead of draining to the built-in water tank (which is a default method).
- Page 20 Installation 2. Insert one end of the accessory hose (long drain hose) into drain water outlet (A). 3. Place the other end (outlet) of the accessory hose at least 70 mm away from a drain hole. 01 70 mm Placing the accessory hose over a wash basin 1.
- Page 21 By using the drain pipe of the wash basin 1. Assemble the hose connector (A), and attach it to the end of the accessory hose as shown. CAUTION To prevent water leak, make sure to connect the hose and the connector firmly. 2.
- Page 22 Installation Draining to the water tank 1. Remove the long drain hose from the drain water outlet (A). * 70 mm NOTE Completely dry the removed long drain hose and keep it in a safe place for later use. 2. Remove the water tank drain hose from the holder (B), and then connect it to the drain water outlet (A).
-
Page 23: Environment
STEP 4 Check the installation • All packaging material is completely removed and properly disposed. • The dryer is level and standing firmly on the floor. • Make sure no accessory remains inside the drum. • Do not block the air inlet hole of the cooling grill at the front of the dryer. •... -
Page 24: Before You Start
Before you start Initial setup • When you turn on your dryer for the first time, the screen shows the initial setup process. Follow the on-screen instructions to complete it. • If you complete the initial setup and operate a cycle for more than a minute, the initial setup will not appear again. -
Page 25: Drying Guidelines
Drying guidelines STEP 1 Sort • Do not mix heavy and lightweight items together. • Wash and dry dark-colored items separately from light-colored items. • Unless recommended on the care label, do not dry woolens or fiberglass items. • Do not dry items soiled with oil, alcohol, gasoline, etc. •... - Page 26 Before you start STEP 4 Determine the load capacity Do not overload the dryer. Overloading reduces the tumbling action, resulting in uneven drying and wrinkling. • Put one wash load in the dryer at a time. • To improve drying efficiency for one or two items, add a dry towel to the load. •...
-
Page 27: Operations
Operations Control panel Tap to turn the dryer on or off. • If you do not manipulate the control panel for 10 minutes after the dryer is turned on, the dryer automatically turns off. • The dryer automatically turns off when the drying completes. 01 Power ... - Page 28 Operations Tap to select the cycle time for Time Dry, Rack Dry, or Cool Air. You can set the 08 Time drying time between 20 minutes and 240 minutes. Available drying time depend on the selected cycle. 09 Additional • Tap to enter the additional functions menu. Functions ...
-
Page 29: Operating A Cycle
Operating a cycle 1. Tap to turn on the dryer. 2. Turn the Navigation dial to select the cycle you want. For more information on “Cycle overview”, see page 30. 3. Tap , or to change the default cycle settings. 4. -
Page 30: Cycle Overview
Operations Cycle overview Sensor dry cycles Cycle Description Max load (kg) For cottons, bed linens, table linens, underwear, towels, Cotton 10.0 or shirts. Auto optimized drying by AI according to the load and AI Dry 10.0 ambient temperature. For mixed loads consisting of cotton and synthetic Quick Dry fabrics that need quick drying. - Page 31 Manual dry cycles Max load Cycle Description (kg) Use to set a desired dry time. Turn the Navigation dial to select Time Dry and tap to set the drying time between 20 minutes and 240 minutes. Tap repeatedly to select the available time options in this order: 20 / 30 / 40 / 50 / 60 / 90 / 120 / 150 / 180 / 240.
- Page 32 Operations Other cycles Cycle Description Max load (kg) 6.0 (for wet) For sanitizing wet and dry clothes and linen fabric to Hygiene Care+ eliminate bacteria. 4.0 (for dry) For dusting off clothes, bed spreads, bed sheets and Air Bedding Care bedding covers, etc.
-
Page 33: Additional Functions
Additional functions Using Additional Functions Damp Alert Tap O to set alert 1. Tap 2. Turn the Navigation dial to select the desired additional function. 3. Tap to change the selected function’s settings or start the function. NOTE • To return to the main screen, tap again or turn the Navigation dial to select Back and tap •... - Page 34 Operations Drum Light You can turn the drum light on or off. 1. Tap 2. Turn the Navigation dial to select Drum Light, and then tap 3. Tap to select On or Off. The drum light turns on even when the dryer is off. (If the dryer is plugged in d to a power outlet.) When the dryer door opens, the drum light automatically turns on and automatically turns off after 2 minutes.
- Page 35 Child Lock To prevent children or infants from accidentally starting or setting the dryer, Child Lock locks all buttons except for 1. Close the door. 2. Tap 3. Turn the Navigation dial to select Child Lock, and then tap 4. Tap to select On or Off.
-
Page 36: System Functions
Operations System functions Using System Functions 01 * * Tap and hold 3 seconds. 1. Tap and hold for 3 seconds. 2. Turn the Navigation dial and select the desired system function, and then tap 3. Tap to change the selected function’s settings or start the function. NOTE •... - Page 37 Calibration You can run calibration again for accurate weight detection. 1. Tap and hold for 3 seconds. 2. Turn the Navigation dial to select Calibration, and then tap Calibration does not start if the door is not closed properly. The drum rotates clockwise and anticlockwise for about 3 minutes. 3.
-
Page 38: Special Features
Operations Special features Smart Control You can connect to the SmartThings app and control your dryer remotely. Connecting your dryer • Download and open the SmartThings app on your mobile device. • Tap and hold to turn on the dryer. •... - Page 39 • This appliance supports the Wi-Fi 2.4 GHz protocols. Download On an app market (Google Play Store, Apple App Store, Samsung Galaxy Apps), find the SmartThings app with a search term of “SmartThings”. Download and install the app on your device.
- Page 40 UK. The full text of the EU declaration of conformity and the UK declaration of conformity is available at the following internet address: The official Declaration of conformity may be found at http://www.samsung.com, go to Support > Support home and enter the model name.
- Page 41 Using the drying rack Set the drying time up to 240 minutes according to the moisture and weight of the items to dry. When drying laundry using the drying rack, the Rack Dry cycle is recommended. 1. Position the drying rack in the drum, inserting the front lips of the rack into the holes of the door diaphram.
- Page 42 Operations Drying suggestions Items (max 1.5 kg) Description Washable sweaters (block to shape and lay flat on When drying the laundry using the rack, fold rack) and place the clothes on the rack to prevent the clothing from becoming wrinkled. Stuffed toys (cotton or polyester fiber filled) Stuffed toys (foam or rubber-filled) Foam rubber pillows...
-
Page 43: Maintenance
Maintenance Emptying the water tank Empty the water tank after each use to prevent leaks. 1. Remove the water tank (A) from the dryer. Pull the water tank handle with one hand until the tank is halfway out. Once the water tank is halfway out, support the bottom of the tank with the other hand and pull it slowly with both hands. -
Page 44: Installing The Micro Soft Filter(Optional Filter)
Maintenance Installing the micro soft filter(Optional Filter) You can install the provided micro soft filter(Optional Filter) to prevent dust accumulation on the heat exchanger. 1. Gently press the top part of the outer cover (A) to open. 2. Unlock the inner cover fixers (B), and then pull the inner cover to remove. -
Page 45: Cleaning
4. Reinsert the inner cover to its original position, and then lock the fixers. 5. Close the heat exchanger’s outer cover. Cleaning WARNING • Do not clean the dryer by directly spraying water onto the dryer. • Do not clean the dryer with benzene, thinner, alcohol, or acetone. This may cause discoloration, deformation, damage, electric shock, or fire. - Page 46 Maintenance Lint filter Clean the lint filter after each use. 1. Open the dryer door, grab the top of the lint filter, and pull to remove the filter. Do not detach the rubber sealing after removing the filter. 2. Open the outer filter and remove the inner filter (A). 3.
- Page 47 NOTE To clean the filters thoroughly, clean the filters in running water, and then dry them completely. 5. Put the inner filter into the outer filter, and then reinsert the lint filter into the original position. CAUTION • Clean the lint filter after each load. Otherwise, the drying performance may decrease. •...
- Page 48 Maintenance Heat exchanger When it is time to clean the heat exchanger, the dryer will alert you by displaying the “Clean heat exchanger” message. A dirty heat exchanger will hinder the product’s performance and should be cleaned regularly. NOTE • Water droplets can form around the heat exchanger due to condensation caused by a temperature difference.
- Page 49 3. Clean the dust on the heat exchanger using the provided brush. After cleaning with the brush, wipe off the remaining dust using a smooth, damp cloth. CAUTION • To avoid physical injury and burns, do not touch or clean the heat exchanger with bare hands. •...
- Page 50 Maintenance Micro soft filter(Optional Filter) When it is time to clean the micro soft filter(Optional Filter), the dryer will alert you by displaying the “Clean micro soft filter(Optional Filter)” message. A dirty micro soft filter(Optional Filter) will hinder the product’s performance and should be cleaned regularly. 1.
-
Page 51: Troubleshooting
Troubleshooting Checkpoints If you encounter a problem with the dryer, first check the table below and try the suggestions. Problem Action • Make sure the dryer is plugged in. • Make sure the door is properly closed. • Check the fuse or reset the circuit breaker. Dryer does not start. - Page 52 If the hose is frozen, submerge it in warm water to allow the water inside the hose to melt and drain out. Reconnect the hose and check for proper draining. If a problem persists, contact a local Samsung service center. English DV8700TK_SimpleUX_DC68-04223A-00_AU_EN.indd 52...
-
Page 53: Information Codes
• Try restarting the cycle. the main and the inverter PBAs. • If this continues, call for service. Compressor overheating • Call for service. If any information code keeps appearing on the screen, contact a local Samsung service center. English 53 DV8700TK_SimpleUX_DC68-04223A-00_AU_EN.indd 53 2020/12/10 11:12:06... - Page 54 Appendix Fabric care chart The following symbols provide garment care Bleaching direction. The Clothing care labels include symbols for drying, bleaching, drying and ironing, Any bleach allowed. or dry cleaning when necessary. The use of symbols ensures consistency among garment Only oxygen bleach allowed.
- Page 55 Ironing Professional dry-cleaning in hydrocarbons (heavy benzines) with Iron at maximum sole plate normal process. temperature of 200 °C. Professional dry-cleaning in Iron at maximum sole plate hydrocarbons (heavy benzines) with temperature of 150 °C. gentle process. Iron at maximum sole plate Do not dry-clean.
- Page 56 Appendix Specification TYPE FRONT LOADING DRYER MODEL NAME DV10T9720** Maximum load capacity Drying 10.0 kg 686 mm 984 mm DIMENSIONS 803 mm 844 mm 1378 mm WEIGHT 74.0 kg ELECTRICAL REQUIREMENTS AC 220–240 V / 50 Hz 1800-2100 W ALLOWABLE TEMPERATURE 5-35 °C English DV8700TK_SimpleUX_DC68-04223A-00_AU_EN.indd 56...
- Page 57 Memo DV8700TK_SimpleUX_DC68-04223A-00_AU_EN.indd 57 2020/12/10 11:12:16...
- Page 58 Memo DV8700TK_SimpleUX_DC68-04223A-00_AU_EN.indd 58 2020/12/10 11:12:16...
- Page 59 Memo DV8700TK_SimpleUX_DC68-04223A-00_AU_EN.indd 59 2020/12/10 11:12:16...
- Page 60 QUESTIONS OR COMMENTS? COUNTRY CALL OR VISIT US ONLINE AT AUSTRALIA 1300 362 603 (Other) www.samsung.com/au/support NEW ZEALAND 0800 726 786 (All Product) www.samsung.com/nz/support DC68-04223A-00 DV8700TK_SimpleUX_DC68-04223A-00_AU_EN.indd 60 2020/12/10 11:12:16...