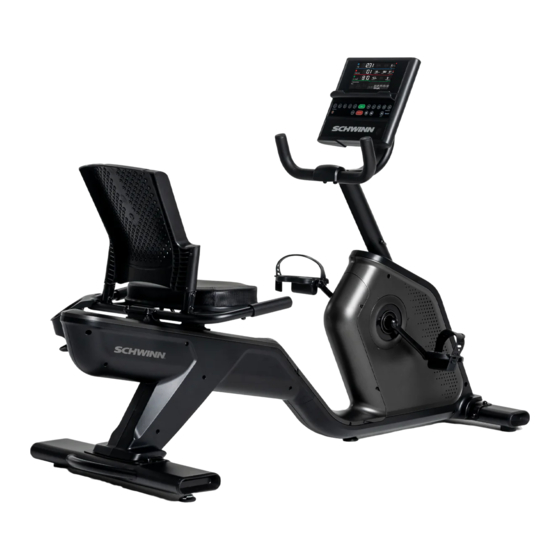
Schwinn 290 Assembly Manual / Owner's Manual
Hide thumbs
Also See for 290:
- Service manual (100 pages) ,
- Troubleshooting manual (6 pages) ,
- Quick start manual (6 pages)

Related Manuals for Schwinn 290


Summary of Contents for Schwinn 290
- Page 1 Manuals in additional languages: ASSEMBLY MANUAL / OWNER’S MANUAL http://www.schwinnfitness.com...
-
Page 2: Table Of Contents
TABLE OF CONTENTS Important Safety Instructions Operation Safety Warning Labels / Serial Number Adjustments Power Up / Idle Mode Parts Hardware Modify Display of Workout Values Tools Pausing or Stopping Assembly Summary Mode Moving the Machine Console Setup Mode Leveling the Machine Maintenance Features Maintenance Parts... -
Page 3: Important Safety Instructions
IMPORTANT SAFETY INSTRUCTIONS This icon means a potentially hazardous situation which, if not avoided, could result in death or serious injury. Obey the following warnings: Read and understand all warnings on this machine. Carefully read and understand the Assembly instructions. genuine replacement parts can cause a risk to users, keep the machine from operating correctly and void the •... - Page 4 • Keep third • This appliance is not intended for use by persons (including children) with reduced physical, sensory or mental...
-
Page 5: Safety Warning Labels / Serial Number
SAFETY WARNING LABELS AND SERIAL NUMBER WARNING! Read, understand and obey all additional warnings and safety possible if caution is not used Product The heart rate displayed is an Serial Number (The label on the machine is available in FCC Compliance could void the user’s authority to operate the equipment. - Page 6 SPECIFICATIONS Maximum User Weight: 150 kg ( 330 lb ) Total Surface Area (footprint) of equipment: Machine Weight: 119.4 cm (47 in) Power Requirements (AC Adapter): Input Voltage: Output Voltage: 12V DC, 3A 168.7 cm (66.4 in) 71.1 cm (28 in) Before Assembly NOTICE: Basic Assembly Tips...
-
Page 7: Parts
PARTS 17 (R) 16 (L) Item Description Item Description Main Assembly Pivot Cover Rear Stabilizer Seat Frame Leveler Feet Seat Pad Front Stabilizer Seat Back Console Mast Seat Adjustment Handle Upright Handlebar Left Pedal (L) Handlebar Mount Cover Right Pedal (R) Console Cup Holder Console Mount Bracket... -
Page 8: Hardware
HARDWARE / TOOLS Item Description Spring Washer, M8 Flat Washer, Narrow, M8 Note: Tools Included Not Included (recommended) 13 mm 15 mm... -
Page 9: Assembly
ASSEMBLY 1. Attach Leveler Feet to Rear Stabilizer, and Stabilizers to Main Assembly Note:... - Page 10 2. Connect the Cables and Attach the Console Mast to Frame Assembly NOTICE: Align the clips on the cable connectors and make sure the 3. Attach Handlebar to the Console Mast NOTICE: Push the cover (7) into position on the...
- Page 11 4. Attach Console Mount Bracket to Console Mast Note: NOTICE: 5a. Remove Console Screws Note: NOTICE:...
- Page 12 5b. Install the Console Assembly on the Console Mast NOTICE: Note: Start lower 5c. Install the Pivot Cover and Media Tray NOTICE: Note: Slide the tabs into the slots on the Console face and evenly against the Console face to attach the...
- Page 13 6. Remove the Support Struts from the Seat Frame and Attach the Seat Pad NOTICE: 7. Attach the Support Struts and Seat Frame Assembly to the Seat Rail NOTICE:...
- Page 14 8. Attach the Support Struts to the Seat Frame Assembly NOTICE: 9. Attach the Seat Back to the Seat Frame Assembly NOTICE:...
- Page 15 10. Attach Seat Adjustment Handle NOTICE: 11. Attach Straps to Pedals and Install the Pedals If the threads strip due to improper installation, then the Pedals can disengage from the bike and/or break while under usage, which can result in serious injury to the user. Note: The Left Pedal is reverse-threaded.
- Page 16 12. Attach Cup Holder to Frame Assembly NOTICE: 13. Adjust the Levelers As Necessary Do not adjust the levelers to such a height that they detach or unscrew from the machine. Injury to you or damage to the machine can occur.
- Page 17 14. Connect AC Adapter to Frame Assembly NOTICE: 15. Final Inspection Do not use until the machine has been fully assembled and inspected for correct performance in accordance with the Owner’s Manual. NOTICE: some hardware will need to be and smooth operation, make sure to tighten the indicated hardware Pedals Maintenance section of this manual...
-
Page 18: Moving The Machine
BEFORE YOU START Moving the Machine The machine may be moved by one or more persons depending on their physical abilities and capacities. NOTICE: Be careful when you move the bike Leveling the Machine Do not adjust the levelers to such a height that they detach or unscrew from the machine. Injury to you or damage to the machine can occur. -
Page 19: Features
FEATURES Console Transport Roller Handlebar, Upright Power Connector Handlebar, Side Fully Shrouded Flywheel Seat Rail Adjustable Console Mount Adjustable Seat Media Tray Seat Adjustment Handle Speakers Cup Holder USB Port Transport Handle AC Adapter Stabilizer Bluetooth Heart Rate (HR) Receiver (not shown) ®... -
Page 20: Console Features
The Console provides important information about your workout and lets you control the resistance levels while you Resistance Level Resistance Level Quick buttons Quick buttons Reset button Volume button Decrease button Increase button Keypad Functions Increase ( Decrease ( It does Reset button (Schwinn ™... - Page 21 Bluetooth App Connected icon ® Bluetooth Heart ® Rate Monitor Connected icon Heart Rate Detected icon Program Display Console Display Bluetooth ® Bluetooth Heart Rate ® ® Heart Rate ® Time Interval Speed Calories Burn Rate Watts...
- Page 22 Heart Rate (Pulse) your chest, become short of breath, or feel faint. Contact your doctor before you use the machine again. Distance Note: To switch units between kilometers and miles before a workout, push the Programs button and hold for 3 seconds Cadence Resistance Program Display...
-
Page 23: Bluetooth ® Heart Rate Monitor
USB Charging Workout with Other Fitness Apps ® latest list of supported apps, please visit: Using your JRNY™ membership with your machine *, it can be accessed through your device when synced to the console of this ® Bluetooth ® Heart Rate Enabled ®... - Page 24 Note: ® ® Heart Rate Monitor ® Heart Rate Calculations The graph is a brief guideline, describing the generally suggested target heart rates Consult your physician for your individual regimens, always use your best judgment when you increase...
-
Page 25: Operation
OPERATION What to Wear your chest, become short of breath, or feel faint. Contact your doctor before you use the machine again. Use the values calculated or measured by the machine’s computer for reference purposes only. The heart • • Seat Adjustment Pull up on the Seat Adjustment Handle, and adjust Push the Seat Adjustment Handle down firmly... - Page 26 Note: Manual (Quick Start) Program During a Manual Workout, each column represents Note: If a Manual workout is performed for more than 9 hours 99 minutes and 59 seconds (9:99:59), the units for Time Interval Programs During the Interval Programs, the workout will switch between an increased intensity, “Sprint” period (more resistance), Note: The “Sprint”...
-
Page 27: Modify Display Of Workout Values
Non-Interval Programs Fat Burn Calorie Burn Rolling Hills Summit Pass Stairs Modify Display of Workout Values To switch units between kilometers and miles before a workout, push the Programs button and hold for 3 seconds to enter Note: Changing Resistance Levels Push the Increase( ) or Decrease( Pausing or Stopping... -
Page 28: Summary Mode
CONSOLE SETUP MODE Muting the Console Note: Workout Summary Mode Note: Console Setup Mode – System Menu The Console Setup Mode allows you to set units of measurement to either Imperial or metric, adjust screen brightness, Note: Push the Pause/Stop button System Menu Note: Note:... - Page 29 Note:...
-
Page 30: Maintenance
MAINTENANCE regular maintenance is done. Worn, damaged or loose components must be repaired or replaced immedi- ately. Only manufacturer supplied components can be used to maintain and repair the equipment. If at any time the Warning labels become loose, unreadable or dislodged, replace the labels. If purchased in US/Canada, contact Customer Service for replacement labels. -
Page 31: Maintenance Parts
Maintenance Parts... - Page 32 Console Seat Adjustment Handle Pedal, Right Console Mount Bracket Seat Slider Shroud, Right Main Media Tray Seat Rail Console Mast Rear Stabilizer Drive Belt Pivot Cover Levelers Drive Pulley Data Cable, Upper Shroud, Left Main Flywheel Insert, Lower Mast Pedal, Left RPM (Speed) Sensor Handlebar, Upright Crank Arm...
-
Page 33: Troubleshooting
TROUBLESHOOTING Condition/Problem Things to Check Solution No display/partial display/ Check electrical (wall) unit will not turn on outlet Check connection at front of unit Check data cable integrity Check data cable Be sure cables at base of mast and at back of console are con connections/orientation Check console display for Check for visual sign that console display is cracked or other... - Page 34 Check pedal to crank to pedal connection Seat Assembly shifts / Hardware Check hardware that attaches Seat assembly, and fully tighten squeaks when in use Console continuously Console is in demonstra Press and hold the Schwinn ™ cycles through program tion mode screens...
-
Page 35: Warranty (Us/Canada Only)
WARRANTY ( if purchased in US/Canada ) Who Is Covered This warranty is valid only to the original purchaser and is not transferable or applicable to any other person(s). What Is Covered Nautilus, Inc. warrants that this product is free from defects in materials and workmanship, when used for the purpose intended, under normal conditions, and provided it receives proper care and maintenance as described in the Product’s Assembly and Owner’s manual. - Page 36 ™ ™ ™ ™ ™ ™...
Need help?
Do you have a question about the 290 and is the answer not in the manual?
Questions and answers
how do I adjust the seat