
Related Manuals for Schwinn 250


Summary of Contents for Schwinn 250
- Page 1 SCHWlNN_ Manual en Esp¢_ol LaSno ArYericano_ ASSEMBLY MANUAL / OWNER'S MANUAL http://www_schwinnfitnes_ s_cor_...
-
Page 2: Table Of Contents
Printed in China I © 2011 Nautilus, Inc., All rights reserved. TMand @ indicate a trademark or registered trademark. Nautilus, Inc. (www.Nautiluslnc.com) trademarks include NAUTILUS@, BOWFLEX@, SCHWINN@ and UNIVERSAL@ and respective Iogos. Other trademarks are the property of their respective owners... -
Page 3: Important Safety Instructions - Assembly
This icon means a potentially hazardous situation which, if not avoided, could result in death or serious injury. Obeythe following warnings: Read and understand all warnings on this machine. Carefully read and understand the Assembly instructions. Keep bystanders and children away from the product you are assembling at all times. Do not connect power supply to the machine until instructed to do so. -
Page 4: Safety Warning Labels / Serial Number
Keep children away. Prior to use, read and understand Owners Manual. Serial Numbe>r Injury or death is possible if Caution is not 00000000000000000000000 used while using this machine. The maximum user weight for this machine is 300 Ibs (136 Kg). Replace any "Caution"... -
Page 5: Specifications
MaximumUserWeight: 300 Ibs. (136 kg) Power Requirements: Operational Voltage: Operational Voltage 9VDC 1500 mA Operating Current: Regulatory Approvals: AC Power Adapter: UL listed, CSA certified (or equivalent), Rated 120V 60Hz Input, 9VDC, 1500mA Output. Class 2 or LPS. Before Assembly Select the area where you are going to set up and operate your machine. -
Page 6: Parts
Item Description Item Description Rear Stabilizer Seat Bottom Front Stabilizer Seat Rail * Seat Frame Console Mast Frame AC Adapter Console Left Pedal Console Bracket Right Pedal Handlebar Bracket Upright Handlebar Seat Rail Bracket * Side Handlebar Seat Back * Pro-installed on Frame (Item 4). -
Page 7: Hardware
item Description item Description Carriage Bolt, M8x85 Mounting Bracket Hex Bolt, M8x85 Hex Bolt, M7x30 Console Tilt Adjustment Knob Curved Washer, M8 Button Head Hex Screw, M8x16 Lock Nut, M8 Button Head Hex Screw, M8x45 Hex Screw, M8x16 Lock Washer, M6 Flat Washer, M8 Flat Washer, M6 Tools... - Page 8 1. Remove SeatRailfrom Frameand Disconnect HeartRateCable NOTICE: Make sure that the heart rate cable does not fall into the frame tube. Hardware is not on hardware card. Remove Seat Rail Bracket from Seat Rail NOTICE: Hardware is not on hardware card.
- Page 9 4. AttachSideHandlebar t o SeatFrame...
-
Page 10: Assembly
5.AttachSeatPads to SeatFrameAssembly ft.Loosen andPullthe SeatPost SlideSeat SeatRail Adjustment Knobto Assemblyonto NOTICE: Do not crimp the Heart Rate ©able. Note: Lock the Adjustment Knob into one of the Seat Rail locking holes. - Page 11 7.Connect H eartRateCableto SeatAssembly NOTICE: Do not crimp the Heart Rate Cable. 8. AttachSeatRailBracket to SeatRailAssembly NOTICE: Do not crimp the Heart Rate Cable. Hardware was pre-installed and not on hardware card. i" ,/"...
- Page 12 9. AttachSeatRailAssembly to FrameAssembly NOTICE: Do not crimp the Heart Rate Cable. Hardware was pre-installed and not on hardware card.
- Page 13 10.AttachConsole Mastto FrameAssembly NOTICE: Align the clips on the cable connectors and make sure the connectors lock. Do not crimp Console Cable. /"...
- Page 14 11. Attach Upright Handlebarto ConsoleMast C -_ ..
- Page 15 AttachConsole Bracketto Console Mast NOTICE: Do not crimp the cables.
- Page 16 13. Remove Hardware from Console NOTICE: Do not crimp the cables. Note: Hardware is pre-installed *...
- Page 17 14.Connect C ablesandAttachConsoleto FrameAssembly NOTICE: Align the clips on the cable connectors and make sure the connectors lock. Do not crimp Console Cable. Do not fully tighten the hardware.
- Page 18 15. Adjustand Tighten the ConsoleMast and Console NOTICE: Tighten hardware and install Caps.
- Page 19 16.AttachPedals to FrameAssembly...
- Page 20 17.Connect A CAdapterto FrameAssembly j/ / 18. Finalinspection Inspect your machine to ensure that all hardware is tight and components are properly assembled. o not use until the machine has been fully assembled and inspected for correct performance in accordance with the Owner's Manual.
-
Page 21: Moving The Bike
Moving the Bike To move the recumbent bike, carefully lift the rear end of the bike and slowly push it to the desired location. NOTICE:Be careful when you move the bike. All abrupt motions can af- fect the computer operation. Leveling the Bike Levelers are found on each side of the Rear Stabilizer and on the Frame Rail. -
Page 22: Important Safety Instructions
This icon means a potentially hazardous situation which, if not avoided, could result in death or serious injury. Before using this equipment, obey the following warnings: Read and understand the complete Manual. Keep the Manual for future reference. Read and understand all warnings on this machine. If at any time the Warning stickers become loose, unreadable or dislodged, contact Nautilus®... -
Page 23: Features
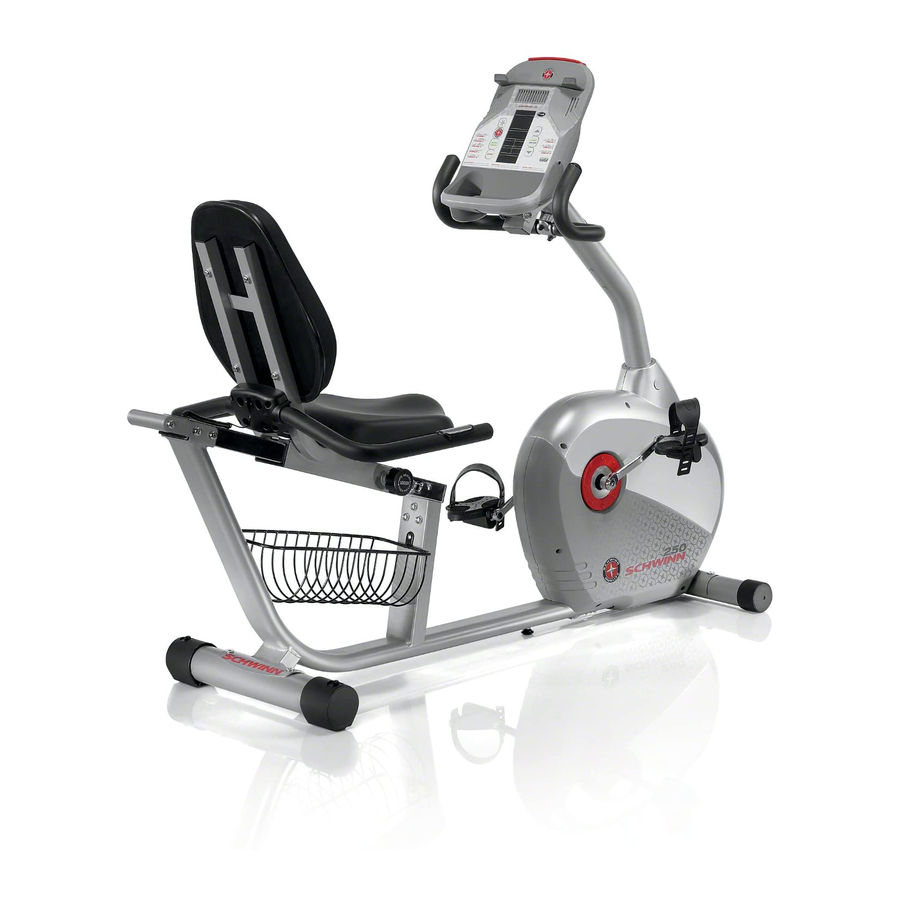
Console Seat Adjustment Knob Console Bracket Contact Heart Rate (CHR) Sensors Console Adjustment Knob Adjustable Seat Handlebar, Side Handlebar, Upright Fully Shrouded Flywheel Transport Handle Transport Wheel MP3 Input Water Bottle Holder AC Adapter Plug Stabilizer Speakers Pedals Leveler Media Tray Entertainment Rack... -
Page 24: Console Features
The Console has a grid display with touch control buttons to navigate you through the exercise programs. Keypad Functions FAN button- Controls 3-speed fan Schwinn Advantage button- Controls the two © programmed users QUICK START button- Begins a Quick Start... - Page 25 LCD Display Data ProgramDisplay The Program Display shows the name of the program selection and the grid display area shows the course profile for the program. Each column in the profile shows one interval (workout segment). The higher the column, the higher the resistance level. The flashing column shows your current interval.
-
Page 26: Remote Heart Rate Monitor
Pulse(HeartRate) The Pulse display shows the heart rate in beats per minute (BPM) from the heart rate monitor. onsult a physician before you start an exercise program. Stop exercising if you feel pain or tightness in your chest, become short of breath, or feel faint. Contact your doctor before you use the machine again. - Page 27 • Some Electrocardiogram (EKG) signals g enerated byindividuals arenotstrong enough to be detected bythesensors. Theproximity o fotherelectronic machines cangenerate i nterference. CHR detection m aybelimited to walking orslowjogging duetotheextreme muscle artifacts a nd handmotion generated bya comfortable running style.Ifyourheart r atesignal everseems erratic after v alidation, wipe offyourhands andthesensors a ndtryagain.
- Page 28 Themostefficient procedure to burnfatduring exercise i stostartata slowpaceandgradually i n- crease yourintensity u ntil y ourheart r atereaches b etween 60- 85%ofyourmaximum heart r ate. Continue a tthatpace, k eeping y ourheart r ateinthattargetzone forover20minutes. Thelonger youmaintain y ourtargetheart r ate,themorefatyourbodywillburn. Thegraph isa brief g uideline, describing t hegenerally suggested t arget h eart r ates based onage.
-
Page 29: Operations
What to Wear Wear rubber-soled athletic shoes. You will need the appropriate clothes for exercise that allow you to move freely. HowOften ShouldYouExercise Consult a physician before you start an exercise program. Stop exercising if you feel pain or tight- ness in your chest, become short of breath, or feel faint. -
Page 30: Initial Setup
Besure toesandknees pointdirectly forward toensure maximum Pedal efficiency. Pedal s traps canbeleftinposition forsubsequent workouts. Console Adjustment To adjust the Console tilt position: Loosen the knob behind the Console. Carefully move the Console tilt to one of the available positions. Tighten the knob. Power=Up / Idle Mode The Console will enter Power-Up / Idle Mode if it is plugged into a... -
Page 31: Quick Start / Manual Program
Quick Start / Manual Program The Quick Start / Manual program lets you start a workout without entering any information. Sit on the machine. Push the QUICK START button to start the QUICK START / MANUAL program. To change the resistance level, push the Increase/Decrease buttons. The current interval and future intervals are set to the new level. -
Page 32: User Setup Mode
User Setup Mode The Schwinn ®50 Series console lets you store and use 2 User profiles. The User profiles automati- cally record the workout results for each User profile, and lets you view your workout data. The User profile stores the following data: •... - Page 33 Push and hold START/ENTER to complete the Custom Workout setup. The Console goes back to the Power-Up Mode screen UserProfileWorkoutProgram From the Power-Up Mode screen, push the Schwinn Advantage button to go to User Selec- tion Mode. Use the Increase/Decrease buttons to select a User Profile and push START/ENTER.
- Page 34 Push the START/ENTER button to start the profile workout. The time will count down from the set time. Edit User Profile From the Power-Up Mode screen, push Schwinn Advantage button and hold for 3 seconds to go to User Setup Mode. The Console will display the name of User Profile 1. Use the Increase/ Decrease buttons to move through the User Profiles, and push START/ENTER to make your selection.
- Page 35 When done, push STOP and the Console will go back to the User Selection option. Deletea User Profile From the Power-Up Mode screen, push the Schwinn Advantage button and hold for 3 sec- onds to go to User Setup Mode. The Console will display the name of User Profile 1. Use the Increase/Decrease buttons to move through the User Profiles, and push START/ENTER to make your selection.
-
Page 36: Profile Programs
Profile Programs These programs automate different resistances and workout levels. Course1 Course2 mmmm mmmm mmmmmm iimml m iimml iimml iimml iimml iimml m iimml iimml iimml iimml Course3 iimml m iimml mmmmmm mmmmmmmmmm Pursuit1 Pursuit2 iimlm mmmmmm mmmm mmmmmmmmmm mmmmmmmmmm Circuit1 Circuit2 Circuit3... -
Page 37: Fitness Test
Fitness Test The Fitness Test measures the improvements of your physical fitness level. The test compares your power output (in Watts) to your heart rate. As your fitness level improves, your power output will increase at a given heart rate. You can start the Fitness Test from the FITNESS TEST option in the Program Menu. -
Page 38: Distance Goal Workout
Formoredetailed i nformation aboutfitness zones, p lease refer t othefitness information onour website: www.schwinnfitness.com. Distance Goal Program The Distance Goal Program lets you set the total Distance and Pacer Speed for your workout. If you go to the Distance Goal program from your User profile, the program will use the Age and Weight values in your User profile. -
Page 39: Pausing Or Stopping
Total calories--maximum is 999999. The Statistics option in the User profile menu lets you look at the recorded data or delete it. Push the Schwinn Advantage button at the Power-Up Mode screen. The Console display shows the User Profiles. Use the Increase(A) and Decrease(T) buttons to select a User profile, and push START/EN- TER to make your selection. - Page 40 5. UsetheIncrease/Decrease buttons to move between t hevalues, oraftera fewseconds t he workout s tatistics s tart t o scroll a utomatically. YoucanusetheIncrease/Decrease buttons to move through theresults manually. Push STOP to exitto theUser S tatistics m enu. InTOTALS, thereis a RESET S TATS o ption toclear t heaccumulated workout v alues. Usethe Increase/Decrease buttons tochange yourselection b etween Y ES andNO, a ndpush START/ ENTER.
-
Page 41: Console Setup Mode
TheConsole S etupMode letsyousettheunitsofmeasurement to either E nglish o r Metric, change themachine t ype,or seemaintenance statistics ( Error L ogandRunHours - forservice technician useonly). Hold down the Increase button and Decrease button together for 3 seconds while in the Power-Up Mode to go into the Console Setup Mode. - Page 43 Read allmaintenance instructions fullybefore youstart a nyrepair w ork.Insomeconditions, an assistant isrequired t o dothenecessary tasks. Equipment must be regularly examined for damage and repairs. The owner is respon- sible to make sure that regular maintenance is done. Worn or damaged components must be repaired or replaced immediately.
-
Page 44: Maintenance
Maintenance Parts... - Page 45 Console Seat Back Speed Sensor Magnet Console Bracket Transport Handle Drive Belt Console Cable HR Sensors Flywheel Heart Rate Sensor Leveler Brake Assembly Cable, Upper Console Adjustment Rear Stabilizer Front Stabilizer Knob Handlebar, Upper Pedal, Left Transport Wheel Console Mast Center Plate Shroud, Right Seat Adjustment...
-
Page 46: Troubleshooting
Condition/Problem Solution Thingsto Check No display/partial display/ Check electrical (wall) Make sure unit is plugged into a func- unit will not turn on outlet tioning wall outlet. Connection should be secure and un- Check connection at front of unit damaged. Replace adapter or connec- tion at unit if either are damaged. - Page 47 Handlebars If tests reveal no other issues, Handle- bars should be replaced. Unitoperates b utTelemet- Chest Strap (optional) Strap should be "POLAR _'' compat- ricHRnotdisplayed ible and uncoded. Make sure strap is directly against skin and contact area is wet. Interference Try moving unit away from sources of interference (TV, Microwave, etc).
- Page 48 Condition/Problem Solution Thingsto Check Console shuts off (enters Check electrical (wall) Make sure unit is plugged into a func- outlet sleep mode) while in use tioning wall outlet. Check connection at front Connection should be secure and un- of unit damaged.
- Page 49 Unitrocks/does n otsit Check leveler adjustment Adjust l evelers u ntil b ikeislevel. level Check surface under unit Adjustment maynotbeabletocom- pensate f orextremely u neven surfaces. Move biketo level a rea. Pedals loose/unit difficult Check pedal t o crank arm Pedal should betightened securely connection to crank.
- Page 52 Bewflex_> Schwinn_ Fitness Universal_> Nautilus_ 004_4639.061511...
Need help?
Do you have a question about the 250 and is the answer not in the manual?
Questions and answers