Advertisement
Advertisement
Table of Contents

Related Manuals for DR. Heater DR-368


Summary of Contents for DR. Heater DR-368
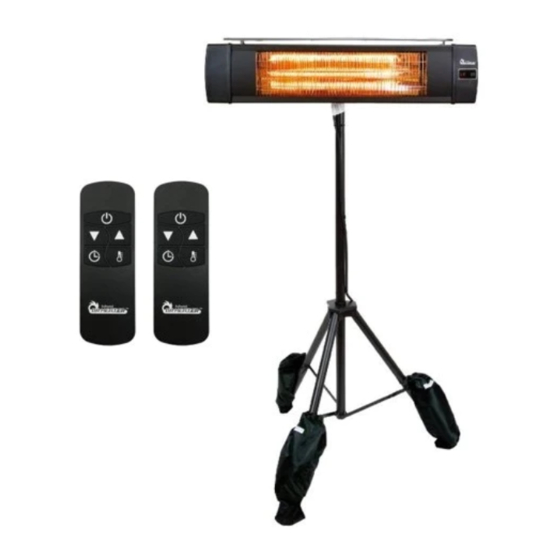
- Page 1 Carbon Infrared Heater Indoor/Outdoor Owner’s Manual Model No.: DR-368...
-
Page 2: Important Safety Instructions
Warning THESE INSTRUCTIONS SHOULD BE READ CAREFULLY AND RETAINED FOR FUTURE REFERENCE, We cannot be liable for any damages caused by failure to observe these instructions. IMPORTANT SAFETY INSTRUCTIONS READ CAREFULLY-The infrared heater is designed for safe operation. Nevertheless, installation, maintenance, and operation of the heater can be dangerous. - Page 3 SAVE THESE INSTRUCTIONS Introduction The DR-368 carbon infrared heater produces instant and comfortable heat like the sun. This robust and weather-proof heater is designed for domestic and commercial heating applications within indoor and outdoor areas.
-
Page 4: Product Features
This heater is designed for 120 volts AC input. The cord has a plug as shown at A in Figure 68.1. An adapter as shown at C is available for connecting three-blade grounding-type plugs to two-slot receptacles. The green grounding lug extending from the adapter must be connected to a permanent ground such as a properly grounded outlet box. -
Page 5: Installation
Installation ATTENTION! The appliance must be installed on the solid surfaces like concrete, wood or metal etc. Important: Ensure that the supply cables is well mounted and that it does not come into contact with reflector of the heater or that does not trail into heated area, the supply cable can be fixed to the metal mounting bracket behind heater with plastic zip ties. - Page 6 Take off the heater from stand and then mount the heater to the wall. 1. Take off the 2 nuts (H4) on the heater with the L-shaped bracket on the stand with a wrench as shown in Fig - 1a. Keep the nuts for next step. Take off two nuts Fig - 1a 2.
- Page 7 3. Take off the 2 screws on the top of the heater to disassemble the protection bracket with using the screwdriver as shown in Fig - 3a. Keep the 2 screws for next step. It will be needs to be assembled back after remove the protection bracket.
- Page 8 After disassembly the heater on the stand and take off the protection bracket. There are 2 L shaped bracket and 4 nuts. And use the hardware on “Wall-mounted hardware” bag. If the new heater does not assembly on the stand, take out the below installation hardware contents on 2 hardware bag (Tripod-mounted hardware &...
- Page 9 1. Assembly the 4 L shaped bracket (H1) with 2 nuts (H4) and 2 screws (H5) as shown in Fig - 1b. Fig - 1b 2. Mark holes on the place where the heater to be mounted with a pencil as shown in Fig - 2b, use the L shaped bracket (H1) to mark each 2holes distance.
- Page 10 4. Insert the point end of plastic anchor (H2) into the holes as shown in Fig - 4b, Tap the anchor with a hammer until the anchor is flush. 4 x Plastic anchor flushed into 4 x hole Fig - 4b 5.
- Page 11 Wall Mounting Height: there must be a 2.4m / 94.5” distance from heater to the ground. For best heating area, please make sure mounting angle is between 30 ° - 45 ° as shown in Fig – 7b and Fig – Min 2.4m / 94.5”...
-
Page 12: Function And Operation
WARNING THE POWER CORD MUST INTO A GFCI OUTLET FOR OUTDOOR USE. Ensure main power is OFF before commencing installation. The supplied main cable must not contact the surface of the heater during operation. The mounting height and intensity should reflect the intended use of the heater. Noted: The heater has a tip-over protection function. -
Page 13: Troubleshooting
Inserting Batteries (included) Insert 2 AAA/ Alkaline type batteries into your remote control. Flip the backside of your remote control and pull out the battery cover. Insert the batteries in accordance with the instructions and polarity of the batteries. Change the batteries in the same way depicted above. NOTICE: Replace the old batteries with the same type of batteries. - Page 14 Check the deformation of the Reflector, Wire, and Frame visually while cleaning the appliance. In case of deformation, contact the service team. Check the Power Cord and Plug visually while cleaning the appliance. In case of deformation, contact the service team. CLEANING Regular and careful cleaning helps your infrared heater operate efficiently for many trouble-free years.
-
Page 15: Warranty Information
Register your product at our website: Or visit DrHeaterUSA.com/register-your-heater At Dr. Heater USA, we are committed to bringing top-quality alternative & supplemental heating products to our customers. Note: There may be a trace of smoke or odor when the unit is first operated. Do not be alarmed. This indicates a drop of oil fell on the interior coils during the manufacturing process.
Need help?
Do you have a question about the DR-368 and is the answer not in the manual?
Questions and answers
Can the carbon filament be replaced