Table of Contents
Advertisement
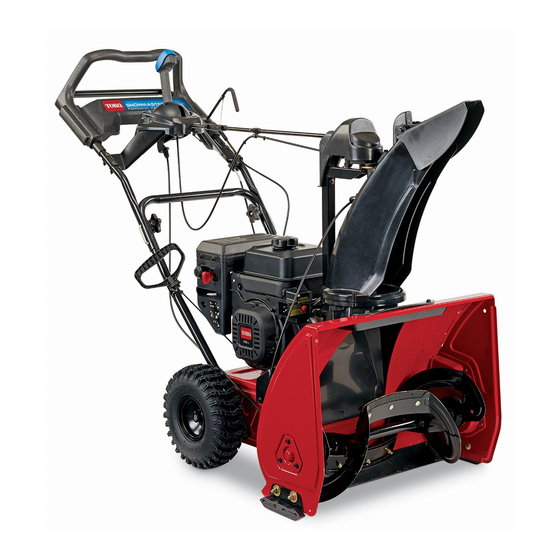
SnowMaster 724/824 QXE Snowthrower
Model No. 36002—Serial No. 316000001 and Up
Model No. 36003—Serial No. 316000001 and Up
WARNING
CALIFORNIA
Proposition 65 Warning
This product contains a chemical or chemicals
known to the State of California to cause cancer,
birth defects, or reproductive harm.
The engine exhaust from this product
contains chemicals known to the State of
California to cause cancer, birth defects,
or other reproductive harm.
Introduction
This machine is intended to be used by residential
homeowners. It is designed for removing snow from
paved surfaces, such as driveways and sidewalks, and
other surfaces for traffic on residential or commercial
properties. It is not designed for removing materials
other than snow, nor is it designed for clearing off gravel
surfaces.
Read this information carefully to learn how to operate and
maintain your machine properly and to avoid injury and
machine damage. You are responsible for operating the
machine properly and safely.
You may contact Toro directly at www.Toro.com for machine
and accessory information, help finding a dealer, or to register
your machine.
Whenever you need service, genuine Toro parts, or additional
information, contact an Authorized Service Dealer or Toro
Customer Service and have the model and serial numbers of
your machine ready.
Figure 1
model and serial numbers on the machine. Write the numbers
in the space provided.
© 2015—The Toro® Company
8111 Lyndale Avenue South
Bloomington, MN 55420
identifies the location of the
Register at www.Toro.com.
1. Model and serial number location
Model No.
Serial No.
This manual identifies potential hazards and has safety
messages identified by the safety alert symbol
which signals a hazard that may cause serious injury or death
if you do not follow the recommended precautions.
1. Safety alert symbol
This manual uses 2 words to highlight information.
Important calls attention to special mechanical information
and Note emphasizes general information worthy of special
attention.
For models with stated power, the net power of the engine was
laboratory rated by the engine manufacturer in accordance
with SAE J1940. As configured to meet safety, emission, and
operating requirements, the actual engine horsepower on this
class of snow thrower will be significantly lower.
Original Instructions (EN)
All Rights Reserved *3396-369* A
Printed in the USA
Form No. 3396-369 Rev A
Operator's Manual
Figure 1
(Figure
Figure 2
2),
Advertisement
Table of Contents

Related Manuals for Toro 36002


Summary of Contents for Toro 36002
-
Page 1: Introduction
You are responsible for operating the machine properly and safely. You may contact Toro directly at www.Toro.com for machine Figure 2 and accessory information, help finding a dealer, or to register 1. -
Page 2: Table Of Contents
Contents Safety Introduction ..............1 This machine meets or exceeds the B71.3 specifications Safety ................2 of the American National Standards Institute in effect Safety and Instructional Decals ......... 3 at the time of production. Setup ................4 • Read and understand the contents of the manual before 1 Unfolding the Handle.......... -
Page 3: Safety And Instructional Decals
Safety and Instructional Decals Note: Safety and instruction decals are located near areas of potential danger. Replace damaged decals. 131–1785 Order part no. 131–5921 1. Auger drive—squeeze the lever to engage; release the lever 4. Thrown object hazard—keep bystanders a safe distance from to disengage. -
Page 4: Setup
Setup Loose Parts Use the chart below to verify that all parts have been shipped. Procedure Description Qty. – No parts required Unfold the handle. Bolt (1/4–20 X 1–1/2 inch) Lock nut (1/4–20 inch) Carriage bolt (1/4–20 x 1 inch) Install the discharge chute. -
Page 5: Installing The Discharge Chute
Installing the Discharge Chute Parts needed for this procedure: Bolt (1/4–20 X 1–1/2 inch) Lock nut (1/4–20 inch) Carriage bolt (1/4–20 x 1 inch) Lock nut (1/4–20 inch) Screw (1/4–20 X 5/8 inch) Procedure 1. Insert the chute post through the bracket into the base of the machine and secure it using a bolt and a lock (Figure Figure 5... -
Page 6: Filling The Engine With Oil
No Parts Required Procedure Your machine comes with oil in the engine. Model Max fill 36002 16.9 oz (0.5 L) 36003 23.7 oz (0.7 L) Oil type: automotive detergent oil with an API service classification of SJ, SL, or higher. -
Page 7: Product Overview
Product Overview Operation Before Operation Safety • Use extension cords and receptacles as specified by the manufacturer for all machines with electric starting motors. • Do not operate the machine without wearing adequate winter garments. Avoid loose fitting clothing that can get caught in moving parts. -
Page 8: Checking The Engine-Oil Level
• than 10% ethanol by volume, such as E15 (contains 15% Exercise extreme caution when operating on slopes. ethanol), E20 (contains 20% ethanol), or E85 (contains • Never operate the machine without good visibility or 85% ethanol). Using unapproved gasoline may cause light. - Page 9 Using the Recoil Starter Using the Electric Starter Figure 11 Figure 12 Note: To use the electric starter, connect a power cord to the electric starter plug-in first and then to a power outlet. Use only a UL-listed, 16-gauge extension cord recommended for outdoor use that is not longer than 15 m (50 feet).
-
Page 10: Engaging The Auger
WARNING The electrical cord can become damaged, causing a shock or fire. Thoroughly inspect the electrical cord before using the machine. If the cord is damaged, do not operate the machine. Replace or repair the damaged cord immediately. Contact an Authorized Service Dealer for assistance. -
Page 11: Clearing A Clogged Discharge Chute
Clearing a Clogged Discharge water heaters, space heaters, or clothes dryers. Allow the engine to cool before storing in any enclosure. Chute • When storing the machine for more than 30 days, refer to Important: Hand contact with the rotating auger inside the Storage section for important details. -
Page 12: Maintenance
Maintain or replace safety and instruction labels, as necessary. • Do not change the governor settings on the engine. • Purchase only genuine Toro replacement parts and accessories. Checking the Engine Oil Level Figure 16 Service Interval: Before each use or daily 1. -
Page 13: Checking And Adjusting The Skids
Checking and Adjusting the Inspecting the Throwing Edges Skids Service Interval: Yearly Service Interval: Yearly—Inspect the throwing edges and have an Authorized Service Dealer Check the skids to ensure that the auger does not contact the replace the throwing edges and scraper paved surface. - Page 14 Figure 20 below to select the best oil viscosity for the outdoor temperature range expected: Model Max fill 36002 0.5 L (16.9 oz) 36003 0.7 L (23.7 oz) Oil type: automotive detergent oil with an API service classification of SJ, SL, or higher.
-
Page 15: Replacing The Spark Plug
1. Loosen the nut on the lower cable clamp, but do not Wait until the engine is cool to replace the spark remove it (Figure 24). plug. Use a Toro spark plug or equivalent (Champion® RN9YC or NGK BPR6ES). 1. Remove the boot (Figure 22). Figure 24 1. -
Page 16: Adjusting The Transmission Cable
Adjusting the Transmission Cable Service Interval: After the first 2 hours Yearly If the wheels easily stall out, or if the wheels drive without engaging the self-propel handle, adjust the transmission cable. 1. Loosen the nut on the upper cable clamp, but do not remove it (Figure 25). -
Page 17: Storage
Storage 16. Cover the machine and store it in a clean, dry place out of the reach of children. Allow the engine to cool before storing it in any enclosure. Storing the Snowthrower WARNING • Gasoline fumes are highly flammable, explosive, and dangerous if inhaled. - Page 18 Such use will not reduce the warranty obligations of The Toro Company. 10. Add-on or modified parts that are not approved by The Toro Company may not be used. The use of a non-approved add-on or modified parts by the purchaser will be grounds for disallowing a warranty claim.
- Page 19 1. Fuel System Parts • Carburetor and internal parts • Cold starting enrichment (primer or choke) • Fuel pump • Fuel line, fittings, and clamps • Fuel tank, cap, and tether • Carbon canister 2. Air Induction System • Air cleaner •...
- Page 20 Countries Other than the United States or Canada Customers who have purchased Toro products exported from the United States or Canada should contact their Toro Distributor (Dealer) to obtain guarantee policies for your country, province, or state. If for any reason you are dissatisfied with your Distributor's service or have difficulty obtaining guarantee information, contact the Toro importer.
Need help?
Do you have a question about the 36002 and is the answer not in the manual?
Questions and answers