Siemens SIPROCESS GA700 Quick Start Manual
Continuous gas analysis
Hide thumbs
Also See for SIPROCESS GA700:
- Operating manual (306 pages) ,
- Compact operating instructions (244 pages) ,
- Operating instructions manual (224 pages)
Table of Contents
Advertisement
Quick Links
Advertisement
Table of Contents

Related Manuals for Siemens SIPROCESS GA700


Summary of Contents for Siemens SIPROCESS GA700
- Page 1 Introduction General information Combination operation Continuous gas analysis Installing SIPROCESS GA700 Quick Start Connecting Operation Compact Operating Instructions Commissioning: Preparation Commissioning: Sequence Appendix A 06/2017 A5E31805656-05...
- Page 2 Note the following: WARNING Siemens products may only be used for the applications described in the catalog and in the relevant technical documentation. If products and components from other manufacturers are used, these must be recommended or approved by Siemens. Proper transport, storage, installation, assembly, commissioning, operation and maintenance are required to ensure that the products operate safely and without any problems.
-
Page 3: Table Of Contents
Table of contents Introduction ............................. 7 Purpose of this document ......................7 History ............................7 Notes on warranty ........................8 Delivery ............................. 8 Conventions ..........................9 General information ..........................11 KC Safety note - Information for Korea only ................11 Safety instructions ........................ - Page 4 Table of contents Installing ............................... 33 Safety instructions for installation ..................33 4.1.1 Rack-mounted device ......................33 4.1.2 Wall-mounted device ......................35 Installing the rack-mounted device ..................36 4.2.1 Installing ..........................36 Installing the wall-mounted device ..................37 4.3.1 Installing ..........................37 Connecting ............................
- Page 5 Table of contents Commissioning: Preparation ......................... 79 General safety instructions ..................... 79 Gas preparation ........................81 OXYMAT 7 ..........................82 7.3.1 Introduction of reference gas ....................82 7.3.2 Reference gas from the gas cylinder ..................83 7.3.3 Checking the reference gas flow .................... 83 7.3.4 Sample gas inlet conditions ....................
- Page 6 Table of contents Appendix A ............................107 Technical support ......................... 107 Certificate ..........................108 References ........................... 108 Returned delivery ......................... 110 A.4.1 Service and support ......................110 A.4.2 Returned delivery ......................... 111 Index ..............................113 Quick Start Compact Operating Instructions, 06/2017, A5E31805656-05...
-
Page 7: Introduction
Introduction Purpose of this document These compact operating instructions are intended for persons who install the device mechanically and electrically, connect it up and commission it. These instructions contain all information required to commission the device. Read the instructions completely before starting the commissioning of the device. You can find a complete description in the documentation on the accompanying CD (Operating instructions, Operating manuals): →... -
Page 8: Notes On Warranty
The contents of this manual shall not become part of or modify any prior or existing agreement, commitment or legal relationship. All obligations on the part of Siemens AG are contained in the respective sales contract, which also contains the complete and solely applicable warranty conditions. -
Page 9: Conventions
Introduction 1.5 Conventions Conventions Overview To allow easier navigation within this documentation, the tables below provide information on the use of markups and terminology. Table 1- 2 Conventions on markups Representation Scope type "Add screen" Terminology that appears in the user interface, for example, dialog names, •... - Page 10 Introduction 1.5 Conventions Quick Start Compact Operating Instructions, 06/2017, A5E31805656-05...
-
Page 11: General Information
General information KC Safety note - Information for Korea only Class A Equipment (Industrial Broadcasting & Communication Equipment) This equipment is Industrial (Class A) electromagnetic wave suitability equipment and seller or user should take notice of it, and this equipment is to be used in the places except for home. -
Page 12: Information On Use
General information 2.3 Information on use Information on use 2.3.1 Information on recycling This product is from a environmentally-friendly manufacturer and com- plies with the directive 2012/19/EU on Waste Electrical and Electronic Equipment (WEEE). This product may contain substances that are potentially harmful to the environment if disposed of improperly (landfills, incineration plants). -
Page 13: Automatic Reset
10 seconds for older devices to switch over, and up to 100 seconds to switch to safe operating mode. If you are using SIPROCESS GA700 devices in critical processes, observe the following information: ● Monitor the limits externally via the control system. - Page 14 General information 2.3 Information on use Quick Start Compact Operating Instructions, 06/2017, A5E31805656-05...
-
Page 15: Combination Operation
• Only install analyzer modules manufactured for operation in a wall-mounted device into such a device. Additional information is also available from your Siemens partner → Technical support (Page 107). Quick Start Compact Operating Instructions, 06/2017, A5E31805656-05... -
Page 16: Analyzer Module/Slot Combinations: Slots
Combination operation 3.1 Analyzer module/slot combinations Note Influence of building vibrations on the measured signal If you are using OXYMAT 7 and/or ULTRAMAT 7 analyzer modules, building vibrations, in particular in the frequency range from 6 to 15 Hz, can influence the measured signal. •... -
Page 17: Operating Modes
Combination operation 3.2 Operating modes Operating modes 3.2.1 Setting instructions Note Mode-dependent parameter assignment of the gas path in serial/parallel operation Analyzer modules can be operated in series or in parallel. • If you are only using one analyzer module or want to operate two analyzer modules in series, set the value "Shared"... -
Page 18: Operating Modes: Selection Of Operating Mode
Combination operation 3.3 Gas connections 3.2.3 Operating modes: Selection of operating mode Selection of operating mode The operating modes selected for the specific application result in the following consequences: ● The mounting positions of sample gas restrictors or clamping screws at the sample gas connections must be checked and changed, if necessary. - Page 19 Combination operation 3.3 Gas connections Note Sample gas disposal: keep exhaust line free from fast pressure fluctuations Make sure that the exhaust line is free from fast pressure fluctuations: • Install a special exhaust line. • Install a damping vessel (> 1 l) with a downstream restrictor between the device and the exhaust line (pneumatic low pass).
-
Page 20: Sample Gas Restrictors/Clamping Screws
Combination operation 3.3 Gas connections 3.3.2 Sample gas restrictors/clamping screws Overview ① For version with pipes: Sample gas bushing with 6 mm connection fittings ② Sample gas restrictors ③ For version with hoses: Sample gas bushing with 6 mm connection fittings Figure 3-2 Sample gas connections with sample gas restrictors For rack-mounted and wall-mounted devices, the sample gas connections of the analyzer... - Page 21 Combination operation 3.3 Gas connections Depending on the analyzer module, sample gas restrictors or clamping screws can be mounted at the connections: ● The sample gas restrictor is used to dampen pressure fluctuations in the sample gas path of an analyzer module. –...
- Page 22 Combination operation 3.3 Gas connections Distinction between sample gas restrictors and clamping screws Note Distinction between sample gas restrictor and clamping screw The sample gas restrictor and clamping screw differ in the bolt head and at the outlet diameter at the bottom end. •...
-
Page 23: Conditions For Use/Mounting
Combination operation 3.3 Gas connections 3.3.3 Conditions for use/mounting Overview of mounting position ① Gas connection before installation of sample gas restrictor or clamping screw ② Gas connection after installation of sample gas restrictor or clamping screw ③ Rear clamp ring ④... - Page 24 Combination operation 3.3 Gas connections OXYMAT 7 Note Order additionally required clamping screws separately Additionally required clamping screws are not included in the scope of delivery. They must be ordered separately. Table 3- 1 Mounting conditions for the sample gas restrictor: OXYMAT 7 Sample gas restrictor/clamping screw Operating mode Operation with one...
- Page 25 Combination operation 3.3 Gas connections Combination operation with ULTRAMAT 7 Table 3- 2 Mounting conditions for the sample gas restrictor: ULTRAMAT 7 Sample gas restrictor/clamping screw Operating mode Combined operation Combined operation OXYMAT 7/ULTRAMAT 7 ULTRAMAT 7/ULTRAMAT 7 Pressure operation No measures 1.
- Page 26 Combination operation 3.3 Gas connections Retrofitting example: "Pressure operation, serial" for OXYMAT 7/ULTRAMAT 7 When you are replacing the ULTRAMAT 7 with an OXYMAT 7 analyzer module, you must replace the sample gas restrictor in the sample gas inlet with a clamping screw. MGE, VGE Sample gas inlet (MGE), Reference gas inlet (VGE) ①...
-
Page 27: Plug & Measure: Permissible Activities
Combination operation 3.4 Plug & Measure: Permissible activities Retrofitting example "Suction operation, serial" operating mode for OXYMAT 7/ULTRAMAT 7 When you are using the ULTRAMAT 7 and the OXYMAT 7 analyzer module in serial suction operation, you must convert the sample gas restrictor of the OXYMAT 7 analyzer module: Sample gas inlet →... -
Page 28: Setting Instructions
Combination operation 3.4 Plug & Measure: Permissible activities Requirement for successful module retrofitting or successful module replacement The firmware of the module to be replaced must be compatible with the firmware of the processing module (PM). Prior to the installation, you must update the firmware of the processing module: ●... - Page 29 Combination operation 3.4 Plug & Measure: Permissible activities Note Authorization level To execute the actions described below, you must be logged on with at least the "Expert" authorization level. You may have to log on again with the requested PIN. Note Alarm window When you change the hardware of the device by replacing or adding modules or...
-
Page 30: Case Differentiations
Combination operation 3.4 Plug & Measure: Permissible activities 3.4.3 Case differentiations Table 3- 4 Plug & Measure - Commissioning Case Description Data synchronization/Action Commissioning, PM without serial Automatic data synchronization number Commissioning, each module has a Automatic data synchronization serial number stored at the factory. None of the modules has been con- nected to another module before Data synchronization: PM parameters are transferred to the AMx (x=1 or 2), parameters of the... - Page 31 Combination operation 3.4 Plug & Measure: Permissible activities Table 3- 6 Plug & Measure installation of a PM into an existing (configured) device / replacement of a PM in an existing (configured) device Case Description Data synchronization/Action The PM electronics is replaced. "-" is Automatic data synchronization , no changed...
- Page 32 Combination operation 3.4 Plug & Measure: Permissible activities Table 3- 8 Plug & Measure - AM slot change Case Description Data synchronization/Action AM1 → Internal swapping of modules between None changed slots is not permitted! AM2 → Install the modules once again in their previous slot and restart the device.
-
Page 33: Installing
Installing Safety instructions for installation For the measurement of high O concentrations in excess of 25%, it is absolutely necessary that all parts that come in contact with the sample gas are free of oil and grease and do not contain any particles that could react with O We highly recommend you use specially cleaned analyzer modules with the "Cleaned for O2"... - Page 34 Installing 4.1 Safety instructions for installation NOTICE Heat buildup due to insufficient air circulation • Make sure that there is no buildup of heat at the installation location. Make sure that sufficient air circulates around the rack-mounted device. • Do not cover the ventilation slits. •...
-
Page 35: Wall-Mounted Device
Installing 4.1 Safety instructions for installation 4.1.2 Wall-mounted device WARNING Protection against incorrect use of the wall-mounted device Only use the wall-mounted device within the voltage limits specified on the nameplate. CAUTION Damage to the membrane keyboard Make sure that the membrane keyboard is not damaged during installation of the wall- mounted device. -
Page 36: Installing The Rack-Mounted Device
Installing 4.2 Installing the rack-mounted device Installing the rack-mounted device 4.2.1 Installing Dimension drawing The following figure shows the dimensions of the rack unit and the distance of the fastening holes. The dimensions are specified in millimeters. Figure 4-1 Dimension drawing Procedure 1. -
Page 37: Installing The Wall-Mounted Device
Installing 4.3 Installing the wall-mounted device Installing the wall-mounted device 4.3.1 Installing Dimension drawing The following figure shows the dimensions of the wall-mounted device and the distance of the fastening holes. The dimensions are specified in millimeters. Figure 4-2 Dimension drawing: Drilling template and side view Quick Start Compact Operating Instructions, 06/2017, A5E31805656-05... - Page 38 Installing 4.3 Installing the wall-mounted device Figure 4-3 Dimensions with open wall-mounted device Procedure 1. Drill four holes into the wall. The dimensions for the drill holes are specified in the dimension drawing. 2. Insert the anchors in the drilled holes. 3.
-
Page 39: Connecting
Connecting Electrical connections 5.1.1 Safety information for rack device 5.1.1.1 Rack-mounted device Note If auxiliary power is required, check that it corresponds with that on the nameplate and with the test certification valid for your country. 5.1.2 Safety information for wall-mounted device 5.1.2.1 Danger due to electrical current WARNING... -
Page 40: Danger Due To Electrical Current
Connecting 5.1 Electrical connections 5.1.2.2 Danger due to electrical current WARNING Danger due to electrical current The power cable to be connected at the customer location could be damaged by incorrect fitting in the device. You should therefore carry out a visual inspection and PE conductor test of the cable in accordance with the country-specific safety standards, regulations or other applicable directives before starting up the device. - Page 41 Connecting 5.1 Electrical connections Note Connection information The power cable must comply with the valid regulations and conditions for the place of installation and be provided with a protective conductor at the potential of the enclosure. The cross-section of each wire must be ≥ 1 mm •...
-
Page 42: Connection Of The Signal Lines
Connecting 5.1 Electrical connections 5.1.3.2 Connection of the signal lines Detail view of option module connections ① OM1.1 and OM2.1/2.2 with embossed connector numbers on the enclosure's rear panel ② Power supply ③ Processing module, Ethernet (MODBUS TCP), and 37-pin sub-D (female), digital inputs and outputs ④... -
Page 43: Electrical Connections, Pin Assignment
Connecting 5.1 Electrical connections 5.1.3.3 Electrical connections, pin assignment Note Number of inputs and outputs The number of inputs/outputs that are actually available in the device depends on the installed optional modules. The paragraph below includes an overview of all inputs/outputs. Figure 5-3 Pin assignments of processing module Quick Start... - Page 44 Connecting 5.1 Electrical connections Figure 5-4 Pin assignment of optional module 1.1 Quick Start Compact Operating Instructions, 06/2017, A5E31805656-05...
- Page 45 Connecting 5.1 Electrical connections Figure 5-5 Pin assignment of optional module 2.1 Note Limited number of analog outputs Because of the functional principle, only a limited number of analog outputs is available. Quick Start Compact Operating Instructions, 06/2017, A5E31805656-05...
- Page 46 Connecting 5.1 Electrical connections Figure 5-6 Pin assignment of optional module 2.2 Quick Start Compact Operating Instructions, 06/2017, A5E31805656-05...
-
Page 47: Wall-Mounted Device
Connecting 5.1 Electrical connections 5.1.4 Wall-mounted device 5.1.4.1 Connecting the power supply Procedure ① ④ Power supply Plate with cable glands ② ⑤ Appliance plug Power supply cable gland ③ Screw Figure 5-7 Connecting the power supply Quick Start Compact Operating Instructions, 06/2017, A5E31805656-05... - Page 48 Connecting 5.1 Electrical connections Note Terminal ranges of the cable glands Use cables matched to the terminal ranges of the cable glands: • Cable gland M16 x 1.5 (plastic): Terminal range 5 to 10 mm • Cable gland M16 x 1.5 (plastic): Terminal range 6 to 10 mm •...
-
Page 49: Electrical Connections, Terminal Assignment
Connecting 5.1 Electrical connections 5.1.4.2 Electrical connections, terminal assignment Note Number of inputs and outputs The number of inputs/outputs that are actually available in the device depends on the installed optional modules. The paragraph below includes an overview of all inputs/outputs. Figure 5-8 Pin assignment of standard terminal block, terminal rows A and B Quick Start... - Page 50 Connecting 5.1 Electrical connections Figure 5-9 Pin assignment of standard terminal block, terminal rows C and D Note Limited number of analog outputs Because of the functional principle, only a limited number of analog outputs is available. Quick Start Compact Operating Instructions, 06/2017, A5E31805656-05...
- Page 51 Connecting 5.1 Electrical connections Figure 5-10 Options for the assignment of the terminal block, terminal rows A and B Quick Start Compact Operating Instructions, 06/2017, A5E31805656-05...
-
Page 52: Ethernet Cable
Connecting 5.1 Electrical connections Figure 5-11 Options for the assignment of the terminal block, terminal rows C and D 5.1.4.3 Ethernet cable Establishing a shield for the Ethernet cable Note Metalized cable gland The metalized cable gland required for shielding is included in the scope of delivery. Quick Start Compact Operating Instructions, 06/2017, A5E31805656-05... - Page 53 Connecting 5.1 Electrical connections 1. Prepare the Ethernet cable: ① Cable gland ②④ Contact shielding ③ Ethernet cable ⑤ Shielding braid Figure 5-12 Ethernet cable shielding ③ ⑤ – Strip the Ethernet cable at the desired location so that the braid is exposed over a length of approx.
-
Page 54: Spark Suppression: Example
Connecting 5.1 Electrical connections 5.1.5 Spark suppression: Example Safety instruction(s) NOTICE Damage to the digital outputs due to missing external protective circuit Arcs can result when switching inductances without external protective circuit; these can damage the digital outputs/relays. • Install an adequate external protective circuit with inductive or ohmic-inductive loading of the digital outputs/relays. -
Page 55: Overview: Spark Suppression For Rack-Mounted Device
Connecting 5.1 Electrical connections 5.1.5.1 Overview: Spark suppression for rack-mounted device Overview: Spark suppression for rack-mounted device ① Sub-D connector, 37-pin: Pin number 6: Function in the analyzer ② Terminal end/spark suppression ③ Power supply unit DI ... Digital input. Floating "... -
Page 56: Overview: Spark Suppression For Wall-Mounted Device
Connecting 5.1 Electrical connections 5.1.5.2 Overview: Spark suppression for wall-mounted device Overview: Spark suppression for wall-mounted device ① Standard terminal block, terminal row A: Function in the analyzer ② Terminal end/spark suppression ③ Power supply unit Digital outputs: Contact load max. 24 V/1.7 A, AC/DC. Shown relay contacts: relay coil has zero current Figure 5-15 Wall-mounted device: Example of spark suppression on a relay contact... -
Page 57: Measures
Connecting 5.2 Gas connections 5.1.5.3 Measures Measures to suppress sparks ● To suppress sparks via relay contacts, you can use RC elements. In direct current operation, you can also use a spark killer diode instead of the RC element. ● The RC element results in a drop-out delay for an inductive component, for example, a solenoid valve. - Page 58 Connecting 5.2 Gas connections Note Unstable measured value display due to pressure surges Pressure surges can result in unstable measured value displays when the sample gas flow is superimposed by fast pressure fluctuations or a sample gas pump delivers sample gas into the device.
-
Page 59: Installing/Removing The Sample Gas Restrictor
Connecting 5.2 Gas connections 5.2.1.2 Installing/removing the sample gas restrictor Requirements The following requirements must be met before you install/remove the sample gas restrictor: ● You have read the section "Combination operation". ● A suitable slot screwdriver is at hand. The sample gas restrictor and clamping screw have a different bolt head and a different outlet diameter. -
Page 60: Gas Connections For Rack Device/Wall-Mounted Device
Connecting 5.2 Gas connections Installation/removal The installation, removal and retrofitting of clamping screws or sample gas restrictors is limited to only a few module types. You can find additional information on the mounting position and conditions at → Gas connections (Page 18). 1. -
Page 61: Oxymat 7
Connecting 5.2 Gas connections WARNING Introduction of toxic, aggressive or flammable gases The limited release of toxic or corrosive gases cannot be avoided with absolute certainty. Flush the device with oil-free and dry purge air or inert gas. Collect the emerging purge gas for environmentally-friendly disposal with a suitable device. 5.2.2.2 OXYMAT 7 Safety instruction(s) - Page 62 Connecting 5.2 Gas connections Note Pipes Connect the pipes with the gas connections using suitable clamp ring screwed glands. The material of the parts in contact with the sample gas (screwed glands) must be appropriate to the application. Note Identifier of the gas connections The identifier of the gas connections is imprinted as numbers 1 to 4 on the module plate.
- Page 63 Connecting 5.2 Gas connections Arrangement of the gas connections in the wall-mounted device ① Slot of analyzer module 1: OXYMAT 7 ② Slot of analyzer module 2 Sample gas inlet Sample gas outlet N.C., bypass outlet for version with external reference gas pump Reference gas inlet Figure 5-18 OXYMAT 7 rack unit in the wall-mounted unit, lower side...
-
Page 64: Ultramat 7
Connecting 5.2 Gas connections 5.2.2.3 ULTRAMAT 7 Safety instruction(s) Note Pipes Connect the pipes with the gas connections using suitable clamp ring screwed glands. The material of the parts in contact with the gas (clamp ring screwed glands) must be appropriate to the application. - Page 65 Connecting 5.2 Gas connections Arrangement of the gas connections in the wall-mounted device ① Slot of analyzer module 1: ULTRAMAT 7 ② Slot of analyzer module 2 Sample gas inlet Sample gas outlet Reference gas outlet Reference gas inlet Atmospheric pressure sensor Figure 5-20 ULTRAMAT 7 gas connections in the wall-mounted unit, lower side Quick Start...
-
Page 66: Calomat 7
Connecting 5.2 Gas connections 5.2.2.4 CALOMAT 7 Safety instruction(s) Note Pipes Connect the pipes with the gas connections using suitable clamp ring screwed glands. The material of the parts in contact with the gas (clamp ring screwed glands) must be appropriate to the application. -
Page 67: Purging Gas Connections (Optional; Wall-Mounted Device Only)
Connecting 5.2 Gas connections Arrangement of the gas connections in the wall-mounted device ① Slot of analyzer module 1: CALOMAT 7 ② Slot of analyzer module 2 Sample gas inlet Sample gas outlet n.c. n.c. Figure 5-22 CALOMAT 7 gas connections in the wall-mounted device, lower side 5.2.2.5 Purging gas connections (optional;... - Page 68 Connecting 5.2 Gas connections ① Purging gas connections (optional) Outer diameter of the purging gas nozzle Figure 5-23 Purging gas connections Table 5- 1 Dimensions Connecting nozzle External diameter 12 mm Length of the connecting nozzle Without sealing caps 28 mm With sealing caps 41 mm Quick Start...
-
Page 69: Operation
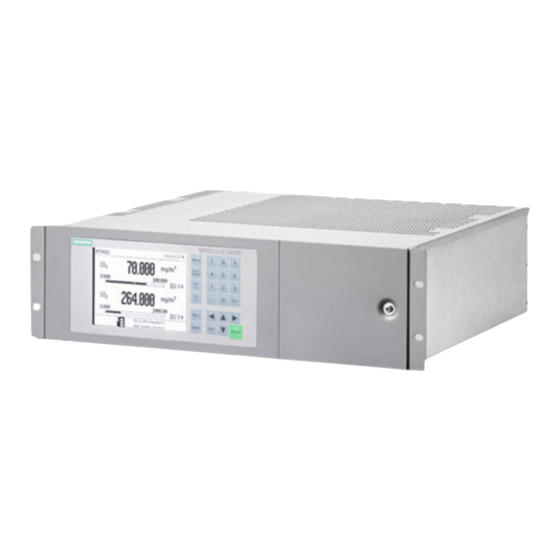
Operation Local User Interface (LUI) Operating elements The LUI (Local User Interface) of the SIPROCESS GA700 devices has the following operating elements: ① ④ Local user interface Numeric keypad ② ⑤ Display Cursor and command keys ③ ⑥ Buttons for special functions... - Page 70 Operation 6.1 Local User Interface (LUI) Views/displays Views structure the access to the functions of the device or its components. Only the operator control options corresponding to the configuration of your device are output on the display. Main view This view contains the measured value display of all components, the expanded measured value display, the process value display and the list of the current messages.
- Page 71 Operation 6.1 Local User Interface (LUI) Navigation-relevant keys Table 6- 1 Functions of navigation-relevant keys Keys Function Navigate to higher-level views/menus. Use the <MEAS> key to return to the measured-value display in selection mode or to the main view. Navigate within a view/menu. Direct selection with the numeric keys.
- Page 72 Operation 6.1 Local User Interface (LUI) To display detailed information about the current messages in the main view, follow the steps below: 1. If necessary, open the main view: – To do this, press the <MEAS> key. – Follow the instructions on the display. 2.
- Page 73 Operation 6.1 Local User Interface (LUI) Table 6- 2 Overview of the user levels User level Description Basic No PIN required. Generally read-only access. Exceptions: Basic settings, for example, display brightness or setting of filters without PIN input. Standard In addition to Basic: Write access with Standard PIN to parameters that influ- '1111' ence the current operation of the device, for example, basic calibration.
-
Page 74: Menu Structure
Operation 6.2 Menu structure Menu structure 6.2.1 Main menu Structure Figure 6-3 Menu entries of the main menu The main menu represents the highest level of the navigational view and comprises the six menu entries shown for each component: The main menu and the submenus form the menu structure. - Page 75 Operation 6.2 Menu structure [2] Settings menu Figure 6-5 Overview of menu [2] Settings You use this menu and its submenus to adjust the selected component to the specific conditions of use. The displayed contents of the [2.20] Service menu are read-only (setting only by service personnel).
- Page 76 Operation 6.2 Menu structure [3] Maintenance and diagnostics menu Figure 6-6 Overview of menu [3] Maintenance & diagnostics In this menu you can call the submenus relevant to maintenance and diagnostics. The contents of the [3.20] Service trace menu are visible, but can only be set with the appropriate permission level (service personnel).
- Page 77 Operation 6.2 Menu structure [5] Security menu Figure 6-8 Overview of the [5] Security menu In this menu you can make settings relevant for security. PINs of higher permission levels always give you the right to make changes at lower permission levels. [6] Language menu Figure 6-9 Overview of menu [6] Language...
- Page 78 Operation 6.2 Menu structure Quick Start Compact Operating Instructions, 06/2017, A5E31805656-05...
-
Page 79: Commissioning: Preparation
Commissioning: Preparation General safety instructions WARNING Danger of poisoning by escaping gas Tighten the threaded joints at the gas connections with a suitable open-ended wrench. Observe the installation instructions of the connection manufacturer. In the process, make sure that you counter properly. Otherwise, there is a danger that the gas path will leak. WARNING Feeding of gases with flammable components →... - Page 80 Commissioning: Preparation 7.1 General safety instructions See also References (Page 108) Note Using an external pressure sensor An external pressure sensor can process ambient or sample gas pressure values up to 3 bar (abs.), regardless of the application. You can obtain additional information on the use of external pressure sensors from your service partner: →...
-
Page 81: Gas Preparation
Commissioning: Preparation 7.2 Gas preparation Note Impact of vibrations at installation site on the measured signal When you use OXYMAT 7 and/or ULTRAMAT 7 analyzer modules, vibrations, especially in the frequency range from 6 Hz to 15 Hz, can influence the measured signal. •... -
Page 82: Oxymat 7
Commissioning: Preparation 7.3 OXYMAT 7 ● Make sure that the sample gas does not condense in the gas preparation unit and in the analyzer itself. Appropriate measures include heated sample gas lines, a heated analyzer, or a compressor cooler. ● You can install the following devices upstream of the sample gas inlet for gas preparation: –... -
Page 83: Reference Gas From The Gas Cylinder
Commissioning: Preparation 7.3 OXYMAT 7 7.3.2 Reference gas from the gas cylinder The reference gas pressure must be 2 000 hPa above the sample gas pressure for sufficient measuring ability. 1. Use a reference gas line with the following characteristics at measuring spans of < 2% oxygen: –... -
Page 84: Ultramat 7
Commissioning: Preparation 7.4 ULTRAMAT 7 4. Then close the sample gas inlet. 5. Wait for approximately 1 minute until the test gas that flowed in has reached the ambient temperature. 6. Note the pressure. 7. Wait approximately 5 minutes. Note the pressure again. If the pressure change is <... -
Page 85: Checking The Sample Gas And Reference Gas Path For Leakage
Commissioning: Preparation 7.4 ULTRAMAT 7 In order to compensate for interference, the reference gas compartment can be subjected to the purified sample gas of the measured component (absorber mode) or gas out of the cylinder, which corresponds to the average interference gas composition. Setting the flow Make sure that the flow of sample gas and reference gas is set to the same level. -
Page 86: Calomat 7
Commissioning: Preparation 7.5 CALOMAT 7 CALOMAT 7 7.5.1 Sample gas inlet conditions Prevent condensation of the sample gas in the gas path with suitable gas preparation, for example: ● Connect a cooler or condensate separator upstream of the device. 7.5.2 Checking the sample gas path for leaks The tightness is checked with air or nitrogen at the operating temperature. -
Page 87: Commissioning: Sequence
Commissioning: Sequence Requirements The following requirements must be met before you commission the device: ● The device includes at least one analyzer module. ● All required lines and equipment that convey gas are connected to the device. Information on how to connect the gas lines correctly is available in the device-specific documentation: →... - Page 88 Commissioning: Sequence 8.2 Procedure 1. Supply the device with power. Information on the power supply of the device is available in the device-specific documentation → References (Page 108). The boot process starts. The splash screen is initially visible on the device display. 2.
- Page 89 Commissioning: Sequence 8.2 Procedure Setting up Note Operator control options When commissioning for the first time, two methods can be used. You can commission the device with the simplified process using the "[1] Quick Start" menu or opt for the more detailed procedure described below.
- Page 90 Commissioning: Sequence 8.3 [1.1] Basic settings 5. Specify measuring ranges: → [2.03] Settings > Measuring ranges Note Putting back into operation with disabled measuring ranges The measuring ranges are activated in the factory. If you disable the measuring ranges (setting: "Off"), all the setting options in other menus related to the measuring range are also hidden.
-
Page 91: Basic Settings
Commissioning: Sequence 8.3 [1.1] Basic settings [1.1] Basic settings Input of basic settings 1. "1 Quick Start" > "01 Basic settings" main menu 2. Call the parameter display: Press <Enter>. 3. Set the display language. If the language of the Quick Start Manual was also set as operating language, this is set at the factory;... -
Page 92: [1.2] Automatic Log-Off
Commissioning: Sequence 8.4 [1.2] Automatic log-off [1.2] Automatic log-off Procedure Note Function of automatic logoff When this function is activated and the logoff time expires, the device logs you off automatically. All changes that are not saved permanently will be discarded. The measured value display of all components is displayed again. -
Page 93: Analog Outputs
Commissioning: Sequence 8.5 [1.3] Analog outputs [1.3] Analog outputs Overview Note Availability of the menu This menu is only available if your device has at least one of the option modules (2.1 and/ or 2.2) installed. If the option modules are not installed in the device, the "Quick Start" menu has a corresponding menu entry. - Page 94 Commissioning: Sequence 8.5 [1.3] Analog outputs Setting analog output ranges 1. "1 Quick Start" > "04 Analog outputs" main menu The menu includes one navigation line for each of the five analog output ranges that can be set: Structure of the navigation line for each analog output range Component name Analog output range 2.
-
Page 95: [1.4] Measuring Ranges
Commissioning: Sequence 8.6 [1.4] Measuring ranges [1.4] Measuring ranges 8.6.1 Overview of measuring ranges Measuring ranges Note Putting back into operation with disabled measuring ranges The measuring ranges are activated in the factory. If you disable the measuring ranges (setting: "Off"), all the setting options in other menus related to the measuring range are also hidden. -
Page 96: Setting The Measuring Ranges
Commissioning: Sequence 8.6 [1.4] Measuring ranges Based on these requirements, the following two measuring range types described below are derived for autoranging. Measuring range type 1 (mr i < mr (i+1)) The full-scale value of measuring range must be less than the full-scale value of the following measuring range . - Page 97 Commissioning: Sequence 8.6 [1.4] Measuring ranges 1. "1 Quick Start" > "4. Measuring ranges" > "n component" main menu The menu includes a navigation line for setting of autoranging. One navigation line is reserved for each of the four measuring ranges that can be set: Structure of the navigation line for each measuring range Measuring range Measuring range start - measuring range end...
-
Page 98: Setting Autoranging
Commissioning: Sequence 8.6 [1.4] Measuring ranges 4. Enable/disable measuring range: "Use measuring range" parameter field. Note Using measuring ranges in other device functions/menus Other device functions or menus can only access measuring ranges activated in this menu. Inactive measuring ranges are not displayed for selection in other device functions/menus. -
Page 99: Calibration
Commissioning: Sequence 8.7 [1.5] Calibration 1. "1 Quick Start" > "4. Measuring ranges" > "n component" main menu The menu includes four navigation lines for setting the measuring ranges and one navigation line for setting autoranging. 2. Call autoranging: Navigation line "Autoranging". The parameter display of autoranging has a parameter field and a display box. - Page 100 Commissioning: Sequence 8.7 [1.5] Calibration 3. Set up the measuring range: Refer to the specifications under → Overview of measuring ranges (Page 95). – Enter start of measuring range: "Start-of-scale value" parameter field Authorize access with Standard PIN, if necessary. –...
-
Page 101: Calibration/Validation Overview
– "Factory calibrations" (normalization and phase calibration). The section below only covers the area of "Customer calibrations". Information on factory calibrations is available under → [2.20.03] Factory calibrations. Contact you Siemens sales rep for more information. ● Single/total: Calibration of only one or all measuring ranges ●... - Page 102 Commissioning: Sequence 8.7 [1.5] Calibration Types of calibration You can set the following types of calibration: Table 8- 1 Types of calibration ("Customer calibrations") Calibration Description 1-point zero gas calibration This calibration eliminates drifts in the zero point. The setpoint corresponds to the actual value in the zero point.
-
Page 103: Execute Calibration/Validation
Commissioning: Sequence 8.7 [1.5] Calibration Sequence When you start the calibration, a wizard is started that guides you through calibration. Depending on the type of calibration selected, the wizard includes the following steps: Figure 8-2 Steps during calibration 8.7.2 Execute calibration/validation Procedure 1. - Page 104 Commissioning: Sequence 8.7 [1.5] Calibration 3. Specify calibration type: "Calibration type" parameter field. – If you select "2-pt.", zero gas calibration and span gas calibration are executed one after the other. Otherwise you set either a zero gas calibration or a span gas calibration.
-
Page 105: [1.6] Save Parameter Set
Parameter sets overview You can use this menu to save your latest settings in a parameter set. You can use it to restore any unintentional changes to the parameter assignment. SIPROCESS GA700 devices use two types of parameter sets: ● Factory data: This parameter set is the factory default and is used to restore the original parameter assignment. - Page 106 Commissioning: Sequence 8.8 [1.6] Save parameter set Quick Start Compact Operating Instructions, 06/2017, A5E31805656-05...
-
Page 107: Technical Support
Our bulletin board, where users and specialists share their knowledge worldwide. Additional Support Please contact your local Siemens representative and offices if you have any questions about the products described in this manual and do not find the right answers. -
Page 108: Certificate
(https://support.industry.siemens.com/cs/products?dtp=Certificate&mfn=ps&pnid=17702&lc= en-WW). References Table A- 1 References 1 - Operating Manuals LUI Title Languages Article numbers SIPROCESS GA700 German (de-DE) A5E31930441 Operating with the local user interface English (en-US) A5E31930478 Operating manual Table A- 2 References 2 - Operating Manuals PDM... - Page 109 Appendix A A.3 References Table A- 4 References 4 - Compact Operating Instructions Title Languages Article numbers SIPROCESS GA700 German (de-DE) A5E31805153 Quick Start English (en-US) A5E31805656 Compact Operating Instructions French (fr-FR) A5E31809624 Italian (it-IT) A5E31809652 Spanish (es-ES) A5E31809707 Portuguese (pt-BR)
-
Page 110: Returned Delivery
Returned delivery A.4.1 Service and support ● Technical support is available on the Internet at → Services & Support (https://support.industry.siemens.com/cs/start?lc=en-WW) ● You can find your regional Siemens representative here → Contact partner (http://www.automation.siemens.com/mcms/aspa-db/en/automation- technology/Pages/default.aspx // XmlEditor.InternalXmlClipboard:2b8c9950-1d49-ffc1- 5ad9-f7f0b769b59f) Quick Start Compact Operating Instructions, 06/2017, A5E31805656-05... -
Page 111: Returned Delivery
Check the item after it has been cleaned. SIEMENS will return devices or spare parts to you at your expense if a declaration of decontamination is not included. - Page 112 Appendix A A.4 Returned delivery Downloads/links You can find information about the return address relevant for you here → Return address (http://www.automation.siemens.com/mcms/aspa-db/en/automation- technology/Pages/default.aspx) Return goods delivery note on the Internet → Return goods delivery note (https://support.industry.siemens.com/cs/attachments/91000005/Rueckwaren- Begleitschein_Returned_Goods_Delivery_Note.pdf) See also Declaration of decontamination (https://support.industry.siemens.com/cs/attachments/91000005/declaration_of_decontamina...
-
Page 113: Index
Index Delivery separate, 8, 15 Disposal, 111 Documentation 1-point calibration to shift the characteristic offset, 102 History, 7 1-point span gas calibration, 102 1-point zero gas calibration, 102 Electrical connection, 41 Wall-mounted device, 47 2-point calibration, 102 Ethernet, 52 Analyzer modules Hotline, 107 Slots, 16 Installation... - Page 114 Index Sample gas quality, 81 Service, 107, 110 Operating principles Single calibration, 102 Log on/log off, 72 Slots Logbook, 73 Analyzer modules, 16 Main view, 71 Spark suppression Navigation keys, 71 Measure for, 57 Views/displays, 70 Support, 107 Operation with two analyzer modules In parallel, 24 In series, 24 OXYMAT 7 gas connections, 62...