
Related Manuals for Segway Navimow


Summary of Contents for Segway Navimow
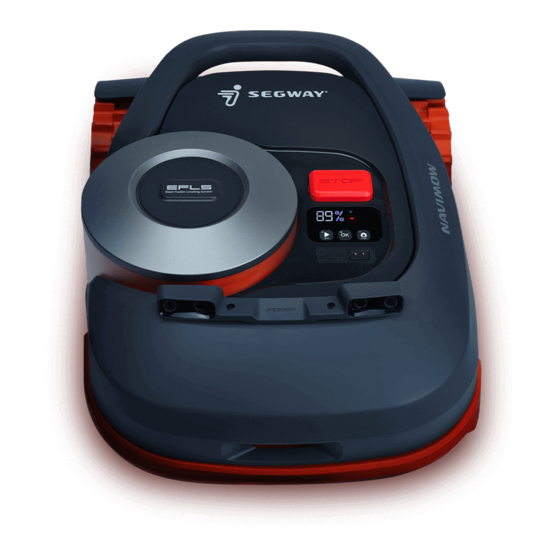
- Page 1 Navimow ser Manual Read the User Manual carefully before use. Make sure you understand all the instructions and safety warnings.
-
Page 2: Table Of Contents
User Manual User Manual User Manual User Manual User Manual User Manual User Manual User Manual User Manual Table of Contents 1 Safety Warnings 2 What’s in the Box? 3 Parts and Functions 4 App Installation 5 Install the Charging Station and the Antenna 6 How to Charge 7 Activate the Mower 8 Set up the Virtual Boundary... - Page 3 Welcome Thank you for choosing Navimow (referred to as 'the mower' in the manual). With Exact Fusion Locating System (EFLS) and superb traversing capabilities, the mower can handle lawns of all types. No perimeter wires are needed and it's super easy to use, thanks to smart app connectivity and the intuitive control panel.
-
Page 4: Safety Warnings
KEEP FOR FUTURE REFERENCE 1 ) Be sure to install and operate the Navimow (referred to as the mower in the manual) and the charging station according to the instructions. Go to navimow.segway.com for the complete User Manual and the latest user materials. - Page 5 Safe Usage: DO NOT operate the mower outside the temperature limits: -10–50℃ (14–122°F), because low/high temperatures can decrease mower performance and even lead to accidents. DO NOT place anything on the mower or the charging station. It is recommended to conduct regular maintenance of the mower (see Maintenance) by an adult. Regularly check the warning devices to ensure they are effective.
- Page 6 Symbols and Decals Please study the symbols on the product and labels carefully and understand their meaning: WARNING-Read instruction WARNING-Do not touch manual before operating the rotating blade. machine. WARNING-Keep a safe WARNING-Do not ride on the distance from the machine machine.
-
Page 7: What's In The Box
2 What’s in the Box? If there are missing or defective parts, please contact after-sales service. We recommend retaining the package for future transportation and shipping. Navimow User materials Important information Quick Start Guide welcome card Quick Start Guide Welcome Card... -
Page 8: Parts And Functions
PIN code: Before manually operating the mower, you must enter the PIN code. The default code is 0000, and can be changed via the Navimow app (referred to as the app in this manual). Press MOW/HOME to increase/decrease the number and press OK to confirm the code. - Page 9 Bottom view Front wheel Blade Blade fender Blade disc Rear wheel/Hub motor Battery compartment Drainage outlet Drainage outlet: If the mower falls into water, take it out immediately and put the mower right side up to drain it. Never submerge the mower in water, otherwise, the components may be damaged and the Limited Warranty will be voided.
-
Page 10: App Installation
4 App Installation To ensure a successful setup, please scan the QR code to download the Navimow app. Alternatively, go to the Google Play Store (Android) or the Apple App Store (iOS) and search "Navimow". After installing the app, please register and log in. - Page 11 For the best positioning accuracy and mowing performance, it is strongly recommended to keep the antenna at a distance that equals or above the height of a building or tall trees. Height of the building Distance between the charging or obstacle station and the building or obstacle 45°...
- Page 12 STEP 2: Install the GNSS Antenna Unfold the base fork and insert it into the ground. Fixate the GNSS antenna on the tube. Rotate the other extension tube onto the base fork. Slide in the tube with the antenna. Connect the GNSS antenna to the charging Secure the cable on the pole with the supplied hook and station.
- Page 13 Connect the extension cable and the power interface. Plug the power supply into a power socket. Check the signal. When the light on the charging station becomes blue (or green), it means the GPS signal is strong. >3min Flashing yellow: the GNSS antenna Pulsating yellow for more than 3min: Flashing red: malfunction.
-
Page 14: How To Charge
6 How to Charge A new mower may have low battery after long storage. After setting up the boundary, the mower will return to the charging station when the mowing task has completed, or when the battery is low. You can also enter the PIN code, press the HOME and then OK button to make the mower go back to the charging station. - Page 15 Where to Place the Power Supply: Protection from direct sunlight and rain Indoors with good ventilation Keep it at least 30 cm (12 in) above the floor to avoid possible damages caused by sunshine or water. WARNING DO NOT charge if the mower, the power supply, the charging station, or the power socket is wet or damaged. DO NOT charge the mower when the temperature is above 40℃...
-
Page 16: Activate The Mower
7 Activate the Mower Enable Bluetooth on your phone, log in to the app and Connect the charging station to the power supply. Place follow the instructions to pair with the mower. the mower on the charging station. XXXXXXXXX Wait patiently for 30s to 3min until the ambient light turns green (or blue). If the light flashes orange for more than 3min, it means the GPS signal is weak. -
Page 17: Set Up The Virtual Boundary
Angle: Make sure to follow a straight line with a smooth turning angle of no smaller than 90°. Use the Navimow ruler to measure the distance. The outer side of the ruler should not exceed the edge of the lawn. - Page 18 Direction: Make sure the blades are facing the outer side of the boundary, so that the mower can cut as close to the boundary as possible. The same goes for setting up the off-limit islands. The blades should face the objects to be protected. Slope: Even though the mower can traverse slopes up to 45% within the lawn, make sure the slope along the edge does not exceed 10%.
- Page 19 STEP 3: Create a Passage to Link Separate Zones Following the instructions in the app, create a channel between the main lawn and the subzone. Boundary O -limit island Channel > Lay the Perimeter Wire When Necessary The GPS signal is a ected by many factors. If you nd the mower exceeds the boundary or o -limit islands, or there is a risk that the mower may fall o onto the road or into bodies of water, a perimeter wire needs to be installed.
-
Page 20: Test Drive
9 Test Drive After laying the boundary, tap 'TEST' in the app to see if it works normally and only runs within the border. The mower should be able to drive into the charging station and exit on its own. TEST If the mower goes beyond the boundary, make sure the GPS signal is strong (see Chapter 5 STEP ③), then test one more time. -
Page 21: Start Mowing
10 Start Mowing Before mowing for the rst time, please cut your lawn to a height of no more than 6 cm. 1 ) Mowing There are three ways to start mowing: a. Start mowing via the app. MOW NOW b. - Page 22 2 ) Pause Press the STOP button on the mower or in the app to pause mower operation at any time. STOP HOME 3 ) Resume Mowing Continue mowing in the app or press MOW and then OK button on the control panel. HOME 4 ) Return to the Charging Station Send the mower back to the charging station in the app or press HOME and then OK button on the mower.
-
Page 23: Settings And Features
Operation mode: you can choose from Standard Mode, Quiet Mode or Dynamic mode. 2 ) IoT Navimow is an Internet of Things (IoT) device. Connect the mower to the Internet via cellular network or your Wi-Fi network to keep it updated to the latest features. -
Page 24: Specifications
12 Speci cations Item H500E H800E H1500E H3000E Product Name Navimow Brand Segway Dimensions: 603 × 468 × 264 mm ( 23.7 × 18.4 × 10.4 in) Basic Information Length × Width × Height Net Weight About 15.6 kg (34.4 lbs) About 15.9 kg (35.0 lbs) -
Page 25: Maintenance
Item H500E H800E H1500E H3000E Input Voltage 32 V DC Input Current 2.5 A MAX Charging Station Output Voltage 25.2 V DC Output Current 2.5 A Indicator Front Wheel Omni-directional wheel with built-in Hall sensor Rear Wheel Rubber tyres with hub motor IMU Sensor, IMU Sensor, IMU Sensor,... - Page 26 WARNING Wear heavy gloves when you inspect or service the blade. Only use the right type of screws and original blades as approved by Segway. Blade model: HA002E. DO NOT reuse the screws. Doing so can cause serious injury. How to replace the blades: Turn off...
- Page 27 3 ) Transportation To protect the mower, use the original packaging for long-distance transportation. Before lifting, moving, or otherwise transporting the product, turn it off. Handle with care and avoid violent force, such as throwing and heavy pressure. Never pick up or carry the mower while the motor is running.
- Page 28 WARNING Use only the original battery pack or that of the same model as specified by Segway. Each mower contains one battery pack. Depending on the specific mower model, the rated capacity of the battery is 5200 mAh, 7800 mAh, or 10400 mAh.
- Page 29 7 ) Recycling and End-of-life Disposal DO NOT treat this product as domestic waste. For recycling information, contact your domestic waste service, your municipality, or point of sale. WARNING DO NOT dispose of this product in a landfill, by incineration, or by mixing with household trash. Danger or serious injury can occur because of the electrical components.
-
Page 30: Faq And Troubleshooting
14 FAQ and Troubleshooting The following chart offers a guide to help identify an issue, and if possible, repair by yourself. When the problem cannot be solved, consult an authorized dealer or repairer. Issue Possible Causes Solutions Check the blades and the blade disc. Replace if damaged or worn. Abnormal vibration when the mower is operating A damaged blade disc The blade disc has to be replaced by an authorized technician. - Page 31 Battery management system error 0x010403 a genuine Segway battery. 0x010404 0x010405 Keep the mower in normal temperature and restart. Make sure to use a genuine Segway battery that Abnormal battery temperature 0x010406 functions properly. Contact after-sales service if the problem persists. 0x020101...
-
Page 32: Trademark And Legal Statement
Such risks include but not limited to injuries, bodily injuries and/or damages to property. SEGWAY and its a liates shall not be liable for any claim, liability and loss related to such consequences, if it is due to the user’s assumption of risk. -
Page 33: Ec Declaration Of Conformity
Name: Ninebot (Changzhou) Tech Co., Ltd. Address: 16F-17F, Block A, Building 3, No.18, Changwu Mid Rd, Wujin Dist., Changzhou, Jiangsu, China Authorized Representative Name: Segway Discovery B.V. Address: Hogehilweg 8 - 6th Floor, 1101CC Amsterdam, The Netherlands Object of the declaration... -
Page 34: Ukca Declaration Of Conformity
Address: Dept 302, 43 Owston Road, Carcroft, Doncaster, DN6 8DA, United Kingdom Object of the declaration Generic designation: Robotic Lawnmower Product name: Navimow Type/model: H500E/H800E/H1500E/H3000E Serial number: S2RA x yyyy x yyyy/S2RC x yyyy x yyyy/S2RE x yyyy x yyyy/S2RT x yyyy x yyyy (“x”... -
Page 35: Certifications
Machinery Directive 2006/42/EC. Europe Authorised Representative: Segway Discovery B.V. Hogehilweg 8 - 6th Floor, 1101CC Amsterdam, The Netherlands. Ninebot (Changzhou) Tech Co., Ltd. hereby declares that the product comply with the essential requirements and other relevant provisions of the RoHS Directive 2011/65/EU and amendment Commission Delegated Directive (EU) 2015/863, the Radio Equipment Directive 2014/53/EU and the Machinery Directive 2006/42/EC. - Page 36 Restriction of the Use of Certain Hazardous Substances in Electrical and Electronic Equipment Regulations 2012, the Radio Equipment Regulations 2017 and the Supply of Machinery (Safety) Regulations 2008. Frequency Band(s) 2.4000-2.4835GHz Bluetooth Max. RF Power 20mW The declaration of conformity can be viewed at the following address: http://eu-en.segway.com/support-instructions...
-
Page 37: Limited Warranty
This Limited Warranty covers only defects of any material or quality of the Product and components when the Product and components thereof are being used under normal and ordinary conditions. In the event that a defect covered by this Limited Warranty occurs, Segway and/or other Segway Parties in its sole discretion will repair or replace the defective Product or components thereof in accordance with this Limited Warranty. - Page 38 For a return eligible for the warranty protection and/or services, Segway will serve defective Products with new or reconditioned parts of the same or similar style at no cost to you for the service. Parts replaced by Segway will be retained by and become the property of Segway.
- Page 39 SEGWAY PARTIES shall not be responsible for any other warranties and/or representations that may be given and/or provided by another person unless SEGWAY PARTIES have in a written form explicitly authorized such additional warranty and/or representation to be given to consumer or end-user.
-
Page 40: Contact Us
Segway Parties, Segway Dealers and you agree that any dispute, controversy or claim arising out of, relating to or in connection with this agreement, the limited warranty, the sale, condition or performance of the product, whether based in contract, tort,... - Page 42 The manufacturer reserves the right to make changes to the product, release firmware updates, and update this manual at any time. Illustrations of the product, accessories, and app interface in the User Manual are for reference purposes only. Actual product and functions may vary. Go to navimow.segway.com for the latest user materials.
Need help?
Do you have a question about the Navimow and is the answer not in the manual?
Questions and answers