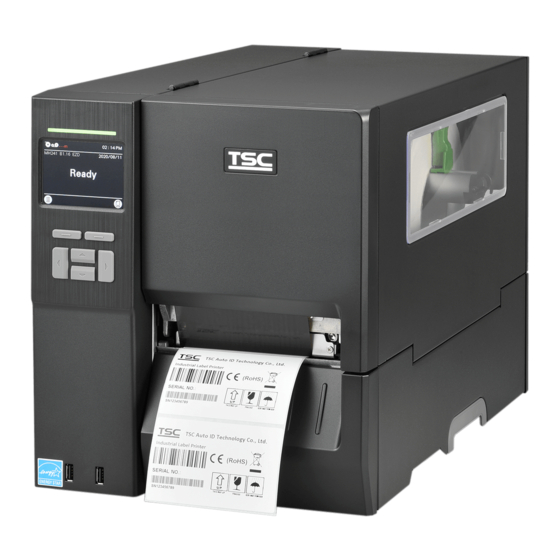
TSC MH241 Series User Manual
Thermal transfer / direct thermal bar code printer
Hide thumbs
Also See for MH241 Series:
- User manual (78 pages) ,
- Service manual (63 pages) ,
- Manual (14 pages)

Related Manuals for TSC MH241 Series


Summary of Contents for TSC MH241 Series
- Page 1 MH241/MH341/MH641/ MH241T/MH341T/MH641T/ MH241P/MH341P/MH641P Series THERMAL TRANSFER / DIRECT THERMAL BAR CODE PRINTER USER’S MANUAL...
- Page 2 Information in this document is subject to change without notice and does not represent a commitment on the part of TSC Auto ID Technology Co. No part of this manual may be reproduced or transmitted in any form or by any means, for any purpose other than the purchaser’s personal use, without the expressed...
- Page 3 Agency Compliance and Approvals EN 55032: Class A EN 55024 EN 60950-1 EN 62368 This is a class A product. In a domestic environment this product may cause radio interference in which case the user may be required to take adequate measures. FCC part 15B, Class A ICES-003, Class A This equipment has been tested and found to comply with the limits for a Class A...
- Page 4 KN 32 KN 35 K60950-1(2011-12) 이 기기는 업무용(A 급) 전자파적합기기로서 판매자 또는 사용자는 이 점을 주의하시기 바라며, 가정외의 지역에서 사용하는 것을 목적으로 합니다. GB 4943.1 GB/T9254, Class A GB 17625.1 此为 A 级产品,在生活环境中,该产品可能会造成无线电干扰, 在这种情况下,可能需要用户对干扰采取切实可行的措施。 Energy Star for Imaging Equipment Version 3.0 IS 13252(Part 1)/ IEC 60950-1 Note: There may have certification differences in the series models, please refer to product label for...
- Page 5 Dispose of used batteries according to the Instructions as below. 1. DO NOT throw the battery in fire. 2. DO NOT short circuit the contacts. 3. DO NOT disassemble the battery. 4. DO NOT throw the battery in municipal waste. 5.
- Page 6 30mW 5470-5725MHz Hereby, TSC Auto ID Technology Co., Ltd. declares that the radio equipment type [Wi-Fi] IEEE 802.11 a/b/g/n is in compliance with Directive 2014/53/EU The full text of the EU declaration of conformity is available at the following internet address: http:// www.tscprinters.com...
- Page 7 Cet appareil numérique de classe B est conforme aux normes canadiennes ICES-003 et RSS-210. Son fonctionnement est soumis aux deux conditions suivantes : (1) cet appareil ne doit pas causer d'interférence et (2) cet appareil doit accepter toute interférence, notamment les interférences qui peuvent affecter son fonctionnement.
- Page 8 For JP Model Made for iPhone XS Max, iPhone XS, iPhone XR, iPhone X, iPhone 8, iPhone 8 Plus, iPhone 7, iPhone 7 Plus, iPhone SE, iPhone 6s, iPhone 6s Plus, iPhone 6, iPhone 6 Plus, iPhone 5s, iPad Pro 12.9-inch (2nd generation), iPad Pro 10.5-inch, iPad (6th generation), iPad (5th generation), iPad Pro 9.7-inch, iPad Pro 12.9-inch (1st generation), iPad Air 2, iPad mini 4, iPad mini 3, iPad Air, iPad mini 2, iPod touch (6th generation) iPad, iPad Air, iPad Pro, iPhone are trademarks of Apple Inc., registered in the U.S.
-
Page 9: Table Of Contents
Contents 1. Introduction ........................ 1 1.1 Product Introduction ..................... 1 1.2 Product Specification and Features..............2 1D bar code ........................3 2D bar code ........................3 2. Operations Overview ....................5 2.1 Unpacking and Inspection ..................5 2.2 Printer Overview ....................5 2.2.1 Front View .......................... - Page 10 5. TSC Console ......................34 5.1 Start TSC Console ....................34 5.2 Set WiFi and Add to TSC Console Interface ............36 5.3 TPH Care ......................38 5.4 Printer Function ....................39 6. LCD Menu Function ....................40 6.1 Enter the Menu ....................40 6.2 Menu Overview ....................
-
Page 12: Introduction
2D barcodes, graphics, fine print and other ultra- high-resolution images. The MH241 Series printers are loaded with standard features including a color touch display with brand-new GUI design and six menu buttons to provide a great user experience, support for 600 meter long ribbons, 8”... -
Page 13: Product Specification And Features
256MB DDR2 microSD Flash memory card reader for Flash memory expansion, up to 32 GB TPH feature Support TSC TPH Care and TPH odometer RS-232 USB 2.0 (High speed mode) Internal Ethernet, 10/100 Mbps Interface ... -
Page 14: Bar Code
Internal switching power supply Power Input: AC 100-240V, 4-2A, 50-60Hz Output: DC 5V, 5A; DC 24V, 7A; DC 36V, 1.4A; Total 243W LCD display/ 6 operation buttons (menu, Multi-language selectable Operation feed/pause, up, down, left, right) 6 operation buttons (menu, select, up, down, left/pause, right/feed) ... - Page 15 Environmenta Comply with RoHS, WEEE l concern Windows labeling software CD disk Quick start guide Accessories USB port cable Power cord Standard RTC & Buzzer GPIO (DB15F)+ Parallel interface Factory option Internal Bluetooth 5.0 MFi * ...
-
Page 16: Operations Overview
2. Operations Overview 2.1 Unpacking and Inspection This printer has been specially packaged to withstand damage during shipping. Please carefully inspect the packaging and printer upon receiving the bar code printer. Please retain the packaging materials in case you need to reship the printer. -
Page 17: Printer Overview
2.2 Printer Overview 2.2.1 Front View For MH241 Series LED indicator LCD display Front panel buttons USB host x 2 Media view window Paper exit chute Printer cover handle - 6 -... - Page 18 For MH241P Series LED indicator LCD display Front panel buttons USB host x 2 Media view window Paper exit chute Printer cover handle Printer lower cover (MH241P Series only)
-
Page 19: Interior View
2.2.2 Interior view For MH241 & MH241T Series Ribbon rewind spindle Print head pressure position adjustment knob Print head pressure adjustment knob Print head release lever Ribbon supply spindle Media near end sensor (movable, MH241T Series only) Label roll guard Label supply spindle External label entrance chute Damper... - Page 20 For MH241P Series Ribbon rewind spindle Print head pressure position adjustment knob Print head pressure adjustment knob Print head release lever Printer lower cover Ribbon supply spindle Media near end sensor (movable, MH241T/MH241P Series only) Label roll guard Label supply spindle Media guide bar &...
-
Page 21: Rear View
2.2.3 Rear View For MH241 & MH241T Series External label entrance chute RS-232C interface Ethernet interface USB interface microSD card slot Centronics interface (Option) GPIO interface (Option) Slot-in Wi-Fi interface (Option) Note: Power switch The interface picture here is for Power cord socket reference only. - Page 22 For MH241P Series External label entrance chute Slot-in Wi-Fi module (Option) RS-232C interface Ethernet interface USB interface microSD card slot Note: Centronics interface (Option) The interface picture here is for Power switch reference only. Please refer to the product specification for the interfaces Power cord socket availability.
-
Page 23: Lcd Monitor Operation (Use 241T Series For Example)
2.3 LCD Monitor Operation (241T series for example) LED indicator Printer firmware Printer version status Printer Time & Date model Touch screen (MH241T/ P series only) ETH: Ethernet IP address Wi-Fi: Wi-Fi IP address (Either one) Icons Select keys Navigational keys - 12 -... -
Page 24: Led Indication And Keys
2.3.1 LED Indication and Keys Status Indication This illuminates that the power is on and the device Solid is ready to use. Green This illuminates that the system is downloading data Flash from PC to memory or the printer is paused. Amber This illuminates that the system is clearing data from printer. -
Page 25: Main
Security lock Icon button Function Enter the menu Calibrate the media sensor Enter the “Favorites” option (please refer to section 6.9 (MH241 Series) & 7.9 (MH241T/ MH241P Series)) Enter cursor (be marked in green) located option Feed button (advance one label) -
Page 26: Power-On Utilities
2.3.3 Power-on Utilities MH241/ 241T/ 241P Series have the power-on utilities for user to set sensor calibration, self-test, and factory default functions. Please refer to the template below to setup the settings. Please follow the steps below for different power-on utilities. 1. -
Page 27: Setup
4. Plug the power cord into the AC power cord socket at the rear of the printer, and then plug the power cord into a properly grounded power outlet. Note: Please switch OFF printer power switch prior to plug in the power cord to printer power jack. MH241P Series MH241 Series MH241T Series - 16 -... -
Page 28: Loading The Ribbon
3.2 Loading the Ribbon Open the printer right side cover. Install the ribbon onto ribbon supply spindle. - Page 29 Push the Print head release lever to open print head mechanism. Thread ribbon below the ribbon guide bar through ribbon sensor slot and as the loading path printed on the printer. Wind the ribbon rewind spindle counterclockwise roughly 3~5 circles until the ribbon is smooth, properly stretched and wrinkle-free.
- Page 30 Close the print head mechanism by pushing down the both sides of the print head release lever. Note: * Please refer to video on YouTube. Ribbon loading path coxxxxxxxxxxatx xxxxed inside Ink coated outside...
-
Page 31: Remove Used Ribbon
3.3 Remove Used Ribbon Break the ribbon between ribbon guide plate and the ribbon rewind spindle. 2. Push the ribbon release button and slide the ribbon off to release the ribbon on the ribbon rewind spindle at SLIDE OFF the same time. - 20 -... -
Page 32: Loading The Media
3.4 Loading the Media 3.4.1 Loading the Media 1. Open the printer right side cover. 2. Move the label roll guard horizontally to the end of label spindle, then flip down the label roll guard. For 1” spindle model, it supports the media with 1” core. For 1.5”... - Page 33 Note: MH241 Series doesn’t attach the media guide bar. Interior view of MH241 Series 5. Move the media sensor by adjusting the media sensor position adjustment knob, make sure the gap or black mark sensor is at the location where media gap/black mark will pass through for sensing.
- Page 34 6. Adjust the label guide to fix the media position. Note: * Please install the media through the media sensor. * The sensor location is marked by a triangle mark ▽ (gap sensor) and arrow mark↓(black mark sensor) at the sensor housing. * The media sensor position is movable, please make sure the gap or black mark is at the location...
-
Page 35: Loading The Fanfold/External Media
3.4.2 Loading the Fanfold/External Media 1. Open the printer right side cover. 2. Insert the fanfold media through the bottom or rear external label entrance chute. 3. Please refer to section 3.4.1 step 4~8 for loading media. Note: Please calibrate the gap/black mark sensor when changing media. -
Page 36: Loading Media In Peel-Off Mode (Option For Mh241P Series)
3.4.3 Loading Media in Peel-off Mode (Option for MH241P Series) 1. Open the printer right side cover. 2. Please refer to section 3.4.1 for loading media. 3. Using the front display panel to do the calibration first and set the printer mode to peeler mode. - Page 37 7. Wrap the liner onto the paper core and stick the liner on the spindle. Wind the spindle until the liner stretched properly. 8. Close print head release lever and using the front display panel to set the print mode to “Peel off”. 9.
-
Page 38: Loading Media In Rewind Mode (Option For Mh241P Series)
3.4.4 Loading Media in Rewind Mode (Option for MH241P Series) 1. Open the printer right side cover. 2. Please refer to section 3.4.1 for loading media. 3. Using the front display panel to do the calibration and set the printer mode to rewind mode. - Page 39 5. Install the paper core onto the rewind spindle. 6. Open print head release lever and label guide bar release lever to pull approximately 650mm of the label through the front of the printer. 7. Feed the leading edge of media through the redirect front panel as picture shown.
- Page 40 9. Adjust the media rewind guide to fit the label width. 10. Close print head release lever and print head lower cover.
-
Page 41: Adjustment Knob
4. Adjustment Knob 4.1 Print Head Pressure Adjustment Knob & Print Head Pressure Position Adjustment Knob The print head pressure adjustment knob has 5 levels of adjustment. Because the printer’s paper alignment is to the left side of mechanism, different media widths require the different pressure to print the label correctly. -
Page 42: Ribbon Tension Adjustment Knob Module
4.2 Ribbon Tension Adjustment Knob Module The ribbon tension adjustment knob has 5 positions for adjustment. Because the printer’s ribbon alignment is to the left side of mechanism, different ribbon or media widths require different tension to print correctly. Therefore, it may require to adjust the ribbon tension adjustment knob to get your best print quality. -
Page 43: Mechanism Fine Adjustment To Avoid Ribbon Wrinkles
4.3 Mechanism Fine Adjustment to Avoid Ribbon Wrinkles This printer has been fully tested before delivery. There should be no ribbon wrinkle presented on the media for general-purpose printing application. Ribbon wrinkle is related to the media width, thickness, print head pressure balance, ribbon film characteristics, print darkness setting…etc. - Page 44 1. Wrinkle happens from label 2. Wrinkle happens from label lower left to upper right lower right to upper left Symptom direction (“ˊ”) direction (“ˋ”) Feed direction If the wrinkle on the label starts from If the wrinkle on the label starts from the lower left side to upper right side, the lower right side to upper left side, please do following adjustment.
-
Page 45: Tsc Console
5. TSC Console TSC Console combine the Printer Management, Diagnostic Tool, CommTool and Printer Webpage settings, which enables you to adjust printer’s settings/status; change printers’ settings; download graphics, fonts and firmware; create a printer bitmap font; and send additional commands to printers at the same time. - Page 46 The printer will be added to TSC Console’s interface Select the printer and set the settings. For more information, please refer to TSC Console Users Manual. ※...
-
Page 47: Set Wifi And Add To Tsc Console Interface
5.2 Set WiFi and Add to TSC Console Interface Use USB or COM Port to set up the interface Click Get to receive printer’s info and finish WiFi setting by clicking WiFi tab. Click Set and the priter will reset. - Page 48 Select the ways of searching WiFi devices. Click Discover to find the printer. Printer firmware version before A.12 and Alpha-2R/3R/4L, TDM series can only be discovered through “IP Address” option. ※...
-
Page 49: Tph Care
5.3 TPH Care TPH Care could check condition of the print head. Set the failure dots threshold for indicating errors when the threshold is reached. To enable (ON)/ disable Warning Condition: If the (OFF) the TPH Care unhealthy dot equals to this value, then printer will stop printing. -
Page 50: Printer Function
5.4 Printer Function 1. Printer Function could be found in Printer Configuration. “Printer Function” will be shown on the left side of the window. Functions Description Calibrate Sensor Detect media types and the size of the label RTC Setup Synchronize printer witn Real Time Clock on PC Factory Default Initialize the printer to default settings Reset Printer... -
Page 51: Lcd Menu Function
6. LCD Menu Function 6.1 Enter the Menu (Use MH241T for sample, Difference between MH241 is MH241 use smaller non-touched screen) * By Keys: Use Select keys to select the “Menu” icon and press the right select key button (means ) to enter each function. -
Page 52: Menu Overview
6.2 Menu Overview There are 6 categories for the menu. You can easy to set the settings of the printer without connecting the computer. Please refer to following sections for more details. This “Setting” category can set up the printer settings for TSPL &... -
Page 53: Tspl
Choose the “Command Set” item on LCD and switch the TSPL and ZPL2 by press right select key. 6.3.1 TSPL This “TSPL” category can set up the printer settings for TSPL. Speed Slew speed Back speed Batch Mode Density None Direction Cutter Batch Print mode... - Page 54 dpi: 3 ips Use this item to setup back feed speed. Setting value is up Back Speed 2 ips to 6 ips. Use this option to setup printing darkness. The available Density setting range is from 0 to 15, and the step is 1. You may need to adjust your density based on selected media.
-
Page 55: Zpl2
6.3.2 ZPL2 This “ZPL2” category can set up the printer settings for ZPL2. Darkness Print Speed Slew Speed BackFeed Speed Tear Off Tear Off Cutter Print Mode Rewind Print Width Peel Off List Fonts Applicator List Images List Formats List Setup Control Prefix Format Prefix Menu... - Page 56 203 dpi: 6 Use this item to setup feed speed. Setting value is up to 300 dpi: 4 Slew Speed 8 ips. 600 dpi: 3 BackFeed Use this item to setup back feed speed. Setting value is 2 ips Speed up to 6 ips.
- Page 57 This option is used to set the action of the media when you close the print head. Selections Description Head Close No Motion Feed Printer will advance one label Printer will calibration the sensor levels, Calibration determine length and feed label Length Printer determine length and feed label No Motion...
-
Page 58: Sensor
6.4 Sensor This option is used to calibrate the selected sensor. We recommend calibrate the sensor before printing when changing the media. Black Mark Auto Calibration Continuous Preprint Manual Standard Black Mark Calibration Continuous Auto Threshold Detect Fixed Menu Sensor Maximum Length Back side... -
Page 59: Interface
6.5 Interface This option is used to set the printer interface settings. Serial Ethernet Menu Interface Wi-Fi Bluetooth GPIO 6.5.1 Serial Comm. This option is used to set the printer RS-232 settings. 9600 bps 4800 bps 2410 bps 1200 bps Baud Rate 115200 bps 57600 bps... -
Page 60: Ethernet
6.5.2 Ethernet Use this menu to configure internal Ethernet configuration, check the printer’s Ethernet module status, and reset the Ethernet module. Status Menu Interface Ethernet Config Description Item Default Use this menu to check the Ethernet IP address Status and MAC setting status. DHCP: This item is used to ON or OFF the DHCP (Dynamic Host Configuration Protocol) network... -
Page 61: Wi-Fi
6.5.3 Wi-Fi This option is used to set the printer Wi-Fi settings. Status Config Menu Interface Wi-Fi SSID Security Password Item Description Default Use this menu to check the Wi-Fi IP address, MAC Status setting status…. DHCP: This item is used to ON or OFF the DHCP (Dynamic Host Configuration Protocol) network protocol. -
Page 62: Gpio
6.5.5 GPIO This option is used to set the print engine GPIO settings. (Applicator interface with DB15F connector +5V I/O) Applicator Port Start Print SIG Error On Pause Ribbon Low Mode Menu Interface GPIO Ribbon Low Output Backfeed Reprint Mode 6.6 Advanced Language Printer Information... - Page 63 Touchscreen This item is used to calibrate the center of the cross for Calibration best result for touchscreen. Date & Time This item is used to setup the date and time on display. This feature is used to set the password for locking the Security Disable menu or favorites.
-
Page 64: File Manager
6.7 File Manager This feature is used to check the printer available memory, show the files list, delete the files or run the files that saved in the printer DRAM/Flash/Card memory. DRAM Menu File Manager FLASH CARD... -
Page 65: Diagnostic
Self-test printout Model name F/W version Firmware checksum Printer S/N TSC configuration file System date System time Printed mileage (meter) Cutting counter Print speed (inch/sec) Print darkness Label size (inch) Print Config. - Page 66 Numbers of download files Total & available memory space Print head check pattern Note: Checking dot damage requires 4” wide paper width. Captures the data from the communications port and prints out the data received by printer. In the dump mode, all characters will be printed in 2 columns.
-
Page 67: Favorites
6.9 Favorites This feature is used to create your own favorites list. You can organize the commonly used setting options in “Favorites”. Select “Favorites” list Touch and hold left select key on main screen, the “Favorites” list will pop up. Note: if the main menu button with locked sign, please input password to unlock the screen. -
Page 68: Troubleshooting
7. Troubleshooting The following guide lists the most common problems that may be encountered when operating this bar code printer. If the printer still does not function after all suggested solutions have been invoked, please contact the Customer Service Department of your purchased reseller or distributor for assistance. - Page 69 * Use the supported capacity microSD * microSD card is damaged. card. * microSD card doesn’t insert * Insert the microSD card again. microSD card is unable to correctly. * The supported microSD card spec and * Use the non-approved SD the approved microSD card card manufacturer.
- Page 70 * Calibrate the sensor sensitivity again. * Set the correct label size and gap size. [Menu] [Setting] [Shift Y] * Press to fine tune the parameter of Shift Y. * If using the software BarTender, please set the vertical offset in the driver. * Media sensor sensitivity is not set properly.
-
Page 71: Maintenance
8. Maintenance This session presents the clean tools and methods to maintain your printer. 1. Please use one of following material to clean the printer. Cotton swab Lint-free cloth Vacuum / Blower brush 100% Ethanol or Isopropyl Alcohol 2. -
Page 72: Revise History
Revise History Date Content Editor... - Page 73 No.35, Sec. 2, Ligong 1st Rd., Wujie Township, New Taipei City 23141, Taiwan (R.O.C.) Yilan County 26841, Taiwan (R.O.C.) TEL: +886-2-2218-6789 TEL: +886-3-990-6677 FAX: +886-2-2218-5678 FAX: +886-3-990-5577 Web site: www.tscprinters.com E-mail: apac_sales@tscprinters.com TSC Auto ID Technology Co., Ltd. tech_support@tscprinters.com - 62 -...
Need help?
Do you have a question about the MH241 Series and is the answer not in the manual?
Questions and answers