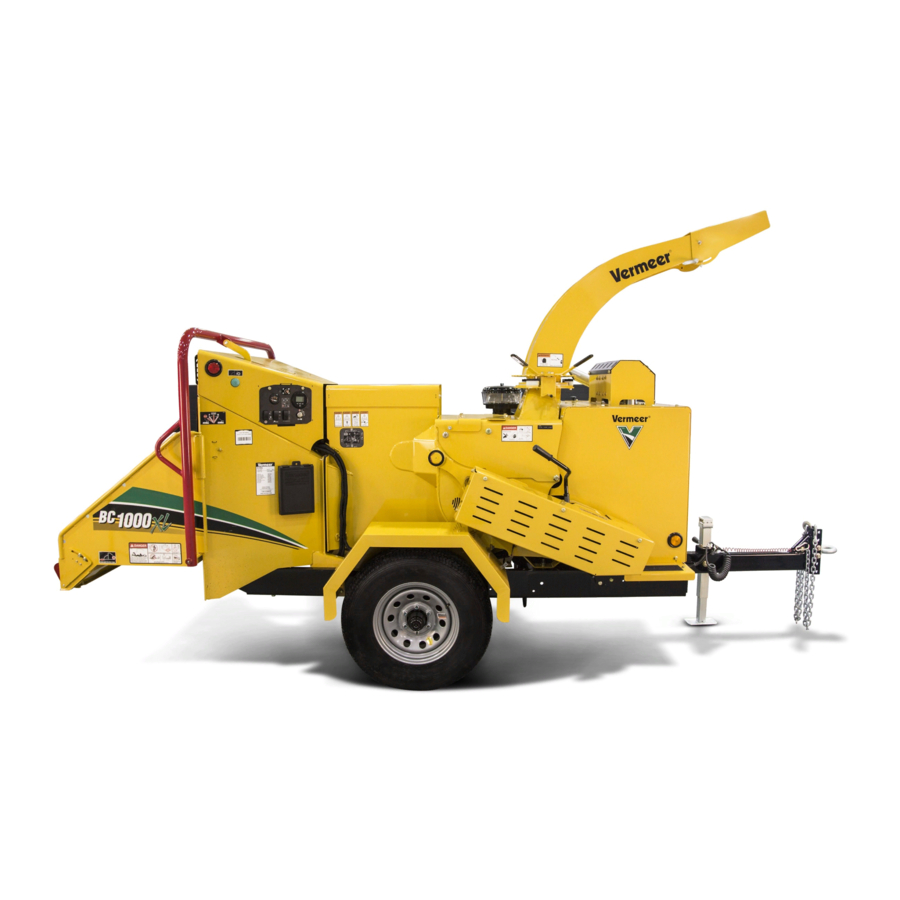
Vermeer BC1000XL Operator's Manual
Brush chipper
Hide thumbs
Also See for BC1000XL:
- Maintenance manual (100 pages) ,
- Operating steps and safety practices (7 pages) ,
- Rental center manual (2 pages)

Related Manuals for Vermeer BC1000XL


Summary of Contents for Vermeer BC1000XL
- Page 1 BC1000XL Brush Chipper Operator’s Manual BC1000XL_o3_06 Serial No. 5001 - Order No. 105400V85 Cabled Order No. 163551738...
- Page 2 This manual explains the proper operation of your machine. Study and understand these instructions thoroughly before operating or maintaining the machine. Failure to do so could result in personal injury or equipment damage. Consult your Vermeer dealer if you do not understand the instructions in this manual, or need additional information.
- Page 3 BC1000XL EU unit NOTE: Right and left sides are determined when facing in the direction of forward travel. RADEMARKS VERMEER and VERMEER Logo are trademarks of Vermeer Manufacturing Company. CUMMINS and FLEETGUARD are trademarks of Cummins Engine Company, Inc. BC1000XL Brush Chipper...
- Page 4 US 4,976,095 US 5,950,942 US 6,843,435 US 7,204,442 US 5,588,474 US 6,014,996 US 6,931,826 B1 US D 308,682 US 5,657,803 US 6,138,932 US 6,978,955 US 5,692,548 US 6,412,715 US 7,011,258 (Other U.S. and foreign patents pending.) 3_05 3_03 BC1000XL Brush Chipper...
- Page 5 EXTENDED WARRANTY OPTIONS ARE AVAILABLE FOR PURCHASE WARRANTY TERMS During the Limited Warranty period specified above, any defect in material or workmanship in any warranted item of Vermeer Industrial Equipment not excluded below shall be repaired or replaced at Vermeer's option without charge by any authorized independent Vermeer dealer.
- Page 6 Transportation costs, if any, of transporting to the Vermeer dealer. Freight costs, if any, of transporting replacement parts to the Vermeer dealer. The travel time of the Vermeer dealer's service personnel to make a repair on the retail purchaser's site or other location. In no event shall Vermeer's liability exceed the purchase price of the product,...
- Page 7 Depreciation damage caused by normal wear, lack of reasonable and proper maintenance, failure to follow operating instructions, misuse, lack of proper protection during storage. (13) Accessory systems and electronics not of Vermeer's manufacture are warranted only to the extent of such manufacturer's respective Limited Warranty if any. (14) Downhole toolage is not covered under this warranty.
- Page 8 NO DEALER WARRANTY. The selling dealer makes no warranty of its own and the dealer has no authority to make any representation or promise on behalf of Vermeer or to modify the terms or limitations of this warranty in any way.
- Page 9 Vermeer Industrial New Equipment Limited Warranty (the “Standard Limited Warranty”) for the Covered Components of the Specified Models of New Vermeer Industrial Equipment for the Extended Term, provided that the Equipment is operated and maintained in accordance with the directions and instructions set forth in the Operator’s and Maintenance Manual(s).
- Page 10 Vermeer Industrial New Equipment Limited Warranty (the “Standard Limited Warranty”) for the Covered Components of the Specified Models of New Vermeer Industrial Equipment for the Extended Term, provided that the Equipment is operated and maintained in accordance with the directions and instructions set forth in the Operator’s and Maintenance Manual(s).
-
Page 11: Receiving And Delivery Report
___ Check machine for shortage or damage in transit. ___ Check installation and condition of all shields. ___ Check machine for proper lubrication. ___ Check condition of all safety signs and operating decals. ___ Check all phases of operation. BC1000XL Brush Chipper 3_01 Receiving and Delivery Report... -
Page 12: Delivery
Review and demonstrate with the customer the various aspects of brush chipper operation: ___ overall explanation of how the brush chipper works ___ brush chipper safety ___ preparing the brush chipper for operation Receiving and Delivery Report 3_01 BC1000XL Brush Chipper... - Page 13 / province: state / province: zip / postal code: zip / postal code: country: country: ACHINE DENTIFICATION UMBERS ECORD Machine Model Number_______________________ Machine Serial Number_______________________ NOTE: Identification tag located under hood. BC1000XL Brush Chipper 3_01 Receiving and Delivery Report...
-
Page 14: Engine Identification Numbers - Record
NGINE DENTIFICATION UMBERS ECORD Engine Model Number________________________ Engine Serial Number________________________ Receiving and Delivery Report 3_01 BC1000XL Brush Chipper... -
Page 15: Table Of Contents
Safety Symbol Explanation ......10-1 Hitch Height - Adjust (BC1000XL Only) ....30-2 Tongue Length - Adjust (BC1000XL Only) . - Page 16 Finishing ........50-8 vi Table of Contents BC1000XL Brush Chipper 3_06...
-
Page 17: Safety Messages
This is the safety alert symbol. This symbol is used in combination with an exclamation mark or other symbols to alert you to the potential for bodily injury or death. WARNING: Read Operator’s Manual and safety signs before operating machine. BC1000XL Brush Chipper 3_06 Safety Messages 10-1... - Page 18 WARNING: Wear personal protective equipment. Dress properly. Refer to Preparing the Brush Chipper and Work Area, page 40-1. WARNING: Keep spectators away. WARNING: Engine exhaust can asphyxiate. Operate only outdoors. 10-2 Safety Messages BC1000XL Brush Chipper...
- Page 19 Fluid injected under the skin must be removed immediately by a surgeon familiar with this type of injury. WARNING: Fuel and fumes can explode and burn. Shut off engine before refueling. No flame. No smoking. BC1000XL Brush Chipper 3_05 Safety Messages 10-3...
- Page 20 WARNING: Failure to follow any of the preceding safety instructions or those that follow within this manual, could result in serious injury or death. This machine is to be used only for those purposes for which it was intended as explained in this Operator’s Manual. 10-4 Safety Messages BC1000XL Brush Chipper...
-
Page 21: Controls
On ....... . . alternator not charging Hourmeter BC1000XL Brush Chipper Controls 20-1... -
Page 22: Engine Monitors - Deluxe Gauge Panel (Option)
NGINE ONITORS ELUXE AUGE ANEL PTION Water Temperature Gauge Air Filter Restriction Indicator Voltmeter Oil Pressure Gauge Tachometer/Hourmeter Fuel Gauge 20-2 Controls BC1000XL Brush Chipper... -
Page 23: Ignition Switch
Deluxe Gauge Package 2nd position clockwise ......engine start BC1000XL Brush Chipper Controls 20-3... -
Page 24: Throttle/Cutter Engage
Right, away from operator ....engaged, low RPM Lever automatically adjusts engine speed as the cutter drum is engaged. 20-4 Controls BC1000XL Brush Chipper... -
Page 25: Feed Roller Controls
• Upper Feed Control Bar is in forward or reverse feeding position, or Hold- to-Run Button is pressed. NOTE: SmartFeed control is always ON, and is activated automatically. NOTE: Feed roller will move in REVERSE at any engine speed and when light blinks. BC1000XL Brush Chipper 3_06 3_05 3_01... - Page 26 Bar pressed ....... . feed roller stops To reset: Briefly press Hold-to-Run Button (see (3) on next page). BC1000XL EU 20-6 Controls BC1000XL Brush Chipper 3_06 3_05 3_01...
- Page 27 Upper Feed Control Bar (1) and Lower Feed Stop Bar (2). After 30 seconds, feed roller stops. (4) Lower Feed Stop Bar Sensitivity Switch (BC1000XL Units Only) Press top ....... Normal sensitivity NOTE: Feed roller stops when stop bar is pushed a shorter distance Press bottom .
- Page 28 Normal sensitivity setting selected ... . warning light off Reduced sensitivity setting selected ... . warning light on BC1000XL and BC1000XL EU Units: • Flashes quickly when feed roller needs to be restarted after pressing Lower Feed Stop Bar or pulling Upper Feed Control Bar.
- Page 29 Clockwise......increase feed roller speed Counterclockwise ....decrease feed roller speed BC1000XL Brush Chipper 3_01...
-
Page 30: Discharge Chute Controls
Tighten (clockwise) ........lock 20-10 Controls BC1000XL Brush Chipper 3_01... -
Page 31: Starting Procedure
In cold weather, take more time to warm up the hydraulic fluid. After the engine is warm, let it run for a minimum of five more minutes at low RPM before operating any controls. NOTE: Slow down engine if the hydraulic pump squeals due to insufficient oil. BC1000XL Brush Chipper Starting Procedure 21-1... -
Page 32: Jump-Starting
External: Flush with plenty of water. If eyes have been exposed, flush with water for 15 minutes and get prompt medical attention. Internal: Drink large quantities of water or milk, follow with milk of magnesia, beaten egg, or vegetable oil. Call a physician immediately. 21-2 Starting Procedure BC1000XL Brush Chipper 3_01... -
Page 33: Jump-Starting Procedure
Step 3: Start engine. Remove cables in REVERSE order and install the red cover over the Step 4: positive cable clamp on the battery. BC1000XL Brush Chipper Starting Procedure 21-3... - Page 34 This page intentionally left blank.
-
Page 35: Shutdown Procedure
IMPORTANT: The cutter drum will continue to turn for a short time after the engine has stopped. Step 7: Remove ignition key. Close and latch feed table. Step 8: BC1000XL Brush Chipper Shutdown Procedure 22-1... -
Page 36: Quick Stop Procedure
Turn ignition to OFF position while cutter drum clutch is still engaged. Step 2: Wait for cutter drum and belt to stop. Fully disengage cutter drum. Step 3: Shut Off Engine With Clutch Engaged 22-2 Shutdown Procedure BC1000XL Brush Chipper... -
Page 37: Transporting The Brush Chipper
(BC1000XL Only) Do not use a brake controller that is purely a manually operated controller. If your towing vehicle is equipped with a manually operated controller, remove it and install one that can be applied both automatically and manually. -
Page 38: Hitch Height - Adjust (Bc1000Xl Only)
Slide tongue to the new set of holes in tongue. Align holes in tongue with Step 3: holes in frame. Insert tongue adjustment pin and secure with snap lock wire. Step 4: 30-2 Transporting the Brush Chipper BC1000XL Brush Chipper 3_02... -
Page 39: Attach To Towing Vehicle (Bc1000Xl)
(4) back onto the chain. Ensure the spring loaded latch snaps closed around the chain and rests snugly against the slip hook. NOTE: Keep chains as short as possible, but leave enough slack to turn corners. BC1000XL Brush Chipper 3_01 Transporting the Brush Chipper 30-3... - Page 40 Attach electrical connector (9) to the towing vehicle. Check that highway Step 4: lights and electric brakes are functioning properly. 30-4 Transporting the Brush Chipper BC1000XL Brush Chipper...
- Page 41 Maintenance Manual safety towing chains and hooks. SLIP HOOK SPRING LOADED LATCH Step 5: Fully raise jack (10), rotate 90° and secure with attachment pin. BC1000XL Brush Chipper Transporting the Brush Chipper 30-5...
-
Page 42: Operating A Ball Coupler Hitch
IMPORTANT: Do not use a wrench or bar to tighten the coupler; hand tighten only. Overtightening strains and wears the coupler parts. It may also cause the coupler to seize on the ball and cause the ball nut to come loose. 30-6 Transporting the Brush Chipper BC1000XL Brush Chipper... -
Page 43: Hitch - Clevis
Back up towing vehicle until pintle is centered under pintle ring (2) of the Step 2: hitch. Step 3: Lower tongue until the pintle ring is seated in the pintle hook (3). Step 4: Latch pintle and lock with cotter pin (4). BC1000XL Brush Chipper Transporting the Brush Chipper 30-7... -
Page 44: Bc1000Xl Eu - Attach To Towing Vehicle
BC1000XL EU - Attach to Towing Vehicle Step 1: Attach to vehicle hitch. a. Squeeze on bottom side of handle (1) and lift to unlock the hitch. b. After hitch is placed over the ball on the towing vehicle, push down on the locking handle (1) until hitch locks into place. -
Page 45: Breakaway On Hydraulic Surge Brake (Option) - Reset
Compressed air can also push moisture through some connector and component seals. Do not point air nozzle directly at seal areas. Ensure feed table is empty. Clean machine to keep debris off road and from striking other vehicles during transport. BC1000XL Brush Chipper 3_06 3_01 Transporting the Brush Chipper 30-9... -
Page 46: Prepare For Transport
Park machine on level ground and chock wheels. Use jack to support tongue. Store electrical connector (1) and safety chains (2) on end of tongue. On BC1000XL EU machines, engage Park Brake Lever and use blocks (3) provided to chock wheels. 30-10 Transporting the Brush Chipper... -
Page 47: Preparing The Brush Chipper And Work Area
Section 40: NTENDED The Vermeer BC1000XL Brush Chipper is designed solely for use in chipping organic material such as wood, bark, limbs, brush, and undergrowth. Always use the machine in accordance with the instructions contained in this Operator's Manual, safety signs on the machine, and other material provided by Vermeer Mfg. -
Page 48: Personal Protection
Other workers in immediate area must also wear the above listed required protective equipment. Wear close-fitting clothing and confine long hair. Avoid wearing jewelry, such as rings, wristwatches, necklaces, or bracelets. 40-2 Preparing the Brush Chipper and Work Area BC1000XL Brush Chipper... -
Page 49: Sound Levels
The actual sound levels for your application and operating conditions may be different. REPARE THE WARNING: Keep all spectators and other workers away from the machine and work area while in operation. BC1000XL Brush Chipper 3_02 Preparing the Brush Chipper and Work Area 40-3... -
Page 50: Prepare The Brush Chipper
Clean Flammable Materials from Machine Prevent fires by keeping engine compartment, battery, hydraulic lines, fuel tank and operator’s station clean of accumulated trash, grease, and debris. 40-4 Preparing the Brush Chipper and Work Area BC1000XL Brush Chipper 3_02... -
Page 51: Discharge Chute
Keep everyone away from discharge area while cutter disc is turning. Direct discharge chute away from people. Wear eye protection. Step 1: Rotate discharge chute (1) to the direction you want to deposit the chipped material by turning the rotation lever (2). BC1000XL Brush Chipper Preparing the Brush Chipper and Work Area 40-5... - Page 52 Adjust deflector height. Tighten locking handle to secure the adjusted deflector. • Remote deflector control (option) Loosen lock (5) and turn crank (6). Tighten lock handle to secure the adjusted deflector. 40-6 Preparing the Brush Chipper and Work Area BC1000XL Brush Chipper...
-
Page 53: Feed Table
Lower Feed Stop Bar (3) along the bottom of the feed table. The BC1000XL EU also has the Lower Feed Stop Bar extend (4) along both sides of the feed table. Do not operate brush chipper unless the control bars are installed and operating properly. - Page 54 This page intentionally left blank.
-
Page 55: Operating The Brush Chipper
Maintenance - 50 Service Hours or Weekly section in the Maintenance Manual instructions. UTTER NGAGE After engine has warmed up, grip Cutter Engage/Throttle Lever (1) firmly and move it slowly to the ENGAGED/HIGH RPM position. BC1000XL Brush Chipper Operating the Brush Chipper 50-1... -
Page 56: Feed Roller Operation
IMPORTANT: Proper operation of the Upper Feed Control Bar and Lower Feed Stop Bar should be checked every 10 hours of operation or daily. Refer to the Maintenance Manual for adjustment instructions. 50-2 Operating the Brush Chipper BC1000XL Brush Chipper 3_06... -
Page 57: Upper Feed Control Bar
Lower Feed Stop Bar and Side Feed Stop Bars The Lower Feed Stop Bar system (2) and Side Feed Stop Bars (3) (BC1000XL European only) provide a means for the operator to quickly stop the feed roller if snagged by a branch and pulled toward the machine. - Page 58 Sensitivity Levels - BC1000XL Only The Lower Feed Stop Bar has two levels of sensitivity. When the NORMAL setting (top of the Sensitivity Switch) is selected (3), the stop bar is depressed a shorter distance before the feed roller stops. When the REDUCED setting (bottom of the Sensitivity Switch) is selected (4), the stop bar is depressed farther before feed roller stops.
-
Page 59: Feed Roller - Engage
NOTE: Each time the engine key is turned ON, the rear warning light (3) flashes quickly, and Hold-to-Run Button (2) must be pushed to start feed roller. NOTE: Engine throttle must be set at HIGH RPM before feed roller will start. 3_01 BC1000XL Brush Chipper 3_06 3_05 Operating the Brush Chipper 50-5... -
Page 60: Smartfeed Operation
The preset RPM setting depends on which of the three Resistor Packs is being used. Contact your Independent Vermeer Industrial Dealer for the one that is best for your chipping needs. -
Page 61: Chip Material
The brush chipper will chip logs approximately 12" (30 cm) in diameter. Sometimes a log, due to its size and shape, will not go in. Trim or shorten the log to aid feeding it into the • chipper. BC1000XL Brush Chipper 3_02 Operating the Brush Chipper 50-7... -
Page 62: Plugs Or Stalls
Never push chipped material with hands, feet, rake, shovel, or any other object. • When the chipping operation is complete, follow Shutdown Procedure, page 22-1. 50-8 Operating the Brush Chipper BC1000XL Brush Chipper 3_06 3_02... -
Page 63: Removing Plugs From The Brush Chipper
Keep away from rotating feed roller and blades. WARNING: Rotating knives behind cover can cut off hand. Thrown objects can strike you. Stop engine, wait for drum to stop, then open access cover. BC1000XL Brush Chipper 3_06 3_01 Removing Plugs from the Brush Chipper 51-1... -
Page 64: Feed Roller - Unplug
Step 6: Fully raise jack foot. Remove jack by removing attachment pin and sliding jack off the mount. Step 7: Return jack to transport position and secure with attachment pin. 51-2 Removing Plugs from the Brush Chipper BC1000XL Brush Chipper 3_01... -
Page 65: Cutter Drum - Unplug
Step 6: Step 7: Close and bolt the access doors. Step 8: Operate machine, without chipping additional material, to blow out chips that remain in the chipper housing. BC1000XL Brush Chipper 3_06 3_01 Removing Plugs from the Brush Chipper 51-3... -
Page 66: Discharge Chute - Clean Out
WARNING: Thrown objects can blind you. Keep everyone away from discharge area while cutter drum is turning. Direct discharge chute away from people. Wear eye protection. 51-4 Removing Plugs from the Brush Chipper BC1000XL Brush Chipper 3_04... -
Page 67: Maintenance Intervals
Refer to for instructions. Shutdown Procedure, page 22-1, Visually inspect machine daily before starting the machine. Make no modifications to your equipment unless specifically recommended or requested by Vermeer Manufacturing Company. AFETY IGNS Safety signs located on your machine contain important and useful information that will help you operate your equipment safely. -
Page 68: Maintenance Manual
Engine Drive Belt -Inspect Engine Cooling System - Check Engine Oil Level - Check Air Cleaner Restriction Indicator - Check Hydraulic Fluid Level - Check Fuel Tank - Fill Brake System - Check 60-2 Maintenance Intervals BC1000XL Brush Chipper 3_06 3_02... - Page 69 Hydraulic Fluid Filter - Replace Jack - Lubricate Battery Electrolyte Level and Terminals - Check Electric Brakes - Test Automatic Brake Controller - Check Brakes - Adjust Function of Optional Hydraulic Surge Brakes - Check BC1000XL Brush Chipper 3_02 Maintenance Intervals 60-3...
- Page 70 Hydraulic Fluid - Change Wheel Bearings - Check Ball Coupler - Lubricate and Inspect Drive Belt Tension - Check Surge Brake Actuator - Grease (BC1000XL EU) Park Brake Lever - Grease (BC1000XL EU) Cooling System - Flush Valve Lash Clearance - Adjust...
-
Page 71: Knife/Drum Maintenance
WARNING: Wear gloves when working with the cutter drum knives. Serious cutting injuries will result if contact is made with the knives while removing or installing them. IMPORTANT: Always remove and replace knives as sets. Chipper balance can be affected if matched knives are not kept together. BC1000XL Brush Chipper 3_01 Knife/Drum Maintenance 61-1... - Page 72 NOTE: Rotate by pushing on the outside surface of the drum. Lock cutter drum. Step 7: Step 8: Repeat Steps 2–5 to remove both knives. Step 9: Clean and inspect the drum, mounting surfaces, knives, and bolts as per the instructions that follow. 61-2 Knife/Drum Maintenance BC1000XL Brush Chipper 3_01...
-
Page 73: Knife Inspection
If any light appears between the knife surface and the straightedge, this indicates that the knife is distorted, and the knife must be replaced. Step 3: Turn straightedge perpendicular to mounting holes and repeat Step 2. BC1000XL Brush Chipper Knife/Drum Maintenance 61-3... -
Page 74: Bolt Inspection
IMPORTANT: When installing a new or sharpened set of knives, discard the existing mounting bolts and use new Vermeer-approved bolts. Repeated reuse of the bolts will decrease their clamping capacity each time the bolts are torqued. Inadequate clamping of the knives will cause the knives to loosen and fail. -
Page 75: Knife Mount Surface Inspection
Thoroughly clean and inspect the following: • Knife Mount Surface — Remove all wood chips and other material from the mounting pocket area (1). • Replaceable Thread Bars (2) — Replace when threads become worn, distorted, or damaged. BC1000XL Brush Chipper Knife/Drum Maintenance 61-5... -
Page 76: Drum Inspection
Cutter Drum Surface — Inspect drum surface (5) for cracks that may begin at the pockets and migrate • outward. If any drum damage or cracks are found, contact an authorized independent Vermeer dealer. 61-6 Knife/Drum Maintenance BC1000XL Brush Chipper... -
Page 77: Knife Sharpening
IMPORTANT: The knives are double-edged and have a minimum usable size of 2.00" (51 mm) measured from the centerline of the bolt holes to the knife edge. Do not use a side of a knife that measures less than this. 2.00" (51 mm) (Minimum) 30° BC1000XL Brush Chipper Knife/Drum Maintenance 61-7... -
Page 78: Knife Installation
ONLY ONCE when rotating knife to its second cutting edge. Failure to replace bolts can cause knife/ drum separation resulting in death or serious injury, and machine damage. Also, to prevent bolt damage, do not use a power or impact tool to install knife/drum bolts. 61-8 Knife/Drum Maintenance BC1000XL Brush Chipper... - Page 79 NOTE: The cutter drum access door will not fully close until the drum lock pin is released and stored. Step 10: Adjust shear bar (refer to the Maintenance Manual, Maintenance As Required section, “Shear Bar - Adjust”). BC1000XL Brush Chipper 3_06 Knife/Drum Maintenance 61-9...
- Page 80 This page intentionally left blank.
- Page 81 Engine Monitors - Deluxe Gauge Panel (Option), 20-2 Battery Burns/Explosion - Avoid, 21-2 Engine, 21-1 BC1000XL EU - Attach to Towing Vehicle, 30-8 Equipping the Towing Vehicle, 30-1 Bolt Inspection, 61-4 Breakaway on Hydraulic Surge Brake (Option) - Reset, 30-9...
- Page 82 Operating a Ball Coupler Hitch, 30-6 Operating the Brush Chipper, 50-1 T–U Operator Qualifications, 40-1 Throttle/Cutter Engage, 20-4 Tongue Length - Adjust (BC1000XL Only), 30-2 Transporting the Brush Chipper, 30-1 Personal Protection, 40-2 Upper Feed Control Bar, 50-3 Plugs or Stalls, 50-8...
- Page 83 TOC; Safety, p. 10-1; Controls, pp. 20-5–8; Transport, p. 30- Updated feed roller and shear bar terminology; o3_06 10/09 9; Operating, p. 50-2–8; Remove Plugs, pp. 51-1,3; Maint. misc. updates. Intervals, pp. 60-2,4; Knife/Drum Maint., p. 61-9; Index. BC1000XL Brush Chipper...
- Page 84 California to cause cancer, birth California to cause cancer, birth defects, or other reproductive harm. defects, and other reproductive harm. Copyright © 2004–2007, 2009. All rights reserved. Vermeer Manufacturing Company 1210 Vermeer Road East, P.O. Box 200 Pella, Iowa 50219-0200...
Need help?
Do you have a question about the BC1000XL and is the answer not in the manual?
Questions and answers