Vermeer BC1000XL Maintenance Manual
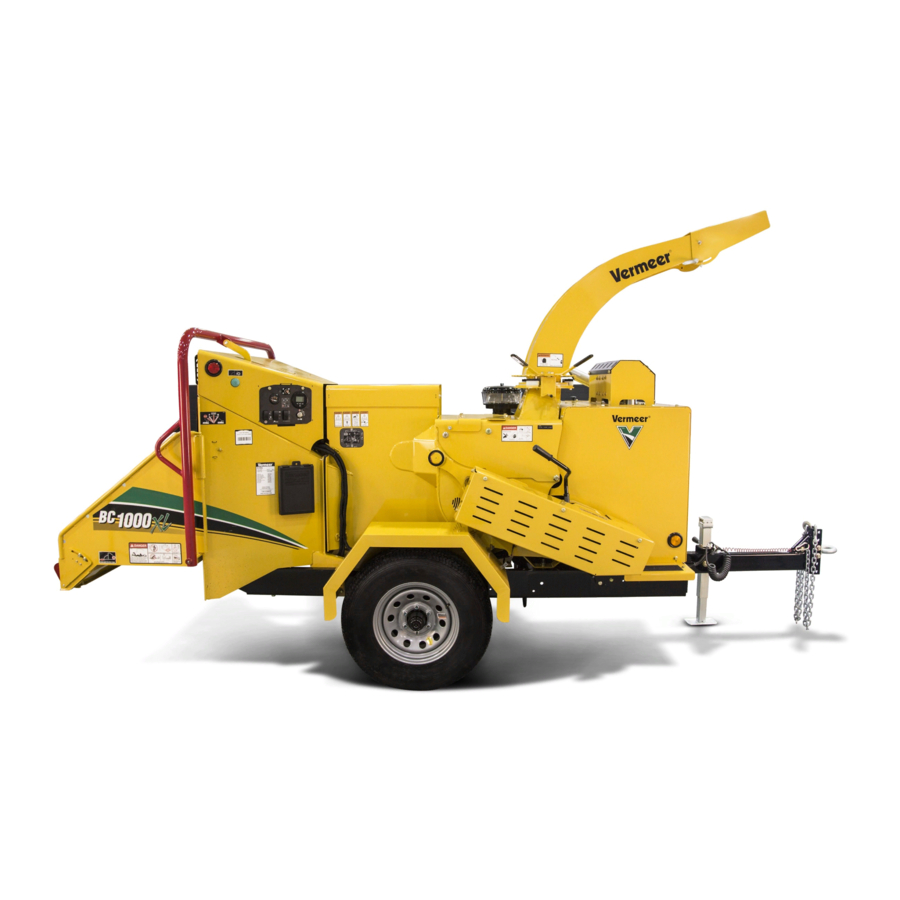
Brush chipper
Hide thumbs
Also See for BC1000XL:
- Operator's manual (84 pages) ,
- Operating steps and safety practices (7 pages) ,
- Rental center manual (2 pages)

Related Manuals for Vermeer BC1000XL


Summary of Contents for Vermeer BC1000XL
- Page 1 BC1000XL Brush Chipper Maintenance Manual BC1000XL_m3_06 Serial No. 5001 - Order No. 105400V87...
- Page 2 This manual explains the proper operation of your machine. Study and understand these instructions thoroughly before operating or maintaining the machine. Failure to do so could result in personal injury or equipment damage. Consult your Vermeer dealer if you do not understand the instructions in this manual, or need additional information.
- Page 3 Service instructions are contained in a separate service manual. Service manuals can be obtained by contacting your Vermeer dealer. If you are considering servicing the machine without the assistance of a Vermeer dealer, remember this is a complex machine which often involves complex service procedures.
- Page 4 This page intentionally left blank.
-
Page 5: Table Of Contents
Engine Maintenance ......25-1 (BC1000XL Only) ......25-20 Engine Cooling System - Check . - Page 6 Cutter Drum Drive Belt - Replace....45-12 Lower Feed Stop Bar Switch - Adjust - BC1000XL ..35-5 Lower Feed Stop Bar Switch - Adjust - BC1000XL 1000 Service Hours .
- Page 7 Lubricants ........70-1 Machine Specifications ......70-2 BC1000XL Brush Chipper Maintenance Table of Contents iii...
- Page 8 This page intentionally left blank.
-
Page 9: Safety Messages
This is the safety alert symbol. This symbol is used in combination with an exclamation mark or other symbols to alert you to the potential for bodily injury or death. WARNING: Read Operator’s Manual and safety signs before operating machine. BC1000XL Brush Chipper Maintenance 3_06 Safety Messages 10-1... - Page 10 Feed base of limb or branch first. Use wood object to push short material. Wear gloves with narrow tight-fitting Keep away from rotating feed roller and cuffs. blades. WARNING: Wear personal protective equipment. Dress properly. 10-2 Safety Messages BC1000XL Brush Chipper Maintenance 3_06...
- Page 11 WARNING: Failure to follow any of the preceding safety instructions or those that follow within this manual, could result in serious injury or death. This machine is to be used only for those purposes for which it was intended as explained in the Operator’s Manual. BC1000XL Brush Chipper Maintenance Safety Messages 10-3...
- Page 12 This page intentionally left blank.
-
Page 13: Shutdown Procedure
IMPORTANT: The cutter drum will continue to turn for a short time after the engine has stopped. Step 7: Remove ignition key. Close and latch feed table. Step 8: BC1000XL Brush Chipper Maintenance 3_01 Shutdown Procedure 15-1... -
Page 14: Quick Stop Procedure
Turn ignition to the OFF position while cutter drum clutch is still engaged. Step 2: Wait for cutter drum and belt to stop. Fully disengage cutter drum. Step 3: Shut Off Engine with Clutch Engaged 15-2 Shutdown Procedure BC1000XL Brush Chipper Maintenance... -
Page 15: Service Hours
Purge with grease ..............two fittings To ensure grease will be evenly distributed in bearing: Disengage cutter drum belt drive. Step 1: Step 2: Shut off engine. Step 3: Grease when cutter drum has almost stopped turning. BC1000XL Brush Chipper Maintenance 5 Service Hours 20-1... -
Page 16: Clutch Arm Bearings - Grease
REASE Applies to Serial No. 10311 and up, or as equipped. Purge with grease ..............two fittings Visually inspect grease that is purged from bearings and if contaminated, grease more often. 20-2 5 Service Hours BC1000XL Brush Chipper Maintenance 3_06... -
Page 17: 10 Service Hours
NGINE AINTENANCE • Inspect engine drive belt. • Inspect for leaks. Check engine oil level. • Refer to the Engine Operation Manual supplied with the machine for instructions. BC1000XL Brush Chipper Maintenance 3_01 3_04 10 Service Hours 25-1... -
Page 18: Engine Cooling System - Check
Fill to within 1/2" (13 mm) of the bottom of the fill pipe with a low-silicate (ethylene glycol) antifreeze and clean water mixture. NOTE: Never add pure antifreeze to a cooling system. Vermeer recommends using a 50/50 mixture. Never use high-silicate antifreeze or antifreeze that is higher than a 60/40 mixture. -
Page 19: Hydraulic Fluid Level - Check
Specifications section, “Lubricants,” page 70-1, for fluid requirements. Push cap back on until fully seated. The hydraulic fluid must be free of bubbles. Bubbles indicate trapped air in the hydraulic system. BC1000XL Brush Chipper Maintenance 3_01 10 Service Hours 25-3... -
Page 20: Fuel Tank - Fill
Shut off engine before refueling. No flame. No smoking. Fill tank at the end of each day to prevent condensation. Do not fill tank to the very top; leave room for expansion. Fill Cap 25-4 10 Service Hours BC1000XL Brush Chipper Maintenance 3_04 3_01... -
Page 21: Air Cleaner Restriction Indicator - Check
Basic Gauge Panel (Indicator located on air cleaner housing) Clean or replace filter element immediately when the red indicator is visible. Reset indicator by pressing button (3) on end of the restriction indicator. BC1000XL Brush Chipper Maintenance 3_04 10 Service Hours 25-5... -
Page 22: Fuel/Water Separator - Drain
Check that brake fluid reservoir is at least half full. If not, fill to 3/8" below top of reservoir. Use DOT-3 heavy duty hydraulic brake fluid. Step 3: Install filler cap and cylinder cap. 25-6 10 Service Hours BC1000XL Brush Chipper Maintenance 3_04 3_03... -
Page 23: Hydraulic Surge Brakes (Option) - Check Function
Repeat Steps 2–6 for the other brake. Fill master cylinder with brake fluid. Step 8: Actuator travel of over 1" (2.5 cm) by front roller path indicates a need to adjust the brakes. BC1000XL Brush Chipper Maintenance 3_04 10 Service Hours 25-7... -
Page 24: Brake System - Check
Trailer plug for corrosion • While adjusting brakes, check magnets for wear or shorting. • • Automatic brake controller; refer to “Automatic Brake Controller with Manual Override (Option) - Check,” page 40-7. 25-8 10 Service Hours BC1000XL Brush Chipper Maintenance 3_04 3_03... -
Page 25: Discharge Chute Rotation Gear - Lubricate
Refer to “Cutter Drum Drive Belt Tension - Check/Adjust,” page 30-1. HEEL ORQUE NITIAL HECK Check wheel lug nut torque after first 10 service hours, and every 100 service hours thereafter. Torque to 90–120 ft-lb (122–163 Nm). BC1000XL Brush Chipper Maintenance 3_03 10 Service Hours 25-9... -
Page 26: Pintle Hitch - Check
Stop engine, wait for drum to stop, then open access cover. Performing the following maintenance procedures will aid in reducing the possibility of the knives becoming loose, failing, and being ejected from the machine. 25-10 10 Service Hours BC1000XL Brush Chipper Maintenance 3_03... -
Page 27: Knife Removal
Step 1: Shutdown Procedure, page 15-1. Remove six bolts and washers, and open cutter drum access door (1). Step 2: WARNING: Knives can cut off hand. Lock drum before servicing knives. BC1000XL Brush Chipper Maintenance 3_03 10 Service Hours 25-11... - Page 28 Lock cutter drum. Step 7: Step 8: Repeat Steps 2–5 to remove both knives. Step 9: Clean and inspect drum, mounting surfaces, knives, and bolts as per the instructions that follow. 25-12 10 Service Hours BC1000XL Brush Chipper Maintenance 3_03...
-
Page 29: Knife Inspection
Step 3: Turn straightedge perpendicular to mounting holes and repeat Step 2. BC1000XL Brush Chipper Maintenance 3_03 10 Service Hours 25-13... -
Page 30: Bolt Inspection
When installing a new or sharpened set of knives, discard the existing mounting bolts and use new Vermeer-approved bolts. Repeated reuse of the bolts will decrease their clamping capacity each time the bolts are torqued. Inadequate clamping of the knives will cause the knives to loosen and fail. -
Page 31: Knife Mount Surface Inspection
Knife Mount Surface — Remove all wood chips and other material from the mounting pocket area (1). • Replaceable Thread Bars (2) — Replace when threads become worn, distorted, or damaged. BC1000XL Brush Chipper Maintenance 3_03 10 Service Hours 25-15... -
Page 32: Drum Inspection
Cutter Drum Surface — Inspect drum surface (5) for cracks that may begin at the pockets and migrate outward. If any drum damage or cracks are found, contact an authorized independent Vermeer dealer. 25-16 10 Service Hours BC1000XL Brush Chipper Maintenance... -
Page 33: Knife Sharpening
IMPORTANT: The knives are double-edged and have a minimum usable size of 2.00" (51 mm) measured from the centerline of the bolt holes to the knife edge. Do not use a side of a knife that measures less than this. 2.00″ (51 mm) (Minimum) 30° 40° BC1000XL Brush Chipper Maintenance 10 Service Hours 25-17... -
Page 34: Knife Installation
WARNING: Overtightened bolts can cause knife distortion, allowing wood to pack under the knife. Distorted knives can crack and fail resulting in death or serious injury, and machine damage. Use a straightedge and check all knives for distortion; discard any that are distorted. 25-18 10 Service Hours BC1000XL Brush Chipper Maintenance... -
Page 35: Feed Roller Controls - Check
Step 2: Place Upper Feed Control Bar (1) in FORWARD, and momentarily push Hold-to-Run Button (2) to start feed roller. Conduct the following feed roller Step 3: control checks. BC1000XL Brush Chipper Maintenance 3_06 3_05 3_03 10 Service Hours 25-19... -
Page 36: Upper Feed Control Bar
Pull Upper Feed Control Bar (1) to rear STOP position. Feed roller rotation must stop and Rear Warning Light (3) must flash quickly. If feed roller does not stop, contact your authorized independent Vermeer dealer for corrections and repairs before using the machine. -
Page 37: Lower Feed Stop Bar
Lower Feed Stop Bar (BC1000XL Only) Select NORMAL sensitivity with Lower Feed Stop Bar Step 1: Sensitivity Switch (1). Step 2: Push Lower Feed Stop Bar (2) forward approximately 3/4" (2 cm). NOTE: The feed roller rotation must stop and the Rear Warning Light (3) flash quickly. - Page 38 This page intentionally left blank.
-
Page 39: 50 Service Hours
HECK DJUST IMPORTANT: On machines with serial numbers below 10311, Vermeer recommends replacing the clutch arm with arm assembly containing greasable bearings, Vermeer Industrial Kit No. IK001380. Proper tension is important for longer life and proper machine operation. If the belts are excessively tight, drive sheave bearing failure or cutter drum bearing failure may occur. -
Page 40: Cutter Drum Drive Belt Tension - Check/Adjust
NOTE: One nut is left-hand thread. Rotate turnbuckle to adjust the center Step 2: distance between the bolts: Longer distance loosens belt tension Shorter distance tightens belt tension Older models Newer models 30-2 50 Service Hours BC1000XL Brush Chipper Maintenance 3_06... -
Page 41: Cutter Drum Drive Belt Tension - Check/Adjust (S/N 10311 - Up) Or With Kit Ik001380
125 ft-lb (169.5 Nm) force using torque wrench. Step 4: Tighten jam nuts (5) on turnbuckle assembly. Step 5: When belt tension is correct, install shield and secure with three bolts. BC1000XL Brush Chipper Maintenance 3_06 3_04 3_01 50 Service Hours 30-3... -
Page 42: Belt Drive Pivots - Grease
RIVE IVOTS REASE Remove three bolts (1) and open belt shield. Apply one shot of grease to two fittings (2). RIVE OINTS REASE One shot ........one fitting 30-4 50 Service Hours BC1000XL Brush Chipper Maintenance 3_04... -
Page 43: Feed Roller Arm Pivots - Grease
OLLER IVOTS REASE One shot ......two fittings BC1000XL Brush Chipper Maintenance 3_04 50 Service Hours 30-5... -
Page 44: Muffler - Clean
Start engine and move throttle from slow to fast several times to clear Step 3: carbon from the spark arrestor. Follow Step 4: Shutdown Procedure, page 15-1. Step 5: Replace plug and close hood. 30-6 50 Service Hours BC1000XL Brush Chipper Maintenance... -
Page 45: 100 Service Hours
Support any loose wires hanging under machine frame. Tow Chains and Slip Hooks - Check for damage and replace if necessary. Refer to “Towing Chain - Replace,” 60-7, and “Slip Hook - Replace,” page page 60-6. BC1000XL Brush Chipper Maintenance 3_04 100 Service Hours 35-1... -
Page 46: Safety Signs - Maintain
40°F (5°C). The mounting surface must also be clean and dry. • When replacing a machine component with a sign attached, replace sign also. • Replacement signs can be purchased from your Vermeer equipment dealer. YDRAULIC YSTEM HECK WARNING: Pressurized fluid can penetrate body tissue and result in serious injury or death. -
Page 47: Hydraulic Tank - Keep Clean
Check tires for correct pressure. Inflate standard tire to 65 psi (4.5 bar); inflate optional flotation tire to 80 psi (5.5 bar). Check tires and rims for damage. • • Check lug nuts for tightness. Torque to 90–120 ft-lb (122–163 Nm). BC1000XL Brush Chipper Maintenance 100 Service Hours 35-3... -
Page 48: Upper Feed Control Bar Force - Adjust
Step 5: Step 6: Replace Upper Feed Control Bar shield (2). IMPORTANT: When the Upper Feed Control Bar is placed in the stop position, as shown, the feed roller must not turn. 35-4 100 Service Hours BC1000XL Brush Chipper Maintenance 3_04... - Page 49 Lower Feed Stop Bar at (7) and table edge at (8) and hold in place. Move switch adjustment plate (9) 102° Step 7: back until feed stop bar indicator light (4) flashes. Tighten bolts (1). Step 8: BC1000XL Brush Chipper Maintenance 3_04 100 Service Hours 35-5...
-
Page 50: Lower Feed Stop Bar Switch - Adjust - Bc1000Xl European
Start engine. Step 4: Press Hold-to-Run Button (5) to reset flashing amber light (6). Step 5: Place a compression spring scale (Vermeer P/N 160637001) at one end of Lower Feed Stop Bar. 35-6 100 Service Hours BC1000XL Brush Chipper Maintenance 3_04... - Page 51 Lower Feed Stop Bar (amber light begins to flash). Step 7: Tighten jam nut (7). Install switch covers (4). Step 8: Repeat Steps 6–8 on other end of Lower Feed Stop Bar. BC1000XL Brush Chipper Maintenance 100 Service Hours 35-7...
- Page 52 This page intentionally left blank.
-
Page 53: 250 Service Hours
• • Initial valve lash clearance adjustment Refer to the Engine Operation Manual supplied with the machine for instructions. UBRICATE Apply a light coat of oil to the inside tube (1). 3_04 BC1000XL Brush Chipper Maintenance 250 Service Hours 40-1... -
Page 54: Cutter Belt Wear - Check
1/32" (1 mm) or if belt contacts the bottom of the sheave (see lower illustration), replace the sheave and/or belt. Refer to the 500 Service Hours section, “Cutter Drum Drive Belt - Replace,” page 45-12. belt or sheave worn out 3_04 40-2 250 Service Hours BC1000XL Brush Chipper Maintenance... -
Page 55: Fuel Filters - Replace
Flush fitting and fuel strainer until they are free of debris. Step 5: Screw fuel strainer back into fitting and then onto the bolt. Install bolt (2) in fuel filter. Install fuel hose (1). Step 6: 3_06 3_04 BC1000XL Brush Chipper Maintenance 250 Service Hours 40-3... -
Page 56: Corrosion Inhibitors - Add To Coolant
Use a filter wrench to turn the filter counterclockwise and remove. Step 2: Step 3: Clean the filter head surface. Step 4: Apply thin film of oil to gasket of new filter. 3_04 3_01 40-4 250 Service Hours BC1000XL Brush Chipper Maintenance... - Page 57 Check for leaks. Follow Check hydraulic fluid level. Check Step 8: Shutdown Procedure, page 15-1. for leaks around filter. IMPORTANT: If leaks are found, tighten filter only enough to stop the leak. 3_04 BC1000XL Brush Chipper Maintenance 250 Service Hours 40-5...
-
Page 58: Air Cleaner - Replace
Install air cleaner element. Ensure end of the element with a gasket is installed against closed end of air cleaner assembly, and is seated properly. Step 6: Install cover; ensure all fasteners and/or clamps are tight. 3_04 40-6 250 Service Hours BC1000XL Brush Chipper Maintenance... -
Page 59: Automatic Brake Controller With Manual Override (Option) - Check
“Less”......decreases trailer braking NOTE: This adjustment does not affect maximum braking capacity of the trailer brakes. 3_04 BC1000XL Brush Chipper Maintenance 250 Service Hours 40-7... -
Page 60: Brakes - Adjust
The adjuster screw may be turned with a screwdriver blade or with a standard brake adjusting tool. Install dirt plug. Step 4: Remove blocking and jack. Step 5: Step 6: Repeat Steps 1–5 for the other brake. 3_04 40-8 250 Service Hours BC1000XL Brush Chipper Maintenance... -
Page 61: 500 Service Hours
UBRICATE AND NSPECT • Oil threads of bolt (1) and loop nut (2). • Check ribs around bolt hole (3) for wear. Replace any missing, broken, damaged, or worn parts. • BC1000XL Brush Chipper Maintenance 3_04 3_02 500 Service Hours 45-1... -
Page 62: Pintle Hitch - Inspect/Maintain
AINTAIN Inspect pintle hitch for wear and damage. If wear exceeds 1/8" (3 mm) from the original surface profile, replace the pintle ring (1). Contact your Vermeer dealer for approved parts. Torque mounting bolts to 80 ft-lb (108 Nm). 45-2 500 Service Hours... -
Page 63: Hydraulic Fluid - Change
NOTE: The hydraulic fluid must be free of bubbles. Bubbles are trapped air that is entering the hydraulic system. Step 7: Operate hydraulic system for a few minutes. Step 8: Shut off engine and check fluid level. BC1000XL Brush Chipper Maintenance 3_04 3_03 500 Service Hours 45-3... -
Page 64: Hydraulic Fluid Strainer - Inspect
Rinse strainer with clean solvent or thinner. Use compressed air to blow it clean. Step 4: Use a suitable thread sealant such as Loctite Vibra-Seal on fitting and strainer. Step 5: Install and tighten strainer and fitting. 45-4 500 Service Hours BC1000XL Brush Chipper Maintenance 3_03 3_04... -
Page 65: Wheel Bearings - Check
If a generous amount of grease is on the bearing and in the housing, and if the grease is soft, the grease will not need changing. If the lubricant is caked and the bearings seem dry, the bearings should be repacked. BC1000XL Brush Chipper Maintenance 3_03 500 Service Hours 45-5... -
Page 66: Bearings - Repack
Install outside bearing (5). Slide brake hub (2) onto the spindle. Step 11: NOTE: When sliding hub onto spindle, watch that the outside bearing (5) does not work out of hub. 45-6 500 Service Hours BC1000XL Brush Chipper Maintenance 3_03... - Page 67 Mount wheel and rim. Step 15: Step 16: Install lug nuts. Torque to 80 ft-lb (110 Nm). Step 17: Remove blocks and lower jack. Step 18: Repeat procedure for the other wheel. BC1000XL Brush Chipper Maintenance 3_03 500 Service Hours 45-7...
-
Page 68: Battery Electrolyte Levels And Terminals - Check
Keep out of reach of children. • Do not short across battery terminals or allow tools to short from battery terminals to frame. Do not jump-start or charge a battery with frozen electrolyte. • 45-8 500 Service Hours BC1000XL Brush Chipper Maintenance... - Page 69 Step 4: Remove negative (-) cable (C) first. Then remove positive (+) cable (D). Remove battery. Step 5: If equipped, remove cell caps (E). Step 6: Fill each cell with distilled water. BC1000XL Brush Chipper Maintenance 3_04 500 Service Hours 45-9...
- Page 70 Step 10: Install hold-down bracket (B) using the two bolts (A) and tighten. Step 11: Replace panel and bolts. Step 12: Close and latch engine hood. 45-10 500 Service Hours BC1000XL Brush Chipper Maintenance 3_04...
-
Page 71: Battery Terminals - Clean
Do not operate brush chipper without barrier curtains (1) in place. The barrier curtains help reduce the amount of chipped material that may be ejected toward the operator. Replace curtains every 500 hours, more often if damaged or missing. BC1000XL Brush Chipper Maintenance 500 Service Hours 45-11... -
Page 72: Cutter Drum Drive Belt - Replace
Place lever (2) in ENGAGE. Step 8: Adjust belt tension. Refer to 50 Service Hours section, “Cutter Drum Drive Belt Tension - Check/ Adjust,” page 30-1. Step 9: Close shield and replace bolts. 45-12 500 Service Hours BC1000XL Brush Chipper Maintenance... -
Page 73: 1000 Service Hours
40-6. Replace engine fan and alternator belts. Refer to the Engine Operation Manual supplied with the machine for instructions. (BC1000XL EU O URGE RAKE CTUATOR REASE Four shots..................two fittings BC1000XL Brush Chipper Maintenance 3_01 3_04 1000 Service Hours 50-1... -
Page 74: Park Brake Lever - Grease (Bc1000Xl Eu Only)
(BC1000XL EU O RAKE EVER REASE Two shots ..................one fitting 50-2 1000 Service Hours BC1000XL Brush Chipper Maintenance 3_04 3_01... -
Page 75: Cooling System - Drain And Clean
Fill radiator. System capacity is approximately 14 qt (13 L). Recheck radiator after engine has cooled overnight. Fill as necessary. Continue to check each time machine is run and cooled off until radiator remains full. BC1000XL Brush Chipper Maintenance 1000 Service Hours 50-3... - Page 76 This page intentionally left blank.
-
Page 77: 2000 Service Hours
Shield eyes and face. WARNING: Battery post, terminals, and related accessories contain lead and lead compounds, chemicals known to the state of California to cause cancer and reproductive harm. Wash hands after handling. BC1000XL Brush Chipper Maintenance 3_04 2000 Service Hours 55-1... - Page 78 Install positive (+) cable (6) first. Then install the negative (-) cable (5) and tighten. Check that the red cap over the positive cable clamp is properly installed. Step 10: Install panel and four bolts. Close engine hood and latch. Step 11: 55-2 2000 Service Hours BC1000XL Brush Chipper Maintenance 3_04...
-
Page 79: Maintenance As Required
Check rubber evacuator valve on bottom of filter housing for cracks or tears. NIFE OUNTING URFACE NSPECT Inspect knife-mounting surface for dirt or debris. Refer to “Knife Mount Surface Inspection,” page 25-15. BC1000XL Brush Chipper Maintenance 3_04 3_01 As Required 60-1... -
Page 80: Shear Bar - Check/Adjust
Replace when there is no adjustment left to move the shear bar toward the knives on the cutter drum. WARNING: Wear gloves when working with the cutter drum knives. Serious cutting injuries will result if contact is made with the knives while adjusting the shear bar. 60-2 As Required BC1000XL Brush Chipper Maintenance 3_06... - Page 81 Finish tightening the bolts by turning them 1/6 of a turn (5) or to 210 ft-lb (285 Nm). 1/8" (3.2 mm) Step 6: Close access door and replace bolts and knife gauge. BC1000XL Brush Chipper Maintenance 3_06 As Required 60-3...
-
Page 82: Shear Bar - Replace
NOTE: This is most easily done with an impact wrench. 1/8" (3.2 mm) NOTE: Shear bar can be turned over and also reversed, giving four edges to use. Shear bar can also be reground for additional life. 60-4 As Required BC1000XL Brush Chipper Maintenance 3_06... -
Page 83: Highway Lights - Replace
IGHWAY IGHTS EPLACE Highway lights include two rear fixtures (1) on the BC1000XL, and five rear fixtures (2) on the BC1000XL EU machine. NOTE: Light fixtures have non-serviceable bulbs. Replace complete assembly. Remove entire light fixture by pushing it out of the grommet from back to front;... -
Page 84: Smartfeed System Fuse - Replace
If the fuse needs to be replaced, often an electrical problem may exist. Contact your Vermeer dealer. EPLACE Replace towing chain slip hook if the latch is damaged, missing, or does not snap closed to the hook. -
Page 85: Towing Chain - Replace
Remove battery and store inside where the temperature will not drop below 32°F (0°C). Check fluid level and charge fully. Check battery every 30 days and charge if necessary. • Lubricate all grease points on the machine. BC1000XL Brush Chipper Maintenance 3_01 As Required 60-7... -
Page 86: Removing From Storage
Refer to the Engine Operation Manual supplied with machine for restoring engine to operation. • Lubricate all grease points on the machine. • Refer to 10 Service Hours, page 25-1, for additional service points. 60-8 As Required BC1000XL Brush Chipper Maintenance... -
Page 87: Troubleshooting
Clean or replace air filter. Low engine compression See your Vermeer dealer. Engine too hot See your Vermeer dealer. Dirty injectors See your Vermeer dealer. Air leak between tank and pump Repair leak. BC1000XL Brush Chipper Maintenance 3_06 Troubleshooting 65-1... -
Page 88: Drive System
CAUSE SOLUTION Manual Feed - Slow down feed roller. Engine stalls when chipping Feed rate too high SmartFeed System - See your Vermeer dealer. Discharging shredded material Knives are dull Replace or sharpen knives. Fed material moves back Knives are dull Replace or sharpen knives. -
Page 89: Electrical System
Alternator not charging See your Vermeer dealer. Loose or corroded battery cables Clean and tighten battery cables. Low battery charge Loose or glazed alternator belt Tighten or replace belt. Defective battery cell Replace battery. BC1000XL Brush Chipper Maintenance Troubleshooting 65-3... -
Page 90: Hydraulic System
Cold hydraulic fluid Let machine warm up and operate hydraulic system. Low hydraulic fluid level Add hydraulic fluid. Oil foams Water in hydraulic fluid Change fluid. Air leak between tank and pump Repair leak. 65-4 Troubleshooting BC1000XL Brush Chipper Maintenance... -
Page 91: Specifications
Engine must be level when checking engine oil. Phillips: Type HG; ISO STD or equivalent If equipped with biodegradable hydraulic fluid, use Vermeer Biodegradable Hydraulic Fluid, Mobil EAL-224H, or equivalent. Hydraulic Fluid Use caution not to get dirt or other contaminants into the system(s) Vermeer Ultra VMF Hydraulic 7 gal (26.5 L) -
Page 92: Machine Specifications
215 ft-lb (291.5 Nm) at 1600 rpm Battery Size Group 31,12 volts Cold cranking amps 660 CCA Hydraulic System System pressure 2,500 psi (172 bar) maximum Tank capacity 7 gal (26.5 L) System flow 2.7 gpm (10 L/min) 70-2 Specifications BC1000XL Brush Chipper Maintenance 3_06... - Page 93 Tires Standard - size ST225/75R15 LRD Standard tire pressure 65 psi (4.5 bar) Flotation tire (option) - size LT245/75R16 LRE Flotation tire pressure 80 psi (5.5 bar) Lug nut torque 90–120 ft-lb (122–163 Nm) BC1000XL Brush Chipper Maintenance Specifications 70-3...
- Page 94 This page intentionally left blank.
- Page 95 Engine Cooling System - Check, 25-2 Brake Controller - Adjust, 40-7 Engine Maintenance, 25-1, 35-1, 40-1, 45-1, 50-1, 55-1 Brake System - Check, 25-8 Engine Spark Arrestor - Clean Out, 30-1 Brakes - Adjust, 40-8 BC1000XL Brush Chipper Maintenance Index 3_06 3_04...
- Page 96 Knife-Mounting Surface - Inspect, 60-1 Fuel Tank - Fill, 25-4 Fuel/Water Separator - Drain, 25-6 Lower Feed Stop Bar Switch - Adjust - BC1000XL European, 35-6 Lower Feed Stop Bar Switch - Adjust - BC1000XL, 35-5 Lower Feed Stop Bar, 25-21...
- Page 97 Wheel Bearings - Check, 45-5 SmartFeed System Fuse - Replace, 60-6 Wheel Lug Nut Torque - Initial Check, 25-9 Specifications, 70-1 Stopping the Machine, 15-1 Storage, 60-7, 60-8 Surge Brake Actuator - Grease (BC1000XL EU Only), 50-1 BC1000XL Brush Chipper Maintenance 3_06 3_04 Index...
- Page 98 This page intentionally left blank.
- Page 99 Added new clutch arm and fuel strainer maint. m3_06 10/09 Hrs., p. 30-1–3; 100 Hrs., p. 35-2; 250 Hrs., p. 40-3; As Reqd., Updated feed roller and shear bar terminology; p. 60-2–5; Troubleshooting, p. 65-1,2; Specs., p. 70-1,2; Index. misc. updates. BC1000XL Brush Chipper Maintenance Revision History...
- Page 100 California to cause cancer, birth California to cause cancer, birth defects, or other reproductive harm. defects, and other reproductive harm. Copyright © 2004–2007, 2009. All rights reserved. Vermeer Manufacturing Company 1210 Vermeer Road East, P.O. Box 200 Pella, Iowa 50219-0200...
Need help?
Do you have a question about the BC1000XL and is the answer not in the manual?
Questions and answers
Tengo el problema de que el tambor no gira porque se le ha quedado material por debajo