
Related Manuals for Potensic Dreamer 4K


Summary of Contents for Potensic Dreamer 4K
- Page 1 DANGER Only suitable for age 14+ Dreamer 4K User Manual Email: support@potensic.com(USA) Tel: 858-222-1895 Email: support.ca@potensic.com(CA) Web: www.potensic.com Email: support.uk@potensic.com(UK) FB: www.facebook.com/Potensic...
-
Page 2: Table Of Contents
Contents ......................... 01 Introduction ...................... 02 Daily maintenance ......................... 03 Packing list ......................04 Product diagram 05 Installation ........................Propeller ........................Camera ......................Micro SD card ......................Mobile phone clip 06 Charging ...................... Drone smart battery ....................Remote control charging 07 Remote control .................... -
Page 3: Introduction
Introduction Thank you for purchasing Potensic Dreamer 4K drone. Please read the user manual carefully and keep it for future reference. If you need help, please contact our support team(support@poten- sic.com)with your order number from Amazon or official website. Potensic Dreamer 4K is equipped with an intelligent flight control system, which can realize functions such as point of interest, intelligent follow me, and automatic return home. -
Page 4: Product Diagram
Product diagram... -
Page 5: Installation
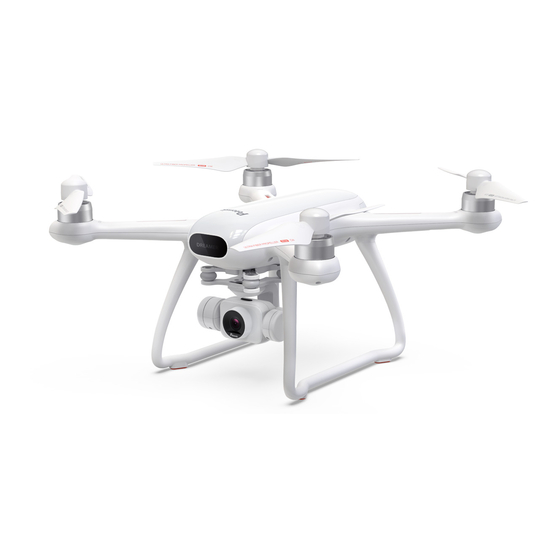
Camera Blade Damping plate Dreamer LED light Front footlight Tripod Motor Rear footlight Smart battery Power indicator Power switch (after short pressing once, long press for 2 seconds to switch on/off the drone) Installation 1. Propeller When installing blades, pay attention to the Press down the blade in alignment with the "CW"... -
Page 6: Camera
2. Camera The camera has been installed at the factory and can be used after power on. But if you are replacing the camera and install it, the installation steps are as follows: 1. Install the damping ball of the camera onto the damping plate. 2. -
Page 7: Mobile Phone Clip
4. Mobile phone clip Pull the remote control pull-out board, and then put into a mobile phone. The size range of clamping: 97-178mm. Charging 1. Drone smart battery Please return in time and charge the battery when the drone in low battery. Connect the adapter correctly as shown in the figure to charge. -
Page 8: Remote Control Charging
Installation and removal of battery Insert the battery in the right direction as shown in Figure 1. Press the left and right sides of the battery and pull out the battery as shown in Figure 2. Figure 1 Figure 2 Note: When hearing a "click"... -
Page 9: Remote Control
Remote control 1. Remote control details Dreamer 4K uses a 2.4G remote control with complete function buttons. It can support various operations and settings of the drone and camera within a maximum communication distance of 800m, and can display real-time HD pictures on the mobile device through PotensicPro app. The remote control has a built-in rechargeable lithium battery, which can work continuously for up to 4 hours. -
Page 10: Remote Control Mode
Push the left stick up or down to control the take off or landing of the drone; push the left stick left or right to control the drone to turn left or right; short press the middle key of the left stick to switch the GPS mode or altitude mode of the drone. - Page 11 2. Remote control mode There are two remote control modes of this product, i.e. mode 1 and mode 2. Mode 1 is the default setting. Mode 1 Right stick Forward Left stick Upward Downward Backward Turn counterclockwise Turn clockwise Move Left Move right Mode 2 Forward...
-
Page 12: Drone App "Potensicpro
(Note: please keep your mobile phone connected with network during registration) WiFi connection steps Turn on drone- turns on WiFi setting on mobile phone - select WiFi account "Potensic D1_XXXXXX "- enter WiFi password "12345678"- click to connect. Note:... - Page 13 Drone flight mode Dreamer 4K adopts a new generation of Potensic flight control, which supports the following two flight modes. GPS mode: GPS module can realize precise hovering, path flight and other intelligent flight modes. In the GPS mode, when GPS signal is no less than 6, it can be used for precise positioning;...
- Page 14 Intelligent flight mode settings Vertical flight speed Flight height One-click return Distance One-click take-off / one-click landing Horizontal flight speed Altitude ball / map Intelligent flight mode Headless mode / head-hold Follow me mode Virtual control stick Lock / unlock GPS mode/ Altitude mode Circling mode Waypoint mode...
-
Page 15: Connection And Calibration
Setting interface More Main controller settings Remote control settings About smart batteries Calibration settings Flight precautions 1. Check if the remote control, smart flight battery and mobile equipment are fully charged. 2. Check if the device body is complete and the propeller is installed correctly. 3. -
Page 16: Connect Drone With Phone App
Figure 2. Connect drone with phone app First, turn on the drone, enter the mobile phone setting option, search "Potensic D1_XXXXXX" in the WiFi setting and connect. Then, start the mobile phone APP "PotensicPro" to enter the operation interface. -
Page 17: Function Details
Figure Figure Function details Safe flight tips The beginner mode is in default. Under the beginner mode: A. The flight distance is limited to 0 ~ 30m B. The flight altitude is limited to 0-30m 1. Take-off and Landing Take-off mode 1: push the left and right stick inwards 45 degrees(Picture 1) at the same time, unlock the drone or click the App unlock icon , and push up the throttle lever. -
Page 18: Return To Home (Rth)
Figure 1 2. Return to home (RTH) The smart return to home (RTH) function enables the drone to return to the last recorded take-off point. This function shall be achieved in GPS mode. There are three types of return to home (RTH): one-click return / smart low-power return / no signal return. -
Page 19: Headless Mode
3. Headless mode Note: Before takeoff, the operator's position is very important for "headless mode". Therefore, after entering "headless mode", please do not change operator's direction to avoid direction confusion or unnecessary loss and damage. Do not change the direction of operation The direction of operator before take-off Do not change the direction of operation How to start headless mode... -
Page 20: Circle Flight Mode
4. Circle flight mode Click the icon to enter circle flight mode Under normal flight conditions (flight altitude is greater than 5m), the drone will take the current position as the circling center by default, with a radius of 10m and a speed of 3m/s, and circle clockwise. -
Page 21: Waypoint Flight Mode
6. Waypoint flight mode Click the icon to start the waypoint flight mode. Set multiple position points on the map, and the drone will fly in the order of set points(15 point at most). The map will identify the serial number of each point. The normal flight altitude is more than 5m, and the GPS signal is no less than 6. - Page 22 Camera Image sensor: 1 / 3-inch Sony CMOS; 8 megapixel Lens: FOV 78° Picture maximum resolution: 3840*2160 Photo shooting mode: single photo Lens rotatable range: + 0° - 90° Video resolution: 2.7K( 2688 x 1512 30p) Maximum video storage code stream: 20 Mbps Supporting file system: FAT32 Image format: JPEG Video format: MP4 (AVC / H.264)
- Page 23 Charger Rated input: 100-240V ~ 50/60Hz, 1A Rated output: 17.5V, 1.5A Rated power: 26.25 W Frequent Q&A Problem Solution Device is not connected properly Restart drone and remote control. Cannot unlock Check if the drone is geomagnetic calibrated. Check the surrounding environment of the Cannot find GPS signal or GPS level drops drone to see if there is high-frequency signal interference.
-
Page 24: Drone Indicator Introduction
Drone Indicator Introduction Light status Normal status From 2s Time Low power Four lights flash Continue cycling... of the drone slowly continuously Binding status Four lights flash Continue cycling... / power on quickly continuously Four lights are Altitude mode Continue cycling... solid on The front light is solid on... - Page 25 Safety precautions: Keep away from people when flying the remote-controlled drone. Improper assembly or damage to the body, poor electronic control, and unfamiliar operation may lead to unpredictable accidents such as drone damage or personal injury. Operators should pay attention to flight safety, and understand responsibilities caused by negligence.
-
Page 26: Warnings And Tips
• Connect the device to a socket with a different circuit from the receiver. • Seek assistance from a dealer or an experienced wireless / video technician. ● The manufacturer shall not be responsible for any wireless and video interference caused by illegal modification of the equipment. - Page 27 23. Keep the model away from ears! Misuse may cause hearing loss. 24. Please use a mirco USB 5V charger instead of higher voltage charger. 25. In order to ensure requirements for magnetic environment of the aviation radio station. The use of model remote control shall be stopped as required within periods and areas of radio control orders by relevant national departments.
Need help?
Do you have a question about the Dreamer 4K and is the answer not in the manual?
Questions and answers