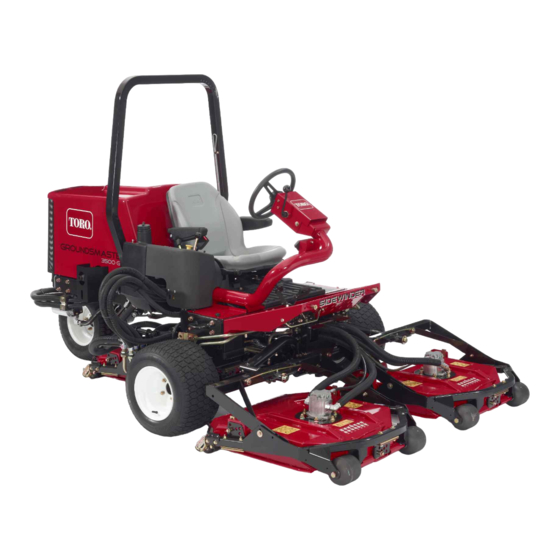
Toro Groundsmaster 3500-G Operator's Manual
Hide thumbs
Also See for Groundsmaster 3500-G:
- Operator's manual (56 pages) ,
- Operator's manual (16 pages) ,
- Operator's manual (52 pages)

Related Manuals for Toro Groundsmaster 3500-G


Summary of Contents for Toro Groundsmaster 3500-G
- Page 1 Form No. 3426-701 Rev A Groundsmaster ® 3500-G Rotary Mower Model No. 30809—Serial No. 402700001 and Up *3426-701* A Register at www.Toro.com. Original Instructions (EN)
- Page 2 Section 4442 or 4443 to use or operate the engine on additional information, contact an Authorized Service any forest-covered, brush-covered, or grass-covered Dealer or Toro Customer Service and have the model land unless the engine is equipped with a spark and serial numbers of your product ready.
-
Page 3: Table Of Contents
Contents Inspecting the Fuel Lines and Connections..........40 Electrical System Maintenance ......41 Safety ............... 4 Electrical System Safety ........41 General Safety ........... 4 Servicing the Battery......... 41 Safety and Instructional Decals ......5 Servicing the Fuses .......... 41 Setup ................ -
Page 4: Safety
Safety This machine has been designed in accordance with ANSI B71.4-2017 and meets these standards when the appropriate ballast is added. General Safety This product is capable of amputating hands and feet and of throwing objects. Always follow all safety instructions to avoid serious personal injury. -
Page 5: Safety And Instructional Decals
Safety and Instructional Decals Safety decals and instructions are easily visible to the operator and are located near any area of potential danger. Replace any decal that is damaged or missing. decal93-6681 93-6681 1. Cutting/dismemberment—hazard, fan-stay away from decal99-3444 moving parts. 99-3444 1. - Page 6 decalbatterysymbols Battery Symbols Some or all of these symbols are on your battery. 1. Explosion hazard 6. Keep bystanders away from the battery. 2. No fire, open flame, or 7. Wear eye protection; decal117-4764 117-4764 smoking explosive gases can cause blindness and other 1.
- Page 7 decal121-3627 121–3627 1. Height-of-cut settings decal121-3623 121-3623 1. Warning—read the Operator's Manual; do not operate the 5. Thrown object hazard—keep bystanders away. machine unless you have received training. 2. Warning—read the Operator's Manual before towing the 6. Warning—wear hearing protection. machine.
- Page 8 decal121-3620 121-3620 1. PTO—Disengage 7. Lock 2. PTO—Engage 8. Engine—Shut off 3. Move the cutting units right. 9. Engine—Run 4. Move the cutting units left. 10. Engine—Start 5. Lower the cutting units. 11. Fast 6. Raise the cutting units. 12. Slow decal138-6977 138-6977 1.
-
Page 9: Setup
Setup Loose Parts Use the chart below to verify that all parts have been shipped. Procedure Description Qty. Activate, charge, and connect the – No parts required battery. – No parts required Add the rear wheel ballast. Inclinometer Check the angle indicator. –... - Page 10 Slowly add electrolyte to each cell until the level is up to the fill ring. Coat both battery connections with Grafo 112X (skin over) grease (Toro Part No. 505-47), Important: Do not overfill the battery. petroleum jelly, or light grease to prevent Electrolyte will overflow onto other parts of corrosion.
-
Page 11: Adding The Rear Wheel Ballast
Adding the Rear Wheel Ballast No Parts Required Procedure g031569 Figure 5 Add 22.6 kg (50 lb) of calcium-chloride ballast to the 1. Angle indicator rear wheel. Important: If a puncture occurs in a tire If the inclinometer does not read 0°, move the containing calcium chloride, remove the machine machine to a different location to obtain a 0°... -
Page 12: Adjusting The Lift Arms
Back off the jam nut on the cylinder (Figure Adjusting the Lift Arms No Parts Required Procedure Start the engine, raise the cutting units, and ensure that the clearance between each lift arm and the floor-plate bracket is 5 to 8 mm (0.18 to g031573 Figure 8 0.32 inch) as shown in... -
Page 13: Adjusting The Carrier Frame
g031575 Figure 10 1. Rear cylinder 2. Adjusting nut Grasp the cylinder rod close to the nut with a pliers and rag, and rotate the rod. g031576 Raise the cutting units and check the Figure 11 clearance. 3. Rear cutting unit mounting 1. -
Page 14: Adjusting The Roller Scraper
bench set 6 mm (1/4 inch) above that of the reels Repeat steps for each side adjustment. cutting in the same area. Tighten the 3 bolts to 41 N∙m (30 ft-lb). Important: Access to the rear cutting units is Note: Tighten the front bolt first. -
Page 15: Installing The Mulching Baffle
Baffle Optional No Parts Required Procedure Contact your authorized Toro distributor for the correct mulching baffle. Thoroughly clean debris from the mounting holes on the rear wall and left wall of the chamber. Install the mulching baffle in the rear opening... - Page 16 Traction Pedals Press the forward traction pedal to move forward. Press reverse traction pedal to move backward or to assist in stopping when moving forward (Figure 16). Note: Allow the pedal to move or move it to the position to stop the machine. NEUTRAL Tilt-Steering Lever Pull the tilt-steering lever back to tilt the steering wheel...
- Page 17 Lift-Lock Lever Note: The cutting units do not drop unless the engine is running. Use the lift-lock lever to secure the lift switch (Figure Move the lever to the right or left to move the cutting 17) to the position when performing RAISE DECK units in the same direction.
-
Page 18: Specifications
Specifications Note: Specifications and design are subject to change without notice. g192077 Figure 20 Description Figure 20 Dimension or Weight reference Overall width in mowing position 192 cm (75-1/2 inches) Overall width in transport position 184 cm (72-1/2 inches) Height 197 cm (77-1/2 inches) Wheel-base width 146 cm (57-1/2 inches) -
Page 19: Attachments/Accessories
Specifications and design are subject to change without notice. Attachments/Accessories A selection of Toro approved attachments and accessories is available for use with the machine to enhance and expand its capabilities. Contact your Authorized Service Dealer or authorized Toro distributor or go to www.Toro.com for a list of all approved attachments and accessories. - Page 20 performance problems and/or engine damage DANGER which may not be covered under warranty. In certain conditions, fuel is extremely – Do not use gasoline containing methanol. flammable and highly explosive. A fire or explosion from fuel can burn you and –...
-
Page 21: Checking The Engine-Oil Level
Selecting a Blade DANGER In certain conditions during fueling, Standard Combination Sail static electricity can be released causing a spark which can ignite the fuel vapors. This blade was designed to provide excellent lift and A fire or explosion from fuel can burn you dispersion in almost any condition. -
Page 22: Choosing Accessories
Choosing Accessories Optional Equipment Configurations Angle Sail Blade High-Lift, Parallel-Sail Mulching Baffle Roller Scraper Blade (Do not use with the mulching baffle) Grass Cutting: 1.9 to 4.4 Recommended in most May work well in light or Has been shown to Use it whenever the cm (3/4 to 1-3/4 inches) applications... -
Page 23: During Operation
• Use accessories, attachments, and replacement • Use your full attention while operating the parts approved by Toro only. machine. Do not engage in any activity that causes distractions; otherwise, injury or property Rollover Protection System damage may occur. -
Page 24: Starting The Engine
Important: operation. Operating the machine on any slope To prevent overheating of the requires extra caution. starter motor, do not engage the starter for longer than 15 seconds. After 10 seconds of • Evaluate the site conditions to determine if the continuous cranking, wait 60 seconds before slope is safe for machine operation, including engaging the starter motor again. -
Page 25: Standard-Control Module (Scm)
Standard-Control Module (SCM) The Standard-Control Module (SCM) is a potted electronic device produced in a 1-size-fits-all configuration. The module uses solid state and mechanical components to monitor and control standard, electrical features required for safe product operation. The module-monitor input includes neutral, parking brake, PTO, start, backlap, and high temperature. - Page 26 Each row (across) in the logic chart below identifies input and output requirements for each specific product function. Product functions are listed in the left column. Symbols identify specific circuit condition, including energized to voltage, closed to ground, and open to ground. Inputs Outputs Function...
-
Page 27: Operating Tips
Practice moving forward and reverse, and starting and stopping the machine. To stop the machine, Refer to the After-cut Appearance Troubleshooting remove your foot from the traction pedal and let it Guide available at www.Toro.com. return to N or press down on the reverse EUTRAL pedal. -
Page 28: After Operation
with the mulching baffles installed, the after-cut the operator’s position, Allow the machine to cool appearance may deteriorate and the observed before adjusting, servicing, cleaning, or storing it. power to cut the turf increases. The mulching • Clean grass and debris from the cutting units, baffles also perform well for shredding leaves in mufflers, and engine compartment to help prevent the fall. -
Page 29: Pushing Or Towing The Machine
Pushing or Towing the Machine In an emergency, you can move the machine a very short distance by actuating the bypass valve in the hydraulic pump and pushing or towing the machine. Important: Do not push or tow the machine faster than 3 to 4.8 km/h (2 to 3 mph). -
Page 30: Maintenance
Download a free copy of the electrical or • If possible, do not perform maintenance while the hydraulic schematic by visiting www.Toro.com and engine is running. Keep away from moving parts. searching for your machine from the Manuals link on the home page. - Page 31 Maintenance Service Maintenance Procedure Interval • Grease the bearings in the rear axle. Every 500 hours • If you are not using the recommended hydraulic fluid or have ever filled the reservoir with an alternative fluid, change the hydraulic fluid. •...
-
Page 32: Daily Maintenance Checklist
Daily Maintenance Checklist Duplicate this page for routine use. For the week of: Maintenance Check Item Monday Tuesday Wednesday Thursday Friday Saturday Sunday Check the safety-interlock operation. Check the brake operation. Check the engine-oil level. Check the cooling-system-fluid level. Check the air filter, dust cup, and burp valve. -
Page 33: Pre-Maintenance Procedures
Pre-Maintenance Using the Cutting Unit Service Latch Procedures When servicing the cutting units, use the service latch to prevent injury. Removing the Hood Center the cutting unit sidewinder with the Unlatch and raise the hood. traction unit. Remove the hairpin cotter securing the hood Raise the cutting unit to the transport position. -
Page 34: Lubrication
Lubrication Greasing the Bearings and Bushings Service Interval: Every 50 hours—Lubricate all of the bearings and bushings. Every 500 hours/Yearly (whichever comes first) The machine has grease fittings that you must lubricate regularly with No. 2 lithium grease. Also, lubricate the machine immediately after every washing. - Page 35 g008901 Figure 34 • g008898 Mow/transport slide (Figure Figure 31 • 2 left, front lift-arm pivots and lift cylinder (Figure g008902 Figure 35 • Belt-tension pivot (Figure g008899 Figure 32 • 2 right, front lift-arm pivots and lift cylinder (Figure g008903 Figure 36 •...
- Page 36 Important: Do not lubricate the Sidewinder cross tube. The bearing blocks are self-lubricated. g008904 Figure 37 • 2 (per cutting unit) cutting unit spindle-shaft bearings (Figure Note: You can use either fitting, whichever is more accessible. Pump grease into the fitting until a small amount appears at the bottom of the spindle housing (under the cutting unit).
-
Page 37: Engine Maintenance
Crankcase capacity is approximately 3.3 L (3.5 US qt) with the filter. Note: Toro Premium Engine oil is available from your distributor in either 15W-40 or 10W-30 viscosity. See the parts catalog for part numbers. Note:... -
Page 38: Changing The Engine Oil And Filter
g016095 Figure 41 Position the machine on a level surface and open the hood. Remove the dipstick (Figure 42) and wipe it with a clean rag. Insert the dipstick into the tube and g002373 make sure that it is seated fully. Remove the Figure 43 dipstick and check the level-of-the-oil. -
Page 39: Replacing The Spark Plugs
g005588 Figure 46 1. Air gap at 0.81 mm (0.032 inch) Set the air gap on each plug between the center and side electrodes to 0.81 mm (0.032 inch). Install the correctly-gapped spark plugs and tighten them to 24.5 to 29 N-m (18 to 22 ft-lb). If you cannot use a torque wrench, tighten the g021414 Figure 45... -
Page 40: Fuel System Maintenance
Fuel System Maintenance Replacing the Fuel-Pump Filter Service Interval: Every 400 hours DANGER In certain conditions, fuel is extremely g021236 Figure 48 flammable and highly explosive. A fire or explosion from fuel can burn you and others 1. Fuel pump 3. -
Page 41: Electrical System Maintenance
Electrical System WARNING Incorrectly routing the battery cable could Maintenance damage the tractor and cables, causing sparks. Sparks can cause the battery gases to explode, resulting in personal injury. Electrical System Safety • Always disconnect the negative (black) • Disconnect the battery before repairing the battery cable before disconnecting the machine. -
Page 42: Drive System Maintenance
Adjusting the Traction Drive System Drive for Neutral Maintenance If the machine moves when the traction pedal is in the position, adjust the traction cam. EUTRAL Checking the Tire Pressure Park the machine on a level surface, lower the Service Interval: Before each use or daily cutting units, engage the parking brake, shut off the engine, and remove the key from the ignition switch. -
Page 43: Cooling System Maintenance
Cooling System Tighten the locknut securing the adjustment. Shut off the engine. Maintenance Remove the support blocks and lower the machine to the shop floor. Test drive the machine to ensure that it does not move when Cooling System Safety the traction pedal is in neutral. -
Page 44: Cleaning The Cooling System
Cleaning the Cooling The capacity of the cooling system is approximately 5.7 L (6 US qt). System CAUTION Service Interval: Before each use or daily If the engine has been running, the Raise the hood. pressurized, hot coolant can escape and Clean the engine area thoroughly of all debris. -
Page 45: Brake Maintenance
Brake Maintenance Belt Maintenance Adjusting the Parking Servicing the Engine Belts Brake Service Interval: After the first 10 hours—Check the condition and tension of all belts. Service Interval: Every 200 hours—Check the Every 100 hours—Check the condition and parking-brake adjustment. tension of all belts. -
Page 46: Controls System Maintenance
Replacing the Hydrostat-Drive Belt Controls System Insert a nut driver or small piece of tubing onto Maintenance the end of the belt-tensioning spring. CAUTION Adjusting the Throttle The spring that tensions the belt is under Position the throttle lever rearward so that it a heavy load, and releasing the tension of stops against the control-panel slot. -
Page 47: Hydraulic System Maintenance
Biodegradable Hydraulic Fluid is the only synthetic biodegradable fluid approved by Toro. This fluid is compatible with the elastomers used in Toro hydraulic systems and is suitable for a wide-range of temperature conditions. This fluid is compatible with conventional mineral oils, but for... - Page 48 If the fluid becomes contaminated, contact your local conventional fluid. The oil is available in 19 L (5 Toro distributor to flush the system. Contaminated US gallons) pails or 208 L (55 US gallons) drums fluid looks milky or black.
- Page 49 (sooner if the service interval indicator is in the red zone). Use a genuine Toro replacement filter (Part No. 86-3010). Important: Using any other filter may void the warranty on some components.
-
Page 50: Cutting Unit Maintenance
Cutting Unit Maintenance Remove the lynch pin or retaining nut securing the cutting unit carrier frame to the lift-arm-pivot (Figure 63). Separating the Cutting Units from the Traction Unit Perform the pre-maintenance procedure; refer Maintenance Safety (page 30). Remove the hydraulic-motor-mounting screws and disconnect and remove the hydraulic motor from the cutting unit (Figure... -
Page 51: Servicing The Front Roller
Inspecting the Blade Plane Remove the hydraulic motor from the cutting unit and remove the cutting unit from the traction unit. Note: Use a hoist (or a minimum of 2 people) and place the cutting unit on a flat table. Mark an end of the blade with a paint pen or marker. - Page 52 Removing the Front Roller Note: If there is a gap over 1.5 mm (0.06 inch), install enough 5/8-inch diameter washers to take Remove the roller-mounting bolt (Figure 66). up the slop. Torque the mounting bolt to 108 N∙m (80 ft-lb). g031649 Figure 66 1.
-
Page 53: Blade Maintenance
Removing and Installing the Cutting-Unit Blade(s) Replace the blade if it hits a solid object, is out of balance, or is bent. Always use genuine Toro replacement blades to ensure safety and optimum performance. Park the machine on a level surface, raise the... - Page 54 7 seconds, the braking valve needs edge is higher than the heel, the blade is bent or adjustment; contact your authorized Toro distributor warped and must be replaced. for assistance in making this adjustment.
-
Page 55: Storage
Storage Coat the cable terminals and battery posts with Grafo 112X skin-over grease (Toro Part No. 505-47) or petroleum jelly to prevent Storage Safety corrosion. Store the battery on the shelf or on the • Shut off the engine, remove the key (if equipped), machine in a cool area. - Page 56 Preparing the Engine Secure all fuel system fittings. Thoroughly clean and service the air cleaner Drain the engine oil from the oil pan and replace assembly. the drain plug. Seal the air cleaner inlet and the exhaust outlet Remove and discard the oil filter. Install a new with weatherproof tape.
- Page 57 Notes:...
- Page 58 Notes:...
- Page 59 While the exposure from Toro products may be negligible or well within the “no significant risk” range, out of an abundance of caution, Toro has elected to provide the Prop 65 warnings. Moreover, if Toro does not provide these warnings, it could be sued by the State of California or by private parties seeking to enforce Prop 65 and subject to substantial penalties.
- Page 60 Countries Other than the United States or Canada Customers who have purchased Toro products exported from the United States or Canada should contact their Toro Distributor (Dealer) to obtain guarantee policies for your country, province, or state. If for any reason you are dissatisfied with your Distributor's service or have difficulty obtaining guarantee information, contact your Authorized Toro Service Center.