Advertisement
Quick Links
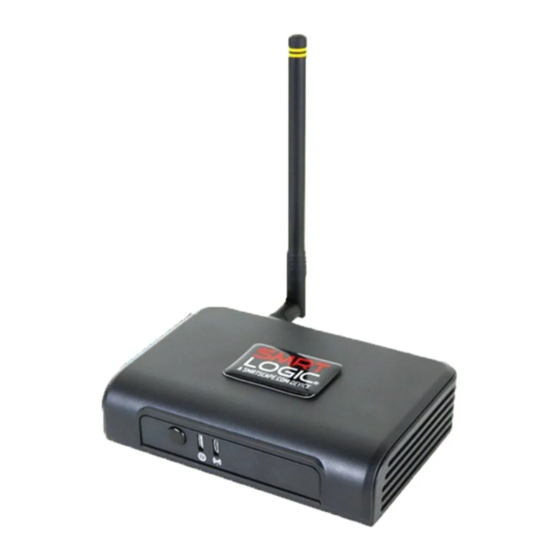
SMRT Logic
Models: SMRT-T, SMRT-I, A-SMRT-T
Thank you for purchasing SMRT Logic™, a
SMRT
™ device. The SMRT Logic Wireless
SCAPE
Gateway allows users to intuitively set up and
control their irrigation and lighting systems from
anywhere they have internet access via the
SMRT
website or app.
SCAPE
Quick Start
1
Connect Hardware
1. Connect Ethernet cable from your internet router
or switch to the port on the back of the SMRT
Logic.
2. Plug in the AC adapter.
3. SMRT Logic lights flash. Left LED should
eventually settle on solid green.
Solid Green -
Red
-
Green
-
Additional LED color related information can be
found in the Troubleshooting section of this
document.
™
Quick Reference Setup Guide
connected to the internet
no internet connection
flashes when data is
transferring to and from
the controller.
Table of Contents
Quick Start
Reference
Specifications
Troubleshooting
Addendum:
Adding Supported Controllers
2
Register
1. Next, register your SMRT Logic.
Point browser to www.smrtscape.com.
2. Click Get Started.
3. Fill out all fields, agree to the SMRT
and our privacy policy, and press Sign Up.
4. A verification email will be sent to the entered
e-mail address. Click the verification link in the
e-mail. You will be taken to the SMRT
website.
Click the Complete Registration button.
5. You will be taken to the sign in page.
Enter e-mail address and password
then click Sign In.
1
5
13
13
14
terms
SCAPE
SCAPE
1
Advertisement

Related Manuals for Toro SMRT Logic


Summary of Contents for Toro SMRT Logic
- Page 1 SCAPE and our privacy policy, and press Sign Up. 2. Plug in the AC adapter. 3. SMRT Logic lights flash. Left LED should eventually settle on solid green. 4. A verification email will be sent to the entered Solid Green - connected to the internet e-mail address.
- Page 2 Setting a Location Add Location 4. It is possible to add a location image if After signing in, add the location of the SMRT Logic. desired. a) Click the Add 1. Click Add Location. Location Image icon. b) Click Select Image.
- Page 3 Adding a Controller Setting an Irrigation Schedule Add Controller to the SMRT Logic Schedules Multiple irrigation / lighting controllers can be added 1. Click the Schedules tab. to a location. Controllers must be added one at a Click the white gear icon for the desired time.
- Page 4 5. Repeat step 4 to add all desired zones to the selected schedule. Below, we have added 4 zones to the schedule. 6. Next, set runtimes for each zone. Simply click inside the Runtime field and click the up and down arrows to adjust the runtime for hours and minutes.
- Page 5 Reference Hello menu Manage Account The Hello menu has To manage the account, click the Locations tab two options: then the gear icon next to the My Account name. 1. Profile The User Profile allows the user to change account information. The Manage Account screen: •...
- Page 6 Gateways It is possible add, edit, and delete SMRT Logic gateways using the SMRT website / app. SCAPE It is possible to add, edit, and delete Locations Add a Gateway: within your SMRT account. SCAPE Adding a gateway is detailed on page 2.
- Page 7 Alerts.Click the bell icon to read controller alerts. Alerts include low battery notifications and more. Running Mode. Click the power icon to change the Running Mode of the controller. • Auto On – The controller is functioning normally. • OFF (until manually turned on): No The Irrigation Dashboard allows the operator to irrigation will occur until the controller is set quickly view the status of the controller, such as...
- Page 8 Start Times: It is possible to have up to four start Advanced Settings: • Monthly Percentage Adjustment: times per schedule. This allows the user to set water runtimes based • Activate a start time: Click the check box next to on the zone runtime for the entire year.
- Page 9 • Irritrol Rain Dial • Irritrol KD II • Irritrol Total Control • Irritrol Kwik Dial • Toro TMC-424 • Toro TMC-212 • Irritrol MC-E • Toro Custom Command • Toro EVOLUTION Ag Edit Controller: Click the gear icon beneath the desired controller.
- Page 10 Edit Controller Controller Information: Review and adjust the controller’s sensor information, such as rain or soil The Edit Irrigation Controller screen allows the sensor information and settings. operator to edit a variety of controller settings: Advanced • Get Controller Configuration: Retrieve the latest configuration settings from the controller.
- Page 11 Edit Scene (screenshot below) From this screen, it is possible to: • edit the scene Name • edit the scene Description The SMRTscape.com website / app has a default • add a Scene Image if desired daily Scene lighting schedule from dusk until 10pm. •...
- Page 12 Click Yes at the confirmation prompt. Controller PIN Setup For a Climate Logic controller: The SMRT Logic PIN must match the PIN entered in Go to MENU►REMOTE. the EVOLUTION controller or Climate Logic device for For a Climate Logic Mini Receiver (CL-MR): the system to operate.
-
Page 13: How It Works
Confirm the network is configured to assign IP addresses. If steady orange get an IP address from needed, a SMRT Logic can be manually configured to use the network’s DHCP a static IP address. Refer to Advanced SMRT Logic network server. - Page 14 At the KD2 controller, open the controller and unplug the Mini-Receiver. 3. Location and SMRT Logic Gateway should already be added. Plug the Mini-Receiver back into the controller. You should see text indicating the Mini-Receiver 4.
- Page 15 Notes...
- Page 16 Antenna types not included in this list, having a gain greater than the maximum gain indicated for that type, are strictly prohibited for use with this device. ©2019 The Toro Company Form Number 373-0875 Rev. F...