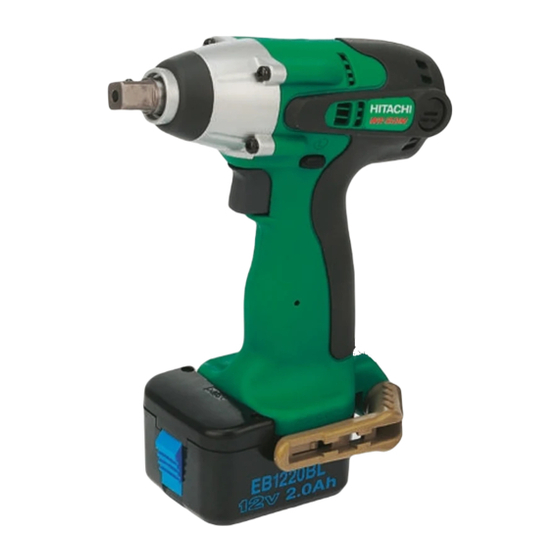
Hitachi WR 12DM Handling Instructions Manual
Cordless, variable speed
Hide thumbs
Also See for WR 12DM:
- Safety instructions and instruction manual (88 pages) ,
- Parts list (4 pages) ,
- User manual (98 pages)
Table of Contents
Advertisement
Quick Links
CORDLESS IMPACT WRENCH
AKKU-SCHLAGSCHRAUBER
CLÉ À CHOC À BATTERIE
AVVITATORE A PERCUSSIONE A BATTERIA
SNOERLOZE SLAGMOERAANZETTER
LLAVE DE IMPACTO A BATERÍA
CHAVE DE IMPACTO A BATERIA
ΜΠΟΥΛΟΝΟΚΛΕΙ∆Ο ΜΠΑΤΑΡΙΑΣ
Variable speed
WR 12DM • WR 9DM
Read through carefully and understand these instructions before use.
Diese Anleitung vor Benutzung des Werkzeugs sorgfältig durchlesen und verstehen.
Lire soigneusement et bien assimiler ces instructions avant usage.
Prima dell'uso leggere attentamente e comprendere queste istruzioni.
Deze gebruiksaanwijzing s.v.p. voor gebruik zorgvuldig doorlezen.
Leer cuidadosamente y comprender estas instrucciones antes del uso.
Antes de usar, leia com cuidado para assimilar estas instruções.
∆ιαβάστε προσεκτικά και κατανοήσετε αυτές τις οδηγίες πριν τη χρήση.
Handling instructions
Bedienungsanleitung
Mode d'emploi
Istruzioni per l'uso
Gebruiksaanwijzing
Instrucciones de manejo
Instruções de uso
Οδηγίες χειρισµού
Advertisement
Table of Contents

Summary of Contents for Hitachi WR 12DM
- Page 1 CHAVE DE IMPACTO A BATERIA ΜΠΟΥΛΟΝΟΚΛΕΙ∆Ο ΜΠΑΤΑΡΙΑΣ Variable speed WR 12DM • WR 9DM Read through carefully and understand these instructions before use. Diese Anleitung vor Benutzung des Werkzeugs sorgfältig durchlesen und verstehen. Lire soigneusement et bien assimiler ces instructions avant usage.
- Page 2 > > >...
- Page 3 11.5mm...
- Page 4 English Deutsch Français Italiano Batteria ricaricabile, 12 V Rechargeable Akkumulator, 12 V Batterie rechargeable, 12 V (Per WR12DM) battery (For WR12DM) (Für WR12DM) 12 V (Pour WR12DM) Batteria ricaricabile, 9.6 V Rechargeable Akkumulator, 9,6 V Batterie rechargeable, battery (For WR9DM) (Für WR9DM) 9,6 V (Pour WR9DM) 9,6 V (Per WR9DM)
-
Page 5: General Operational Precautions
Stop the impact wrench before switching the 17. Use only original HITACHI replacement parts. direction of rotation. Always release the switch 18. Do not use power tools for applications other than and wait for impact wrench to stop before those specified in the Handling Instructions. -
Page 6: Specifications
English 11. Do not use the charger continuously. 16. Do not insert object into the air ventilation slots When one charging is completed, leave the charger of the charger. for about 15 minutes before the next charging of Inserting metal objects or inflammables into the battery. -
Page 7: Optional Accessories
English OPTIONAL ACCESSORIES (Sold separately) 1. Sockets Form B Form C Form D <For WR12DM> Table 1 Square Suitable Bolt Diameter Main Socket Hexagonal head drive Dimensions (mm) Part Name width across Form Code No. High Inch dimensions flats H (mm) S (mm) tension (ordinary) (small) bolts... - Page 8 English <For WR12DM> Table 3 Square Suitable Bolt Diameter Main Socket Hexagonal head drive Dimensions (mm) Part Name Form width across Code No. High Inch dimensions flats H (mm) tension (ordinary) (small) bolts øF S (mm) 12 mm 955138 W5/16" 13 mm 955139 21.5...
-
Page 9: Battery Removal/Installation
English 7. Bit adaptor: WR12DM: Code No. 991476 BATTERY REMOVAL/INSTALLATION WR9DM: Code No. 996144 This is used for tightening small screws (M6 – M8). 1. Battery removal NOTES Hold the hadle tightly and push the battery latch (1) This adaptor is set only on the anvil (drive angle) to remove the battery. -
Page 10: Prior To Operation
English Table 5 Indications of the lamps Before Blinks Lights for 0.5 seconds. Does not light for charging (RED) 0.5 seconds. (off for 0.5 seconds) While Lights Lights continuously charging (RED) Blinks Charging Lights for 0.5 seconds. Does not light for (RED) 0.5 seconds. -
Page 11: How To Use
English 2. Checking the battery The L-side of the push button is pushed to turn the Make sure that the battery is installed firmly. If it bit counterclockwise. (See Fig. 11). (The is at all loose it could come off and cause an marks are engraved on the body.) accident. - Page 12 English 2. Cautions on use of the speed control switch 6. Confirm the tightening torque This switch has a built-in, electronic circuit which The following factors contribute to a reduction of steplessly varies the rotation speed. Consequently, the tightening torque. So confirm the actual when the switch trigger is pulled only slightly (low tightening torque needed by screwing up some speed rotation) and the motor is stopped while...
- Page 13 English <For WR9DM> M10 × 30 M12 × 45 kgf•cm N•m kgf•cm N•m 1000 1000 High tension High tension bolt bolt N•m M8 × 30 kgf•cm High tension bolt Ordinary bolt Ordinary bolt Ordinary bolt Tightening time: sec Tightening time: sec Tightening time: sec (Steel plate thickness (Steel plate thickness...
-
Page 14: Maintenance And Inspection
NOTE: The wire coloured brown must be connected to the When replacing the carbon brush with a new one, be sure to use the Hitachi Carbon Brush Code No. terminal marked with the letter L or coloured red. 999054. Neither core must be connected to the earth terminal. - Page 16 English Nederlands GARANTIEBEWIJS GUARANTEE CERTIFICATE 1 Modelnummer 1 Model No. 2 Serienummer 2 Serial No. 3 Datum van aankoop 3 Date of Purchase 4 Naam en adres van de gebruiker 4 Customer Name and Address 5 Naam en adres van de handelaar 5 Dealer Name and Address (Stempel a.u.b.
- Page 18 Questa dichiarazione è applicabile ai prodotti cui sono applicati i marchi CE. Αυτή η δήλωση ισχύει στο προι ν µε το σηµάδι CE. Hitachi Power Tools Europe GmbH Siemensring 34, 47877 Willich, F. R. Germany 28. 9. 2001 Hitachi Koki Co., Ltd.


