Advertisement
Quick Links
Thank you for purchasing a Sealey product. Manufactured to a high standard, this product will, if used according to these
instructions, and properly maintained, give you years of trouble free performance.
IMPORTANT: PLEASE READ THESE INSTRUCTIONS CAREFULLY. NOTE THE SAFE OPERATIONAL REQUIREMENTS, WARNINGS & CAUTIONS. USE
THE PRODUCT CORRECTLY AND WITH CARE FOR THE PURPOSE FOR WHICH IT IS INTENDED. FAILURE TO DO SO MAY CAUSE DAMAGE AND/OR
PERSONAL INJURY AND WILL INVALIDATE THE WARRANTY. KEEP THESE INSTRUCTIONS SAFE FOR FUTURE USE.
Refer to
instructions
1. SAfETy
1.1
GENERAL SAfETy
‰
WARNING! Ensure Health & Safety, local authority, and general workshop practice regulations are adhered to when using this bench.
9
locate bench in a suitable working area.
9
Keep the work area clean, uncluttered and ensure there is adequate lighting.
‰
WARNING! Use bench on level and solid ground, preferably concrete. Avoid tarmacadam since the bench may sink into the surface.
9
Keep the bench clean and tidy in accordance with good workshop practice.
9
Keep children and unauthorised persons away from the working area.
8
DO NOT use the bench for any purpose other than that for which it is designed.
8
DO NOT undertake work on the bench without the work-piece being adequately secured. Use clamps or a vice (not included) to secure
the work-piece. Available from your Sealey Stockist.
8
DO NOT use the bench outdoors.
8
DO NOT get the bench wet or use in damp or wet locations or areas where there is condensation.
8
DO NOT clean the bench with any solvents which may damage the paint surface or the protective coating on the wooden top.
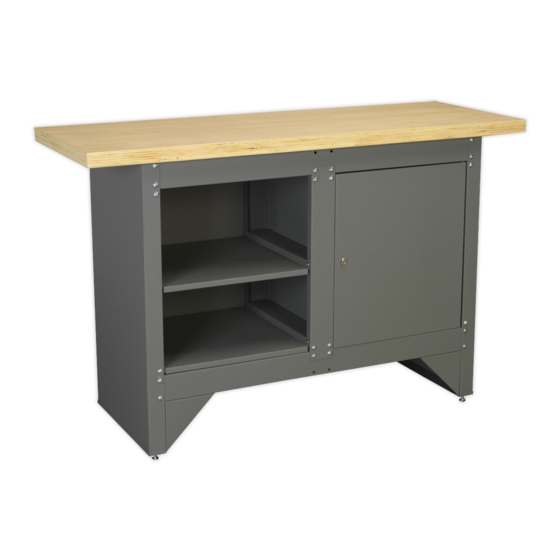
2. INTRODuCTION
Powder coated steel panels with 40mm wood laminate top. Features lockable cupboard with 6-pin tumbler lock and two keys. Supplied flat
packed.
2.1.
Carefully unpack the product and check the contents against the diagram below. Should any items be missing or damaged make
immediate contact with your Sealey dealer.
© Jack Sealey limited
HARDWOOD TOP WORK BENCH
AP2010.V2
Model no:
Original Language Version
AP2010.V2 Issue 1 (HF) 26/06/18
Advertisement

Related Manuals for Sealey AP2010.V2


Summary of Contents for Sealey AP2010.V2
- Page 1 AP2010.V2 Model no: Thank you for purchasing a Sealey product. Manufactured to a high standard, this product will, if used according to these instructions, and properly maintained, give you years of trouble free performance. IMPORTANT: PLEASE READ THESE INSTRUCTIONS CAREFULLY. NOTE THE SAFE OPERATIONAL REQUIREMENTS, WARNINGS & CAUTIONS. USE THE PRODUCT CORRECTLY AND WITH CARE FOR THE PURPOSE FOR WHICH IT IS INTENDED.
- Page 2 Bolt the two back wall panels (F) to the rear of the cabinet using the self tapping screws (o). 3.6. Bolt the two shelf parts (H) into the left hand compartment of the cabinet using the self tapping screws (o). Original Language Version AP2010.V2 Issue 1 (HF) 26/06/18 © Jack Sealey limited...
- Page 3 Put shelf component (K) into place at desired height inside cupboard. Place the finished workbench in its final location and adjust the leg levellers so that the bench is both level and stable in use. Original Language Version AP2010.V2 Issue 1 (HF) 26/06/18 © Jack Sealey limited...
- Page 4 Important: no liability is accepted for incorrect use of this product. Warranty: Guarantee is 12 months from purchase date, proof of which is required for any claim. Sealey Group, Kempson Way, Suffolk Business Park, Bury St Edmunds, Suffolk. IP32 7AR 01284 757500 01284 703534 sales@sealey.co.uk...