Table of Contents
Advertisement
Quick Links
Advertisement
Table of Contents

Related Manuals for Blackfin 212

Summary of Contents for Blackfin 212
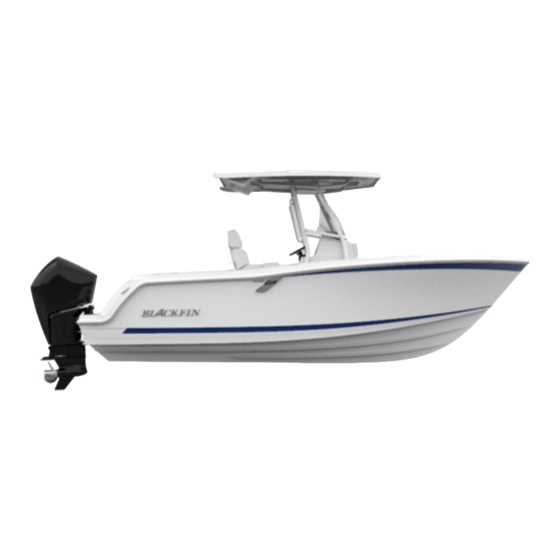
- Page 1 BLACKFIN OWNER’S MANUAL 212 Blackfin...
-
Page 3: Table Of Contents
TABLE OF CONTENTS TABLE OF CONTENTS ......................3 SAFETY INFORMATION ......................7 BOAT INFORMATION ......................9 EXPORT DOCUMENTATION ....................11 INTRODUCTION & IMPORTANT INFORMATION ...............13 OWNER / OPERATOR INFORMATION ..................15 NEW BOAT DELIVERY ......................16 Chapter 1: SAFETY EQUIPMENT 1.1 General ........................17 1.2 Engine Alarms ......................17 1.3 Neutral Safety Switch ....................17 1.4 Engine Stop Switch .....................17... - Page 4 TABLE OF CONTENTS Chapter 4: HELM CONTROL SYSTEMS 4.1 General ........................43 4.2 Engine Throttle & Shift Controls ..................43 4.3 Neutral Safety Switch ....................44 4.4 Engine Power Tilt & Trim ....................44 4.5 Engine Stop Switch .....................45 4.6 Steering System ......................46 4.7 Trim Tabs ........................47 4.8 Control Systems Maintenance ..................48 Chapter 5: FUEL SYSTEM...
- Page 5 TABLE OF CONTENTS Chapter 9: DRAINAGE SYSTEM 9.1 General ........................77 9.2 Cockpit & Deck Drainage ....................77 9.3 Bilge Drainage ......................79 9.4 Hardtop & Helm Seat Base Drains .................80 9.5 Drainage System Maintenance ..................80 Chapter 10: EXTERIOR EQUIPMENT 10.1 Deck Rails & Deck Hardware ..................81 10.2 Anchor &...
- Page 6 MAINTENANCE LOG ......................121 Appendix C: BOATING ACCIDENT REPORT ....................123 Appendix D: FLOAT PLAN ........................127 Appendix E: GLOSSARY OF TERMS ......................129 Appendix F: TROUBLESHOOTING GUIDE ....................135 Appendix G: 212 BLACKFIN SPECIFICATIONS ..................139 Appendix H: OCCUPANT SEATING ......................141 Appendix I: BLACKFIN WARRANTY ......................143...
-
Page 7: Safety Information
SAFETY INFORMATION State of California Safety Requirements WARNING PROPOSITION 65 OPERATING, SERVICING AND MAINTAINING A RECREATIONAL MARINE VESSEL CAN EXPOSE YOU TO CHEMICALS INCLUDING ENGINE EXHAUST, CARBON MONOXIDE, PHTHALATES, AND LEAD, WHICH ARE KNOWN TO THE STATE OF CALIFORNIA TO CAUSE CANCER AND BIRTH DEFECTS OR OTHER REPRODUCTIVE HARM. - Page 8 SAFETY INFORMATION Your Blackfin owner’s manual has been written to include a number of safety instructions to assure the safe operation and maintenance of your boat. These instructions are in the form of DANGER, WARNING and CAUTION statements. The following definitions apply:...
-
Page 9: Boat Information
BOAT INFORMATION Please fill out the following information section and leave it in your Blackfin owner’s manual. This information will be important for you, your dealer and/or Blackfin service personnel to know, if you may need to call them for technical assistance or service. - Page 10 NOTES...
-
Page 11: Export Documentation
To be in compliance with European directives for recreational boats as published by the International Organization for Standardization (ISO) in effect at the time this boat was manufactured, we are providing the following information. Manufacturer: Name SEABRING MARINE INDUSTRIES, INC., d.b.a. Blackfin 1579 SW 18th Street Williston, FL Zip Code: 32696... - Page 12 NOTES...
-
Page 13: Introduction & Important Information
YOUR BOAT IS SAFE FOR YOU AND YOUR PASSENGERS. Your Blackfin Boats Dealer will assist you in filling A LWAY S E X E R C I S E G O O D C O M M O N S E N S E W H E N in the hull number and other data required on your INSTALLING EQUIPMENT AND OPERATING THE BOAT. - Page 14 Blackfin dealer or the dealer fails to remedy the cause of the problem, Service then contact Blackfin within 15 days. It is the All warranty repairs must be performed by an boat owner’s responsibility to deliver the authorized Blackfin Dealer.
-
Page 15: Owner / Operator Information
OWNER / OPERATOR INFORMATION Registration and Numbering web site at www.uscg.mil/mil/forms. For as- sistance or additional instructions, contact your Federal law requires that all undocumented ves- state’s primary boating authority. sels equipped with propulsion machinery be regis- tered in the State of principal use. A certificate of Education number will be issued upon registering the boat. -
Page 16: New Boat Delivery
Blackfin Boats. At the time of new boat delivery, your Blackfin Dealer will ask you to sign the completed Inspection Report at the same time as the Warranty Registrations for the boat and other accessory equipment. By signing these docu- ments, you acknowledge that you have reviewed and understand all information. -
Page 17: Safety Equipment
Control adjustments may be required to correct engine and other options installed by you or your this condition should it persist. See your Blackfin dealer. dealer for necessary control adjustments. Please refer to the Helm Control Systems chapter for more information on the neutral safety switch. -
Page 18: Required Safety Equipment
PFDs should be worn at all times when the vessel is underway. Throwable devices Non-Pyrotechnic Devices must be immediately available for use. All Blackfin Non-Pyrotechnic visual distress signals must be boats must be equipped with at least one Type I,... -
Page 19: Bilge & Fuel Fires
Safety Equipment Electric Distress Light (Night use only) • Refer to the “Federal Requirements And Safety The electric distress light is accepted for Tips For Recreational Boats” pamphlet or contact night use only and must automatically flash the Coast Guard Auxiliary, for information on the the international SOS distress signal. -
Page 20: First Aid
Safety Equipment Typical First Aid Kit 1.7 First Aid In many emergency situations, the Coast Guard can provide assistance in obtaining medical advice It is the operator’s responsibility to be familiar for treatment of serious injuries or illness. If you with the proper first-aid procedures and be able are within VHF range of a Coast Guard Station, to care for minor injuries or illnesses of your pas-... - Page 21 Safety Equipment so that the beacon’s unique distress code can be Additional Equipment to Consider: used to quickly identify the boat and owner. Cell Phone Spare Anchor Fenders Heaving Line Marine Radio Mirror First Aid Kit A marine radio is the most effective method of receiving information and requesting assistance.
-
Page 22: Caution & Warning Labels
The caution and warning labels shown are ex- becomes missing or damaged it must be replaced. amples of the labels that could be on your boat. Immediately contact your dealer or Blackfin Cus- The actual labels and their location could vary on tomer Service for a replacement. -
Page 23: Operation
Chapter 2: OPERATION 2.1 General in accordance with the sea conditions, boat traffic and weather conditions. Before you start the engines on your boat, you should become familiar with the various compo- Remember, it is the operator’s responsibility to nent systems and their operation, and have per- use good common sense and sound judgement in formed a “Pre-Cruise System Check.”... - Page 24 Operation Overtaking Situations When one motor boat is overtaking another mo- tor boat, the boat that is being passed has the right-of-way. The overtaking boat must make the adjustments necessary to provide clearance for a safe passage of the other vessel. The boats should sound the appropriate signals.
- Page 25 Operation...
-
Page 26: Pre-Cruise Check
Operation 2.3 Pre-Cruise Check • Have a tool kit aboard. The kit should include the following basic tools: Before Starting The Engine • Check the weather forecast and sea conditions Hammer Electrician’s tape before leaving the dock. Decide if the planned Screwdrivers Offset screwdrivers cruise can be made safely. -
Page 27: Operating Your Boat
• Alcohol severely reduces the ability to react to • Your Blackfin is a heavy boat that will produce several different signals at once. a large wake at certain speeds. You are • Alcohol makes it difficult to correctly judge responsible for damage and injury caused by speed and distance or track moving objects. -
Page 28: Docking, Anchoring & Mooring
Operation Notice: • If you are going to leave the boat for a long For more instructions on safety, equipment period of time, put the battery main switch in and boat handling, enroll in one of the sev- the “Off” position and close all seacocks. eral free boating courses offered. For infor- •... - Page 29 Operation Maneuvering To The Dock Approach the dock slowly at a 30 to 40 degree angle. Whenever possible, approach against the wind or current. Turn the engine straight & shift to neutral when you feel you have enough momen- After Bow Spring Cleat Stern Cleat tum to reach the dock.
-
Page 30: Controls, Steering Or Propulsion System Failure
Operation Mooring boat directly above the anchor and tie the line to the cleat as tight as possible. The up and down Approach the mooring heading into the wind or movement of the boat will usually loosen the an- current. Shift to neutral when you have just chor within a minute. -
Page 31: Flooding Or Capsizing
THE MOORING CLEATS ON BLACKFIN BOATS ARE NOT boats in the area. DESIGNED OR INTENDED TO BE USED FOR TOWING PURPOSES. -
Page 32: Water Skiing & Wakeboarding
Operation • Make sure to approach the person from the • Be sure that the skier is wearing a proper downwind side and maneuver the boat so the life jacket. A water skier is considered on propellers are well clear of the person in the board the boat and a Coast Guard approved water. - Page 33 Operation • Always make sure to slowly pull the slack out of the ski rope and wait for the OK from the skier before advancing the throttle to ensure the rope is not wrapped around the skier and that the skier is ready. Never advance the throttle until the skier provides the ready signal.
-
Page 34: Trash Disposal
26 feet (7.9 Meters). Important: Your Blackfin is a heavy boat and care must You should never exceed the “U.S. Coast be taken when selecting the trailer. We rec- Guard Maximum Capacities” indicated on the ommend that you use a bunk style trailer capacity plate. - Page 35 STRAKES AND ARE PROVIDING ENOUGH SUPPORT FOR THE HULL. HULL DAMAGE RESULTING FROM IMPROPER Notice: TRAILER SUPPORT IS NOT COVERED BY THE BLACKFIN Make sure your towing vehicle and trailer are WARRANTY. in compliance with all state and local laws.
- Page 36 NOTES...
-
Page 37: Propulsion System
Chapter 3: PROPULSION SYSTEM 3.1 General Your boat is designed to be powered with a 4-cycle outboard motor. 4-cycle outboard engines do not use an oil injection system and are not equipped with a remote oil tank. They have an oil sump in the crankcase that must be kept full of the type of oil recommended by the engine manufacturer. -
Page 38: Engine Lubrication
Propulsion System 3.5 Propellers CAUTION Propellers convert the engine’s power into thrust. They come in a variety of styles, diameters and DO NOT PAINT THE OUTBOARD MOTOR WITH ANTIFOULING pitches. The one that will best suit the needs of PAINTS DESIGNED FOR BOAT HULLS. MANY OF THESE PAINTS CAN CAUSE SEVERE DAMAGE TO THE ENGINE. - Page 39 Outboard engines can be damaged and the engine warranty void if the boat is not propped correctly. Always consult your Blackfin dealer or authorized engine service dealer when making changes to the propel- ler or if the boat does not run near the top recommended RPM.
-
Page 40: Engine Instrumentation
Most Blackfin boats are equipped with a Yamaha CAUTION engine and a Command Link Plus LCD multifunc- ®... - Page 41 Propulsion System Typical Mercury VesselView 4 Tachometer & Engine Monitoring Display Typical Mercury Analog/Digital Gauge Contact your dealer if you need assistance with CAUTION the operation and features for the tachometer in your boat. CONTINUED OPERATION OF AN OVERHEATED ENGINE CAN RESULT IN ENGINE SEIZURE.
- Page 42 Propulsion System Hour Meter The hour meter keeps a record of the operating time for the engine. Tilt/Trim Gauge The tilt/trim gauge monitors the position of the engine. The upper range of the gauge indicates the tilt, which is used for trailering and shallow water operation.
-
Page 43: Helm Control Systems
Chapter 4: HELM CONTROL SYSTEMS 4.1 General The helm controls consist of the following sys- tems: the engine throttle and shift control, the steering system and could include optional trim tab control switches. These systems provide the operator with the ability to control the direction and attitude of the boat from the helm station. -
Page 44: Neutral Safety Switch
Helm Control Systems The engine control and key pad typically have in- the neutral safety switch, make sure the engine is tegrated switches and indicator lights which allow tilted down and move the shift lever to the forward the operator to control all aspects of the boat’s position. -
Page 45: Engine Stop Switch
Helm Control Systems The term “trim” generally refers to the adjust- ment of the outboard within the first 20 range of travel. This is the range used while operating your boat on plane. The term “tilt” is generally used when referring to adjusting the outboard further up for shallow water operation or trailering. -
Page 46: Steering System
Helm Control Systems 4.6 Steering System Power Assist Hydraulic Steering Hydraulic Steering System Most power assisted steering systems on single engines are hydraulic and comprised of two hydraulic circuits: a manual system, which is the control element, and a hydraulic power assist pump, which is the working element. -
Page 47: Trim Tabs
Helm Control Systems Tilt Steering Wheel The steering wheel can be tilted to five different positions by activating the tilt lock lever located on the bottom of the helm station. When the lever is released, it automatically locks the steering wheel at or close to that angle. -
Page 48: Control Systems Maintenance
The steering fluid level should be main- sary. If adjustments become necessary, see your tained at no less than 1/2” below the bottom of the Blackfin dealer. fill plug hole on the hydraulic power assist pump reservoir located in the aft systems compartment. - Page 49 Helm Control Systems Generally, periodic lubrication of all moving parts and connections with a light waterproof grease is in order. Check the hydraulic hoses and fittings for chaffing, rub marks and leaks. Replace if nec- essary. Failure to do so could lead to steering system failure that would result in loss of control.
- Page 50 NOTES...
-
Page 51: Fuel System
Chapter 5: FUEL SYSTEM 5.1 Gasoline Fuel Systems General The Gasoline fuel system used in Blackfin boats is designed to meet or exceed the emission control standards of the U.S. Environmental Protection Agency (EPA) and the requirements of the U.S. -
Page 52: Engine Fuel Delivery System
TO PUMP IT OUT YOURSELF. WATER AND WASTE PUMPS ARE NOT DESIGNED TO PUMP FUEL AND A FIRE OR EXPLOSION Typical Engine Fuel Filter In Aft Systems Compartment COULD RESULT. CONTACT YOUR DEALER OR THE BLACKFIN CUSTOMER SERVICE DEPARTMENT FOR ASSISTANCE IN HAVING THE FUEL PROFESSIONALLY REMOVED. -
Page 53: Fueling Instructions
ETHANOL ALCOHOL BLEND. ANY DAMAGE DONE TO THE FUEL SYSTEM THAT IS THE RESULT OF USE OF A HIGHER is full and maintain this air space. ALCOHOL BLEND IS NOT COVERED BY THE BLACKFIN WARRANTY. REFER TO THE ENGINE MANUFACTURER Notice OWNER’S MANUAL REGARDING FUEL REQUIREMENTS... -
Page 54: Fuel System Maintenance
Fuel System WARNING SPILLED FUEL CAN CAUSE A FIRE OR AN EXPLOSION. MAKE SURE YOU DO NOT SPILL ANY FUEL. IF A SMALL AMOUNT OF FUEL IS SPILLED ON THE FIBERGLASS, USE A CLOTH TO REMOVE THE FUEL AND PROPERLY DISPOSE OF THE CONTAMINATED CLOTH. - Page 55 Fuel System WARNING WARNING BEFORE STARTING THE ENGINE, ALWAYS OPEN ALL AFTER THE FILTER ELEMENT HAS BEEN CHANGED, PRIME HATCHES AND DOORS TO COMPLETELY VENTILATE THE THE FUEL SYSTEM AND CHECK ALL FITTINGS FOR LEAKS BOAT AFTER SERVICING THE FUEL SYSTEM. BEFORE AND AFTER STARTING THE ENGINE FOLLOWING ANY FUEL SYSTEM SERVICE.
- Page 56 NOTES...
-
Page 57: Electrical System
Chapter 6: ELECTRICAL SYSTEM 6.1 Electrical System Overview Your boat is equipped with a 12 volt DC electrical system and could be equipped with an optional 120 volt AC battery charging system. The battery charger draws current from a shore power outlet at dockside. - Page 58 Electrical System CAUTION PROPER FUSE OR BREAKER PROTECTION MUST BE PROVIDED FOR ALL 12 VOLT EQUIPMENT ADDED. DO NOT OVERLOAD THE ACCESSORY CIRCUIT BREAKERS OR OTHER CIRCUITRY THROUGH ADDITIONAL 12 VOLT EQUIPMENT. Battery Switch The battery switch is located in a panel in the port rear of the cockpit.
-
Page 59: Ignition Switch Panel
The following is an overview of key activated igni- tion switch panels commonly installed on Blackfin boats. Your boat may be different depending on the options selected. Standard Ignition Switch... -
Page 60: Volt Accessory Switch Panels
Electrical System Helm Switch Panel 6.4 12 volt Accessory Switch Panels Navigation Lights The switch is a three-position switch. The middle The main accessory switch panel is located at the position is OFF. Moving the switch in one direc- helm. Most “push to reset” circuit breakers that tion will activate the navigation lights. - Page 61 ACC 1 Reserved for additional DC accessories installed A three position switch that actives the overhead by you or your Blackfin dealer. lights in the in the Hardtop liner. The center po- sition is OFF. Moving the switch in one direction Forward Spreader will activate the white overhead lights.
- Page 62 ACC 2 Reserved for additional DC accessories installed by you or your Blackfin dealer. ACC 3 Reserved for additional DC accessories installed by you or your Blackfin dealer.
-
Page 63: Dc Circuit Protection
Electrical System 6.5 DC Circuit Protection General Power is distributed to most of the 12 volt acces- sories through individual “push to reset” circuit breakers located the helm switch panel or in-line fuses near the batteries. A heavy duty, main cir- cuit breaker near the battery switch protects the DC system from an overload. -
Page 64: Engine Control Systems Circuit Protection
Electrical System 6.6 Engine Control Heavy Duty Main Circuit Breakers DC Power is distributed to the accessory breakers Systems Circuit Protection and other main circuits through heavy duty circuit Main Circuit Breakers breakers located in the battery switch panel near the Power assist steering and Yamaha or Mercury en- battery switch. -
Page 65: Volt Battery Charging System
Electrical System 6.7 120 Volt Battery Charging System General A 120 volt AC battery charging system is an avail- able option. The system is fed 120 volt AC current by a power cable connected to a shore side outlet and the shore power inlet. It is wired totally sepa- rate from the 12 volt DC system and charges the engine and house batteries simultaneously when connected. -
Page 66: Bonding System
Electrical System Procedure For Disconnecting A Shore Connection Turn the circuit breaker on the dockside outlet to the OFF position. Disconnect the cable from the dockside outlet and close the outlet cap. Discon- nect the cable from the inlet plug and close the cap. -
Page 67: Electrical System Maintenance
Electrical System 6.9 Electrical System Maintenance DC Electrical System Maintenance At least once a year, spray all exposed electrical components behind the helm, in the stern bilge area and in the plugs with a protector. Remov- able light fixture bulbs should be removed and the metal contact areas coated with a non-water soluble lubricant like Teflon or Silicone grease. - Page 68 Electrical System AC Electrical System Maintenance WARNING Periodically inspect all wiring for nicks, chafing, brittleness, improper support, etc. Examine the CORROSION ALLOWED TO BUILD ON THE ELECTRICAL shore power cord closely for cracks in the insula- C O N N E C T O R S C A N C A U S E A P O O R C O N N E C T I O N tion and corrosion in electrical connectors.
-
Page 69: Fresh Water System
ATTEMPT TO PUMP IT OUT YOURSELF. WATER AND WASTE PUMPS ARE NOT DESIGNED TO PUMP FUEL AND A FIRE OR EXPLOSION COULD RESULT. CONTACT YOUR DEALER OR THE BLACKFIN CUSTOMER SERVICE DEPARTMENT FOR ASSISTANCE IN HAVING THE FUEL PROFESSIONALLY REMOVED AND COMPONENTS OF THE FRESH WATER SYSTEM REPLACED AS NECESSARY. -
Page 70: Fresh Water System Maintenance
Fresh Water System Fresh Water Shower There is a shower located near the transom door. It has cold water and a retractable shower head with an on/off valve. To use a shower, make sure the Fresh Water Pump switch in the helm switch panel is on, then open the shower compartment cover and pull the shower head out. - Page 71 Fresh Water System • The batteries must be properly maintained and charged. Operating the pressure pump from a battery with a low charge could lead to pump failure. • Add a commercially available potable water conditioner to the water tank to keep it fresh. Sanitizing the Fresh Water Tank The freshwater system should be sanitized if it has not been used for a long period or you are unsure...
- Page 72 NOTES...
-
Page 73: Raw Water System
If this procedure doesn’t work, contact your Blackfin dealer. Closing the thru-hull valve before the boat is hauled from the water will help to eliminate air locks in the raw water system. -
Page 74: Baitwell
Raw Water System pressure drops, the pump will turn on. The water system is equipped with a strainer on the intake side of the pump. The strainer should be checked frequently and cleaned as necessary. Whenever the boat is left unattended, the Raw Water Pump switch should be placed in the OFF position. -
Page 75: Raw Water System Maintenance
Raw Water System To drain the livewell, turn off the livewell pump and open the drain valve. When the livewell has completely drained, use the washdown hose to flush the livewell and drain of debris. The livewell seacock valve should be closed when- ever the livewell is not in use. - Page 76 NOTES...
-
Page 77: Drainage System
9.2 Cockpit & Deck Drainage Cockpit Sole Your Blackfin has two scupper drains located at the rear of the cockpit. The scuppers are drained overboard by thru-hull fittings on each side of the hull. A flap built into the each thru-hull fitting... - Page 78 Drainage Systems Forward Below Deck Storage Compartment The forward storage compartment below the cockpit sole is drained by gravity to the bilge. The bilge is drained overboard by the bilge pump. Bow Fishbox/Storage Compartments The forward fishbox/storage compartments below the port and starboard bow seats drain by gravity to thru-hull fittings located in the hull sides above the waterline.
-
Page 79: Bilge Drainage
Drainage Systems 9.3 Bilge Drainage The aft bilge pump is located in aft systems compart- ment bilge near the transom. It is activated both manually by a switch in the helm switch panel and automatically by a switch integrated into the pump. The bilge pump should be manually activated briefly each time the boat is used. -
Page 80: Hardtop & Helm Seat Base Drains
Drainage Systems 9.4 Hardtop & Helm Seat Base Drains There is a hole drilled in the legs for the helm seat base and hard top to prevent water from being trapped within the legs. Additional drain holes are drilled in the tubing to drain other areas as required. -
Page 81: Exterior Equipment
All fittings must be periodically inspected for loose fit, wear or damage. Any problems should be corrected immediately. Stern Cleat Retracted WARNING BLACKFIN BOATS ARE NOT EQUIPPED WITH HARDWARE DESIGNED FOR TOWING PURPOSES. THE MOORING CLEATS ARE NOT TO BE USED FOR TOWING ANOTHER VESSEL OR HAVING THIS BOAT TOWED. Stern Cleat... -
Page 82: Anchor & Rope Locker
Exterior Equipment 10.2 Anchor & Rope Locker The anchor/rope locker is in the bow of the boat and accessed through a hatch in the deck. A flush, “push to close” latch secures the hatch in the closed position. Always make sure the hatch is closed and latched before operating the boat above idle speed. -
Page 83: Hull
Exterior Equipment 10.3 Hull Engine Mounting System and Swim Platform Your Blackfin is equipped with an engine mounting system and swim platform that is integrated into the hull and stringer system that is designed to equally distribute the stresses of engine weight and thrust throughout the entire hull. - Page 84 Exterior Equipment Underwater Lights (Optional) Your boat may be equipped with optional under- water lights mounted in the transom. They are activated by a switch in the helm switch panel and should only be used when the boat is in the water and the lights are submerged.
-
Page 85: Cockpit Features
Exterior Equipment 10.4 Cockpit Features General Some hatches in the cockpit and deck are se- cured with automatic “push to close” latches. The latches are released by lifting the handle. Push the door or hatch firmly in the closed position to secure the latch. - Page 86 Exterior Equipment WARNING THE TRANSOM DOOR SHOULD BE CLOSED AND PROPERLY LATCHED WHENEVER THE ENGINE IS RUNNING. NEVER OPEN THE TRANSOM DOOR WHILE UNDERWAY OR IN ROUGH SEA CONDITIONS. IN CERTAIN SITUATIONS, AN OPEN TRANSOM DOOR COULD ALLOW A SUBSTANTIAL AMOUNT OF WATER TO ENTER THE COCKPIT CREATING A POTENTIALLY DANGEROUS CONDITION.
- Page 87 Exterior Equipment Bow Seats With Forward Facing Backrests In Lounge Position Bow Seats With Forward Facing Backrests Against Cockpit Sides Bow Seats and Storage Compartments There are two fishbox/storage compartments located in the bow below the port and starboard seats. The bow seat cushions are secured to the hatches with snaps and should be removed and stored when the boat is not being used.
- Page 88 Exterior Equipment Forward Cockpit Storage Compartment Another storage compartment that provides ad- ditional storage for dunnage is located below the cockpit sole between the bow seats. The hatch is equipped with special hinges that hold it open and a flush, “lift to release” latch secures the hatch when it is closed.
-
Page 89: Helm Seats & Cooler
Exterior Equipment 10.5 Helm Seats & Cooler Helm Seats The helm seats are equipped with a flip up bolster to provide more room between the seats and the helm. The bolster converts the seat to a leaning post style seat with a backrest, allowing the opera- tor and passenger to sit or stand at the helm. -
Page 90: Center Console
Exterior Equipment 10.6 Center Console Helm The steering, engine controls, engine instruments and switches for exterior equipment, navigation lights and other 12 volt DC accessories are located on the helm station. Molded-in electronics storage is located forward of the engine controls. A storage compartment for small items is located on the starboard side of the helm station. - Page 91 Exterior Equipment Head Compartment Door/Bench Seat The head compartment door with a molded in bench seat is located on the front of the console. It is secured in the closed position with a lockable twist lock latch. The bench seat is designed for one person and is equipped with a seat cushion, backrest and hand rails on each side.
-
Page 92: Hardtop
Blackfin does not recommend installing an after- market hardtop or tower. An improperly designed or installed fabrication can cause structural dam- age to the deck and void the Blackfin Limited War- ranty. Additionally, Blackfin will not be responsible for any damage resulting from the installation of a fabrication not installed at the Blackfin factory. -
Page 93: Interior Equipment
Chapter 11: INTERIOR EQUIPMENT 11.1 Head Compartment The head compartment is equipped with a light and could be equipped with an optional portable marine toilet. A compartment in the step provides storage for equipment and dunnage. Equipment racks on each side provide a mounting area for cushions, the optional table and other equip- ment. -
Page 94: Portable Marine Head System
Interior Equipment 11.2 Portable Marine Head System The optional portable marine head (Porta Potti) system is made up of two major components, an upper tank and a lower tank. The upper tank contains the fresh water supply, a bellows pump, seat and the lid. -
Page 95: Routine Maintenance
Sacrificial Anodes Your Blackfin hull is manufactured using state-of- Sacrificial anodes are installed on the outboard en- the-art materials and processes. A super tough gines. Additional anodes are installed on the trim layer of vinyl ester resin with high density and tab planes. - Page 96 Routine Maintenance be the problem. There could also be a problem in fade, dull or chalk. A heavier buffing is required the bonding system. Contact your dealer for the to bring the gelcoat back to its original luster. For proper size and type of anodes to be used and the power cleaning use a light cleaner.
- Page 97 Routine Maintenance GEMLUX MAINTENANCE INSTRUCTIONS Cleaning Agents Method Comments Apply with a sponge Once your stainless is Routine Cleaning Soap and Water or soft cloth. Dry area free of discoloration completely. and/or bleeding, spray GEMLUX Passivation S o l u t i o n d i r e c t l y onto stainless.
- Page 98 Routine Maintenance Anodized Aluminum Surfaces the boat is used in saltwater or polluted water, the aluminum should be washed with soap and Anodized aluminum should be washed periodi- water after each use. Saltwater allowed to remain cally with soap and water to keep it clean. If the on powder coated aluminum will penetrate the boat is used in saltwater or polluted water, the coating and attack the aluminum, usually around...
-
Page 99: Upholstery, Canvas & Enclosures
Routine Maintenance Notice: Notice: Boats that are towed behind larger vessels Clear plastic (Isinglass) is subject to ultra- require special attention to the aluminum violet (sunlight) degradation over time. It hardware. The salt spray, salty steam, and may turn yellow-brown (a burnt appearance) chemicals in exhaust gases are particularly and get brittle. - Page 100 Routine Maintenance The following are typical stains and cleaning • Crayon, mustard, ketchup – Sponge with mild tips for marine vinyl: soap and water. For stubborn stains that may • For normal cleaning – In general most common have set, use a cloth soaked in diluted mild stains can be cleaned using warm, soapy water detergent with gentle rubbing.
- Page 101 Routine Maintenance Marine Interior Fabrics The following are typical stains and cleaning tips for interior marine vinyl: Spot clean only with water based shampoo or foam • Dry soil, dust and dirt, dried on dirt - Remove upholstery cleaner. Pretest a small, inconspicu- with a soft cloth.
- Page 102 UPHOLSTERY DAMAGE AND MILDEW CAUSED BY WATER is a registered trademark of the Clorox Com- SATURATION AND/OR IMPROPER CLEANING AND STORAGE pany. Fantastik is a registered trademark of WILL NOT BE COVERED BY THE BLACKFIN LIMITED The Dow Chemical Company. WARRANTY. WARNING Exterior Carpet SOME SOLVENTS ARE HIGHLY FLAMMABLE.
- Page 103 If this occurs, Notice: wash the fabric and treat it with a commercially Your Blackfin boat is basically an open ve- available water proofing designed for this purpose. hicle. Therefore, in spite of well-designed Blackfin recommends 303 High Tech Fabric Guard.
-
Page 104: Cabin Interior
CONNECTOR, BOW COVER AND COCKPIT COVER) UP. with a light abrasive cleanser and a Scotch-Brite BLACKFIN BOATS’ CANVAS IS NOT DESIGNED TO WITHSTAND ® THE HIGH WIND LOADS OF TRAILERING. SEVERE WIND pad. -
Page 105: Engine & Fuel
Routine Maintenance 12.5 Engine & Fuel 12.6 Drainage System Proper engine maintenance is essential to the It is essential that the following items be done proper performance and reliability of your out- periodically to maintain proper drainage of your board engines. Maintenance schedules and proce- boat: dures are outlined in your engine owner’s manual. - Page 106 NOTES...
-
Page 107: Seasonal Maintenance
Chapter 13: SEASONAL MAINTENANCE 13.1 Storage & Lay-up CAUTION Before Hauling: • Pump out the portable head holding tank. BOATS CAN BE DAMAGED FROM IMPROPER LIFTING AND Flush the holding tank using clean water and TRANSPORTING WITH FORK LIFTS. CARE AND CAUTION MUST BE EXERCISED WHEN TRANSPORTING A BOAT WITH a deodorizer. -
Page 108: Winterizing
FROM IMPROPER CRADLE OR TRAILER SUPPORT IS NOT • Remove cushions and open as many locker COVERED BY THE BLACKFIN WARRANTY. doors as possible. Leaving as many of these areas open as possible will improve the boat’s ventilation during the storage period. - Page 109 Notice: Properly winterize the engine and fuel sys- Portable Head tem by following the engine manufacturer’s The portable head must be properly winterized by winterizing procedures located in your en- following the manufacturer’s winterizing instruc- gine owner’s manuals or contact an Blackfin tions in the portable head owner’s manual. dealer.
-
Page 110: Recommissioning
Seasonal Maintenance Hardtop And Helm Seat Base Proper storage is very important to prevent serious It is imperative that all drain holes in the legs damage to the boat. If the boat is to be stored are open and that the legs are completely free indoors, make sure the building has enough ven- of water. - Page 111 Seasonal Maintenance • Check all hose clamps for tightness. • When the engine starts, check the cooling system port below the engine cowling for a • Pump the antifreeze from the fresh and raw strong stream of water. This ensures that the water systems and flush several times with cooling pump is operating.
- Page 112 NOTES...
-
Page 113: Appendix A: Schematics
Appendix A: SCHEMATICS MONTEREY (BLACKFIN) HARNESS, CONSOLE 60506003-00-HARN SE-338 D HITCHCOCK 1 OF 1 12/14/16 Console Harness... -
Page 114: Hull Harness
Schematics Hull Harness... -
Page 115: Hardtop Harness
Schematics REV # DATE: 12/13/16 PROTO/RELEASED TO FLOOR NOTE: 1. ALL CONNECTORS TO BE HEAT SHRINK TYPE HARDTOP GND BUSS Pacer Marine CUSTOMER: HARNESS, HARDTOP TITLE: CUSTOMER 212BF MONTEREY BOATS Engineering Inc. MODEL: PART NO. : Hardtop Harness SE-P340 PACER MRP#: ZP#: 12/19/2016 CREATOR:... -
Page 116: Deck Harness
Schematics Deck Harness... -
Page 117: Helm Switch Panel - Front
Schematics MONTEREY BOATS PANEL, HELM SWITCH (LED) 212 BLACKFIN SE-342-A SEE ABOVE M.HERRERA 1 OF 1 12/15/2016 Helm Switch Panel - Front... -
Page 118: Helm Switch Panel - Back
Schematics Helm Switch Panel - Back... -
Page 119: Battery Switch Panel
Schematics Battery Switch Panel... - Page 120 Schematics NOTES...
-
Page 121: Appendix B: Maintenance Log
Appendix B: MAINTENANCE LOG Date Hours Dealer Service/Repairs... - Page 122 Maintenance Log Date Hours Dealer Service/Repairs...
-
Page 123: Boating Accident Report
BOATING ACCIDENT REPORT Appendix C: ... - Page 124 Boating Accident Report ...
- Page 125 Boating Accident Report ...
- Page 126 NOTES...
-
Page 127: Appendix D: Float Plan
Appendix D: FLOAT PLAN Blackfin recommends filling out a float plan each time you use your boat for an offshore day trip or a long cruise. Leave this information with a responsible person ashore, like a close friend or relative that you know well. - Page 128 NOTES...
-
Page 129: Appendix E: Glossary Of Terms
Appendix E: GLOSSARY OF TERMS Bow: The front end of a boat’s hull. ft: In, near, or toward the stern of a boat. Bow Line: A line that leads forward from the bow Aground: A boat stuck on the bottom. of the boat. - Page 130 Glossary of Terms Compartment: The interior of a boat divided off by Fore: Applies to the forward portions of a boat bulkheads. near the bow. Cradle: A framework designed to support a boat Foundering: When a boat fills with water and sinks. as she is hauled out or stored.
- Page 131 Glossary of Terms Moored: A boat secured with cables, lines or an- eel: A plate or timber plate running lengthwise chors. along the center of the bottom of a boat. Mooring: An anchor permanently embedded in the Knot: Unit of speed indicating nautical miles per bottom of a harbor that is used to secure a boat.
- Page 132 Glossary of Terms Spring Line: A line that leads from the bow aft or aw Water Cooled: Refers to an engine cooling from the stern forward to prevent the boat from system that draws seawater in through a hull moving ahead or astern. fitting or engine drive unit, circulates the water in the engine, and then discharges it overboard.
- Page 133 Glossary of Terms Trough: The area of water between the crests of Wharf: A structure generally parallel to the shore. waves and parallel to them. Working Anchor: An anchor carried on a boat for Twin-Screw Craft: A boat with two propellers on most normal uses.
- Page 134 NOTES...
-
Page 135: Troubleshooting Guide
Appendix F: TROUBLESHOOTING GUIDE problem cause aNd solutioN CONTROL SYSTEMS Hydraulic Steering is slow to respond & erratic. • Steering system is low on fluid. Fill and bleed system. • Steering system has air in it. Fill and bleed system. • A component in the steering system is binding. Check and adjust or repair binding component. - Page 136 Troubleshooting Guide problem cause aNd solutioN PERFORMANCE PROBLEMS The boat vibrates at cruising speeds. • Propeller may be damaged & need repair. • A propeller or propeller shaft is bent. Repair or replace damaged components. • The running gear is fouled by marine growth or rope. Clean running gear.
- Page 137 Troubleshooting Guide problem cause aNd solutioN ACCESSORY PROBLEMS The livewell pump runs, but does not pump water. • The strainer on the intake scoop is clogged preventing the water from getting to the pump. Put the boat in reverse to clean the strainer.
- Page 138 Troubleshooting Guide problem cause aNd solutioN ACCESSORY PROBLEMS The automatic switch on the bilge pump does not activate • The fuse or circuit breaker for the automatic switch has tripped or blown. Replace the fuse or reset the circuit breaker. the pump .
-
Page 139: Blackfin Specifications
Appendix G: 212 BLACKFIN SPECIFICATIONS HULL LENGTH OVERALL W/ PLATFORM ____________________________________________ 21’ 6” / 6.55 m BEAM __________________________________________________________________________ 8’ 6” / 2.6 m WEIGHT DRY - NO ENGINES ___________________________________________________3600 lb / 1633 kg DEAD RISE _____________________________________________________________________________ 20 DRAFT WITH ENGINE UP __________________________________________________________ 18” / 46 cm DRAFT WITH ENGINE DOWN _______________________________________________________ 30”... - Page 140 NOTES...
-
Page 141: Appendix H: Occupant Seating
THIS DOCUMENT IS THE PROPERTY OF MONTEREY BOATS. THIS DOCUMENT AND ANY INFORMATION OBTAINED FROM IT CAN NOT BE COPIED OR SHARED WITH OTHERS WITHOUT THE WRITTEN PERMISSION OF MONTEREY BOATS. ALL RIGHTS ARE RESERVED. 212CC Blackfin Occupant Seating TITLE: DESIGNATED OCCUPANT POSITIONS... - Page 142 NOTES...
-
Page 143: Appendix I: Blackfin Warranty
Appendix I: BLACKFIN WARRANTY LIFETIME LIMITED WARRANTY warrants to the original retail purchaser of its product beginning with the 2018 models that it will repair or replace defects in materials and workmanship found to exist in its product during the applicable warranty periods defined below if purchased from an authorized dealer, subject to the exclusions, limitations, conditions and provisions noted below. - Page 144 Warranty 1. The request for transfer must be made in writing by the new owner and sent within thirty (30) days of the date of his/her purchase of the boat to: 1579 SW 18th Street Williston, Florida 32696 2. The request must include: A copy of the bill of sale with the Hull ID number, the new owner’s name and address and a Certified Check or Money Order for the correct transfer fee amount.
- Page 145 Warranty THREE-YEAR EXTERIOR COSMETIC GELCOAT LIMITED WARRANTY: warrants to the original retail purchaser of its product that will correct or repair any air voids in the exterior gelcoat surface of the boat as a result of defects in materials or workmanship within three (3) years from the warranty commencement date provided that the original factory gelcoat surface has not been altered in any way: Alterations which will void this warranty include, without limitation, damage, accident repair, sanding,...
- Page 146 Warranty Any boat which has previously been repossessed from an authorized dealer. However, this exclusion shall not affect the Lifetime Limited Structural Hull Warranty set forth above. GENERAL PROVISIONS: ALL GENERAL, SPECIAL, INDIRECT, INCIDENTAL AND/OR CONSEQUENTIAL DAMAGES ARE EXCLUDED FROM THIS WARRANTY AND ARE TOTALLY DISCLAIMED BY .
- Page 147 Warranty 1. The original retail purchaser of its product or the dealer either completes and returns the Warranty Registration to by mail or facsimile or the dealer registers the Warranty electronically “online” within fifteen (15) days from the date the product is delivered to the original retail purchaser;...
- Page 148 CAUSE AND SOLUTION...
- Page 150 Blackfin Boats 1579 S.W. 18th Street Williston, FL 32696 Phone 352-529-9181 Fax 352-529-9173 P/N 63105600-00-MANU Rev. 3-27-2018...
Need help?
Do you have a question about the 212 and is the answer not in the manual?
Questions and answers