Table of Contents
Advertisement
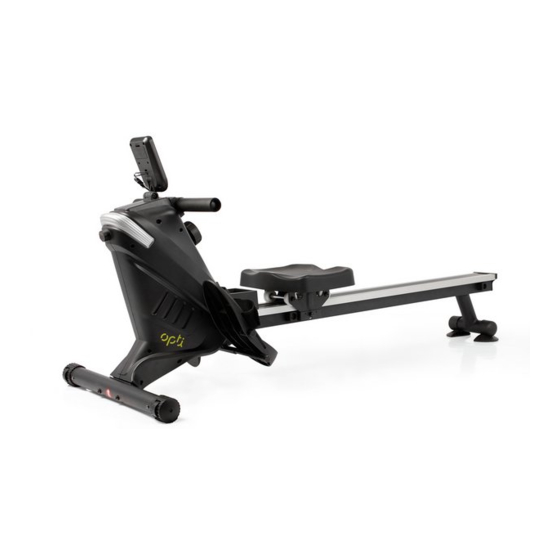
Magnetic Rower
Assembly & User Instructions - Please keep for future reference
621/4151
Important
– Please read these instructions fully before assembly or use
These instructions contain important information which will help you get the best from your
equipment and ensure safe and correct assembly, use and maintenance.
If you need help or have damaged or missing parts, call the Customer Helpline: 0345 600 1714
http://www.argos-support.co.uk/
Issue 1 -
11/21/11
Advertisement
Table of Contents

Related Manuals for Argos Opti 621/4151


Summary of Contents for Argos Opti 621/4151
- Page 1 These instructions contain important information which will help you get the best from your equipment and ensure safe and correct assembly, use and maintenance. If you need help or have damaged or missing parts, call the Customer Helpline: 0345 600 1714 http://www.argos-support.co.uk/ Issue 1 - 11/21/11...
-
Page 2: Table Of Contents
Contents Safety Information Components - Parts Components - Fixings Assembly Instructions Computer Operation 10-11 Using Information Storage Moving Instructions Exercise Guide Exercising Information 14-17 Before starting 14-15 16-17 Warming up and cooling down Care and Maintenance Disposal information Explodes Diagram Parts List Guarantee Back Cover... -
Page 3: Safety Information
35 or persons with pre-existing health problems. You MUST read all instructions before using any fitness equipment. Argos and its associates assumes no responsibility for personal injury or property damage sustained by or through the use of this product. -
Page 4: Components - Parts
Components - Fixings Please check you have all the fixings listed below Note: Some of the fixings are pre-fitted to the larger components. Please check carefully before contacting Argos regarding any missing fixings. 1 Main Frame 1pc 3 Base Frame 1pc... -
Page 5: Components - Fixings
Please check you have all the fixings listed below Note: Some of the fixings are pre-fitted to the larger components. Please check carefully before contacting Argos regarding any missing fixings. Bolt, Button Head (M8x15mm) x 6 Lock Washer (M8) x 4... -
Page 6: Assembly Instructions
Assembly Instructions Step 1 Position the main assembly of the Magnetic Rower as shown in illustration A. Attach the BASE FRAME (3) to the CONNECTION BRACKET (11) with BUTTON HEAD BOLTS (M8x40mm)(84) and WASHERS (M8) (62). Step 2 Refer to illustration B. Turn the main assembly of the Magnetic Rower upside down. - Page 7 Assembly Instructions Step 3 Refer to the illustration below. Unfold the RAIL (48), and then attach to the BASE FRAME (3) with BUTTON HEAD BOLTS (M8x20mm)(85) and WASHERS (M8)(62) Step 4 Slide the FRONT COVER (28) onto the LEFT and RIGHT COVERS (17,18), then attach to the BASE FRAME (3) with ROUND...
- Page 8 Assembly Instructions Step 6 Put the Handlebar (15) to the Strap (25), then take out the Iron tube (a). Make sure the STRAP (25) isn’t twisted and let it return into the main body of the Magnetic Rower. The STRAP (25) will hold the HANDLEBAR (15) taut against the HAN- DLEBAR HOLDER (24).
- Page 9 Assembly Instructions Step 8 Insert the PEDAL SHAFT(6) through the tube located on the MAIN FRAME(1). Slide a PEDAL CAP(19)onto each end of the PEDAL SHAFT(6). Then secure the PEDAL CAPS (19) with BUTTON HEAD- BOLTS(M8x15mm)(60) and LARGE WASH- ERS(M8)(83) at both ends of the PEDAL SHAFT(6).You need to use two Allen Wrenches...
- Page 10 Assembly Instructions Pedal strap Adjustment adjustment Holes If you feel it is more comfortable for your workout, you can attach the PEDAL STRAP(20) to the lower position in the PEDAL CAP(19) as shown in illustration 1 below. Run the PEDAL STRAP(20) through the opening from the bottom of the PEDAL CAP(19).
-
Page 11: Computer Operation
Computer Operation Functions and operations Item Description Count up - No preset target, Time will count up from 00:00 to maximum Time 99:59 with each increment is 1 minute. Count down – The console will countdown from preset time to 00:00 and each preset increment or decrement will be 1 minute between 01:00 to 99:00. - Page 12 Computer Operation Botton Function Item Description -In SCAN mode, press MODE to select single function display and setting Mode -In Standby mode, press it to clear up the setting value. Or hold on this key for 2 Reset seconds to clear all values to 0 as TOTAL RESET. -In Standby mode, press it to increase setting value of STROKES/TIME/DISTANCE/ CALORIES.
-
Page 13: Using Information
Using Information Storage 1. To store the Magnetic Rower, simply keep it in a clean dry place. 2. Move the Magnetic Rower with the moving wheels on the Front Stabilizer of the BASE FRAME(3). Lift the REAR STAND (2) to move the Magnetic Rower. Do not use the SEAT (21) to move the Magnetic Rower. -
Page 14: Exercise Guide
Exercise Guide The Basic Rowing Stroke Rowing is an extremely effective form of exercise. It strengthens the heart and improves circulation as well as exercising all the major muscle groups; the back, waist, arms, shoulders, hips and legs. 1.Sit on the saddle and fasten your feet to the pedals using the Velcro straps. Then take hold of the rowing bar. -
Page 15: Exercising Information
Exercising Information Before starting your exercise How you begin your exercise program depends on your physical condition. If you have been inactive for several years, or are overweight, you must start slowly and increase your time on the equipment; a few minutes per increase is advisable. Initially, you may be able to exercise only for a few minutes in your target zone, however, your aerobic fitness will improve over the next six to eight weeks. - Page 16 Exercising Information Muscle chart Aerobic Exercise Aerobic exercise improves the fitness of your lungs and heart - your body’s most important muscle. Aerobic exercise fitness is promoted by any activity that uses your large muscles (arms, legs, or buttock, for example). Your heart beats quickly and you breathe deeply.
-
Page 17: Warming Up And Cooling Down
Exercising Information Warming up and Cooling down Each workout should include the following three parts: 1. A warm-up, consisting of 5 to 10 minutes of stretching and light exercise. A proper warm-up increases your body temperature, heart rate, and circulation in preparation for exercise. 2. - Page 18 Exercising Information Calf/Achilles stretch With one leg in front of the other, reach forward and place your hands against a wall. Keep your back leg straight and your back foot flat on the floor. Bend your front leg, lean forward and move your hips toward the wall.
-
Page 19: Care And Maintenance
Customer before using the equipment, Helpline: 0345 600 1714. replace defective components http://www.argos-support.co.uk/ immediately and/or keep the equipment out of use until repair Information for Users on Disposal of old Equipment and Batteries (European Union only) -
Page 20: Explodes Diagram
Exploded Diagram Using the Wo rko ut Be nc h... -
Page 21: Parts List
Exploded Parts Diagram List Part Description Part Description Main Frame Flywheel Shaft V-Ribbed Belt (220 PJ3) Rear Stand Base Frame Conduction band wheel Idler Wheel Rear Support Micro-adjust tube Bolt, Button Head (M8 x 20mm) Pedal Shaft Bearing (608zz) Rear Spring Hook Round Plug (ø19mm) Spring Hook EVA pad... -
Page 22: Guarantee
• The guarantee is in addition to, and does not diminish your statutory or legal rights. • In the event of a problem with the product with in the guarantee period call the Customer Helpline: 0345 600 1714 . http://www.argos-support.co.uk/ Guarantor: Argos Ltd 489 - 499 Avebury Boulevard Central Milton Keynes MK9 2NW...
Need help?
Do you have a question about the Opti 621/4151 and is the answer not in the manual?
Questions and answers
I cannot get the straps back on the pedals. Struggled for days. Is there a video? The manual doesn't help.
To reattach the straps on the pedals of the Argos Opti 621/4151, follow these steps:
1. Locate the PEDAL STRAP (20) and the PEDAL CAP (19).
2. Run the PEDAL STRAP (20) through the opening in the PEDAL CAP (19).
3. If needed for comfort, attach the PEDAL STRAP (20) to the lower position in the PEDAL CAP (19), as shown in the manual illustration.
There is no mention of a video tutorial in the provided information.
This answer is automatically generated
I need a new console bracket can you help ? ref621/ 4151
The manual does not specifically mention a console bracket. However, for replacement parts, you can contact the Argos Customer Helpline at 0345 600 1714. Check if the bracket is included in the listed components or fixings before calling.
This answer is automatically generated