Advertisement
Advertisement
Table of Contents

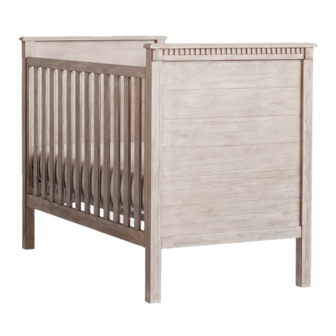
Summary of Contents for pottery barn kids RORY CRIB
- Page 1 RORY CRIB www.potterybarnkids.com Date: 2014-Dec.- 03 Page 1 of 7 R e v :...
- Page 2 Do not use it if any parts are loose or missing or if there are any signs of damage. Do not substitute parts. Contact Pottery Barn Kids if replacement parts or additional instructions are needed.
- Page 3 CAUTION: ANY MATTRESS USED IN THIS CRIB MUST BE AT LEAST 27 ¼” (69 CENTIMETERS) 5/8” (131 CENTIMETERS) WITH A THICKNESS NOT EXCEEDING 6” (15 CENTIMETERS) THIS CRIB CONFORMS TO APPLICABLE REGULATIONS PROMULGATED BY THE CONSUMER PRODUCT SAFETY COMMISSION. 04-000094-3 MPORTANT SAFETY INSTRUCTIONS: ...
- Page 4 (H) Bolt M6 x 15 – (I) Half moon Washer (J) Left Bracket – (2x) (K) Right Bracket – (8x) 1/4” x 24 – (4x) (2x) (L) Acorn Nut (M) Open Wrench – (1x) M6x10 – (8x) ASSEMBLY INSTRUCTIONS: Attach (J&K) to (C). Use Allen Key (D) to tighten as shown below. Note: Make sure the brackets (J&K) point outwards as shown below Date: 2014-Dec.- 03 Page 4 of 7...
- Page 5 2. Attach (L) to (H). Use Open Wrench (M) and Allen Key (D) to tighten as shown below. Attach (B) to (A) by aligning pre-drill holes with wooden dowels as shown below. Do not fully tighten bolts (E & F) at this time. 2x ...
- Page 6 4. Attach (A) to (B) by aligning pre-drill holes with wooden dowels as shown below. Do not fully tighten bolts (E & F) at this time. 2x *Note: The mattress base (C) should be at the highest level (Level 3) when the child is born. It must be at the lowest level (Level 1) before the child can stand up.
- Page 7 6. Check alignments and fully tighten all connections at this time. Assembly is now complete. Place the assembly instructions back into the envelope mounted on the mattress base for future reference. CARE INSTRUCTIONS Dust often using a clean, soft, dry, lint-free cloth. ...


Need help?
Do you have a question about the RORY CRIB and is the answer not in the manual?
Questions and answers