Table of Contents
Advertisement
Quick Links
Part List A ..............................................................................................................................2
Part List B ..............................................................................................................................3
Part List C ..............................................................................................................................4
Care of Your Frame ................................................................................................................6
Assembly Steps:
Step 1: Leveling Foot Assembly ...........................................................................................7
Step 2: Outer Leg Brace "A" Assembly ...............................................................................8
Step 3: Side Leg Brace "B" Assembly ..................................................................................9
Step 4: Table Assembly .........................................................................................................10
Step 5: Middle Leg Spacer Assembly ...................................................................................12
Step 6: Table Splice to Table Assembly ................................................................................13
Step 7: Frame End Hardware Assembly ...............................................................................14
Step 8: Track Installation ......................................................................................................14
Step 9: Frame End Assembly to Table Assembly .................................................................15
Step 10: Side Leg to Table Assembly ...................................................................................15
Step 11: Middle Leg Installation ...........................................................................................16
Step 12: Middle Leg Assembly .............................................................................................17
Step 13: Take Up Sides Assembly ........................................................................................18
Step 14: Take Up Sides to Table Assembly ..........................................................................18
Step 15: Take Up Rail Mount End Assembly .......................................................................19
Step 16: Take Up Rail Mount End to Table Assembly .........................................................19
Step 17: Three Rail Side to Table Assembly .........................................................................20
Step 18: Pivot End to Fabric Layer Rail Mount End ............................................................20
Step 19: Pivot End/ Fabric Layer Rail Mount End to Table Assembly ................................21
Step 20: Batting Rail Mount End Assembly .........................................................................21
Step 21: Batting Rail Mount End to Table Assembly ...........................................................22
Step 22: Rail Assembly .........................................................................................................22
Step 23: Rails to Frame Assembly ........................................................................................24
Step 24: Ratchet Stop Assembly ...........................................................................................25
Step 25: Carriage Stop Assembly .........................................................................................26
Fabric Installation ................................................................................................................27
Making Cloth Leaders ............................................................................................................28
Installing Your Fabric Layers to the Rails .............................................................................29
Step 1: Quilt Backing to Second Rail ...................................................................................29
Step 2: Quilt Top to 3rd Rail .................................................................................................29
Step 3: Batting.......................................................................................................................29
Step 4: Attaching Layers to the Take-Up Rail ......................................................................30
Step 5: Putting Your Machine/ Carriage onto Frame ............................................................30
Rolling Your Fabric ................................................................................................................31
The Four-Inch Principle .........................................................................................................31
Bungee Clamp Assembly .......................................................................................................31
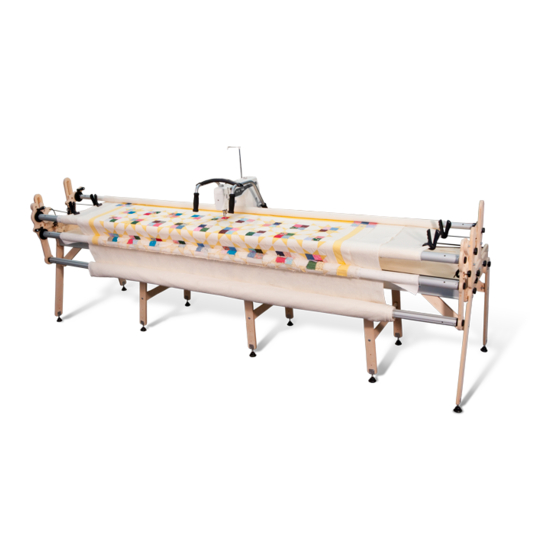
The GMQ Pro
Home Machine Quilting System
Equipped with the Professional Series Rails
Copyright April 2008
Jim M. Bagley, GraceWood, Inc
(Reproduction Prohibited)
Print Date 02-01-2010
Advertisement
Table of Contents

Related Manuals for Grace GMQ Pro


Summary of Contents for Grace GMQ Pro
-
Page 1: Table Of Contents
The GMQ Pro Home Machine Quilting System Equipped with the Professional Series Rails Parts List Part List A ..........................2 Part List B ..........................3 Part List C ..........................4 Care of Your Frame ........................6 Assembly Steps: Step 1: Leveling Foot Assembly ...................7 Step 2: Outer Leg Brace “A”... -
Page 2: Parts List
GMQ Pro Parts List A (1) Left Frame End (1) Left (1) Right Frame End (1) Right Pivot End Pivot End (2) Carriage (2) Carriage Stop Base Stop Clamp (1) Left Fabric (1) Right Fabric Layers Pole Layers Pole Mount End... -
Page 3: Part List B
(1) Crib Back Track Support GMQ Pro Parts List B (1) Crib Front Track Support (1) Queen Front Track Support (1) Queen Back Track Support (1) King Front Track Support (1) King Back Track Support (3) 2” x 70" Rail (6) 2”... -
Page 4: Part List C
GMQ Pro Parts List C (1) Crib Back Track Support (1) Crib Front Track Support (1) Queen Front Track Support (1) Queen Back Track Support (1) King Front Track Support (1) King Back Track Support (3) 2” x 70" Rail (6) 2”... - Page 5 GMQ Pro Parts List D (56) M6 x 20mm Philips (24) M6 x 40mm (6) 1/4" X 2-1/4" (6) M6 x 55mm (24) 1/4" X 1-1/2" (56) 1/4" X 3/4" Phillips Pan Head Screw Carriage Bolt Carriage Bolt Carriage Bolt...
-
Page 6: Care Of Your Frame
CARE OF YOUR GMQ PRO Your GMQ Pro frame is a machine quilting system that can be used finished or unfinished. Most use it unfinished with no problem, and doing so does not adversely affect warranty coverage. However, for extra protection, or to give it a finished look, you may seal, stain and/or finish the frame using a number of different applications. -
Page 7: Step 1: Leveling Foot Assembly
6) This is a new product! We welcome your feedback on this product or these instructions. If you encounter a problem during assembly or use of the GMQ Pro, and you can’t seem to overcome it, call us before frustration sets... -
Page 8: Step 2: Outer Leg Brace "A" Assembly
Step 2: Outer Leg Brace “A” Assembly Parts Needed: 2- Outer Leg Brace “A” 1- Right Front Leg 1- Left Back Leg 2- M6 X 45mm Connector Bolt 2- M6 Rectangle Nut (threaded) M6 x 45mm 1/4" X 45mm Connector Bolt Outer Leg Brace "A"... -
Page 9: Step 3: Side Leg Brace "B" Assembly
Step 3: Outer Leg Brace “B” Assembly Parts Needed: 2- Outer Leg Brace “B” 1- Right Back Leg 1- Left Front Leg 2- M6 X 45mm Connector Bolt 2- M6 Rectangle Nut (threaded) M6 x 45mm Outer Leg Brace "B" 1/4"... -
Page 10: Step 4: Table Assembly
Step 4: Table Assembly Parts Needed: 1- Table #1 1- Table #2 1*- Table #3 1**- Table #4 1- Front Crib and *Queen and **King Table Aluminum Track Support 1- Back Crib and *Queen and **King Table Aluminum Track Support 12 or 18* or 24**- M6 x 20mm Phillips Pan Head Screw 12 or 18* or 24**- M5 Flat Washer 12 or 18* or 24**- M6 Jam Nut... - Page 11 QUeeN ASSeMBLY: • Place the Table #3 on the front queen table aluminum track support (as M6 x 20mm pictured left). IMPORTANT! Again, 1/4" X 3/4" Phillips Philips Pan Head Pan Head Screw carefully identify your Front and Back Screw Queen Track Supports based on the position of the holes.
-
Page 12: Step 5: Middle Leg Spacer Assembly
Step 5: Middle Leg Spacer Assembly M6 Flat Washer 1/4" Flat Washer 1/4" Flat Washer Parts Needed: 1- Crib Table (assembled) M6-20 Jam 1/4-20 Jam Nut 1/4-20 X 3/4" 1/4-20 Jam Nut 1/4-20 X 3/4" M6 x 20mm Phillips Phillips Pan Head 1*- Queen Table (assembled) Phillips Pan Head Screw... -
Page 13: Step 6: Table Splice To Table Assembly
• The M6 X 20mm phillips M6 Jam Nut 1/4" Jam Nut M6 x 20mm Philips pan head screws will go 1/4" X 3/4" Phillips Pan Head Screw Pan Head Screw through the end two holes M5 FLat Washer 3/16" Flat Washer with a washer and jam nut M6 x 50mm 1/4"... -
Page 14: Step 7: Frame End Hardware Assembly
Step 7: Frame End Hardware Assembly Parts Needed: 1- Right and Left Frame end 12- M6 Jam Nut 12- M5 Flat Washer 12- M6 x 40mm Carriage Bolt • Place an 40mm carriage bolts through each of the holes, except for the two on each end, on the Right Frame end, making sure the head M6 x 40mm... -
Page 15: Step 9: Frame End Assembly To Table Assembly
Step 9: Frame End Assembly to Table Assembly Parts Needed: 1- Table Assembled (Crib or Queen or King) 1- Right and Left Frame end Assembly 8- M6 X 25mm Phillips Pan Head Screw M6 x 25mm Philips Pan 1/4" X 1" Phillips Head Screw Pan Head Screw •... -
Page 16: Step 11: Middle Leg Installation
Step 11: Middle Leg Installation NOTe: This illustration shows the Middle Leg Parts Needed: 1 or 2* or 3**- Middle Leg (assembled) Brace assembled to the Middle Legs. Do this AFTeR you have installed your Middle Legs 2 or 4* or 6**- 6MM Plastic Knob to the frame (Step 13). -
Page 17: Step 12: Middle Leg Assembly
Step 12: Middle Leg Assembly Parts Needed: 1 or 2* or 3**- “A” Middle Leg 1 or 2* or 3**- “B” Middle Leg 1 or 2* or 3**- Middle Leg Brace 2 or 4* or 6**- M6 X 45mm Connector Bolt 2 or 4* or 6**- M6 Rectangle Nut (threaded) * Queen assembly ONLY ** King assembly ONLY... -
Page 18: Step 13: Take Up Sides Assembly
Step 13: Take Up Sides Assembly Parts Needed: 1- Right and Left Take Up Side 4- M6 Jam Nut 4- M5 Flat Washers 4- M6 x 40mm Carriage Bolt • Place one of the carriage bolts through each of the holes on the Left Take Up Side, making sure the head of the M5 Flat Washer bolt is on the side with the L. -
Page 19: Step 15: Take Up Rail Mount End Assembly
Step 15: Take Up Rail Mount End Assembly M5 Flat 3/16" Flat M6 Jam 1/4" Jam Parts Needed: 1- Right and Left Take Up Rail Mount end Washer Washer 4- M6 Jam Nut 4- M5 Flat Washer 4- M6 x 40mm Carriage Bolt •... -
Page 20: Step 17: Three Rail Side To Table Assembly
Step 17: Three Rail Side to Table Assembly Parts Needed: 1- Right and Left Three Rail Side 2- M8 Fender Washer M6 Flat Washer 1/4" Flat Washer 2- 6MM Plastic Knob Left 3 Rail Side M6 Nylock Nut 1/4" Nylock Nut 2- M6 Nylock Nut 2- M6 Flat Washer M8 Fender... -
Page 21: Step 19: Pivot End/ Fabric Layer Rail Mount End To Table Assembly
Step 19: Pivot End/ Fabric Layer Rail Mount End to Table Assembly Parts Needed: 1- Right and Left Pivot end/ Fabric Layer Rail Mount end Assembly 2- M6 Plastic Knob Right Fabric Layers Rail Mount End Assembly 2- M8 Fender Washer M8 Fender Washer 1-1/4"... -
Page 22: Step 21: Batting Rail Mount End To Table Assembly
Step 21: Batting Rail Mount End to Table Assembly Parts Needed: 1- Right and Left Top Fabric Rail Mount end 2- M6 Nylock Nut Left Batting Rail 2- M6 Flat Washer Mount End Assembly 2- M6 Plastic Knob 2- M8 Fender Washer M6 Nylock Nut 1/4"... - Page 23 • Next, insert an M5 x 16mm socket head screw through the hole and into each square nut in the end cap. • Follow the above instructions to put the rest of the square end caps on the 70” Rails. •...
-
Page 24: Step 23: Rails To Frame Assembly
• If you are setting up your frame in king size, follow the same previous steps to attach an additional coupler onto the 34” and 24” rails. • When you have the two rails attached you will put the round end caps in the end of the 24” Rail in the same manner as you did the square end caps. -
Page 25: Step 24: Ratchet Stop Assembly
• You will want to put an end cap shoulder on each end of the rail, leaving them loose just as you did on the first rail. • Put the last two rails on in the same way you did the last one, except YOU WILL WANT THe TeeTH ON THe RATCHeT WHeeLS GOING TOWARDS THe FRAMe. -
Page 26: Step 25: Carriage Stop Assembly
Step 25: Carriage Stop Assembly Parts Needed: 2- Carriage Stop Base 2- Carriage Stop Clamp M6 x 55mm 1/4" X 2-1/4" 2- M6 x 55mm Carriage Bolt Carriage Bolt Carriage Bolt 2- M5 Flat Washer 2- M6 Jam Nut Carriage Stop Base 2- M8 Fender Washer 2- M6 Plastic Knob 1-1/4"... -
Page 27: Fabric Installation
All that remains is to install your fabric and begin quilting! With the specially designed Fabri-Fast rails, installing your fabric is easier on the GMQ Pro than on any other frame. Each rail has a Fabri-Fast slot and accompanying tubing. These work together to make your fabric installation much easier and faster than using tape, tacks or Velcro®. -
Page 28: Making Cloth Leaders
This will be the line to which you attach your fabric layer. Take Up Center your cloth leader lengthwise along Leader 5" the rail. Using Grace’s new Fabri-Fast Top Fabric Leader 18" System, take a piece of plastic tubing (cut to the appropriate length), and, holding... -
Page 29: Installing Your Fabric Layers To The Rails
INSTALLING YOUR FABRIC LAYERS TO Take Up Leader THE RAILS Backing STEP 1: QUILT BACKING TO SECOND RAIL To begin, determine which will the front and Top Fabric back edges of your quilt BACKING (be sure it will fit within the width of your frame set- up). -
Page 30: Step 4: Attaching Layers To The Take-Up Rail
Center the batting on the rail and attach one end of the batting using the fabri-fast tubing. (NOTE: Fabri-Fast Quilt Top tubing will work with most batting, however, if the batting is too thick to squeeze into the slot, you may tape the batting to the rail to keep it in place). -
Page 31: Rolling Your Fabric
Limit any quilting pattern to four inches or less from front to back. The Grace Machine Quilter gives you close to 16” of reach, but because of a limited throat size of your machine, and because the fabric will eventually roll up on the take up rail, further decreasing space, you will want to keep patterns to a 4”...
Need help?
Do you have a question about the GMQ Pro and is the answer not in the manual?
Questions and answers
I bought the GMQ pro several years ago and I can’t seem to get the table that rolls that holds the sewing machine. The bottom one isn’t lining up with the black strips on my table. How do I put it together right? I’ve taken the wheels off, and I can’t seem to get the fit.
To properly assemble the table for the Grace GMQ Pro sewing machine, follow these steps:
1. Leveling Foot Assembly – Attach the leveling feet to ensure stability.
2. Outer Leg Brace "A" Assembly – Connect the outer leg braces to the frame.
3. Side Leg Brace "B" Assembly – Secure the side leg braces for additional support.
4. Table Assembly – Assemble the table surface, ensuring all parts align properly.
5. Middle Leg Spacer Assembly – Install spacers to reinforce the middle leg.
6. Table Splice to Table Assembly – Connect table sections securely.
7. Frame End Hardware Assembly – Attach hardware to secure the frame ends.
8. Track Installation – Install tracks to guide the quilting machine.
9. Frame End Assembly to Table Assembly – Connect the frame ends to the table.
10. Side Leg to Table Assembly – Secure the side legs to the table.
11. Middle Leg Installation – Install the middle leg for extra support.
12. Middle Leg Assembly – Finalize the middle leg setup.
13. Take Up Sides Assembly – Assemble the take-up sides.
14. Take Up Sides to Table Assembly – Attach the take-up sides to the table.
15. Take Up Rail Mount End Assembly – Install the take-up rail mount ends.
16. Take Up Rail Mount End to Table Assembly – Secure the take-up rail mounts to the table.
17. Three Rail Side to Table Assembly – Attach the three-rail side to the table for proper quilting function.
Ensure all connections are tight and level throughout the process.
This answer is automatically generated
@Linda Schreiber