Table of Contents
Advertisement
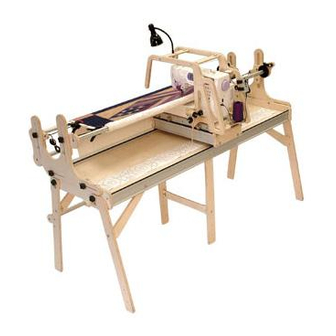
The New Little Gracie II
Home Machine Quilting System
Parts List
Part List A ........................................................................................................ 2
Part List B ........................................................................................................ 3
Part List C ........................................................................................................ 4
Care of Your Frame .......................................................................................... 5
Assembly Steps:
Step 1: Take Up Rail Mount End Assembly ................................................... 7
Step 2: Fabric Layer Rail Mount End Assembly ............................................ 8
Step 3: Rail Mount End Assembly .................................................................. 9
Step 4: Frame End Hardware Assembly ......................................................... 10
Step 5: Frame End Assembly .......................................................................... 11
Step 6: Side Leg Brace "B" Assembly ............................................................ 11
Step 7: Side Leg Brace "A" Assembly ........................................................... 12
Step 8: Legs to Frame End Assembly ............................................................. 13
Step 9: Table Assembly ................................................................................... 14
Step 10: Middle Leg Spacer Assembly ........................................................... 15
Step 11: Track Installation .............................................................................. 16
Step 12: Frame End to Table Assembly .......................................................... 16
Step 13: Middle Leg Installation ..................................................................... 17
Step 14: Middle Leg Assembly ....................................................................... 18
Step 15: Rail Assembly ................................................................................... 19
Step 16: Ratchet Stop Assembly ..................................................................... 19
Step 17: Carriage Handle Assembly ............................................................... 20
Step 18: Cross Brace Assembly ...................................................................... 20
Step 19: Cone Thread Holder Assembly ......................................................... 20
Step 20: Cone Thread Guide Assembly .......................................................... 21
Step 21: Lever to Carriage Assembly ............................................................. 21
Step 22: Lever Linkage to Handle Assembly ................................................. 22
Step 23: Pedal Clamp to Handle Assembly .................................................... 24
Step 24: Carriage to Frame Assembly ............................................................ 24
Step 25: Sewing Machine to Frame Assembly ............................................... 25
Step 26: Stylus Clamp Base Assembly ........................................................... 25
Step 27: Stylus Clamp Assembly .................................................................... 25
Step 28: Stylus Assembly................................................................................ 25
Step 29: Stylus to Carriage Assembly ............................................................. 26
Step 30: Carriage Stop Assembly ................................................................... 26
Optional 4th Pole ............................................................................................. 27
Fabric Installation .......................................................................................... 28
Making Cloth Leaders ...................................................................................... 29
Installing Your Fabric Layers to the Rails ....................................................... 30
Step 1: Quilt Backing to Second Rail ............................................................. 30
Step 2: Quilt Top to 3rd Rail ........................................................................... 30
Step 3: Batting................................................................................................. 30
Step 4: Attaching Layers to the Take-Up Rail ................................................ 31
Step 5: Putting Your Machine/ Carriages Onto Frame ................................... 31
Rolling Your Fabric .......................................................................................... 32
The Four-Inch Principle ................................................................................... 32
Bungee Clamp Assembly ................................................................................. 32
Copyright June 2005
Jim M. Bagley, GraceWood, Inc
(Reproduction Prohibited)
4-28-06
Advertisement
Table of Contents

Related Manuals for Grace Little Gracie II


Summary of Contents for Grace Little Gracie II
-
Page 1: Table Of Contents
The New Little Gracie II Home Machine Quilting System Parts List Part List A ......................2 Part List B ......................3 Part List C ......................4 Care of Your Frame ..................5 Assembly Steps: Step 1: Take Up Rail Mount End Assembly ........... 7 Step 2: Fabric Layer Rail Mount End Assembly .......... - Page 2 Little Gracie II Parts List A (1) Left Frame Side (1) Right Rail Mount End (1) Right Frame Side (1) Left Rail Mount End (1) Table #1 (1) Left (1) Right (1) Left (1) Right Front Leg Front Leg Back Leg...
- Page 3 Little Gracie II Parts List B (1) Back Handle (2) Middle (2) Track Cross Brace Leg Spacer Support Splice (1) Lamp Holding (1) Right Handle (1) Left Handle Cross Brace (1) Front Lever (1) Left (1) Right Back Lever Back Lever...
- Page 4 Little Gracie II Parts List C (13) 1/4" X 35 mm (4) 1/4" X 3" (15) 1/4" X 45mm Connector Bolt Carriage Bolt Connector Bolt (4) 1/4" X 30mm (2) 1/4" X 40 mm (2) 1/4" X 2-1/4" Connector Bolt...
- Page 5 For details on accessories and other information, see us online at www.graceframe.com For shipping of materials to The Grace Company address package (postage prepaid) to: The Grace Company, 2225 South 3200 West, SLC, UT 84119. Materials may be returned only with a valid RMA# or Returned Merchandise Authorization Number which may be obtained by calling GraceWood, Inc.
- Page 6 3) Using the parts list as a reference, take the parts out of the box and make sure that you have them all. (If there is something missing or broken, contact the Grace Company at 1-800-264-0644. Our offices are open from 8:00 am- 5:00 pm MST Mon.-Fri.
-
Page 7: Step 1: Take Up Rail Mount End Assembly
Step 1: Take Up Rail Mount End Assembly Left Take Up Parts Needed: 1- Right and Left Take Up Rail Mount End Rail Mount End 4- 1/4” Jam Nut 4- 3/16” Flat Washer 4- 1/4” X 1-1/2” Carriage Bolt Left Take Up Rail Mount End Inside View 1/4"... -
Page 8: Step 2: Fabric Layer Rail Mount End Assembly
Step 2: Fabric Layers Rail Mount End Assembly Parts Needed: 1- Right and Left Fabric Layer Rail Mount End 4- 1/4” Jam Nut Left Fabric Layers 4- 3/16” Flat Washer Rail Mount End 4- 1/4” X 1-1/2” Carriage Bolt Left Fabric Layers Rail Mount End Inside View 1/4"... -
Page 9: Step 3: Rail Mount End Assembly
Step 3: Rail Mount End Assembly Parts Needed: 1- Right and Left Take Up Rail Mount End 1- Right and Left Fabric Layer Rail Mount End 1- Right and Left Rail Mount Ends 1-1/4" Fender Washer 4- 1- 1/4” Fender Washer 4- 1/4”... -
Page 10: Step 4: Frame End Hardware Assembly
Step 4: Frame End Hardware Assembly Parts Needed: 1- Right and Left Frame End 12- 1/4” X 1-1/2” Carriage Bolt 12- 3/16” Flat Washer 12- 1/4” Jam Nuts 1/4" X 1-1/2" Carriage Bolt 3/16" Flat Washer Left Frame End 1/4" Jam Nut Outside View Left Frame End •... -
Page 11: Step 5: Frame End Assembly
Step 5: Frame End Assembly Right Frame End Outside View Parts Needed: 1- Right and Left Frame End 1- Right and Left Rail Mount End 4- 1-1/4” Fender Washer 4- 1/4” Plastic Knob 1-1/4" Fender Washer 1/4" Plastic Knob • Place the top two bolts on the Right Frame End in the slots on the bottom of the Right Rail Mount. -
Page 12: Step 7: Side Leg Brace "A" Assembly
Front Left Side Leg Side Leg Outside View • Complete the above steps again to complete the Brace "B" Left Front Side Leg. 1/4" X 45mm Connector Bolt 1/4" Rectangle Nut Side Leg Front Left Step 7: Side Leg Brace “A” Assembly Parts Needed: 2- Side Leg Brace “A”... -
Page 13: Step 8: Legs To Frame End Assembly
Step 8: Legs to Frame End Assembly Parts Needed: 1- Right and Left Frame End 1- Right and Left Front Side Leg Right Frame End 1- Right and Left Back Side Leg Outside View 4- 1/4” Nylock Nut 4- 1/4” Flat Washer 4- 1- 1/4”... -
Page 14: Step 9: Table Assembly
Step 9: Table Assembly •IMPORTANT! Carefully identify your Front and Back Parts Needed: 1- Table #1 Crib Track Supports based on the position of the holes. 1- Table #2 NOTE: The Crib Back Track Support mounts to the “slot- ted” side of the table. 1*- Table #3 1- Front Crib and *Queen Table Aluminum Track Support 1- Back Crib and *Queen Table Aluminum Track Support... -
Page 15: Step 10: Middle Leg Spacer Assembly
Step 10: Middle Leg Spacer Assembly • You will not want to completely tighten the nuts on this step until you have completed track installation in step Parts Needed: 1- Crib Table (assembled) 11. Your tracks will go in easier if the bolt is not tight. 1*- Queen Table (assembled) 2- Middle Leg Spacer •... -
Page 16: Step 11: Track Installation
Step 11: Track Installation Crib Parts Needed: 2- 65-1/2” Plastic Track 1- Crib Table (assembled) Queen Parts Needed: 2- 99-1/2” Plastic Track 1- Queen Table (assembled) **CRIB TRACK is preinstalled in your Crib Track Support 65-1/2" Crib Plastic Track pieces. Installed Track NOTE: You have been provided plastic track for both possible frame sizes so that you will never have more than 1 piece of track in each track support. -
Page 17: Step 13: Middle Leg Installation
Instructions continued from previous page 1/4" X 3/4" Phillips Pan Head Screw • The 1/4 X 3/4” phillips pan head screw goes through the aluminum track support to the Side Leg Brace. (as illustrated left). • Two of the 1/4 X 1” phillips pan head screw go through the front Left Frame End to screw into the aluminum track support, similar to what you just did on the back. -
Page 18: Step 14: Middle Leg Assembly
• On the other bolt you will put a fender washer and then a plastic knob. • The right side is just opposite of the above instructions. The illustration on the previous page will help. • Lay the Little Graice on it’s side with the front down, as illustrated. - Page 19 • First, you will install one square end cap on the end of each 64” Rail. • Place the square hex nuts into the square end cap and the end cap into the end of the 64” rail. Round End Cap #10 Square Nut •...
- Page 20 • If you are setting your frame up in the queen size, you will need to add a coupler to the end that does not have the square end cap on the 64” Rail. • First, insert one end of the coupler into the end of the rail. Insert a #10 socket head screw through the second hole from the end of the rail and into the threaded hole of the coupler.
- Page 21 • Put the rails into the rail mount ends by putting the stem of the end cap from the ratchet side of each rail into the hole in the left rail mount end. Then force the end cap on the opposite side of the frame into the hole on the right rail mount end.
-
Page 22: Step 16: Ratchet Stop Assembly
1/4" X 1-1/2" Truss Bolt Step 17: Ratchet Stop Assembly Parts Needed: 3- Ratchet Stops 3- 1/4” x 1-1/2 Truss Bolt Ratchet Stop • You will need to put the bolt through the ratchet stop. • As pictured right, you will screw the ratchet stops into the holes near the ratchet wheels. -
Page 23: Step 18: Cross Brace Assembly
Step 19: Cross Brace Assembly OPTION #1 THINNER PLATFORM: If using a speed control Parts Needed: 1- Top Carriage (with handles) mechanism to power you machine (as opposed to the 1- Front Handle Cross Brace machine’s foot pedal), install the new, thinner platform 1- *Pedal Platform shown below: 1- *Thinner Platform... -
Page 24: Step 20: Cone Thread Guide Assembly
Step 21: Cone Thread Guide Assembly Parts Needed: 2- #10 X 3” Eye Bolt #10 Hex Nut 4- #10 Hex Nut 4- 3/16” Flat Washer • Tighten one of the jam nuts so it is almost to the end of the threads, by the eye. 3/16"... -
Page 25: Step 22: Lever Linkage To Handle Assembly
**You have the option of having the handles on the Left or Right side. You will want to decide the side you want them on before you get started on the rest of the steps.** • Slide a 1/4” washer on the end of a bolt and then thread the bolt through the hole that is the farthest away from the end of the Front Lever, as shown above. - Page 26 1/4" X 35mm Connector Bolt 1/4" Flat Washer Back Lever Linkage 3/16" Flat Washer 1/4" Nylock Nut Front Lever Linkage 1/4" X 40mm Connector Bolt • On the end of the bolt sticking out of your Middle Lever you will place a 1/4” washer and then slide the bolt through the hole on your Front Lever Linkage.
-
Page 27: Step 23: Pedal Clamp To Handle Assembly
Step 24: Pedal Clamp to Handle Assembly 1-1/4" Fender Washer 1/4" Plastic Knob 1/4" Jamb Nut Parts Needed: 1- Pedal Clamp Pedal 3/16" Flat Washer Clamp 1- Pedal Wheel Pedal Clamp Spacer 3- Pedal Clamp Spacer 1- 1/4” x 3” Carriage Bolt 1/4"... - Page 28 Before moving to the next step, test your bottom carriage by moving it from left to right along the track. If travel is not smooth, check your wheel alignment on the track. Do this be getting eye-level with the table of your frame.
-
Page 29: Step 25: Sewing Machine To Frame Assembly
Step 26: Sewing Machine to Frame Assembly Parts Needed: 1- Frame (assembled) 1- Sewing Machine • You must take your Cone Thread Holder off your carriage before you can slide your machine inside. You may have to take your cone thread guides out. •... -
Page 30: Step 29: Stylus To Carriage Assembly
Step 30: Stylus to Carriage Assembly Parts Needed: 1- Stylus (assembled) 1- Top Carriage (assembled) Stylus Clamp • Choose which side you want your stylus on and then you will loosen the back knob. • Slide the stylus onto the handles, as pictured right, and then tighten the knob back up. - Page 31 Optional 4th Rail Assembly Parts Needed: 1- 64” Rail 1/4" X 30mm 1- 34” Rail w/ Coupler Connector Bolt 1- Square Plastic Cap 1- Round Plastic Cap 2- Plastic End Cap 2- #8 X 7/8” Screw 2- 4th Rail Bracket 4- 1/4 X 30mm Connector Bolt •...
-
Page 32: Fabric Installation
Congratulations! You have completed the assembly of your Little Gracie Quilting Frame. Save any extra hardware you have left over (if you assembled the crib size you will have bolts and wood pieces remaining). Store these in a safe, dry place for later use. All that remains is to install your fabric and begin quilting! With the specially designed Fabri-Fast rails, installing your fabric is easier on the Little Gracie than on any other frame. -
Page 33: Making Cloth Leaders
5" Take Up Center your cloth leader lengthwise along the rail. Leader 20-1/2" Top Using Grace’s new Fabri-Fast System, take a piece Fabric Leader of plastic tubing (cut to the appropriate length), and, holding your cloth leader to the slot (lining up the dashed line), press the tubing over the leader and into the slot. -
Page 34: Installing Your Fabric Layers To The Rails
INSTALLING YOUR FABRIC LAYERS TO THE RAILS STEP 1: QUILT BACKING TO SECOND RAIL To begin, determine which will be the front and back edges of your quilt BACKING (be sure it will fit within the width of your frame set-up). NOTE: If your backing is made up of more than one piece of fabric, cut your selvedges off and flatten them out to allow the backing the proper give it needs. -
Page 35: Step 5: Putting Your Machine/Carriages Onto Frame
backing, along the pinned edge on the take up rail. If you have the Optional 4th Rail, roll the batting onto rail, being sure to roll the proper direction so that it, like the quilt top, comes off the rail from the bottom when unrolling. Quilt Backing STEP 4: ATTACHING YOUR QUILT LAYERS TO THE TAKE UP RAIL... -
Page 36: Rolling Your Fabric
Rolling your fabric When you have completed your work area and are ready to roll to the next, simply take the stops off the 2 and 3 rails, allowing them to roll freely. Then, with one or both hands, roll the 1 rail forward, rolling the completed work area onto that rail.
Need help?
Do you have a question about the Little Gracie II and is the answer not in the manual?
Questions and answers