Table of Contents
Advertisement
Advertisement
Table of Contents

Related Manuals for Cognex In-Sight 1720 Series


Summary of Contents for Cognex In-Sight 1720 Series
- Page 3 The information in this document is subject to change without notice and should not be construed as a commitment by Cognex Corporation. Cognex Corporation is not responsible for any errors that may be present in either this document or the associated software.
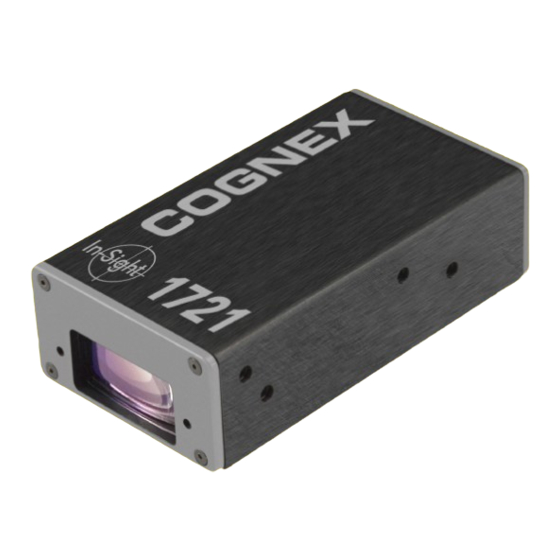
- Page 4 Regulations/Compliance Regulations/Compliance Declaration of Conformity Cognex Corporation Manufacturer One Vision Drive Natick, MA 01760 USA Declares this -marked Wafer Reader Machine Vision System Product Product Number In-Sight 1721: P/N 800-5865-1; P/N 800-5865-1R (RoHS Compliant) In-Sight 1722: P/N 800-5865-2; P/N 800-5865-2R (RoHS Compliant)
- Page 5 Observe these precautions when installing the In-Sight wafer reader to reduce the risk of injury or equipment damage: • The wafer reader is intended to be supplied by a Cognex power source (24V ±10%). Any other voltage creates a risk of fire or shock and can damage the In-Sight hardware.
- Page 6 Precautions...
-
Page 7: Table Of Contents
® Installing In-Sight 1720 Series Wafer Readers Table of Contents Introduction...........................1 In-Sight 1720 Series Wafer Reader Overview .............1 In-Sight Support ......................1 Initial Setup Checklist....................2 Set Up the PC ........................3 Install the In-Sight Software on a Windows PC ............3 Determine the Network Configuration................5 2.2.1... - Page 8 Table of Contents Appendix A..........................39 Firmware Update Instructions..................39 A.1.1 Updating the Firmware.................. 39 A.1.2 Copy the .JOB and .HTML Files ..............40 Appendix B..........................41 Connecting the Breakout Module ................41 Appendix C..........................43 Cleaning the Reader....................43...
- Page 9 Figure 4-8: Location of Focus Adjustment Screw ...............27 Figure 4-9: Image Artifact Example ....................28 Figure 5-1: LED Outputs ......................32 Figure 5-2: Acquisition Trigger Input Schematic .................34 Figure 5-3: In-Sight 1720 Series Wafer Reader Dimensions............37 Figure 5-4: In-Sight 1720 Series Wafer Reader Dimensions with Horizontal Mirror Mount ..38...
- Page 10 List of Figures viii...
- Page 11 1720 Series Wafer Readers List of Tables Table 3-1: Working Distances .....................14 Table 5-1: In-Sight 1720 Series Wafer Reader General Specifications ........30 Table 5-2: LED Function ......................32 Table 5-3: Breakout Port Pin Assignments .................33 Table 5-4: Acquisition Trigger Input Specifications..............34 Table 5-5: CAT5/CAT5e Network Cable Wiring................35...
- Page 12 List of Tables...
-
Page 13: Introduction
In-Sight Native Mode commands to change settings and retrieve read results. In-Sight Support The following resources are available to assist you in using the In-Sight 1720 series wafer reader and graphical user interface: ®... -
Page 14: Initial Setup Checklist
Introduction Initial Setup Checklist Install the In-Sight Software on a Windows PC Determine the Network Configuration Configure the PC’s Network Settings (Non-DHCP) Verify Required Hardware Components Attach the Mirror for Horizontal Operation (Optional) Mount the Wafer Reader Connect the Network and Breakout Cables Add the Wafer Reader to the Network Log On to the Wafer Reader Acquire an Image... -
Page 15: Set Up The Pc
2 Set Up the PC In this Section… Install the In-Sight Software on a Windows PC ....... 3 Determine the Network Configuration ..........5 Configure the PC’s Network Settings (Non-DHCP)......8 Install the In-Sight Software on a Windows PC The In-Sight wafer reader may be configured, and its operation monitored, over an Ethernet network from a PC. - Page 16 Set Up the PC In-Sight Explorer can connect to both In-Sight 1720 series wafer readers running the new .NET user interface and to legacy In-Sight 1700 and 1701 readers running the Java applet interface. If an In-Sight 1700 or 1701 wafer reader is double-clicked in the In-Sight Explorer Network pane, the Java applet Browser View will open within the In-Sight Explorer interface for the selected wafer reader.
-
Page 17: Determine The Network Configuration
PC are on a non-DHCP network. For information on configuring your PC’s network settings on a non-DHCP network, refer to Section 2.3. The In-Sight 1720 series wafer reader has an Autosense capability, allowing the wafer reader to connect directly to a PC using either a standard CAT5 network cable or a CAT5 crossover cable. -
Page 18: Figure 2-2: Standalone In-Sight Network With Ethernet Switch
Set Up the PC Configurations Using Switches/Routers An In-Sight network may be extended to include multiple wafer readers by using an Ethernet switch or network router. The only limit on the size of this type of network is the number of routers or switches connected and the number of connections they provide. -
Page 19: Fab Floor In-Sight Network Configurations
® Installing In-Sight 1720 Series Wafer Readers 2.2.2 Fab Floor In-Sight Network Configurations To take full advantage of its networking capabilities, the wafer reader can operate as a host on the larger, fab floor network. The only physical difference between fab floor-networked wafer readers and a standalone wafer reader network is that the switch/router is connected directly to the network. -
Page 20: Configure The Pc's Network Settings (Non-Dhcp)
Set Up the PC Configure the PC’s Network Settings (Non-DHCP) This section provides information on how to configure Microsoft Windows network settings in order to connect to a wafer reader running In-Sight software on a non-DHCP network. NOTE The steps listed below and the example dialogs are specific to Windows XP Professional. 2.3.1 Configure the IP Address and Subnet Mask 1. -
Page 21: Figure 2-5: Select Network Protocol Dialog
® Installing In-Sight 1720 Series Wafer Readers 7. For Non-DHCP networks, click the “Use the following IP address” radio button (Figure 2-5). The IP address, Subnet Mask, Default Gateway, Preferred DNS server and Alternate DNS server fields, which are grayed-out, become active. Figure 2-5: Select Network Protocol Dialog a. - Page 22 Set Up the PC...
-
Page 23: Install The Wafer Reader
Connect the Network and Breakout Cables ........15 This section describes the connection of the wafer reader to its standard and optional components. For a complete list of options and accessories, contact your Cognex sales representative. Verify Required Hardware Components •... -
Page 24: Attach The Mirror For Horizontal Operation (Optional)
Install the Wafer Reader Attach the Mirror for Horizontal Operation (Optional) The optional horizontal mirror attachment (P/N 800-5796) allows the wafer reader to be installed in top or bottom-side reading applications where a low mounting profile is required. NOTE For an increased working distance, mount the horizontal mirror in the recommended configuration. To attach the mirror mount: 1. -
Page 25: Mount The Wafer Reader
® Installing In-Sight 1720 Series Wafer Readers Mount the Wafer Reader The working distance is adjustable, with a factory-set option of 50.0mm when vertically mounted. The useable working distance range is 1 to 80.0mm for the wafer reader in the vertical position. -
Page 26: Table 3-1: Working Distances
Install the Wafer Reader Table 3-1 shows examples of the wafer reader’s vertical working distances and the corresponding horizontal working distances required at the same focal setting. For more information on adjusting the focus, refer to Section 4.4. Table 3-1: Working Distances Corresponding Horizontal Working Distance Vertical Working Recommended Mirror Mounting... -
Page 27: Connect The Network And Breakout Cables
® Installing In-Sight 1720 Series Wafer Readers Connect the Network and Breakout Cables The wafer reader has two RJ-45 connector ports: the Network Port and the Breakout Port (see Figure 3-4). The Network Port provides the Ethernet connection for network communications. - Page 28 Install the Wafer Reader To Connect the Breakout Cable to the Wafer Reader: 1. Verify the 24VDC power supply being used is switched off. 2. Attach the Breakout Cable’s power (white-green wire) and ground (brown wire) to the corresponding terminals on the power supply. 3.
-
Page 29: Configure The Wafer Reader
4 Configure the Wafer Reader In this Section… Add the Wafer Reader to the Network .......... 17 Log On to the Wafer Reader ............24 Acquire an Image ................26 Adjust the Focus ................27 Add the Wafer Reader to the Network The Wafer reader is ready to be installed as a network host once it has power and is physically connected to the network. -
Page 30: Install To A Non-Dhcp Network
Configure the Wafer Reader 4.1.2 Install to a Non-DHCP Network To install the wafer reader on a network that does not provide a DHCP server, use the In-Sight Connection Manager to configure the wafer reader's network settings. 1. Ensure that the wafer reader is connected to the network and has power. 2. -
Page 31: Figure 4-2: User Name And Password
® Installing In-Sight 1720 Series Wafer Readers 5. You may need to supply administrative credentials (User Name and Password) for at least one In-Sight wafer reader on your network in order to proceed (Figure 4-2). 6. Click Next. Figure 4-2: User Name and Password... -
Page 32: Figure 4-3: Mac Address
Configure the Wafer Reader 7. In the left-hand text box, enter the MAC Address for the wafer reader you would like to configure, then click Add (Figure 4-3). Repeat these two steps for any additional wafer readers you would like to configure. Alternately, you can simply cycle power on any wafer readers you would like to configure, and the In-Sight Connection Manager will automatically add the corresponding MAC address to the list after they reboot. -
Page 33: Figure 4-4: Set Network Configuration Dialog
® Installing In-Sight 1720 Series Wafer Readers 9. In the Set Network Configuration dialog (Figure 4-4), select the first option, “Use The Following Network Settings For All Sensors”. Figure 4-4: Set Network Configuration Dialog 10. Enter values for the Subnet mask; these settings will be applied to every wafer reader. -
Page 34: Figure 4-5: Enter Ip Address
Configure the Wafer Reader 13. For each wafer reader in the table (Figure 4-5), enter a unique IP address in the New IP column. Optionally, you can type in meaningful names for each wafer reader under the New Name column. 14. -
Page 35: Figure 4-6: Configure In-Sight Vision Sensors
® Installing In-Sight 1720 Series Wafer Readers 15. Click Configure (Figure 4-6). Figure 4-6: Configure In-Sight Vision Sensors 16. For every wafer reader in the table, disconnect the power for five seconds and reconnect it. The status text will change once the new network settings have been confirmed. -
Page 36: Log On To The Wafer Reader
Configure the Wafer Reader Log On to the Wafer Reader After the wafer reader has been added to the network, log on to the wafer reader to verify the installation. To log on to a wafer reader, you must supply a valid User Name and Password. NOTE If you are connecting to a newly installed wafer reader, leave the Password field blank. -
Page 37: Figure 4-7: Http Logon Dialog
® Installing In-Sight 1720 Series Wafer Readers To Open a Connection to the Wafer Reader from Internet Explorer: 1. Enter the IP address or host name of the wafer reader into the browser’s Address Bar followed by “/WaferID.html” (for example, http://192.168.0.1/WaferID.html or http://is1721_00060b/WaferID.html). -
Page 38: Acquire An Image
Examples: To log on as admin, with no password and open the WaferID.html file: http://is1721_00060b/WaferID.html?isSL=admin+ To log on as admin, with the password Cognex and open the WaferID.html file: http://192.168.0.1/WaferID.html?isSL=admin+Cognex Acquire an Image Once you’ve logged on to the wafer reader, you can verify the acquisition of live images. -
Page 39: Adjust The Focus
® Installing In-Sight 1720 Series Wafer Readers Adjust the Focus The recommended working distance range is 1 to 80mm for the wafer reader in the vertical position. If using the horizontal mirror mount, the recommended working distance range is 1 to 56.0mm. -
Page 40: Image Artifacts
Configure the Wafer Reader 4.4.1 Image Artifacts Under certain conditions, horizontal lines may be observed in the image (Figure 4-9). These lines are artifacts of the wafer reader’s optical design. They are most visible at a working distance of approximately 30.0mm, with a dark field image (most often observed when the lighting Mode is set to Mode 4 –... -
Page 41: Specifications
5 Specifications In this Section… General Specifications ..............29 I/O Specifications ................32 CAT5 Network Cable Specifications ..........35 Mechanical Specifications ............. 36 General Specifications The following sections list general specifications for the In-Sight 1720 series wafer readers. -
Page 42: Table 5-1: In-Sight 1720 Series Wafer Reader General Specifications
Specifications Table 5-1: In-Sight 1720 Series Wafer Reader General Specifications Specification Description Configurations Vertical mount w/ factory-set 50.0mm working distance. In-Sight 1721: P/N 800-5865-1; P/N 800-5865-1R (RoHS Compliant) In-Sight 1722: P/N 800-5865-2; P/N 800-5865-2R (RoHS Compliant) Optional Horizontal Mirror Mount (800-5796-1) Firmware In-Sight version 2.90 and later. - Page 43 ® Installing In-Sight 1720 Series Wafer Readers Communications Network 1 Ethernet port, 10/100 Base-T, TCP/IP protocol. Supports DHCP (factory default) or static IP address. Serial 1 RS-232C port (4800 to 115,200 baud rates). Protocols In-Sight, Native Mode, Electroglas and LKx5. Power 24 ±10% VDC;...
-
Page 44: I/O Specifications
Specifications I/O Specifications The wafer reader features one built-in acquisition trigger input and two user-configurable LED outputs for general-purpose use. 5.2.1 Wafer Reader Status LEDs As shown in Figure 5-1, the wafer reader provides four status LEDs; two LEDs are user- configurable outputs. -
Page 45: Breakout Port Pin Assignments
® Installing In-Sight 1720 Series Wafer Readers 5.2.2 Breakout Port Pin Assignments Table 5-3 lists the pin assignment for each of the 8 signal lines of the Breakout Port (labeled “24VDC”) according to each method of access. Table 5-3: Breakout Port Pin Assignments In-Sight Breakout Breakout Cable Signal... -
Page 46: Acquisition Trigger Input Specifications
Specifications 5.2.3 Acquisition Trigger Input Specifications Table 5-4: Acquisition Trigger Input Specifications Specification Description ON 20 to 28V (24V nominal) Voltage OFF 0 to 3V (12V nominal threshold) ON 2.0 to 2.9mA Current OFF <150µA Resistance ~10,000 Ohms For higher current add external resistor (for example, 2.2kΩ, 0.5W for 12mA) across inputs. -
Page 47: Cat5 Network Cable Specifications
® Installing In-Sight 1720 Series Wafer Readers CAT5 Network Cable Specifications Cognex-supplied, straight-pinned and crossover network patch cables meet CAT5/CAT5e specifications using 568-B standard wire pairing. Table 5-5: CAT5/CAT5e Network Cable Wiring Straight-Pinned Signal Name RJ-45 Connectors Wire Color TPO+... -
Page 48: Mechanical Specifications
Specifications Mechanical Specifications The following sections present dimensional drawings for the In-Sight 1720 series wafer readers. NOTE All dimensions are shown in millimeters [inches]. -
Page 49: In-Sight 1720 Series Wafer Reader Dimensions
Installing In-Sight 1720 Series Wafer Readers 5.4.1 In-Sight 1720 Series Wafer Reader Dimensions Figure 5-3: In-Sight 1720 Series Wafer Reader Dimensions CAUTION The wafer reader must be mounted from only one side. Mounting the wafer reader from both sides may... -
Page 50: Figure 5-4: In-Sight 1720 Series Wafer Reader Dimensions With Horizontal Mirror Mount
Specifications Figure 5-4: In-Sight 1720 Series Wafer Reader Dimensions with Horizontal Mirror Mount (Recommended Horizontal Configuration) CAUTION The wafer reader must be mounted from only one side. Mounting the wafer reader from both sides may damage optical components. The maximum torque is 1.5 N-m (13.5 in-lb). -
Page 51: Firmware Update Instructions
Appendix A A.1 Firmware Update Instructions WARNINGS ■ The firmware update process will erase all job and settings files from In-Sight non-volatile flash memory. In-Sight Explorer creates a backup of all job files and settings prior to the firmware update. These files are restored to the wafer reader automatically after the firmware update;... -
Page 52: Copy The .Job And .Html Files
1. Open a command prompt. 2. From the root directory, change the directory to the Wafer ID 3.x.x directory (for example, cd Program Files\Cognex\In-Sight\In-Sight Wafer ID 3.x.x). 3. Open an FTP session by typing ftp followed by the wafer reader's IP address or Host Name (for example, ftp 196.68.0.1 or ftp is1721_00060b). -
Page 53: Connecting The Breakout Module
Appendix B B.1 Connecting the Breakout Module The optional In-Sight Breakout Module (P/N 800-5743) is more convenient than using the standard Breakout Module cable to connect the wafer reader’s power, serial communications, and I/O lines. For additional information on connecting a Breakout Module, refer to the In-Sight Breakout Module Installation and Reference manual (P/N 597-0008-xx). - Page 54 Connecting the Breakout Module...
-
Page 55: Cleaning The Reader
Appendix C C.1 Cleaning the Reader To maintain optimal imaging and reading performance, keep the glass read window free of dust and fingerprints. To remove dust, use a pressurized air duster. If the window needs cleaning, use a lens cleaning cloth or a cleaner approved for use on coated optics. Do not spray water or cleaning fluids directly onto the glass window, which could allow moisture to enter the case. - Page 56 Installing the In-Sight ® 1720 Series Wafer Reader P/N 597-0047-01 www.cognex.com...
Need help?
Do you have a question about the In-Sight 1720 Series and is the answer not in the manual?
Questions and answers