
Related Manuals for Soredex Cranex Novus e


Summary of Contents for Soredex Cranex Novus e
- Page 1 ENGLISH CRANEX™ Novus e Digital Panoramic X-ray Unit User Manual 208898 rev. 4 (2015-01) Reviewed: Savinen Antti Juhani 2015-03-12 11:32 D508980, 4 Approved: Ukkonen Juha-Pekka 2015-03-13 13:08...
- Page 2 Reviewed: Savinen Antti Juhani 2015-03-12 11:32 D508980, 4 Approved: Ukkonen Juha-Pekka 2015-03-13 13:08...
- Page 3 Digital Panoramic X-ray Unit User Manual Medical Device Directive 93/42/EEC Number 208898 rev. 4 (2015-01) Original approved English language version Manufactured by SOREDEX, PaloDEx Group Oy Nahkelantie 160, FI-04300 Tuusula, Finland Tel. + 358 (0)10 270 2000 www.soredex.com User Manual 208898...
- Page 4 Contents CRANEX Novus e CRANEX, DIGORA, SCANORA and MULTICONNECT are either registered trademarks or trademarks of Soredex in the United States and/or other coun- tries. Soredex endeavours to produce product documentation that is accurate and up to date. However, our policy of continual product development may result in changes to products that are not refl...
-
Page 5: Table Of Contents
A.1 Technical specifi cations ................A-1 A.2 Unit dimensions ..................A-9 A.3 Symbols that may appear on the unit ............A-10 A.4 EMC declaration for CRANEX Novus e (CRA-2) ........A-12 User Manual 208898 Reviewed: Savinen Antti Juhani 2015-03-12 11:32 D508980, 4 Approved: Ukkonen Juha-Pekka 2015-03-13 13:08... - Page 6 Contents CRANEX Novus e User Manual 208898 Reviewed: Savinen Antti Juhani 2015-03-12 11:32 D508980, 4 Approved: Ukkonen Juha-Pekka 2015-03-13 13:08...
-
Page 7: Introduction
CRANEX Novus e 1. Introduction 1. Introduction 1.1 CRANEX™ Novus e X-ray unit The CRANEX Novus e (the unit) is a digital pano- ramic dental x-ray unit designed to take: Adult panoramic exposures Child panoramic exposures (reduced width) TMJ exposures... -
Page 8: About This Manual
1. Introduction CRANEX Novus e 1.2 About this manual This manual describes how to use and set up the unit. Please read these instructions carefully before op- erating the unit. Before operating the unit, please read and observe the warnings and precautions that appear in section 8. -
Page 9: Unit Description
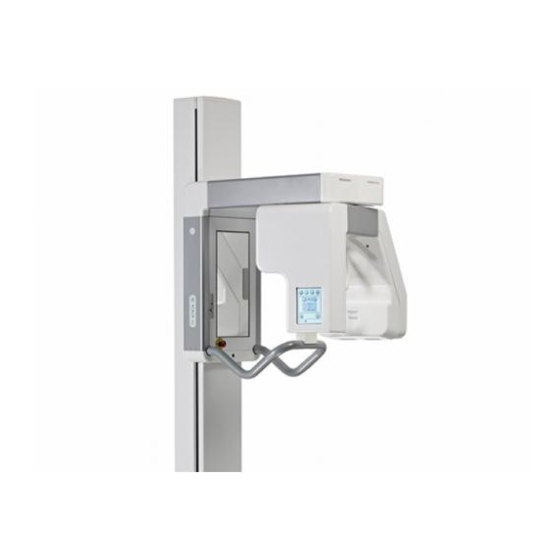
CRANEX Novus e 2. Unit description 2. Unit description 2.1 Main parts 1. Exposure warning light 2. Emergency stop button (Press to stop, rotate to release) 3. Exposure switch 4. On / off switch (rear of column) 5. Column 6. Sensor 7. -
Page 10: Reviewed: Savinen Antti Juhani 2015-03-12 11:32 D508980
2. Unit description CRANEX Novus e 9. Patient positioning mirror 10. Frankfort light 11. Midsaggital light 12. Focal trough light 13. Head support 14. Patient handles 15. Chin support A. Chin rest and bite block B. Chin rest and lip holder C. -
Page 11: Control Panels And Keys
CRANEX Novus e 2. Unit description 2.2 Control panels and keys Side control panel Lights key - switches the positioning lights on and off. Up / down keys Return key - drives rotating unit to the patient in/out position (PIO) -
Page 12: Accessories
2. Unit description CRANEX Novus e 2.3 Accessories Chin rest Disposable cover Bite block Disposable cover Rod short (62.5 mm) Rod long (72.5 mm) Lip holder Disposable cover Lip support Disposable cover User manual 208898 Reviewed: Savinen Antti Juhani 2015-03-12 11:32 D508980, 4... -
Page 13: Using The Unit
CRANEX Novus e 3. Taking an Exposure 3. Using the Unit IMPORTANT NOTE: If the unit is being used for the fi rst time or if you are using the unit for the fi rst time check that it is set up to your requirements. - Page 14 3. Taking an Exposure CRANEX Novus e NOTE: If the no connection symbol (X) appears next to the unit status indictor, it indicates that there is no connection between the unit and the PC. See section 6. Troubleshooting and Maintenance for more information.
- Page 15 CRANEX Novus e 3. Taking an Exposure 6. Press the Return key to drive the rotating unit to the Patient In/Out (PIO) position. If the Patient Name key appears on the display, you can check the patient’s name by pressing the Patient Name key once.
- Page 16 3. Taking an Exposure CRANEX Novus e DIGORA for Windows software (not in USA) 1. PC: Switch on the PC that is connected to the unit. 2. PC: Open DIGORA for Windows software and then open a patient card. 3. Switch the unit on. The on/off switch is at the rear of the column near the base.
- Page 17 CRANEX Novus e 3. Taking an Exposure 5. PC: Click the Reserve the device button to reserve the unit. The Connect window will disappear and the GREEN Multiconnect icon will start to fl ash. This indicates that you have now reserved the unit and it is now ready to take an exposure.
-
Page 18: Exposure Programs
3. Taking an Exposure CRANEX Novus e 3.2 Exposure programs Exposure programs can be selected using the unit’s main control panel. Before taking exposures, it is recommended to revise the need for the exposure and select the exposure program accordingly. - Page 19 CRANEX Novus e 3. Taking an Exposure Exposed areas of TMJ program Exposed areas of Bitewing program (optional) User manual 208898 Reviewed: Savinen Antti Juhani 2015-03-12 11:32 D508980, 4 Approved: Ukkonen Juha-Pekka 2015-03-13 13:08...
- Page 20 3. Taking an Exposure CRANEX Novus e Exposed sections of Sectional Panoramic program (1...5) (optional) NOTE: Section heights are the same, the differences shown are for illustrative purposes only. Section selection keys in Sectional Panoramic screen. Selected sections are highlighted in green.
-
Page 21: Taking Exposures
CRANEX Novus e 3. Taking an Exposure 3.3 Taking Exposures Panoramic - Adult, Child and Sectional 1. Slide the chin rest on to the support holder. 2. For dentate patients, attach the bite block to the rod and then insert the rod and bite block into the appropriate hole in the chin rest according to the patient’s occlusion. - Page 22 3. Taking an Exposure CRANEX Novus e For edentulous patients use the lip holder and insert it into the round hole at the rear of the chin rest. 3. Place the appropriate disposable covers on to the patient support you are using.
- Page 23 CRANEX Novus e 3. Taking an Exposure 5. A default kV value for the selected panoramic program will appear on the display. If you consider that the default kV value for the program selected is not correct for the patient being examined, select a different kV value based on the patient’s size, age and estimated...
- Page 24 3. Taking an Exposure CRANEX Novus e 7. Ask the patient to remove any spectacles, dentures, jewelry and hair clips and pins. Place a protective lead apron over the patient’s shoulders. NOTE: If the patient is nervous, you can reassure him/ her by demonstrating how the unit works before taking the exposure.
- Page 25 CRANEX Novus e 3. Taking an Exposure 10. Press the mirror to open it so that you can see a refl ection of the patient. The patient positioning lights will automatically come on when the mirror is opened or when one of the Up/Down keys is pressed.
- Page 26 3. Taking an Exposure CRANEX Novus e 12. Press either Up/Down key to adjust the tilt of the patient’s head until the patient’s Frankfort plane coincides with, or is parallel to, the horizontal light. If necessary use the light positioning knob to adjust the height of the light.
- Page 27 CRANEX Novus e 3. Taking an Exposure If the roots of the front incisors are on the same vertical plane but not within the focal trough reposition the patient by moving the rod and bite block backwards or forwards. 14. Close the temple supports by sliding the temple support knob to the right (A).
- Page 28 3. Taking an Exposure CRANEX Novus e 16. Make sure that the unit status indicator is still GREEN, indicating that the unit is ready to take an exposure. If the indicator is not GREEN the unit reservation time may have expired.
- Page 29 CRANEX Novus e 3. Taking an Exposure 21. Press the release button (A) at the top of the forehead support and then slide the forehead support away from the patient (B). Open the temple supports by sliding the temple support knob to the left (C).
-
Page 30: Temporomandibular Joint (Tmj)
3. Taking an Exposure CRANEX Novus e Temporomandibular Joint (TMJ) 1. Slide the lip support on to the support holder. Use the slot nearest the mirror for patients with large skulls and the slot furthest away from the mirror for patient with small skulls. - Page 31 CRANEX Novus e 3. Taking an Exposure 5. Ask the patient to remove any spectacles, dentures, jewelry and hair clips and pins. Place a protective lead apron over the patient’s shoulders. NOTE: If the patient is nervous you can reassure him/ her by demonstrating how the unit works before taking the exposure.
- Page 32 3. Taking an Exposure CRANEX Novus e The Patient Positioning lights can also be switched on and off with the Lights key. 9. Look at the refl ection of the patient in the mirror and position the midsagittal plane of the patient so that it coincides with the midsagittal plane light.
- Page 33 CRANEX Novus e 3. Taking an Exposure 11. Close the temple supports by sliding the temple support knob to the right (A). Make sure that patient’s neck is stretched and straight. Adjust the height of the forehead support until it is level with the patient’s forehead or nasion (B).
- Page 34 3. Taking an Exposure CRANEX Novus e 16. Move at least two metres from the unit and protect yourself from radiation. Make sure that you can see and hear the patient during the exposure. 17. Press and hold down the exposure button for the duration of the exposure.
- Page 35 CRANEX Novus e 3. Taking an Exposure 20. Press the release button (A) at the top of the forehead support and then slide the forehead support away from the patient (B). Open the temple supports by sliding the temple support knob to the left (C).
-
Page 36: Bitewing (Optional)
3. Taking an Exposure CRANEX Novus e Bitewing (Optional) 1. Slide the chin rest on to the support holder. 2. Attach the bite block to the rod and insert the rod and bite block into hole 4 in the chin rest. - Page 37 CRANEX Novus e 3. Taking an Exposure 5. A default kV value for the selected program will appear on the display. If you consider that the default kV value for the program selected is not correct for the patient being examined select a different kV value based on the patient’s size, age and estimated...
- Page 38 3. Taking an Exposure CRANEX Novus e 8. Ask the patient to step into the unit, grasp the patient handles, place his/her chin on the chin rest and bite gently the notches in the bite block. NOTE! Evaluate the condition of the patient’s dentition before using the bite block.
- Page 39 CRANEX Novus e 3. Taking an Exposure 11. Press either Up/Down key to adjust the tilt of the patient’s head until the patient’s Occlusal plane coincides with, or is parallel to, the horizontal light. If necessary use the light positioning knob to adjust the height of the light.
- Page 40 3. Taking an Exposure CRANEX Novus e 14. Make sure that the unit status indicator is still GREEN, indicating that the unit is ready to take an exposure. If the indicator is not GREEN the unit reservation time may have expired.
- Page 41 CRANEX Novus e 3. Taking an Exposure 19. Press the release button (A) at the top of the forehead support and then slide the forehead support away from the patient (B). Open the temple supports by sliding the temple support knob to the left (C).
-
Page 42: Operating The Unit Without Generating X-Rays
4. Operating the unit without x-rays CRANEX Novus e 4. Operating the unit without generating x-rays In some situations, for example with nervous patients or patients with unusual anatomy, you may wish to operate the unit without generating x-rays before taking an exposure. -
Page 43: Unit Setup
CRANEX Novus e 5. Unit Setup 5. Unit Setup Various set-up options allow the unit to be customized to your requirements 5.1 Setup options 1. PC: Open the dental imaging software you are using. 2. Select Options and then click Novus e Setup. - Page 44 5. Unit Setup CRANEX Novus e The Image Capturing fi eld (DIGORA for Windows software only) The Show Image Preview check box, see section 5.2 Image Preview. The Image Processing fi eld (DIGORA for Windows software only) The Noise Filtering check box should normally be selected.
- Page 45 CRANEX Novus e 5. Unit Setup The Retrieve Last Image fi eld: (DIGORA for Windows software) (SCANORA software) If the last image taken is not transferred to the PC because of a network, PC or software failure, the image can be retrieved from the unit memory.
- Page 46 5. Unit Setup CRANEX Novus e Device Serial Number fi eld: Click the Add serial number ... check box and the serial number of the unit will be added to all new images. The serial number will appear in the top left-hand corner and the bottom right- hand corner of the image.
- Page 47 CRANEX Novus e 5. Unit Setup 5.2 Image Preview (DIGORA for Windows software only) The Image Preview feature allows an image to be adjusted BEFORE it is saved. The adjustments will be applied to the open image only or to ALL subsequent images.
- Page 48 5. Unit Setup CRANEX Novus e NOTE: If you wish to have the factory default settings click the Factory defaults radio button. The Marking fi eld These tools allow you to add text and numbers to an image. User manual 208898...
-
Page 49: Troubleshooting And Maintenance
CRANEX Novus e 6. Troubleshooting and Maintenance 6. Troubleshooting and Maintenance 6.1 Error messages and symbols If the unit is not used correctly or the unit malfunctions an error message or symbol will appear on the unit display. There are three groups of error message:... - Page 50 6. Troubleshooting and Maintenance CRANEX Novus e Error symbols REASON The PC connected to the unit is not on. The dental imaging software in the PC is not open. iii. The cable connecting the unit to the PC is disconnected or damaged.
- Page 51 CRANEX Novus e 6. Troubleshooting and Maintenance User errors REASON The exposure button was released during an exposure. SOLUTION Clear the error message and check if the attempted exposure is suffi cient for the diagnostic task. If it is not, take a new exposure.
- Page 52 6. Troubleshooting and Maintenance CRANEX Novus e REASON Z-motor has overheated. SOLUTION Wait until the Z-motor, driving the unit up and down, has cooled down. The error message clears automatically when the motor has cooled down to the appropriate level. If the error message keeps on appearing or does not disappear within a reasonable amount of time, contact service.
-
Page 53: Care And Maintenance
CRANEX Novus e 6. Troubleshooting and Maintenance 6.2 Care and Maintenance Cleaning and disinfecting the unit Warning Switch the unit off before cleaning it. Surfaces that the patient touches All surfaces and parts that the patient touches or comes into contact with must be disinfected after each patient. - Page 54 6. Troubleshooting and Maintenance CRANEX Novus e Correct operation of the unit If any of the unit’s controls, displays or functions fail to operate or do not operate in the way described in this manual, switch the unit off, wait 30 seconds and then switch the unit on again.
- Page 55 CRANEX Novus e 6. Troubleshooting and Maintenance Yearly maintenance Once a year an authorized service technician must carry out a full inspection of the unit. The following tests and checks must be carried out: – a kV/mA test – a beam alignment test –...
-
Page 56: Quality Assurance
7. Quality Assurance CRANEX Novus e 7. Quality Assurance Additional Quality Assurance (QA) exposures can be taken after installation and periodically to ensure that the image quality remains stabile. The QA exposures can be taken using a special QA program. - Page 57 CRANEX Novus e 7. Quality Assurance Taking a QA exposure: 1. PC: Prepare the unit for an exposure. 2. Attach the Ball and Pin Phantom to the chin support. 3. Then attach the Digital Test Tool (Prüfkörper test tool) to the Ball and Pin Phantom.
- Page 58 7. Quality Assurance CRANEX Novus e 6. The QA program screen appears. Here the user can select from two preset programs which to use for the QA exposure. QA 1 for use with 0,8mm thick Cu fi lter QA 2 for use with 1,8mm thick Cu fi lter 7.
- Page 59 CRANEX Novus e 7. Quality Assurance 12. PC: Visually evaluate the result using the dental imaging software. Subjects to be evaluated: 1. Exposed area; Smoothness of the exposed area. Non-exposed area surrounds the whole image. 2. Line Pair Resolution; minimum 2.5 LP/mm must be distinguishable.
- Page 60 7. Quality Assurance CRANEX Novus e NOTE: When using the 0.8 mm copper fi lter the expected Line Pair resolution achievable with the unit is 3.1 LP/mm or better, with all four low contrast resolution holes distinguishable. The line pair and low contrast resolutions...
-
Page 61: Warnings And Precautions
If this device will be used with 3rd party imaging • application software not supplied by Soredex, the 3rd party imaging application software must comply with all local laws on patient information software. This includes, for example, the Medical Device Directive 93/42/ EEC and/or FDA if applicable. -
Page 62: User / Patient Warnings
8. Warnings and precautions Cranex Novus e 8.2 User / patient warnings • The unit may be dangerous to the user and the patient, if the safety regulations in this manual are ignored, if the unit is not used in the way described in this manual and/or if the user does not know how to use the unit. - Page 63 Cranex Novus e 8. Warnings and precautions enough to fully protect the user from radiation. The radiation protection area must be at least 60 cm wide, 60 cm deep and 200 cm high. The radiation protection screen must include lead shielding with a minimum thickness 0.5...
- Page 64 Do not use the unit if any of its covers, parts or cables are damaged, loose or have been removed. Contact a service person approved by Soredex and get them to repair or replace any damaged, loose or removed covers, parts or cables before reusing the unit.
-
Page 65: Disposal
CRANEX Novus e 9. Disposal 9. Disposal At the end of useful service life of the device, its spare parts, its replacement parts and its accessories make sure that you follow all local, national and international regulations regarding the correct and safe disposal and/or recycling of the device, its spare parts, its replacement parts and its accessories. -
Page 66: Appendix A. Technical Information
CRANEX Novus e Appendix A. Technical Information Appendix A. Technical Information A.1 Technical specifi cations Type CRA-2 Classifi cation Complies with - IEC 60601-1 - IEC 60601-1-2 - IEC 60601-1-3 - IEC 60601-1-4 - IEC 60601-2-7 - IEC 60601-2-28 - IEC 60601-2-32... - Page 67 Appendix A. Technical Information CRANEX Novus e FOCAL SPOT ACCURACY The accuracy is 10 mm from the marking on the tubehead cover TARGET ANGLE 5º TARGET MATERIAL Tungsten NOMINAL X-RAY TUBE VOLTAGE WITH THE HIGHEST X-RAY TUBE CURRENT 100 V~ 77 kV at 8 mA...
-
Page 68: Power Requirements
CRANEX Novus e Appendix A. Technical Information FILTRATION Inherent fi ltration minimum 0.6 mm Al at 50 kV (IEC 60522/1999) Additional fi ltration minimum 2 mm Al Patient support attenuation equivalent less than 0.2 mm Al Attenuation equivalent of plastic cover, approximately 0.25 mm Al Total fi... - Page 69 Appendix A. Technical Information CRANEX Novus e EARTH LEAKAGE CIRCUIT BREAKER (when required) 100 - 120 V~ Approved type, min. 16 A 250 V~ 220 - 240 V~ Approved type, min. 10 A 250 V~, breaker activation leakage current in accordance with local regulations.
- Page 70 CRANEX Novus e Appendix A. Technical Information Leakage technique factors PANORAMIC 100V~: 4564 mAs/h, exposure with maximum values (77 kV, 8 mA, 9 s) according to the 1:5 duty cycle 120V~: 4713 mAs/h, exposure with maximum values (77 kV, 10 mA, 9 s) according to the 1:7 duty cycle...
- Page 71 Appendix A. Technical Information CRANEX Novus e System requirements and connections The PC and any other external device(s) connected to the system must meet the IEC 60950 standard (minimum requirements). Devices that do not meet the IEC 60950 standard must not be connected to the system as they may pose a threat to operational safety.
- Page 72 CRANEX Novus e Appendix A. Technical Information Tube housing assembly cooling/heating characteristics Tube rating chart Toshiba D-052 SB Reviewed: Savinen Antti Juhani 2015-03-12 11:32 D508980, 4 Approved: Ukkonen Juha-Pekka 2015-03-13 13:08...
- Page 73 Appendix A. Technical Information CRANEX Novus e Anode thermal characteristics Reviewed: Savinen Antti Juhani 2015-03-12 11:32 D508980, 4 Approved: Ukkonen Juha-Pekka 2015-03-13 13:08...
-
Page 74: A.2 Unit Dimensions
CRANEX Novus e Appendix A. Technical Information A.2 Unit dimensions Standard Standard column leg column leg (91.1”) (91.1”) 2315 mm 2315 mm Short Short column leg column leg (87.6”) (87.6”) 2225 mm 2225 mm Standard Standard column leg column leg... -
Page 75: A.3 Symbols That May Appear On The Unit
Appendix A. Technical Information CRANEX Novus e A.3 Symbols that may appear on the unit Radiation warning (yellow label) Dangerous voltage On or enabled Off or disabled Exposure switch Connector for Ethernet RJ45 Connector for exposure switch Connector for external exposure light... - Page 76 CRANEX Novus e Appendix A. Technical Information Ground (functional) Protective ground Warning, Laser radiation (yellow label) Laser class label (Patient positioning lights) This symbol indicates that the waste of electrical and electronic equipment must not be disposed of as unsorted municipal waste and must be collected separately.
- Page 77 Appendix A. Technical Information CRANEX Novus e A.4 EMC declaration for CRANEX Novus e (CRA-2) CRA-2 Guidance and manufacturer’s declaration – electromagnetic emissions The device is intended for use in the electromagnetic environment specified below. The customer or the user of the device should assure that it is used in such an environment.
- Page 78 CRANEX Novus e Appendix A. Technical Information CRA-2 Guidance and manufacturer’s declaration – electromagnetic immunity The device is intended for use in the electromagnetic environment specified below. The customer or the user of the device should assure that it is used in such an environment.
- Page 79 Appendix A. Technical Information CRANEX Novus e CRA-2 Guidance and manufacturer’s declaration – electromagnetic immunity The device is intended for use in the electromagnetic environment specified below. The customer or the user of the device should assure that it is used in such an environment.
- Page 80 CRANEX Novus e Appendix A. Technical Information CRA-2 Recommended separation distances between portable and mobile RF communications equipment and the device. The device is intended for use in an electromagnetic environment in which radiated RF disturbances are controlled. The customer or the user of the device can help prevent...
Need help?
Do you have a question about the Cranex Novus e and is the answer not in the manual?
Questions and answers