Table of Contents
Advertisement
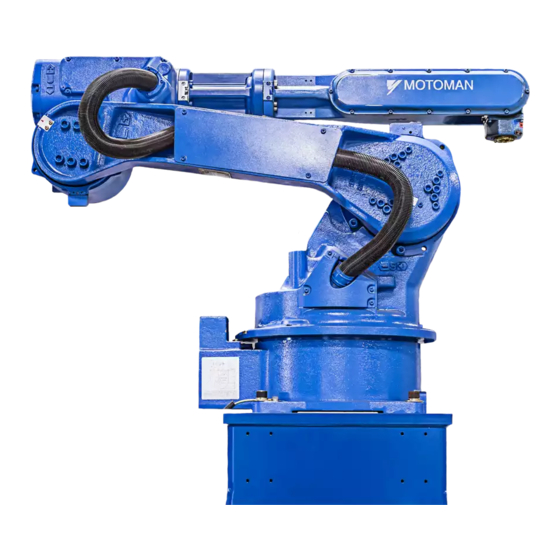
MOTOMAN-HP20
INSTRUCTIONS
TYPE: YR-HP20-A00 (STANDARD SPECIFICATIONS)
YR-HP20-A01 (WITH SLU-AXES LIMIT SWITCHES)
Upon receipt of the product and prior to initial operation, read these instructions thoroughly, and retain
for future reference.
MOTOMAN INSTRUCTIONS
MOTOMAN-HP20 INSTRUCTIONS
NX100 INSTRUCTIONS
NX100 OPERATOR'S MANUAL
NX100 MAINTENANCE MANUAL
The NX100 operator's manuals above correspond to specific usage.
Be sure to use the appropriate manual.
YASKAWA
YASKAWA
149615-1CD
2
MANUAL NO. RE-MTO-A247 3
Advertisement
Table of Contents

Related Manuals for YASKAWA MOTOMAN-HP20


Summary of Contents for YASKAWA MOTOMAN-HP20
- Page 1 YR-HP20-A01 (WITH SLU-AXES LIMIT SWITCHES) Upon receipt of the product and prior to initial operation, read these instructions thoroughly, and retain for future reference. MOTOMAN INSTRUCTIONS MOTOMAN-HP20 INSTRUCTIONS NX100 INSTRUCTIONS NX100 OPERATOR’S MANUAL NX100 MAINTENANCE MANUAL The NX100 operator’s manuals above correspond to specific usage.
- Page 2 If such modification is made, the manual number will also be revised. • If your copy of the manual is damaged or lost, contact a YASKAWA rep- resentative to order a new copy. The representatives are listed on the back cover.
- Page 3 Notes for Safe Operation Read this manual carefully before installation, operation, maintenance, or inspection of the NX100. In this manual, the Notes for Safe Operation are classified as “WARNING,” “CAUTION,” “MANDATORY,” or “PROHIBITED.” Indicates a potentially hazardous situation which, if not WARNING avoided, could result in death or serious injury to personnel.
- Page 4 WARNING • Before operating the manipulator, check that servo power is turned OFF when the emergency stop buttons on the front door of the NX100 and programming pendant are pressed. When the servo power is turned OFF, the SERVO ON LED on the program- ming pendant is turned OFF.
- Page 5 • Read and understand the Explanation of the Warning Labels in the NX100 Instructions before operating the manipulator. Definition of Terms Used Often in This Manual The MOTOMAN manipulator is the YASKAWA industrial robot product. The manipulator usually consists of the controller, the programming pendant, and supply cables.
- Page 6 Warning Label A: WARNING MODEL MOTOMAN- Moving parts TYPE may cause PAYLOAD MASS injury ORDER NO. DATE SERIAL NO. YASKAWA ELECTRIC CORPORATION 2-1 Kurosakishiroishi, Yahatanishi-ku, Warning Label B: Kitakyushu 806-0004 Japan NJ3247 MADE IN JAPAN WARNING Do not enter robot work area.
-
Page 7: Table Of Contents
Product Confirmation 1.1 Contents Confirmation ......1-1 1.2 Order Number Confirmation ......1-2 Transporting 2.1 Transporting Method . - Page 8 Allowable Load for Wrist Axis and Wrist Flange 6.1 Allowable Wrist Load ....... 6-1 6.2 Wrist Flange .
- Page 9 Wrist Axes ........9-17 9.2.10 Encoder Connector (with CAUTION Label) .
-
Page 10: Product Confirmation
1.1 Contents Confirmation 1 Product Confirmation CAUTION • Confirm that the manipulator and the NX100 have the same order num- ber. Special care must be taken when more than one manipulator is to be installed. If the numbers do not match, manipulators may not perform as expected and cause injury or damage. -
Page 11: Order Number Confirmation
1.2 Order Number Confirmation Order Number Confirmation Check that the order number of the manipulator corresponds to the NX100. The order num- ber is located on a label as shown below. Label (Enlarged View) THE MANIPULATOR AND THE CONTROLLER Check that the manipulator SHOULD HAVE SAME ORDER NUMBER. -
Page 12: Transporting
2.1 Transporting Method 2 Transporting CAUTION • Sling and crane or forklift operations must be performed by authorized personnel only. Failure to observe this caution may result in injury or damage. • Avoid excessive vibration or shock during transportation. The system consists of precision components, so failure to observe this caution may adversely affect performance. - Page 13 2.1 Transporting Method Eyebolt M12 (2 eyebolts) (Delivered with the manipulator) View E Eyebolt M12 (2 eyebolts) (Delivered with the manipulator) View F Fig. 2 Transporting Position...
-
Page 14: Using A Forklift
2.1 Transporting Method 2.1.2 Using a Forklift When using a forklift, the manipulator should be fixed on a pallet with shipping bolts and brackets as shown in "Fig. 3 Using the Forklift." Insert claws under the pallet and lift it. The pallet must be strong enough to support the manipulator. -
Page 15: Shipping Bolts And Brackets
2.2 Shipping Bolts and Brackets Shipping Bolts and Brackets The manipulator is provided with shipping bolts and brackets at sections A and B. ("Fig. 2 Transporting Position") Eyebolts M12 (2 eyebolts) (delivered with the manipulator) Enlarged View: Section A Enlarged View: Section C Enlarged View: Sections B and D Parts Drawing for Section A Parts Drawing for Section B... -
Page 16: Installation
3 Installation WARNING • Install the safeguarding. Failure to observe this warning may result in injury or damage. • Install the manipulator in a location where the manipulator’s tool or the workpiece held by the manipulator will not reach the wall, safeguarding, or NX100 when the arm is fully extended. -
Page 17: Installation Of Safeguarding
3.1 Installation of Safeguarding Installation of Safeguarding To insure safety, be sure to install the safeguarding. It prevents unforeseen accidents with per- sonnel and damage to equipment. The following is quoted for your information and guidance. Responsibility for Safeguarding (ISO10218) The user of a manipulator or robot system shall ensure that the safeguarding is provided and used in accordance with Sections 6, 7, and 8 of this standard. -
Page 18: Installation Example
3.2 Mounting Procedures for Manipulator Base 3.2.1 Installation Example For the first process, anchor the baseplate firmly on the floor. The baseplate should have enough rigidity, which is 32 mm or more in thickness. The size of the anchor bolt recom- mended for the baseplate fixation is M16 or larger. -
Page 19: Installation Method
3.3 Installation Method Installation Method The manipulator can be mounted in three different ways: floor-mounted (standard), wall- mounted, and ceiling-mounted types are available. For wall- and ceiling-mounted types, the three points listed below are different from the floor-mounted types. • S-axis Operating Range •... -
Page 20: Ip (International Protection) For Main Part Of The Manipulator
In case of using the wall-/ceiling-mounted type, inform Yaskawa of the matter when placing NOTE an order. Be sure to contact Yaskawa representative (listed on the back cover of this instruction manual) to execute a wall/ceiling installation on site. Location... -
Page 21: Wiring
4 Wiring WARNING • Ground resistance must be 100 Ω or less. Failure to observe this warning may result in fire or electric shock. • Before wiring, make sure to turn the primary power supply OFF, and put up a warning sign. (ex. DO NOT TURN THE POWER ON.) Failure to observe this warning may result in fire or electric shock. -
Page 22: Grounding
4.1 Grounding Grounding Follow the local regulations and electrical installation standards for grounding. The recom- mended grounding wire size is 5.5 mm at minimum. For grounding, connect the ground wire directly to the manipulator as shown in "Fig. 6 Grounding Method". •... -
Page 23: Connection To The Manipulator
4.2 Manipulator Cable Connection 4.2.1 Connection to the Manipulator Before connecting the manipulator cables to the manipulator, verify the numbers: 1BC and 2BC on both the cables and the connectors of the manipulator. Connect 2BC first, and then connect 1BC. After inserting the cables, lower each lever until it clicks. 4.2.2 Connection to the NX100 Before connecting the manipulator cables to the NX100, verify the numbers: 1BC and 2BC on... - Page 24 4.2 Manipulator Cable Connection Connector details (Manipulator side) Fig. 8 (a) Manipulator Cable Connection to the Manipulator Fig. 8 (b) Manipulator Cable Connection to the NX100...
-
Page 25: Basic Specifications
5.1 Basic Specifications 5 Basic Specifications Basic Specifications Table. 3 Basic Specifications Item Model MOTOMAN-HP20 Configuration Vertically Articulated Degree of Freedom Payload 20 kg ±0.06 mm Repeatability S-axis (turning) ±180° L-axis (lower arm) +155°, -110° U-axis (upper arm) +255°, -165°... -
Page 26: Part Names And Working Axes
5.2 Part Names and Working Axes Part Names and Working Axes Wrist flange U-arm Wrist L-arm Rotary head Manipulator base Fig. 9 Part Names and Working Axes... -
Page 27: Manipulator Base Dimensions
5.3 Manipulator Base Dimensions Manipulator Base Dimensions ±0.1 Fitting surface Fitting surface 18 dia. holes (4 holes) (for manipulator fixing) +0.018 260 ±0.1 dia. holes (2 holes) View Units: mm Fig. 10 Manipulator Base Dimensions... -
Page 28: Dimensions And P-Point Maximum Envelope
5.4 Dimensions and P-Point Maximum Envelope Dimensions and P-Point Maximum Envelope 2072 87.5 180° P-point 1003 180° P-point maximum envelope View A Units: mm Fig. 11 Dimensions and P-point Maximum Envelope... -
Page 29: Alterable Operating Range
Alterable Operating Range The operating range of the S-axis can be altered according to the operating conditions as shown in "Table. 4 S-axis Working Range." If alteration is necessary, contact your Yaskawa representative in advance. Table. 4 S-axis Working Range... -
Page 30: Allowable Wrist Load
The allowable inertia is calculated when the moment is at the maximum. Contact your Yas- kawa representative when only load inertia, or load moment is small and inertia is large. Also, when the load is combined as a force but a mass, contact your Yaskawa representative. Load gravity... -
Page 31: Wrist Flange
6.2 Wrist Flange Wrist Flange The wrist flange dimensions are shown in " Fig. 13 Wrist Flange ". In order to see the align- ment marks, it is recommended that the attachment be mounted inside the fitting. Fitting depth of inside and outside fittings must be 5 mm or less. Alignment mark Tapped holes M6 (depth: 10) -
Page 32: System Application
7.1 Peripheral Equipment Mounts 7 System Application Peripheral Equipment Mounts The peripheral equipment mounts are fixed on the upper arm for easier installation of the user’s system application as shown in " Fig. 14 Installing Peripheral Equipment Mounts ". When peripheral equipment is attached to the U-axis, the following conditions should be observed. -
Page 33: Internal User I/O Wiring Harness And Air Line
7.2 Internal User I/O Wiring Harness and Air Line (kg) W1=6kg W1=10kg W1=16kg Weight W2 W1=20kg *1 In this case, unbalanced moment is not permitted. -200 -100 200 300 400 (mm) Distance between Center of U-axis Rotation and Load Gravity ( direction) Fig. - Page 34 7.2 Internal User I/O Wiring Harness and Air Line Connectors on Connector Base Air inlet: Tapped hole PT3/8 with pipe plug View A Connector for internal Connectors on U-arm user I/O wiring harness: JL05-2A20-29PC (pin connector with a cap) Prepare socket connector JL05-6A20-29S.
-
Page 35: Electrical Equipment Specification
8.1 Position of Limit Switch 8 Electrical Equipment Specification Position of Limit Switch Limit switches are optional. Refer to " Fig. 18 Location of Limit Switch " for location. A manip- ulator type with the S- or L-axis overrun limit switch or the LU-axes interference limit switch is YR-HP20-A01. -
Page 36: Internal Connections
8.2 Internal Connections Internal Connections High reliability connectors which can be easily put on and removed are used with each connector part. For the numbers, types, and locations of connectors, refer to "Fig. 19 Loca- tion and Numbers of Connectors." Diagrams for internal connections of the manipulator are shown in "... - Page 37 DATA-2 and connector base, the connection in the section B should be changed as shown in the L-AXIS section C below. CN1-8 CN1-8 (Contact your Yaskawa representative in case of modifying the wiring before use.) No.5CN No.22CN CN2-1 CN2-1 SPG+3...
- Page 38 8.2 Internal Connections 2BC(6X6) No.3CN CN1-1 CN1-1 3CN-1 CN1-2 CN1-2 S-AXIS CN1-3 CN1-3 CN1-4 CN1-4 CN1-5 CN1-5 CN1-6 CN1-6 No.4CN CN2-1 CN2-1 CN2-2 CN2-2 L-AXIS CN2-3 CN2-3 CN2-4 CN2-4 CN2-5 CN2-5 CN2-6 CN2-6 No.26CN CN3-1 CN3-1 26CN-1 CN3-2 CN3-2 U-AXIS CN3-3 CN3-3 CN3-4...
-
Page 39: Maintenance And Inspection
For any different or special applications, the inspection process should be developed on an case-by-case basis. For axes which are used very frequently (in handling applications, etc.), it is recom- mended that inspections be conducted at shorter Intervals. Contact your Yaskawa repre- sentative. - Page 40 9.1 Inspection Schedule Table. 7 Inspection Items Schedule Inspection Charge Operation Items Method 1000 6000 12000 24000 36000 Specified Service Daily Licensee Person Company Cycle Cycle Cycle Check alignment mark accordance Alignment mark Visual and damage at the home position.
- Page 41 Inspection No. correspond to the numbers in "Fig. 21 Inspection Parts and Inspection Numbers (Manipurator in Home Position)." The occurrence of a grease leakage indicates the possibility that grease has seeped into the motor. This can cause a motor breakdown. Contact your Yaskawa representative. Table. 8 Inspection Parts and Grease Used Grease Used Inspected Parts Molywhite RE No.
- Page 42 9.1 Inspection Schedule S-axis T-axis S-axis Note: The manipulator is in the home position. B-axis BT-axes U-axis R-axis U-axis L-axis Fig. 21 Inspection Parts and Inspection Numbers (Manipurator in Home Position)
-
Page 43: Notes On Maintenance Procedures
9.2 Notes on Maintenance Procedures Notes on Maintenance Procedures 9.2.1 Battery Pack Replacement The battery packs are attached in the two positions indicated in "Fig. 22 Battery Pack Loca- tion". If the battery alarm occurs in the NX100, replace the battery pack in accordance with the following procedure: Battery pack Connector base... - Page 44 9.2 Notes on Maintenance Procedures Battery pack before replacement See the step 5. Connector Circuit board See the step 4. New battery pack Fig. 23 Battery Pack Connection 1. Turn the NX100 main power supply OFF. 2. Remove the mounting screws for the battery pack on the support. 3.
-
Page 45: Grease Replenishment/Exchange For S-Axis Speed Reducer
9.2 Notes on Maintenance Procedures 9.2.2 Grease Replenishment/Exchange for S-axis Speed Reducer Grease exhaust port (Hexagon socket head plug PT1/8) Grease exhaust port (Hexagon socket head plug PT1/8) S-axis speed reducer Grease inlet (Hexagon socket head plug PT1/8) Fig. 24 S-axis Speed Reducer Diagram NOTE For ceiling mounted manipulators, the exhaust port and the grease inlet are inverted. -
Page 46: Grease Exchange
9.2 Notes on Maintenance Procedures 2. Install the grease zerk PT1/8 to the grease inlet. (The grease zerk PT1/8 is delivered with the manipulator.) 3. Inject the grease into the grease inlet using a grease gun. Grease type: Molywhite RE No.00 Amount of grease: 30 cc (60 cc for the 1st supply) 4. -
Page 47: Grease Replenishment/Exchange For L-Axis Speed Reducer
9.2 Notes on Maintenance Procedures 9.2.3 Grease Replenishment/Exchange for L-axis Speed Reducer L-arm Grease exhaust port (Hexagon socket head plug PT1/8) L-axis speed reducer Grease inlet (Hexagon socket head cap screw M6) Fig. 25 L-axis Speed Reducer Diagram NOTE The exhaust port and the grease inlet are inverted in case of ceiling installation. ... - Page 48 9.2 Notes on Maintenance Procedures 7. Wipe the grease exhaust port with a cloth and reinstall the plug. Tighten the plug with a tightening torque of 5 N·m (0.51 kgf·m). Apply Three Bond 1206C on the thread part of the plug. ...
-
Page 49: Grease Replenishment/Exchange For U-Axis Speed Reducer
9.2 Notes on Maintenance Procedures 9.2.4 Grease Replenishment/Exchange for U-axis Speed Reducer U-arm Grease exhaust port (Hexagon socket head cap screw M6) U-axis speed reducer Grease inlet (Hexagon socket head plug PT1/8) Fig. 26 U-axis Speed Reducer Diagram NOTE The exhaust port and the grease inlet are inverted in case of ceiling installation. ... - Page 50 9.2 Notes on Maintenance Procedures Grease Exchange (Refer to "Fig. 26 U-axis Speed Reducer Diagram".) Exchange the grease according to the following procedure: 1. Posture the U-arm as shown in "Fig. 26 U-axis Speed Reducer Diagram". 2. Remove the hexagon socket head cap screw on the grease exhaust port. If grease is injected with the screw on, the grease will go inside the motor and may damage NOTE it.
-
Page 51: Grease Replenishment For R-Axis Speed Reducer
9.2 Notes on Maintenance Procedures 9.2.5 Grease Replenishment for R-axis Speed Reducer Grease inlet (Grease zerk A-MT6X1) Exhaust port (Hexagon socket head cap screw M6) Fig. 27 R-axis Speed Reducer Diagram 1. Remove the hexagon socket head cap screw M6 on the exhaust port. 2. -
Page 52: Grease Replenishment For B-, T-Axes Speed
9.2 Notes on Maintenance Procedures 9.2.6 Grease Replenishment for B-, T-axes Speed Reducers Exhaust port (for B-axis) (Plug LP-M5) T-axis speed reducer Exhaust port (for T-axis) (Hexagon socket B-axis speed reducer set screw M6) Gease inlet (for T-axis) (Hexagon socket head cap screw M6) Gease inlet (for B-axis) (Hexagon socket head cap screw M6) -
Page 53: Grease Replenishment For T-Axis Gear
9.2 Notes on Maintenance Procedures 9.2.7 Grease Replenishment for T-axis Gear Exhaust port (Plug LP-M5) Gear grease inlet (Hexagon socket head cap screw M6) Fig. 29 T-axis Gear Diagram 1. Remove the plug on the exhaust port. 2. Remove the hexagon socket head cap screw on the grease inlet and install the grease zerk A-MT6X1. -
Page 54: Grease Replenishment For R-Axis Cross Roller Bearing
9.2 Notes on Maintenance Procedures 9.2.8 Grease Replenishment for R-axis Cross Roller Bear- Exhaust port (Plug LP-M5) R-axis cross roller bearing Grease inlet (Hexagon socket head cap screw M6) (Length: 6mm) Fig. 30 R-axis Cross Roller Bearing Diagram 1. Remove the plug on the exhaust port. 2. -
Page 55: Notes For Maintenance
Therefore, if the wrist cover is disassembled, reseal with sealing bond (Three Bond 1206C). Refer to "Table 9 Spare Parts for the MOTOMAN-HP20". Cover Cover jointing face... - Page 56 9.2 Notes on Maintenance Procedures NOTE Do not remove the battery pack in the connector base. Encoder connector Motor CAUTION Motor power connector Connect battery to encoder to save the data before removing conector. CAUTION label 0BT* BAT* Battery pack (HW9470932-A) Connector for the battery backup a: Crimped contact-pin (pin) CAUTION label (Enlarged view)
-
Page 57: Battery Pack Connection (For R-, B-, T-Axes Motors)
9.2 Notes on Maintenance Procedures Battery Pack Connection (for R-, B-, T-axes Motors) The connectors (crimped contact-pin) for the battery backup are installed at the end point of the motors (marked as BAT and OBT). Connect the battery pack according to the following procedure. -
Page 58: Recommended Spare Parts
• Rank B: Parts for which replacement may be necessary as a result of frequent operation • Rank C: Drive unit NOTE To replace parts in Rank B or Rank C, be sure to contact your Yaskawa representative. Table. 9 Spare Parts for the MOTOMAN-HP20 Parts... - Page 59 Table. 9 Spare Parts for the MOTOMAN-HP20 Parts Rank Name Type Manufacturer Remarks Unit L-axis Yaskawa Electric HW0304302-1 Input Gear Corporation U-axis Yaskawa Electric HW9280880-A Speed Reducer Corporation R-axis Yaskawa Electric HW0381463-A Speed Reducer Corporation B-axis Yaskawa Electric HW9381633-A Speed Reducer...
-
Page 60: Parts List
11.1 S-axis Driving Unit 11 Parts List 11.1 S-axis Driving Unit 1014 1013 1040 1041 1016 1031 1017 1033 1041 1032 1005 1042 1003 1004 1027 1008 1006 1028 1002 1007 1010 1015 1009 6001 (Zeroing Option) 6002 (Zeroing Option) 1029 1011 6005 (Zeroing Option) - Page 61 11.1 S-axis Driving Unit DWG No. Name 1001 EZ5036A0 1002 CD-31 Saddle 1003 M6X10 Socket screw 1004 TA1-S10 Clamp 1005 M5X10 Screw with spring washer 1006 TSH6-01M Union 1007 HW0305812-1 Holder 1008 M6X15 Socket screw 2H-6 Spring washer 1009 TA1-S10 Clamp 1010 M5X10...
-
Page 62: L-Axis Driving Unit
11.2 L-axis Driving Unit 11.2 L-axis Driving Unit 2019 6010 (Zeroing Option) 6009 (Zeroing Option) 6008 (Zeroing Option) 2020 2022 2035 2021 2016 2014 2013 2015 2030 2018 2017 2002 2036 2003 2004 2037 6011 (Zeroing Option) 6012 (Zeroing Option) 2007 2012 2010... - Page 63 11.2 L-axis Driving Unit DWG No. Name 2001 PT1/8 Plug 2002 PT1/8 Plug 2003 M8X25 Socket screw 2H-8 Spring washer 2004 M8X25 Socket screw 2H-8 Spring washer 2006 HW0304229-1 M base 2007 SGMRS-13A2A-YR1* Motor 2008 M6X90 Socket screw 2009 2H-6 Spring Washer 2010 HW0304302-1...
-
Page 64: U-Axis Driving Unit
11.3 U-axis Driving Unit 11.3 U-axis Driving Unit 3003 3034 3002 3016 3004 3001 3004 3005 3018 3020 3019 6016 (Zeroing Option) 3018 6018 (Zeroing Option) 3020 6019 (Zeroing Option) 3019 6015 (Zeroing Option) 6017 (Zeroing Option) 3009 3021 3008 3006 3007 3011... - Page 65 11.3 U-axis Driving Unit DWG No. Name 3001 M8X30 Socket screw 2H-6 Spring washer 3002 HW0404656-1 M cover 3003 M4X10 APS Bolt 3004 PT1/8 Plug 3005 HW0100729-1 Casing 3006 HW9280880-A Reduction gear 3007 M8X45 Socket screw 2H-8 Spring washer 3008 M4X65 Socket screw 3009...
-
Page 66: R-Axis Driving Unit
11.4 R-axis Driving Unit 11.4 R-axis Driving Unit 4012 4033 4032 4031 4029 4074 4036 4071 4072 4008 4030 4010 4066 4029 4042 3005 4035 4009 4058 4057 4043 4006 4007 4005 4056 4044 4011 4003 4075 4076 4073 4022 4026 4060 4034... - Page 67 11.4 R-axis Driving Unit DWG No. Name DWG No. Name 4001 M6X65 Socket screw 4060 HW0304930-1 Support 4002 2H-6 Spring Washer 4062 6811LLU Bearing 4003 M5X20 Socket screw 4065 M4X20 Socket screw 2H-5 Spring washer 4066 KQE12-03 Union 4004 M4X12 Socket screw 4067 2H-4...
-
Page 68: Wrist Unit
11.5 Wrist Unit 11.5 Wrist Unit 5045 5005 5069 5068 3005 5002 5001 5003 5046 5011 5006 5070 5007 5008 5055 5057 5026 5008 5006 5007 5005 5064 5044 5070 5003 5045 5037 5071 5043 5038 5039 5035 5048 5034 5013 5040 5014... - Page 69 11.5 Wrist Unit DWG No. Name DWG No. Name 5001 HW9406556-1 Support 5052 M5X16 Socket screw 5002 M4X12 Socket screw 2H-5 Spring washer 2H-4 Spring washer 5053 M6X6 Socket screw 5003 M5X20 Socket screw 5055 M6X14 Bolt 2H-5 Spring washer HW0405202-1 Plug (Zeroing Option)
- Page 70 INSTRUCTIONS YASKAWA ELECTRIC CORPORATION 2-1 Kurosakishiroishi, Yahatanishi-ku, Kitakyushu, 806-0004, Japan Phone: +81-93-645-7703 Fax: +81-93-645-7802 http://www.yaskawa.co.jp YASKAWA AMERICA, INC. (MOTOMAN ROBOTICS DIVISION) 100 Automation Way, Miamisburg, OH 45342, U.S.A. Phone: +1-937-847-6200 Fax: +1-937-847-6277 http://www.motoman.com YASKAWA EUROPE GmbH (ROBOTICS DIVISION) Yaskawastrasse 1, 85391, Allershausen, Germany Phone: +49-8166-90-100 Fax: +49-8166-90-103 http://www.yaskawa.eu.com...
Need help?
Do you have a question about the MOTOMAN-HP20 and is the answer not in the manual?
Questions and answers